1. Overview
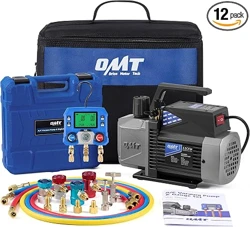
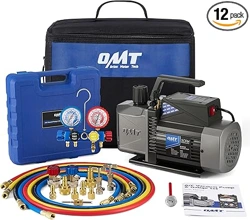
The ZENY 3.5CFM Single-Stage Vacuum Pump is a rotary vane pump designed for HVAC/R (Heating, Ventilation, Air Conditioning, and Refrigeration) applications. It is used to evacuate air and moisture from systems before charging with refrigerant.
Key applications include servicing household air conditioners, automotive A/C systems, refrigeration units, and for processes like vacuum packaging or degassing.
2. Features and Components

2.1 Physical Construction
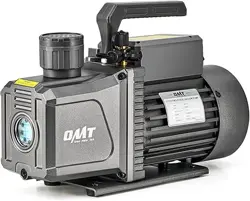
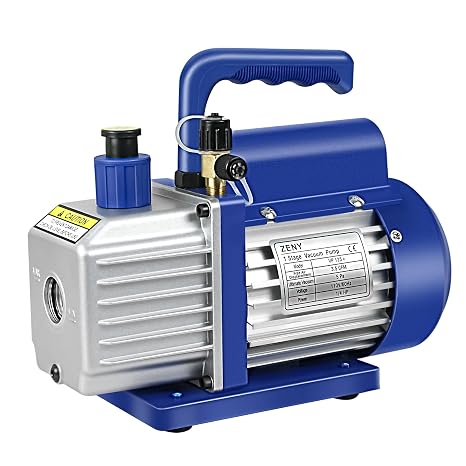
- Heavy-duty Aluminum Alloy Casing: Provides durability and heat dissipation.
- Non-Slip Cushion Handle: For easier portability.
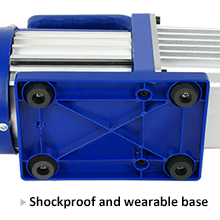
- Shock-Proof Rubber Base: Four rubber feet for stability and vibration reduction.
2.2 Motor and Drive
- Direct Drive Motor (1/4 HP): Allows for easy starting and is maintenance-free.
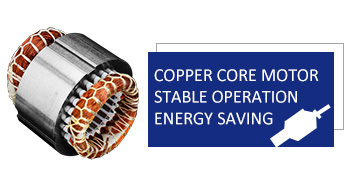
- Strong Copper Core Motor: Designed for stable, long-term operation and energy efficiency.
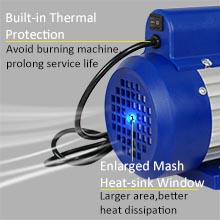
- Built-In Thermal Protection: Helps prevent motor burnout by shutting down if overheating occurs.
- Internal High-Volume Cooling Fan: Aids in extended operation times.
2.3 Operational Features
- Inlet Port: 1/4" SAE Flare for connecting to manifold gauge hoses.
- Exhaust Port: Includes an exhaust cap.
- Oil Sight Glass: A window for monitoring vacuum oil level and condition.
- Oil Drain Plug: Positioned at the bottom of the oil reservoir for easy oil changes.
- ON/OFF Switch: Simple power control.
3. Specifications
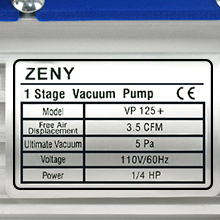
- Model Type: Single-Stage, Rotary Vane
- Voltage / Frequency: 110V / 60Hz
- Power: 1/4 HP
- Flow Rate (CFM): 3.5 CFM (100 L/min)
- Ultimate Vacuum: 5 Pa (0.05 mbar)
- Inlet Port Size: 1/4" SAE Flare
- Oil Capacity: 320 ml
- Dimensions (L x W x H): Approximately 10.6" x 4.6" x 8.5"
- Item Weight: 11.7 pounds
4. Use Guide
4.1 Initial Setup and Connections
- Check Oil Level: Before first use, ensure the oil level is visible in the sight glass. The pump is shipped with a bottle of vacuum oil.
- Power Source: Plug the pump into a standard 110V/60Hz outlet. Do not use with a voltage converter unless specified for 110V operation.
- System Connection:
- Connect a vacuum hose (not always included) from your manifold gauge set to the pump's 1/4" flare inlet port.
- Connect the other side of the manifold gauge set to the system (e.g., air conditioner service port).
- Ensure all connections are tight to prevent leaks.
Note on Compatibility: Verify your manifold gauge hose ends are 1/4" SAE flare to match the pump's inlet. An adapter may be required if your hoses are a different size.
4.2 Pulling a Vacuum
- Open the valves on your manifold gauge set to the vacuum position.
- Turn the pump's ON/OFF switch to the "ON" position.
- The pump will begin evacuating the system. Monitor your manifold gauges for the pressure drop.
- Allow the pump to run until the desired vacuum level (deep vacuum) is reached and holds stable. This process removes air and moisture.
- Once complete, close the manifold gauge valves before turning off the pump.
- Turn the pump OFF using the switch.
4.3 After Use
- Allow the pump to run for a few minutes with the inlet port open to atmospheric pressure. This helps clear any residual refrigerant from the oil.
- Always replace the exhaust cap after use.
- Store the pump in a clean, dry place.
5. Maintenance
5.1 Oil Maintenance
The vacuum oil is critical for performance and pump longevity. Contaminated oil (milky or cloudy appearance) will reduce pumping efficiency.
- Checking Oil: Regularly view the oil level and color through the sight glass.
- Changing Oil:
- Run the pump for a few minutes to warm the oil, making it easier to drain.
- Turn the pump off and unplug it.
- Place a container under the oil drain plug at the bottom of the reservoir.
- Remove the drain plug and allow the old oil to drain completely.
- Replace the drain plug and fill with fresh, high-grade vacuum pump oil (320 ml capacity) through the oil fill port (typically the same as the sight glass). Do not overfill.
Warning: Dispose of used vacuum oil according to local environmental regulations. It may contain absorbed moisture and refrigerant.
5.2 General Care
- Keep the cooling fan vents clear of debris.
- Wipe the exterior with a dry cloth. Do not use solvents or excessive water.
- If the pump overheats or stops unexpectedly, allow it to cool completely and check the oil level and color before restarting.
6. Troubleshooting
- Pump will not start: Check power connection and outlet. Ensure the ON/OFF switch is engaged.
- Poor vacuum performance (slow to pull down):
- Check for leaks in your hose and system connections.
- Inspect the vacuum oil. If contaminated (milky), change it immediately.
- Ensure the inlet and exhaust ports are not obstructed.
- Excessive noise or vibration: Ensure the pump is on a stable, level surface. Check that internal components are not loose.
- Oil leak: Check that the oil drain plug and fill port are securely closed. Inspect seals and gaskets for wear.
- Pump overheats: The built-in thermal protector may activate. Allow to cool. Ensure the cooling fan is operating and vents are clear. Check oil level.
Important: If the pump heats up excessively or the inlet fitting does not suit your hoses, contact the seller for assistance before attempting modifications.
7. Safety Information
- Read all instructions before use.
- Use only with 110V/60Hz power supply. Using incorrect voltage can cause damage or fire.
- Do not operate in wet or damp conditions.
- Ensure the pump is properly grounded.
- Wear appropriate safety gear (e.g., gloves, safety glasses) when servicing systems.
- Be aware that the pump and exhaust may become hot during operation.
- Use only recommended vacuum pump oil. Do not use automotive or other lubricants.
- This pump is designed for creating a vacuum. Do not use it for pressure testing or with compressed gases.