Loading ...
Loading ...
Loading ...
8
Power or Appliance Failure
If a power failure occurs, frozen foods will
stay frozen for at least 24 hours if the
appliance door is kept closed. If the power
failure continues, pack seven or eight
pounds of dry ice into the appliance every
24 hours. Look in the Yellow Pages under
Dry Ice, Dairies, or Ice Cream manufac-
turers for local dry ice suppliers. Always
wear gloves and use caution when
handling dry ice.
If the appliance has stopped operating,
see Appliance does not run in the
Troubleshooting Guide. If you cannot
solve the problem, call an authorized
servicer immediately. If the appliance
remains off for several hours, follow the
directions above for the use of dry ice
during a power failure. If necessary, take
the food to a local locker plant until the
appliance is ready to operate. Look in the
Yellow Pages under Frozen Food Locker
Plants.
Door Reversal
The appliance is shipped with the hinge on
the right so that the door swings open from
left to right. Perform the following
procedure to reverse the door swing.
WARNING: Unplug the refrigerator before
performing the door reversal procedure.
Failure to unplug may result in serious injury
or death from electrical shock.
CAUTION: To avoid personal injury or
property damage, obtain assistance from
another person to perform this procedure.
IMPORTANT: After the appliance is placed
on its back, it must be allowed to remain
upright for 6 hours before plugging in to
avoid damage to internal components.
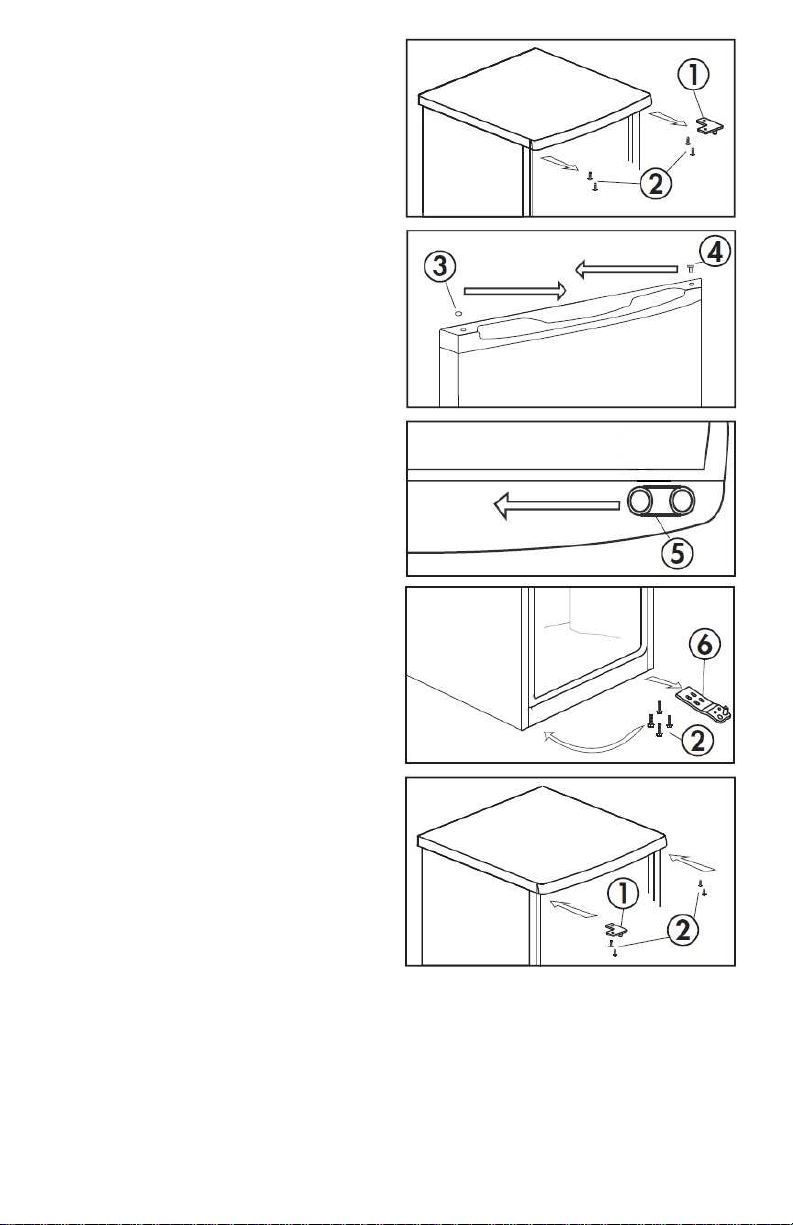
1. Open the door and remove the two
screws (2) from the upper hinge (1) on the
right side of the cabinet top. Push up
slightly on top and carefully remove the
hinge and door from the cabinet.
Remove the hinge from the door. Remove
the two screws from the upper hinge
recess on the left side of cabinet top.
These will be used later to secure upper
hinge to left side.
1. Upper hinge
2. Screws
3. Upper hinge hole plug
4. Upper hinge pin bushing
5. Door stop
6. Lower hinge
Door Reversal instructions
are continued on next page.
Loading ...
Loading ...
Loading ...