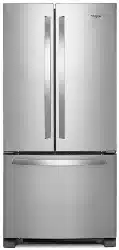
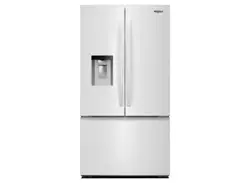
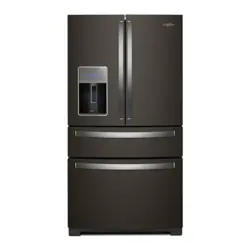
There are two refrigerator compartment doors. The doors can be opened and closed either separately or together.
There is a vertically-hinged seal on the left-hand refrigerator door.
When the left-hand door is opened, the hinged seal automatically folds inward so that it is out of the way.
When both doors are closed, the hinged seal automatically forms a seal between the two doors.
Using the Controls
The control center is located at the top front of the refrigerator compartment.
Temperature Controls
For your convenience, your temperature controls are preset at the factory. When you first install your refrigerator, make sure the controls are still set to the recommended set points as shown.
Recommended Settings
IMPORTANT:
The recommended settings should be correct for normal household refrigerator use. The controls are set correctly when milk or juice is as cold as you like and when ice cream is firm.
When the power is on, the temperature display shows the set point temperature of the compartment.
Wait 24 hours for your refrigerator to cool completely before adding food. If you add food before the refrigerator has cooled completely, your food may spoil. NOTE: Adjusting the refrigerator and freezer temperature controls to a colder than recommended setting will not cool the compartments any faster.
If the temperature is too warm or too cold in the refrigerator or freezer, first check the air vents to be sure they are not blocked before adjusting the controls
To Turn Your Refrigerator Off/On:
Press the freezer (+) touch pad repeatedly until “OFF” appears in the freezer display. Allow a few seconds for the refrigerator to shut off. Neither compartment will cool.
Press either the refrigerator or freezer (-) touch pad to turn on the refrigerator.
Adjusting Controls
The REFRIGERATOR control adjusts the refrigerator compartment temperature. The FREEZER control adjusts the freezer compartment temperature.
If you need to adjust the temperature in either the refrigerator or freezer compartment, use the settings listed in the chart as a guide.
To Adjust Set Point Temperatures:
The first touch of the (+) or (-) touch pad displays the current temperature set point.
Press the (+) or (-) touch pads until the desired temperature set point is displayed
NOTE: Except when first turning on the refrigerator, do not adjust either temperature control more than one setting at a time. Wait 24 hours between adjustments for the temperature to stabilize.
CONDITION/REASON:
ADJUSTMENT:
REFRIGERATOR too warm
REFRIGERATOR Control 1° lower
FREEZER too warm/too little ice
Adjust FREEZER Control 1° lower
REFRIGERATOR too cold
Adjust REFRIGERATOR Control 1° higher
FREEZER too cold
Adjust FREEZER Control 1° higher
Additional Control Center Features
Max Ice:The Max Ice feature assists with temporary periods of heavy ice use by increasing ice production.
Press the Max Ice feature touch pad to set the freezer to the lowest temperature setting. Press the Max Ice feature touch pad again to return to the normal freezer set point.
NOTE: The Max Ice feature will automatically shut off in approximately 24 hours.
Humidity Control
The Humidity Control feature turns on a heater to help reduce moisture on the door hinge seal. Use in humid environments or when you notice moisture on the door hinge seal. The refrigerator uses more energy when Humidity Control is on.
Press Humidity Control when the environment is warm and more humid, or if you notice moisture on the door hinge seal. The indicator light will be lit when humidity control is ON.
Press Humidity Control to save energy when the environment is less humid.
Temp Alarm
The Temp Alarm feature provides temperature information in the event of a power outage.
Power outage: During a power outage, if the temperatures in the refrigerator and freezer compartments exceed normal operating temperatures, the highest temperature reached will be displayed.
Press the Temp Alarm touch pad until the indicator light is lit, to turn on this feature. Press and hold Temp Alarm for 3 seconds until the indicator light goes off to turn off this feature.
Temperature alarm: An alarm will sound repeatedly if the freezer or refrigerator compartment temperatures exceed normal operating temperatures for an hour or more.
The temperature displays will alternately show the current temperatures and the highest temperatures the compartments reached.
Press the Temp Alarm touch pad once to stop the audible alarm and alternating temperature displays. The Temp Alarm light will continue to flash until the refrigerator returns to the set temperature.
Door Alarm
The Door Alarm feature sounds a chime every few seconds when the refrigerator door has been left open for 5 continuous minutes.
The chime will sound until the door is closed or Door Alarm is turned off.
Press the Door Alarm touch pad to turn this feature on or off. The indicator light will be lit when the Door Alarm feature is on.
Max Cool
The Max Cool feature assists with periods of high refrigerator use, full grocery loads, or temporarily warm room temperatures.
Press Max Cool to set the freezer and refrigerator to the lowest temperature settings. Press Max Cool again to return to the normal refrigerator set point.
NOTE: The Max Cool feature will automatically shut off in approximately 12 hours
Filter Reset
The Filter Reset control allows you to restart the water filter status tracking feature each time you replace your water filter. See “Water Filtration System.”
Press and hold the Filter Reset touch pad for 3 seconds, until the Order or Replace light turns off.
User Preferences
The control center allows you to set user preferences, if desired.
Temperature Display (F_C)
This preference allows you to change the temperature display.
F - Temperature in degrees Fahrenheit
C - Temperature in degrees Celsius
Alarm (AL)
This preference allows you to turn off the sound of all alarms.
ON - You will hear the alarm sound.
OFF - You will not hear the alarm sound.
To Access the User Preferences Menu:
Press and hold the Door Alarm touch pad for 3 seconds. The preference name will appear in the Freezer display and the preference status (F or C) or (ON or OFF) will appear in the Refrigerator display.
Use the Freezer (+) or (-) touch pads to scroll through the preference names. When the desired preference name is displayed, press the Refrigerator (+) or (-) touch pads to change the preference status.
Set your preferences by pressing and holding the Door Alarm touch pad for 3 seconds, or by shutting the refrigerator compartment door.
Ice Maker
IMPORTANT: Flush the water system before turning on the ice maker. See “Water Dispenser.”
Turning the Ice Maker On/Off
To turn the ice maker ON, simply lower the wire shutoff arm.
To manually turn the ice maker OFF, lift the wire shutoff arm to the OFF (arm up) position and listen for the click.
NOTE: Your ice maker has an automatic shutoff. As ice is made, the ice cubes will fill the ice storage bin and the ice cubes will raise the wire shutoff arm to the OFF (arm up) position. Do not force the wire shutoff arm up or down.
NOTE: Turn off the ice maker before removing the ice storage bin to serve ice or to clean the bin. This will keep the ice cubes from dropping out of the ice maker and into the freezer compartment. After replacing the ice storage bin, turn on the ice maker.
Ice Production Rate
The ice maker should produce a complete batch of ice approximately every 3 hours.
To increase ice production, lower the freezer and refrigerator temperature. See “Using the Controls.” Wait 24 hours between adjustments.
Remember
Allow 24 hours to produce the first batch of ice. Allow 3 days to completely fill the ice storage bin. Discard the first three batches of ice produced.
The quality of your ice will be only as good as the quality of the water supplied to your ice maker. Avoid connecting the ice maker to a softened water supply. Water softener chemicals (such as salt) can damage parts of the ice maker and lead to poor quality ice. If a softened water supply cannot be avoided, make sure the water softener is operating properly and is well maintained.
Do not store anything on top of the ice maker or in the ice storage bin.
Water Dispenser
IMPORTANT:
After connecting the refrigerator to a water source or replacing the water filter, flush the water system. Use a sturdy container to depress and hold the water dispenser lever for 5 seconds, then release it for 5 seconds. Repeat until water begins to flow. Once water begins to flow, continue depressing and releasing the dispenser lever (5 seconds on, 5 seconds off) until a total of 4 gal. (15 L) has been dispensed. This will flush air from the filter and water dispensing system, and prepare the water filter for use. Additional flushing may be required in some households. As air is cleared from the system, water may spurt out of the dispenser.
NOTE: After 5 minutes of continuous dispensing, the dispenser will stop dispensing water to avoid flooding. To continue dispensing, press the dispenser button again.
Allow 24 hours for the refrigerator to cool down and chill water. Dispense enough water every week to maintain a fresh supply.
Dispensing Water
Hold a container under the dispenser while pressing the button.
Release the button to stop dispensing
Water Filtration System
The water filter is located in the upper right-hand corner of the refrigerator compartment.
Do not use with water that is microbiologically unsafe or of unknown quality without adequate disinfection before or after the system. Systems certified for cyst reduction may be used on disinfected waters that may contain filterable cysts.
IMPORTANT: The disposable water filter should be replaced at least every 6 months. If the water flow to the water dispenser or ice maker decreases noticeably before 6 months have passed, replace the water filter more often.
Replacing the Water Filter
To purchase replacement water filters, model UKF8001AXX-750 or model UKF8001AXX-200, contact your dealer or call 1-800-253-1301 U.S.A. or 1-800-807-6777 Canada.
IMPORTANT: Air trapped in the water system may cause water and filter to eject. Always dispense water for at least 2 minutes before removing the filter or blue bypass cap.
Turn filter counterclockwise to remove.
Remove sealing label from replacement filter and insert the filter end into the filter head.
Turn the filter clockwise until it stops. Snap the filter cover closed.
Flush the water system. See “Water and Ice Dispenser(s).”
NOTE: The dispenser feature may be used without a water filter installed. Your water will not be filtered. If this option is chosen, replace the filter with the blue bypass cap.
REFRIGERATOR CARE
Cleaning
WARNING - Explosion Hazard: Use non-flammable cleaner. Failure to do so can result in death, explosion, or fire.
Both the refrigerator and freezer sections defrost automatically. However, clean both sections about once a month to avoid buildup of odors. Wipe up spills immediately.
IMPORTANT:
Because air circulates between both sections, any odors formed in one section will transfer to the other. You must thoroughly clean both sections to eliminate odors. To avoid odor transfer and drying out of food, wrap or cover foods tightly.
For stainless steel models, stainless steel is corrosion resistant and not corrosion-proof. To help avoid corrosion of your stainless steel, keep your surfaces clean by using the following cleaning instructions.
To Clean Your Refrigerator:
NOTE: Do not use abrasive or harsh cleaners such as window sprays, scouring cleansers, flammable fluids, muriatic acid, cleaning waxes, concentrated detergents, bleaches or cleansers containing petroleum products on exterior surfaces (doors and cabinet), plastic parts, interior and door liners or gaskets. Do not use paper towels, scouring pads, or other harsh cleaning tools.
Unplug refrigerator or disconnect power.
Hand wash, rinse, and dry removable parts and interior surfaces thoroughly. Use a clean sponge or soft cloth and a mild detergent in warm water.
Clean the exterior surfaces. Painted metal: Wash painted metal exteriors with a clean, soft cloth or sponge and a mild detergent in warm water. Rinse surfaces with clean, warm water and dry immediately to avoid water spots. Stainless steel: Wash stainless steel surfaces with a clean, soft cloth or sponge and a mild detergent in warm water. Rinse surfaces with clean, warm water and dry immediately to avoid water spots. NOTE: When cleaning stainless steel, always wipe in the direction of the grain to avoid cross-grain scratching.
There is no need for routine condenser cleaning in normal home operating environments. If the environment is particularly greasy or dusty, or there is significant pet traffic in the home, the condenser should be cleaned every 2 to 3 months to ensure maximum efficiency. If you need to clean the condenser:
Remove the base grille.
Use a vacuum cleaner with a soft brush to clean the grille, the open areas behind the grille and the front surface area of the condenser.
Replace the base grille when finished.
Plug in refrigerator or reconnect power.
Changing the Light Bulb
IMPORTANT: The light bulbs in both the refrigerator and freezer compartments of your new refrigerator use LED bulbs, incandescent bulb or a combination of the two. If the lights do not illuminate when the refrigerator and/or freezer door is opened, call for assistance or service. See “Warranty” for phone numbers.
Unplug the refrigerator or disconnect power.
Remove the light shield (on some models).
Top of the refrigerator compartment - Slide the light shield toward the back of the compartment to release it from the light assembly
Replace the burned-out bulb(s) with a bulb of the same size, shape and wattage.
To replace the burned-out LED bulb with an LED bulb, order Part Number W10565137 (3.6 watts). NOTE: Some LED replacement bulbs are not recommended for wet/damp environments. The refrigerator and freezer compartments are considered to be wet/damp environments. If using a brand of LED bulb other than the recommended LED bulb, before installation, read and follow all instructions on the LED packaging.
When replacing an incandescent bulb, use only incandescent bulbs for household appliances with a maximum of 40 watts. Replace bulb sheild/shroud after replacing incandescent bulb.
Replace the light shield.
Plug in refrigerator or reconnect power
Vacation and Moving Care
Vacations
If You Choose to Leave the Refrigerator On While You’re Away:
Use up any perishables and freeze other items.
If your refrigerator has an automatic ice maker, and is connected to the household water supply, turn off the water supply to the refrigerator. Property damage can occur if the water supply is not turned off.
If you have an automatic ice maker, turn off the ice maker. NOTE: Depending on your model, raise the wire shutoff arm to OFF (arm up) position, or press the switch to OFF.
Empty the ice bin. Models with Vacation Mode Feature
Turn on Vacation mode. See “Using the Controls.”
NOTE: Activating Vacation mode does not turn off the ice maker.
If You Choose to Turn Off the Refrigerator Before You Leave:
Remove all food from the refrigerator.
If your refrigerator has an automatic ice maker:
Turn off the water supply to the ice maker at least one day ahead of time.
When the last load of ice drops, raise the wire shutoff arm to the OFF (up) position or press the switch to OFF, depending on your model.
Empty the ice bin.
Turn off the Temperature control(s). See “Using the Control(s).”
Clean refrigerator, wipe it, and dry well.
Tape rubber or wood blocks to the tops of both doors to prop them open far enough for air to get in. This stops odor and mold from building up.
Moving
When you are moving your refrigerator to a new home, follow these steps to prepare it for the move.
If your refrigerator has an automatic ice maker:
Turn off the water supply to the ice maker at least one day ahead of time.
Disconnect the water line from the back of the refrigerator.
When the last load of ice drops, raise the wire shutoff arm to the OFF (up) position or press the switch to OFF, depending on your model.
Remove all food from the refrigerator and pack all frozen food in dry ice.
Empty the ice bin.
Turn off the Temperature control(s). See “Using the Control(s).”
Unplug refrigerator.
Clean, wipe, and dry thoroughly
Take out all removable parts, wrap them well, and tape them together so they don’t shift and rattle during the move.
Depending on the model, raise the front of the refrigerator so it rolls more easily OR raise the leveling screws so they don’t scrape the floor. See “Adjust the Door(s)” or “Door Closing and Door Alignment.”
Tape the doors closed and tape the power cord to the back of the refrigerator.
When you get to your new home, put everything back and refer to the “Installation Instructions” section for preparation instructions. Also, if your refrigerator has an automatic ice maker, remember to reconnect the water supply to the refrigerator.
TROUBLESHOOTING
Refrigerator Operation
The refrigerator will not operate
WARNING - Electrical Shock Hazard: Plug into a grounded 3 prong outlet. Do not remove ground prong. Do not use an adapter. Do not use an extension cord. Failure to follow these instructions can result in death, fire, or electrical shock.
Power cord unplugged? Plug into a grounded 3 prong outlet.
Is outlet working? Plug in a lamp to see if the outlet is working.
Household fuse blown or circuit breaker tripped? Replace the fuse or reset the circuit breaker. If the problem continues, call an electrician.
Are controls on? Make sure the refrigerator controls are on. See “Using the Control(s).”
New installation? Allow 24 hours following installation for the refrigerator to cool completely.
NOTE: Adjusting the temperature controls to coldest setting will not cool either compartment more quickly.
The motor seems to run too much
Your new refrigerator may run longer than your old one due to its high-efficiency compressor and fans. The unit may run even longer if the room is warm, a large food load is added, doors are opened often, or if the doors have been left open.
The refrigerator seems noisy
Refrigerator noise has been reduced over the years. Due to this reduction, you may hear intermittent noises from your new refrigerator that you did not notice from your old model. Below are listed some normal sounds with explanations.
Buzzing - heard when the water valve opens to fill the ice maker
Pulsating - fans/compressor adjusting to optimize performance
Hissing/Rattling - flow of refrigerant, movement of water lines, or from items placed on top of the refrigerator
Sizzling/Gurgling - water dripping on the heater during defrost cycle
Popping - contraction/expansion of inside walls, especially during initial cool-down
Water running - may be heard when ice melts during the defrost cycle and water runs into the drain pan
Creaking/Cracking - occurs as ice is being ejected from the ice maker mold.
The doors will not close completely
Door blocked open? Move food packages away from door.
Bin or shelf in the way? Push bin or shelf back in the correct position.
The doors are difficult to open
WARNING - Explosion Hazard: Use non-flammable cleaner. Failure to do so can result in death, explosion, or fire.
Gaskets dirty or sticky? Clean gaskets and contact surfaces with mild soap and warm water. Rinse and dry with soft cloth.
Temperature and Moisture
Temperature is too warm
New installation? Allow 24 hours following installation for the refrigerator to cool completely.
Door(s) opened often or left open? Allows warm air to enter refrigerator. Minimize door openings and keep doors fully closed.
Large load of food added? Allow several hours for refrigerator to return to normal temperature.
Controls set correctly for the surrounding conditions? Adjust the controls a setting colder. Check temperature in 24 hours. See “Using the Control(s).”
There is interior moisture buildup
NOTE: Some moisture buildup is normal.
Humid room? Contributes to moisture buildup.
Door(s) opened often or left open? Allows humid air to enter refrigerator. Minimize door openings and keep doors fully closed.
Ice and Water
The ice maker is not producing ice or not enough ice
Refrigerator connected to a water supply and the supply shutoff valve turned on? Connect refrigerator to water supply and turn water shutoff valve fully open.
Kink in the water source line? A kink in the line can reduce water flow. Straighten the water source line.
Ice maker turned on? Make sure wire shutoff arm or switch (depending on model) is in the ON position.
New installation? Wait 24 hours after ice maker installation for ice production to begin. Wait 72 hours for full ice production.
Freezer door closed completely? Firmly close the freezer compartment door. If the freezer compartment door will not close all the way, see “The doors will not close completely,” earlier in this section.
Large amount of ice recently removed? Allow 24 hours for ice maker to produce more ice.
Ice cube jammed in the ice maker ejector arm? Remove ice from the ejector arm with a plastic utensil.
Water filter installed on the refrigerator? Remove filter and operate ice maker. If ice volume improves, then the filter may be clogged or incorrectly installed. Replace filter or reinstall it correctly.
Reverse osmosis water filtration system connected to your cold water supply? This can decrease water pressure. See “Water Supply Requirements.”
The ice cubes are hollow or small
NOTE: This is an indication of low water pressure.
Water shutoff valve not fully open? Turn the water shutoff valve fully open.
Kink in the water source line? A kink in the line can reduce water flow. Straighten the water source line.
Water filter installed on the refrigerator? Remove filter and operate ice maker. If ice quality improves, then the filter may be clogged or incorrectly installed. Replace filter or reinstall it correctly.
Reverse osmosis water filtration system connected to your cold water supply? This can decrease water pressure. See “Water Supply Requirements.”
Questions remain regarding water pressure? Call a licensed, qualified plumber
Off-taste, odor or gray color in the ice
New plumbing connections? New plumbing connections can cause discolored or off-flavored ice.
Ice stored too long? Discard ice. Wash ice bin. Allow 24 hours for ice maker to make new ice.
Odor transfer from food? Use airtight, moisture proof packaging to store food.
Are there minerals (such as sulfur) in the water? A water filter may need to be installed to remove the minerals.
Water filter installed on the refrigerator? Gray or dark discoloration in ice indicates that the water filtration system needs additional flushing. Flush the water system before using a new water filter. Replace water filter when indicated. See “Water Filtration System.”
The water dispenser will not operate properly
Refrigerator connected to a water supply and the supply shutoff valve turned on? Connect refrigerator to water supply and turn water shutoff valve fully open.
Kink in the water source line? Straighten the water source line.
New installation? Flush and fill the water system. See “Water Dispenser.”
Is the water pressure at least 35 psi (241 kPa)? The water pressure to the home determines the flow from the dispenser. See “Water Supply Requirements.”
Water filter installed on the refrigerator? Remove filter and operate dispenser. If water flow increases, the filter may be clogged or incorrectly installed. Replace filter or reinstall it correctly.
Refrigerator door closed completely? Close the door firmly. If it does not close completely, see “The doors will not close completely,” earlier in this section.
Recently removed the doors? Make sure the water dispenser wire/tube assembly has been properly reconnected. See “Refrigerator Door(s) and Drawer.”
Reverse osmosis water filtration system connected to your cold water supply? This can decrease water pressure. See “Water Supply Requirements.”
Water is leaking from the dispenser system
NOTE: One or two drops of water after dispensing is normal.
Glass not being held under the dispenser long enough? Hold the glass under the dispenser 2 to 3 seconds after releasing the dispenser lever.
New installation? Flush the water system. See “Water Dispenser.”
Recently changed water filter? Flush the water system.
See “Water Dispenser.”
Water on the floor near the base grille? Make sure the water dispenser tube connections are fully tightened. See “Refrigerator Door(s) and Drawer.”
Water from the dispenser is warm
NOTE: Water from the dispenser is only chilled to 50°F (10°C).
New installation? Allow 24 hours after installation for the water supply to cool completely.
Recently dispensed large amount of water? Allow 24 hours for water supply to cool completely.
Water not been recently dispensed? The first glass of water may not be cool. Discard the first glass of water.
Refrigerator connected to a cold water pipe? Make sure the refrigerator is connected to a cold water pipe. See “Water Supply Requirements.”