Loading ...
Loading ...
Loading ...
esatto.house 17
When you set the time for several cooking zones simultaneously, decimal dots
of the relevant cooking zones are on. The minute display shows the min. timer.
The dot of the corresponding zone flashes.
(set to 15 minutes) (set to 45 minutes)
Once the countdown timer expires, the corresponding zone will switch off.
Then it will show the new min. timer and the dot of corresponding zone will
flash.
(set to 30 minutes)
Ifthe timer is set on more zone:than one
►
►
USER MANUAL PAGE 16
OPERATING YOUR COOKTOP
COOKTOP GUIDELINES
► The first few times the cooktop is used, it may give off a burning smell. This smell will disappear completely with
repeated use.
► The cooktop surface is fitted with cooking areas of different diametre and power.
► The positions where the heat will radiate from are clearly marked on the cooktop. The saucepans must be positioned
exactly on these zones for efficient heating to occur. Pans should have the same diametre as the cooking zone that they
are being used on.
► You should not use saucepans with rough bottoms, as this can scratch the ceramic surface.
► Before use, make sure that the bottoms of the saucepans are clean and dry.
► When cold, the bottom of the pans should be slightly concave, as they expand when hot and lie flat on the surface of
the cooktop.
► This will allow the heat to transfer more easily.
► The best thickness for the bottom of the pans is 2–3 mm of enameled steel and 4–6 mm for stainless steel with
sandwich type bottoms.
► If these rules are not followed, then there will be a great loss of heat and energy. Heat not absorbed by the saucepan,
will spread to the cooktop, frame and surrounding cabinets.
► Preferably cover pans with a lid to permit cooking at a lower heat.
► Always cook vegetables and potatoes, etc. in as little water to reduce cooking times.
► Food or liquid that has high sugar content may damage the cooktop if it comes into contact with the ceramic cooktop
surface. Any spillages should be wiped up immediately, however this may not prevent the cooktop surface from
becoming damaged.
IMPORTANT! The ceramic cooktop surface is tough; however it is not unbreakable and can be damaged especially if
pointed or hard objects are allowed to fall on it with some force.
Warning! Do not use the cooktop if the surface becomes broken or cracked. You should contact the Residentia
Group Support team immediately.
PAGE 17
By ensuring proper cleaning and maintenance of your Esatto cooktop,
you can ensure that it will have a long and fault free operation.
WARNING! Do not start cleaning the cooktop until it has completely cooled.
CLEANING YOUR CERAMIC COOKTOP
► Any residues that are left on the cooktop surface from cleaning agents will damage it.
You should remove any residues with warm water mixed with a little washing up liquid.
► Abrasive cleaners or sharp objects will damage the cooktop surface; you should clean
it using warm water mixed with a little washing up liquid.
► Although it is easier to clean some deposits whilst the cooktop surface is still warm, you
should take care not to burn yourself if cleaning the cooktop surface when it is still warm.
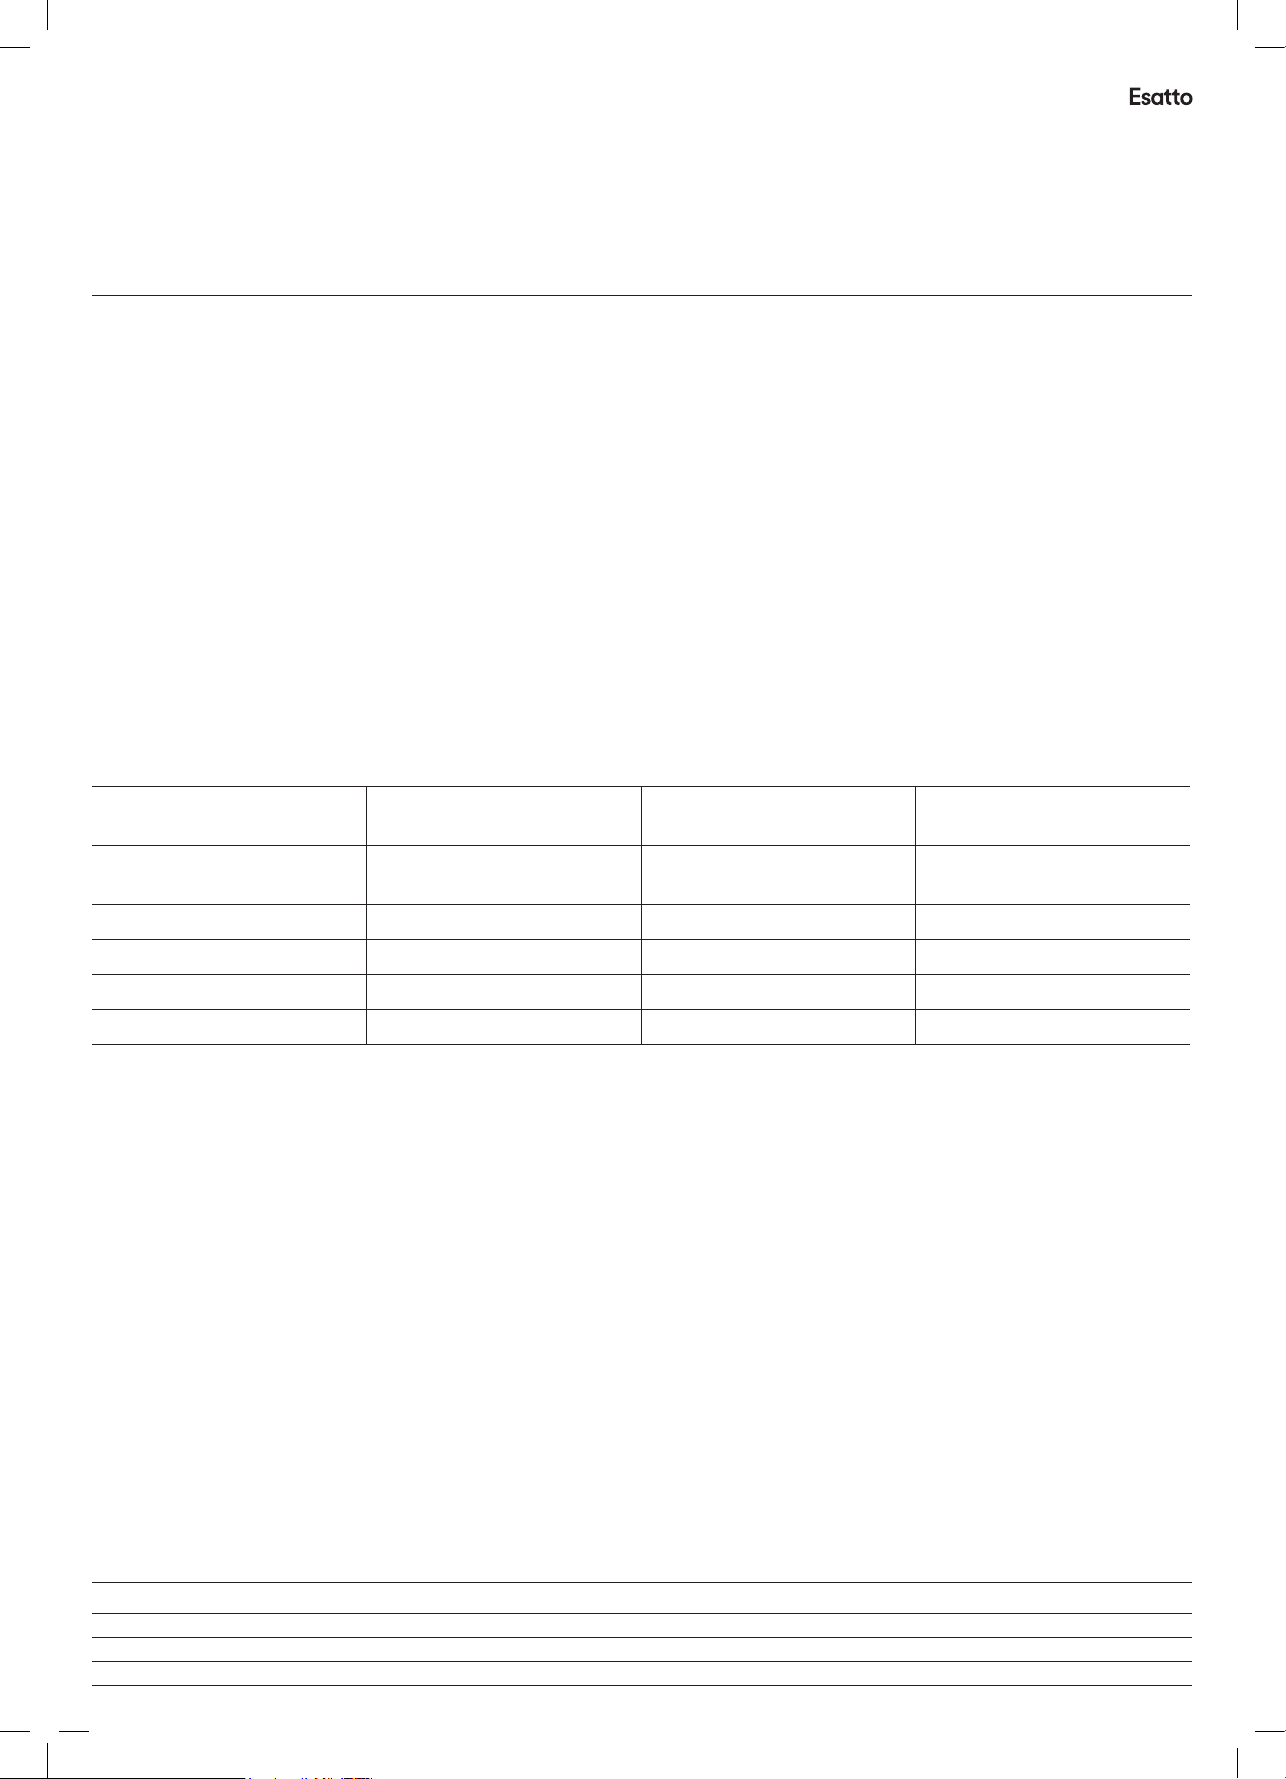
After each use:
► Wipe the cooktop over with a damp cloth.
► Dry the cooktop by rubbing the surface with a clean cloth.
Type of deposit Remove immediately? Remove when the cooktop
has cooled down?
What should I use to
remove the deposit?
Sugar or food/liquid
containing sugar
Yes No Ceramic cooktop scraper
Tin foil or plastic Yes No Ceramic cooktop scraper
Fat splashes No Yes Ceramic cooktop cleaner
Metallic discolouration No Yes Ceramic cooktop cleaner
Water splashes or water rings No Yes Ceramic cooktop cleaner
USING A SPECIALIST CERAMIC COOKTOP CLEANER
It is possible to purchase a specialist ceramic cooktop cleaner/conditioner.
You should follow the instructions given by the manufacturer of the cleaner
and ensure that it is suitable for use on your appliance.
Cleaning & Maintenance
Technical Data
ELECTRICAL DETAILS Rated Voltage: 220 - 240 Volts, 50-60 Hz
Supply Connection: 30A (double pole switch fuse outlet with 3mm contact gap)
Max Rated Inputs: 6.0kW
Mains Supply Lead: 3 core x 4mm² (not supplied)
Loading ...
Loading ...
Loading ...