Loading ...
Loading ...
Loading ...
4
appliance, particularly in the vicinity of young children.
- A safety device will turn the radiator o. To reset, contact
the technical assistance service.
Use in compliance with intended use
Use this heater only as described in this manual. All other use is
considered improper. This appliance is not suitable for
commercial use. The manufacturer is not liable for damage
deriving from improper use of the appliance. This is a
household appliance only. It is not intended to be used in:
• staff kitchen areas in shops, offices and other working
environments;
• farm houses;
• by clients in hotels, motels and other residential type
environments;
• bed and breakfast type environments.
Use in this manner will invalidate the manufacturers warranty.
Introduction
Thank you for choosing the TRD Oil Filled Radiator. We hope you
enjoy using your new appliance. Take a few minutes to read
these instructions. This will avoid all risks and damage to the
appliance.
DESCRIPTION
(see figure on pag. 2).
The terminology below will be used repeatedly in the following
pages.
A Thermostat
B Power selector
C/D/E Power indicator lights (MIN, MED, MAX)
F Timer
G Cord holder
H Wheel
USE
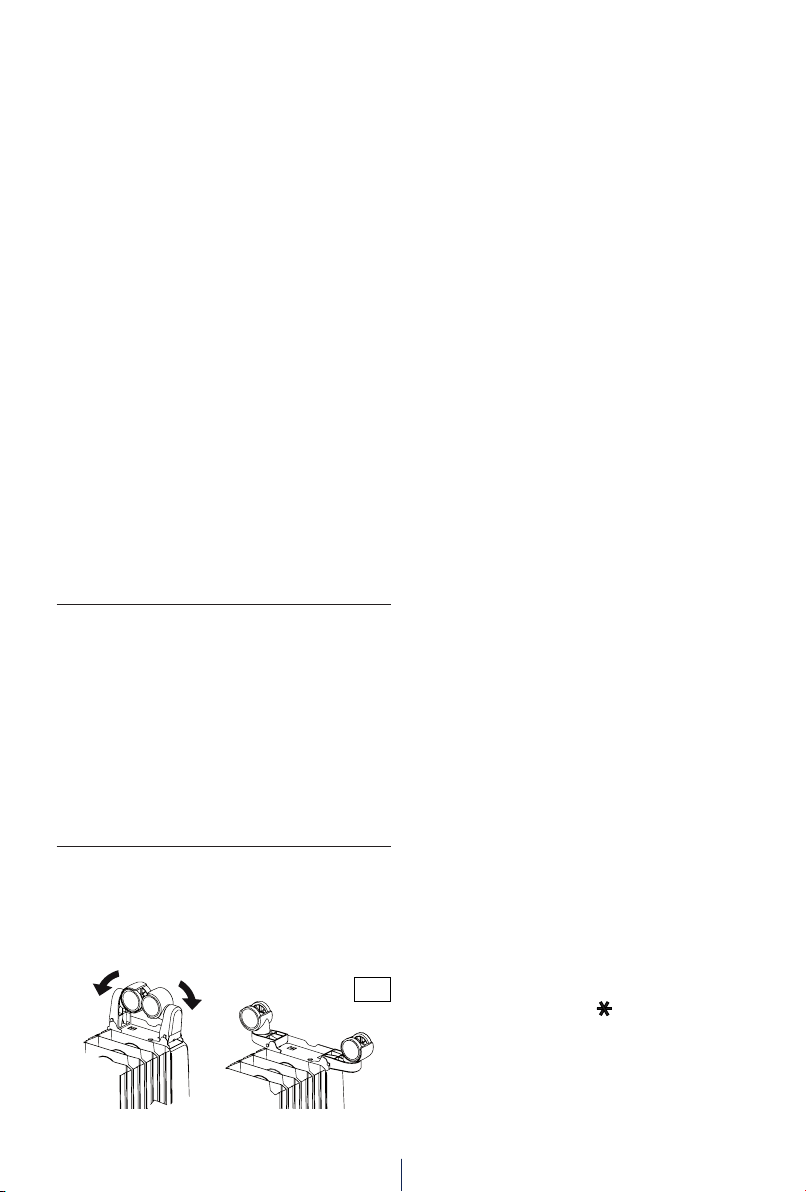
Fitting the wheels
Turn the radiator upside down on a rug or soft surface to prevent
damaging the paint nish. Fully unfold the wheels by turning
them outwards (Fig. 1). Turn the radiator back to its upright
position.
Caution
Always operate the heater in upright position only (wheels on
the bottom, controls on top).
Any other position could create a hazardous situation.
Location
The heater should not be placed immediately below a power
outlet. Do not use this radiator in rooms with a oor area of less
than 4 m
2
(43 sq. ft. ).
Connection
- Before using the appliance check that your supply voltage
is the same of that shown on the rating label of the
unit and that the power socket and power supply line
correspond to the load specied.
- Check also the current capacity of your fuses. CONNECT
YOUR HEATER TO EARTH PROVIDED SOCKET ONLY.
- This appliance complies with directive 2004/108/ec on
electromagnetic compatibility.
Keep loose clothing or bedding, furniture and ammable
material away from the heater's wall outlet.
Turning on
Insert the plug into an electrical outlet, rotate the thermostat
knob to maximum and turn the unit on as follows using the
power selector:
- Turn the power selector to position MIN to select minimum
output (the min light will be on).
- Turn the power selector to position MED to select medium
output (the min/med light will be on).
- Turn the power selector to position MAX to select maximum
output (the lights will be on).
Adjusting the thermostat
When the room has reached the desired temperature, turn the
thermostat knob slowly in an anti-clockwise direction until you
hear a "click" and not beyond it. The thermostat will then adjust
the set temperature automatically and keep it constant.
If your unit is a three-output version, in intermediate seasons
or on days when temperatures are not particularly cold, select
minimum output to optimize savings and consumption.
Antifreeze function
Turn the thermostat dial to the position and the power
selector to position MAX. The appliance will maintain a minimum
room temperature of approximately 5°C, thus preventing
freezing while conserving energy. In models that come with a
timer, tabs must be set in the inward position.
Fig. 1
Loading ...