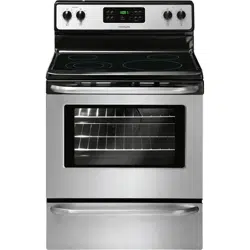
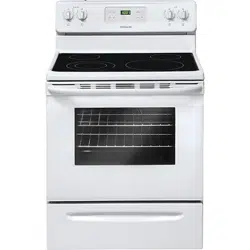
18. Ceramic smoothtop (elements, styles and color will vary by model).
19. 6” single radiant element (some models).
20. 5-7” dual radiant element (some models).
21. 9” single radiant element (some models).
22. 6-9” dual radiant element (some models).
23. 12” single radiant element (some models).
24. Broil pan (some models).
25. Broil pan insert (some models).
26. Leveling legs and anti-tip bracket (included).
OVEN CONTROL FUNCTIONS
SETTING OVEN CONTROLS
Setting the clock
When the appliance is first plugged in or when the power supply to the appliance has been interrupted, the display will flash “12:00”. It is recommended to always set the clock for the correct time of day before using the appliance.
To set the clock:
Press clock once (do not hold key pad down).
Within 5 seconds, press and hold the or until the correct time of day appears in the display.
Changing temperature display (°F or °C)
The electronic oven control is set to display °F (Fahrenheit) when shipped from the factory. The oven may be programmed for any temperature from 170°F to 550°F (77°C to 287°C).
To change the temperature to display °C (Celsius) or from °C to °F:
Press broil. “— —” appears in the display.
Press and hold the until “HI” appears in the display.
Press and hold broil until °F or °C appears in the display.
Press the or to change °F to °C or °C to °F.
Press any control pad to return to normal operating mode.
Setting a silent control panel
When choosing a function, a tone will be heard each time a keypad is pressed. If desired, the control can be programmed for silent operation.
To block the controls from sounding when any keypad is pressed in the future, press and hold start time keypad for 6 seconds. The control will beep once then release the keypad.
To return the tones, press and hold start time again for 6 seconds until the control beeps once.
Setting the minute timer
1. Press timer on-off.
2. Press the to increase the time in one minute increments. Press and hold the to increase the time in 10 minute increments. The timer can be set for any amount of time from 1 minute to 11 hours and 59 minutes.
Note: If the pad is pressed first, the timer will advance to 11 hours and 59 minutes.
3. When the set time has run out, the timer will beep 3 times and will continue to beep 3 times every 60 seconds until timer on-off is pressed.
To change the timer while it is in use
While the timer is active and shows in the display, press and hold the or to increase or decrease the time remaining.
To cancel the minute timer before the set time has run out
Press timer on-off once .
Changing between continuous bake setting or 12-Hour Energy Saving feature
The oven control has a built-in 12-Hour Energy Saving feature that will shut off the oven if the oven is left on for more than 12 hours. The oven control can be programmed to override this feature for continuous baking.
Changing to continuous bake setting:
Press and hold timer on-off down for 6 seconds until a tone sounds. “ — — hr” will appear in display for continuous cooking. The current time of day will return to the display.
To cancel the continuous bake setting, press timer on-off and hold for 6 seconds until a tone sounds. “12hr” will appear in display indicating that the control has returned to the 12-Hour Energy Saving feature.
Setting bake
The oven can be programmed to bake at any temperature from 170°F to 550°F (77°C to 287°C). The factory preset automatic bake temperature is 350°F (177°C).
To set bake
Press bake. “— — —” appears in the display.
Within 5 seconds, press the or . The display will show “350°F (177°C).” By pressing and holding the or , the temperature can then be adjusted in 5°F increments (1°C if the control is set to display Celsius).
As soon as the or pad is released, the oven will begin heating to the selected temperature. When the displayed temperature reaches the desired baking temperature, the preheat indicator light will turn OFF and the control will beep 3 times.
To change the oven temperature after bake has started
Press bake. Visually check the bake temperature and that it needs to be changed.
Press the or pad to increase or decrease the set temperature to the desired new oven temperature.
Setting bake time
The bake time pad sets the amount of time needed for baking. The oven will turn on immediately and stop automatically after the set bake time ends.
To program the oven to begin baking immediately and to shut off automatically (timed bake)
Be sure that the clock shows the correct time of day.
Place the food in the oven.
Press bake. “ — — — ° “ appears in the display.
Within 5 seconds, press the or . The display will show “350°F (177°C).” By holding the or , the temperature can then be adjusted in 5°F increments (1°C if the control is set to display Celsius).
Press bake time. “:00” will appear in the display.
Press the or until the desired baking time appears in the display.
The oven will turn ON and begin heating.
SELF-CLEANING
Self-Cleaning
A self-cleaning oven cleans itself with high temperatures (well above normal cooking temperatures) which eliminate soils completely or reduces them to a fine powdered ash you can wipe away with a damp cloth.
IMPORTANT
Adhere to the following self-clean precautions:
• DO NOT use oven cleaners or oven protective coatings in or around any part of the oven interior.
• DO NOT clean the oven door gasket (See Fig. 1). The woven material of the oven door gasket is essential for a good seal. Care should be taken not to rub, damage or remove the gasket.
• DO NOT use any cleaning materials on the oven door gasket. Doing so could cause
damage.
• Remove the broiler pan and insert, all utensils and ANY ALUMINUM FOIL. These items cannot withstand high cleaning temperatures and will melt.
• Completely remove ALL OVEN RACKS and ANY ACCESSORIES. If the oven racks are not removed they will lose their special coating properties and no longer slide in and out of the oven cavity easily.
• Remove any excessive spillovers. Any spills on the oven bottom should be wiped-up and removed before starting the self-cleaning cycle. To clean, use hot, soapy water and a cloth. Large spillovers can cause heavy smoke or fire when subjected to high temperatures. DO NOT allow food spills with a high sugar or acid content (such as milk, tomatoes, sauerkraut, fruit juices or pie filling) to remain on the surface as they may leave a dull spot even after cleaning.
• Clean any soil from the oven frame, the door liner outside the oven door gasket and the small area at the front center of the oven bottom. These areas heat sufficiently to burn soil on. Clean with soap and water. These areas are shown in white (See Fig. 1).
CAUTION
During the self-cleaning cycle, the outside of the range can become very hot to the touch. DO NOT leave small children unattended near the appliance.
The health of some birds is extremely sensitive to the fumes given off during the self-cleaning cycle of any range. Move birds to another well-ventilated room.
DO NOT force the oven door open. This can damage the automatic door locking system. Use caution when opening the door after the self-cleaning cycle is complete. The oven may still be VERY HOT.
Setting a self-clean cycle or a delayed start self-clean cycle
Setting a self-clean cycle
1. Be sure the clock displays the correct time of day.
2. Press start time. The “ : “ in the time of day will flash.
3. Press and hold the pad to scroll to the time to start the delayed Self-Clean cycle. Release the pad when the desired time is displayed.
4. Press clean. “---” appears in the display.
5. Press the or pad once. “3:00” will appear in the display indicating that a 3 hour self-clean time is set. To change to a 2 hour self-clean time press once (2:00 appears in the display).
(Some models) For a 4 hour self-clean time press until (4:00 appears in display).
6. “CLn” will appear in the display during the self-clean cycle and the “LOCK” light will glow until the selfcleaning cycle is complete or cancelled and the oven temperature has cooled.
When the self-clean cycle has completed:
The time of day will appear in the display window and the “Clean” and “LOCK” light will continue to glow.
Once the oven has cooled down for about 1 HOUR and the “LOCK” light has gone out, the oven door can be opened
Stopping or interrupting a self-clean cycle
If it becomes necessary to stop or interrupt a selfcleaning cycle once it has been activated:
Press clear off.
Once the oven has cooled down for about 1 HOUR and the “LOCK” light has turned off, the oven door can be opened.
Restart the self-clean cycle once all conditions have been corrected.
CARE & CLEANING
Cleaning recommendation table
Surface type
Recommendation
Control knobs
Painted body parts
Painted decorative trim
Aluminum, plastic or vinyl trim pieces
Use hot, soapy water and a cloth. Dry with a clean cloth.
For general cleaning, use hot, soapy water and a cloth. For more difficult soils and built-up grease, apply a liquid detergent directly onto the soil. Leave on soil for 30 to 60 minutes. Rinse with a damp cloth and dry. Do not use abrasive cleaners on any of these materials; they can scratch. To remove control knobs, turn to the OFF position; grasp firmly and pull straight off the shaft. To replace knobs after cleaning, line up the flat sides of both the knob and the shaft; then push the knob into place.
• Control panel
• Decorative trim (some models)
Before cleaning the control panel, turn all controls OFF and if needed remove any knobs from the panel. Clean using hot, soapy water and a dishcloth. Be sure to squeeze excess water from the dishcloth before wiping the control panel; especially when wiping around the controls area. Excess water in or around the controls may cause damage to the appliance. When rinsing, use clean water and a dishcloth and be sure to squeeze excess water from dishcloth before wiping the control panel.
Stainless steel (some models)
Clean heavier soils with hot, soapy water and a dishcloth. Rinse with clean water and a cloth. Do not use cleaners with high concentrations of chlorides or chlorine. Do not use harsh scrubbing cleaners. Only use kitchen cleaners that are especially made for cleaning stainless steel. Always be sure to rinse the cleaners off from the surface as bluish stains may occur during heating that cannot be removed.
Porcelain enamel broiler pan and broiler pan insert (if equipped)
Door liner & body parts
Gentle scouring with a soapy non-abrasive scouring pad will remove most spots. Rinse with a 1:1 solution of clear water and ammonia. If necessary, cover difficult spots with an ammonia-soaked paper towel for 30 to 40 minutes. Rinse with clean water and a damp cloth, and then scrub with a soap-filled non-abrasive scouring pad. Rinse and wipe dry with a clean cloth. Remove all cleaners or the porcelain may become damaged during future heating.
Oven racks
Oven racks must be removed from oven cavity. Clean by using a mild, abrasive cleaner following manufacturer’s instructions. Rinse with clean water and dry.
Oven door
Use soap & water to thoroughly clean the top, sides and front of the oven door. Rinse well. You may use a glass cleaner on the outside glass of the oven door. Do not immerse the door in water. Do not spray or allow water or the glass cleaner to enter the door vents. Do not use oven cleaners, cleaning powders or any harsh abrasive cleaning materials on the outside of the oven door.
Do not clean the oven door gasket. On self-cleaning models the oven door gasket is made of a woven material which is essential for a good seal. Care should be taken not to rub, damage or remove this gasket.
Ceramic cooktop
Do not use spray oven cleaners on the cooktop. See cooktop cleaning and maintenance in the Care & Cleaning section.
Cooktop maintenance
Prior to using your cooktop for the first time, apply a ceramic cooktop cleaning cream (available in most hardware, grocery and department stores) to the ceramic surface. Clean and buff with a clean paper towel. This will make cleaning easier when soiled from cooking. Cooktop cleaning creams leave a protective finish on the glass to help prevent scratches and abrasions.
Sliding aluminum or copper clad bottom pans on the cooktop can cause metal markings on the cooktop surface. These marks should be removed immediately after the cooktop has cooled using the cooktop cleaning cream. Metal marks can become permanent if not removed prior to future use.
Cookware (cast iron, metal, ceramic or glass) with rough or dirty bottoms can mark or scratch the cooktop surface.
Do not:
Slide anything metal or glass across the cooktop.
Use cookware with dirt or dirt build up on bottom; replace with clean cookware before using.
Use your cooktop as a cutting board or work surface in the kitchen.
Cook foods directly on the cooktop surface without a pan.
Drop heavy or hard objects on the ceramic glass cooktop, they may cause it to crack.
Cooktop cleaning
For light to moderate soil:
Apply a few drops of cooktop cleaning cream directly to the cooktop. Use a clean paper towel to clean the entire cooktop surface. Make sure the cooktop is cleaned thoroughly, leaving no residue. Do not use the towel you use to clean the cooktop for any other purpose.
For heavy, burned on soil:
Apply a few drops of glass-ceramic cooktop cleaner directly to the soiled area. Rub the soiled area using a non-abrasive plastic type no-scratch cleaning pad, applying pressure as needed. Do not use the pad you use to clean the cooktop for any other purpose.
If soils remain, carefully scrape soils with a metal razor blade scraper, holding scraper at a 30 degree angle to the surface. Remove loosened soils with cooktop cleaning cream and buff surface clean.
Plastic or foods with a high sugar content: These types of soils need be removed immediately if spilled or melted onto the ceramic cooktop surface. Permanent damage (such as pitting of the cooktop surface) may occur if not removed immediately.
After turning the surface elements OFF, use a razor blade scraper or a metal spatula with a mitt and scrape the soil from the hot surface (as illustrated). Allow the cooktop to cool, and use the same method for heavy or burned on soils.
Do not use the following on the cooktop:
Do not use abrasive cleaners and scouring pads, such as metal and some nylon pads. They may scratch the cooktop, making it more difficult to clean.
Do not use harsh cleaners, such as chlorine bleach, ammonia or oven cleaners, as they may etch or discolor the cooktop.
Do not use dirty sponges, cloths or paper towels, as they can leave soil or lint on the cooktop which can burn and cause discoloration.
Caution for aluminum use on the cooktop
Aluminum Foil - Use of aluminum foil on a hot cooktop will damage the ceramic cooktop. Do not use thin aluminum cooking utensils or allow aluminum foil to touch the ceramic cooktop under ANY circumstances.
Aluminum utensils - The melting point of aluminum is much lower than that of other metals. Care must be taken when aluminum pots or pans are used on the cooktop. If aluminum pans are allowed to boil dry when using the cooktop, not only will the utensil be damaged or destroyed, but it may fuse to, break or mark the ceramic glass surface, permanently damaging the cooktop surface.
Replacing the oven light
The light bulb is located at the rear of the oven and is covered with a glass shield held by a wire holder. The glass shield must be in place whenever the oven is in use.
To replace the oven light bulb:
Turn electrical power off at the main source or unplug the range.
Press wire holder to one side to release the glass shield.
Replace bulb with a new 40 watt appliance bulb.
Replace glass shield over bulb and snap wire holder into place.
Turn power back on again at the main source (or plug the range back in).
The clock will then need to be reset. To reset, see Setting the clock and minute timer in this Use & Care Guide.
Removing and replacing the lift-off oven door
To remove oven door:
Open oven door completely (horizontal with floor - See Fig. 1).
Pull the door hinge locks on both left and right door hinges down from the oven frame completely towards the oven door (See Fig. 2). A tool such as a small flatblade screwdriver may be required.
Firmly grasp both sides of oven door along the door sides (Do not use the oven door handle - See Fig. 3).
Close the door to the broil stop position (the oven door will stop into this position just before fully closing).
With the oven door in the broil stop position, lift the oven door hinge arms over the roller pins located on each side of the oven frame (See Fig. 4).
To replace oven door:
Firmly grasp both sides of oven door along the door sides (Do not use the oven door handle - See Fig. 3).
Holding the oven door at the same angle as the removal position, seat the hook of the hinge arm over the roller pins located on each side of the oven door frame (See Fig. 4). The hook of the hinge arms must be fully seated onto the roller pins.
Fully open the oven door (horizontal with floor - See Fig. 1).
Push the door hinge locks up towards and into the oven frame on both left and right oven door hinges (See Fig. 2) to the locked position.
Close the oven door.
Special door care instructions - Most oven doors contain glass that can break.
Read the following recommendations:
Do not close the oven door until all the oven racks are fully in place.
Do not hit the glass with pots, pans, or any other object.
Scratching, hitting, jarring or stressing the glass may weaken its structure causing an increased risk of breakage at a later time
BEFORE YOU CALL
Problem
Solution
Poor baking results.
Many factors affect baking results. Make sure the proper oven rack position is used. Center food in the oven and space pans to allow air to circulate. Allow the oven to preheat to the set temperature before placing food in the oven. Try adjusting the recipe’s recommended temperature or baking time. If you feel the oven is too hot or cool, see “Adjusting Oven Temperature” section in this Use & Care Guide.
Appliance is not level.
Be sure floor is level, strong & stable enough to adequately support range
If floor is sagging or sloping, contact a carpenter to correct the situation.
Poor installation. Place oven rack in center of oven. Place a level on the oven rack. Adjust leveling legs at base of appliance until the rack is level.
Kitchen cabinet alignment may make range appear not level. Be sure cabinets are square & have sufficient room for appliance clearance.
Cannot move appliance easily. Appliance must be accessible for service.
Cabinets not square or are built in too tightly. Contact builder or installer to make appliance accessible.
Carpet interferes with appliance. Provide sufficient space so appliance can be lifted over carpet.
Surface element too hot or not hot enough.
Incorrect control setting. Be sure the correct control is ON for the element that you are attempting to use.
Surface element does not heat.
Lightweight or warped pans used. Use only flat, evenly balanced, medium or heavyweight cookware. Flat pans heat better than warped pans. Cookware materials and weight of the material affect heating. Heavy & medium-weight pans heat evenly. Because lightweight pans heat unevenly, foods may burn easily.
Entire appliance does not operate.
The time of day is not set. The time of day must first be set in order to operate the oven. See “Setting the clock” in the Setting oven controls section.
Make sure cord/plug is plugged correctly into outlet.
Service wiring is not complete. Contact your dealer, installing agent or authorized service agent.
Electrical power outage. Check house lights to be sure. Call your local electric company for service.
Oven portion of appliance does not operate.
Be sure the oven controls are set properly for the desired cooking feature. See Setting Oven Controls in this manual or read the instructions “Entire appliance does not operate” in this checklist.
Oven light does not work.
Be sure the light is secure in the socket. Also see “Changing & replacing the oven light” section.
Self-clean cycle does not work.
Oven control not set properly. Follow instructions under Self-clean.
Self-clean cycle was interrupted. Follow steps under “Stopping or Interrupting a Self-cleaning cycle” under Self-clean.
Soil not completely removed after selfcleaning cycle.
Failure to clean bottom, front top of oven, frame of oven or door area outside oven seal. These areas are not in the self-cleaning area, but get hot enough to burn on residue. Clean these areas before the self-cleaning cycle is started. Burned-on residue can be cleaned with a stiff nylon brush and water or a nylon scrubber. Be careful not to damage the oven gasket
Oven smokes excessively during broiling.
Incorrect setting. Follow broiling instructions in Setting Oven Controls.
Make sure oven door is opened to broil stop position.
Meat too close to the broil element. Reposition the broil rack to provide proper clearance between the meat & the element. Preheat the broil element for searing.
Meat not properly prepared. Remove excess fat from meat. Cut remaining fatty edges to prevent curling, but do not cut into lean.
Broiler pan and insert wrong side up and grease not draining. Always place grid on the broiler pan with ribs up & slots down to allow grease to drip into pan (some models).
Grease has built up on oven surfaces. Regular cleaning is necessary when broiling frequently. Old grease or food spatters cause excessive smoking.
Flames inside oven or smoking from oven vent.
Excessive spillovers in oven. For example this will happen for pie spillovers or large amounts of grease left on the oven bottom. Wipe up excessive spillovers before starting oven. If flames or excessive smoke are present see “About broiling” in the Setting Oven Controls section.
Oven control panel beeps & displays any F code error (for example F10, F11, F13, F14, F15, F30, F31 or F90).
Oven control has detected a fault or error condition. Press clear off to clear the display & stop beeping. Try the bake or broil feature again. If the F code error repeats, remove power from appliance, wait 5 minutes and then repower appliance and set clock for the time of day. Try the bake or broil feature again. If the fault recurs, record fault and call for service.
Scratches or abrasions on cooktop surface.
Coarse particles such as salt or sand between cooktop and utensils can cause scratches. Be sure cooktop surface and bottoms of utensils are clean before usage. Small scratches do not affect cooking and will become less visible with time.
Cleaning materials not recommended for ceramic-glass cooktop have been used. See “Cooktop cleaning and maintenance” in the Care & Cleaning section of this Use & Care Guide.
Cookware with rough bottom has been used. Use smooth, flat-bottomed cookware.
Metal marks on the cooktop.
Sliding or scraping of metal utensils on cooktop surface. Do not slide metal utensils on cooktop surface. Use a ceramic-glass cooktop cleaner to remove the marks. See “Cooktop cleaning and maintenance” in the Care & Cleaning section.
Brown streaks or specks on cooktop surface.
Boilovers are cooked onto surface. Use razor blade scraper to remove soil. See “Cooktop Cleaning and Maintenance” in the Care & Cleaning section.
Areas of discoloration with metallic sheen on cooktop surface.
Mineral deposits from water and food. Remove using a ceramic-glass cooktop cleaner. Use cookware with clean, dry bottoms.


 or
or  until the correct time of day appears in the display.
 IMPORTANT
 CAUTION