Loading ...
Loading ...
Loading ...
ESPAÑOL
33
INSTRUCCIONES DE USO
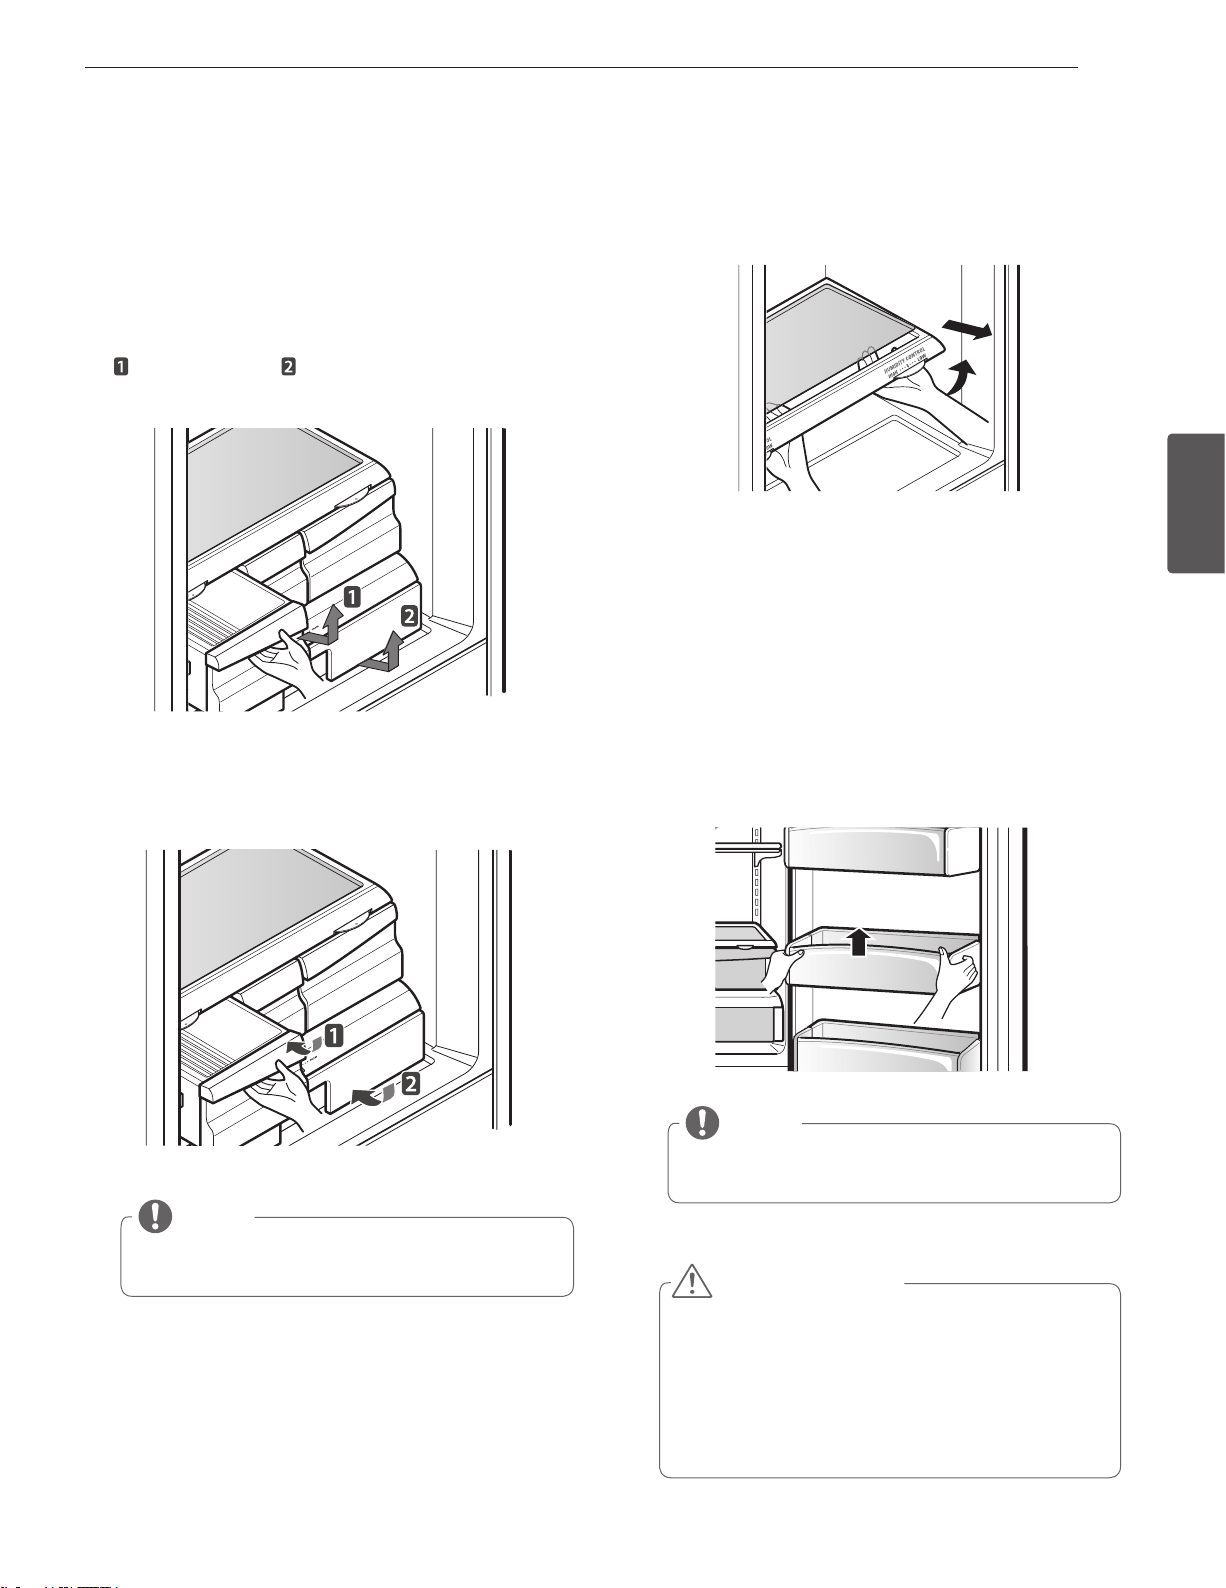
Bandejas de las puertas
Montaje y desmontaje de las bande-
jas de almacenamiento
Glide'N'Serve y Cajón para verduras con
control de humedad
Para retirar el cajón para verduras con control de humedad y
el cajón deslizante Glide'N'
tire hacia afuera el cajón para verdu-
ras
y el Glide’N’Server lo más posible, levante el frente, y
tire hacia afuera.
PRECAUCIÓN
No aplique demasiada fuerza mientras monta o
y
desmonta las bandejas de almacenamiento.
No utilice el lavavajillas de platos para limpiar las
y
bandejas de almacenamiento y los estantes.
Desmonte y lave las bandejas de almacenamiento y
y
los estantes con regularidad, ya que pueden con-
taminarse fácilmente por los alimentos.
Para retirar el vidrio
(Para mayor claridad, no se muestra el cajón)
Levante el vidrio debajo del cajón para verduras y tire hacia
arriba y hacia afuera.
Para instalarlo, incline la parte delantera ligeramente hacia ar-
riba, inserte el cajón en el marco y empuje hasta que encaje
en su sitio.
Las bandejas de la puerta son extraíbles para facilitar su limp-
ieza y ajuste.
1
Para extraer la bandeja, simplemente levántela hacia arriba
y tire de ella hacia fuera.
2
Para volver a colocar la bandeja, deslícela por encima del
soporte deseado y empuje hacia abajo hasta que encaje
en su sitio.
NOTA
Algunas bandejas tienen una apariencia diferente y
sólo encajarán en una ubicación.
32
REMOVING AND REPLACING COMPONENTS
NOTE: When reinstalling components, reverse
the order of steps for removal. To prevent damage,
never use excessive force when removing or
reinstalling components.
wCAUTION
• Personal injury can occur if the door bins are not
firmly assembled.
NOTE: DO NOT adjust a loaded bin.
• DO NOT allow children to play with baskets.
The sharp corners on the baskets could cause
injury.
Dairy Bin Gallon Storage Bins
To remove the dairy bin, simply lift it and pull
straight out. To replace the dairy bin, slide it into
place and push down until it stops.
NOTE: The dairy bin will only fit in the top space
on the right-hand door.
The door bins are removable for easy cleaning
and adjusting. Simply lift the bin and pull it straight
out to remove it. To replace the bin, slide it in
above the desired support button and push down
until it stops.
Dispenser Drip Tray
The dispenser drip tray has no self-draining function. It should be cleaned regularly. Remove the cover by
pressing and pulling the tray. Dry it with a cloth. To reinstall the tray, slightly tilt the front of the tray and
snap the ribs into the holes.
NOTA
Contenedores Strage pueden variar de aspecto,
según el modelo.
Loading ...
Loading ...
Loading ...