Loading ...
Loading ...
Loading ...
WARNING!
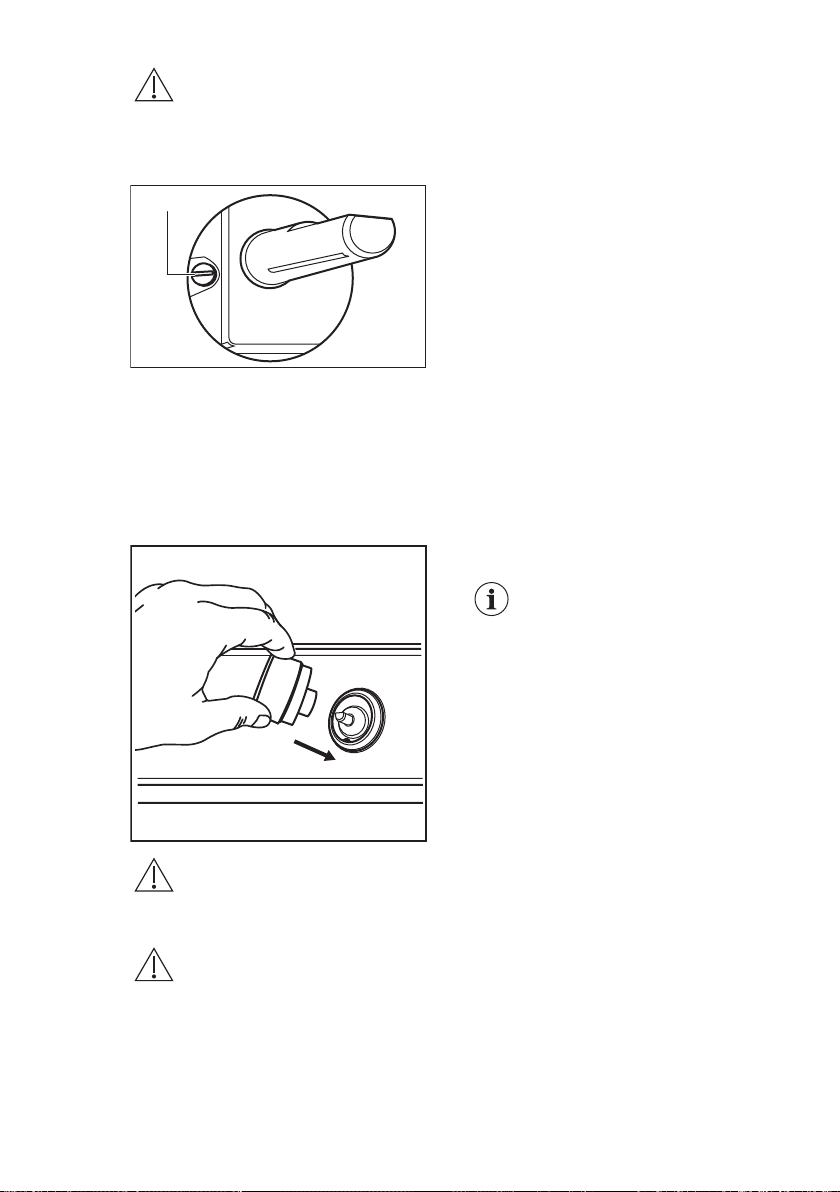
Pay attention not to damage
the gasket. Do not use sharp
tool to remove it.
4. With a thin screwdriver, adjust the
bypass screw position (A).
A
5. If you change:
• from natural gas G20 20 mbar to
liquid gas, fully tighten the bypass
screw in.
• from liquid gas to natural gas G20
20 mbar, undo the bypass screw
approximately 1/4 of a turn (1/2 of
a turn for Multi Crown burner).
6. Reassemble the gasket and the knob.
WARNING!
Make sure to place the
gasket exactly in the original
position.
WARNING!
Make sure the flame does
not go out when you quickly
turn the knob from the
maximum position to the
minimum position.
3.5 Electrical connection
• Make sure that the rated voltage and
type of power on the rating plate
agree with the voltage and the power
of the local power supply.
• This appliance is supplied with a
mains cable. It has to be supplied with
a correct plug which can hold the load
that the rating plate rates. Make sure
that you install the plug in a correct
socket.
• Always use a correctly installed
shockproof socket.
• Make sure that there is an access to
the mains plug after the installation.
• Do not pull the mains cable to
disconnect the appliance. Always pull
the mains plug.
• There is a risk of fire when the
appliance is in connection with an
extension cable, an adapter or a
multiple connection. Make sure that
the ground connection agrees with
the standards and regulations.
• Do not let the power cable to heat up
to a temperature higher than 90° C.
Make sure that you connect
the blue neutral cable to the
terminal with a letter "N" on
it. Connect the brown (or
black) phase cable to the
terminal which has a letter
"L". Keep the phase cable
connected at all times.
3.6 Connection cable
To replace the connection cable use only
the special cable or its equivalent. The
cable type is: H03V2V2-F T90.
Make sure that the cable section is
applicable to the voltage and the
working temperature. The yellow / green
earth wire must be approximately 2 cm
longer than the brown (or black) phase
wire.
ENGLISH
9
Loading ...
Loading ...
Loading ...