Loading ...
Loading ...
Loading ...
If oven is used in a new branch circuit installation
(1996 NEC), mobile home, recreational vehicle, or
where local codes DO NOT permit grounding through
the neutral (white) wire, the appliance frame MUST
NOT be connected to the neutral wire of the 4-wire
electrical system. (see figure 4):
1. Disconnect the power supply.
2. Separate the green (or bare copper) and white
appliance cable wires.
3. In the junction box:
connect appliance and power supply cable wires as
shown in Figure 4.
5. Cabinet Installation
Do not lift or manipulate the oven by the door handle
or the control panel.
Heavy Weight Hazard
Use 2 or more people to move and install wall oven,
Failure to follow this instruction can result in injury or
damage to the unit,
Cable from Power Supply
Ground Wire __-_"
Red "<_::_ hite Wire
_ire_ _,,,x-__ Black
Ground Wire j-_jx' ( s
(Bare or Gree__
Wire) J _, ire
Junction Box _LndLui stt_donnactor
Cable from appliance (or CSA listed)
Figure 4
4-WIRE GROUNDED JUNCTION BOX
Model and Serial Number Location
The serial plate is located along the interior side trim of
the oven and visible when the door is opened.
When ordering parts for or making inquires about your
oven, always be sure to include the model and serial
numbers and a lot number or letter from the serial plate
on your oven.
Single Wall Oven
Serial Plate Location
Double Wall Oven
Serial Plate Location
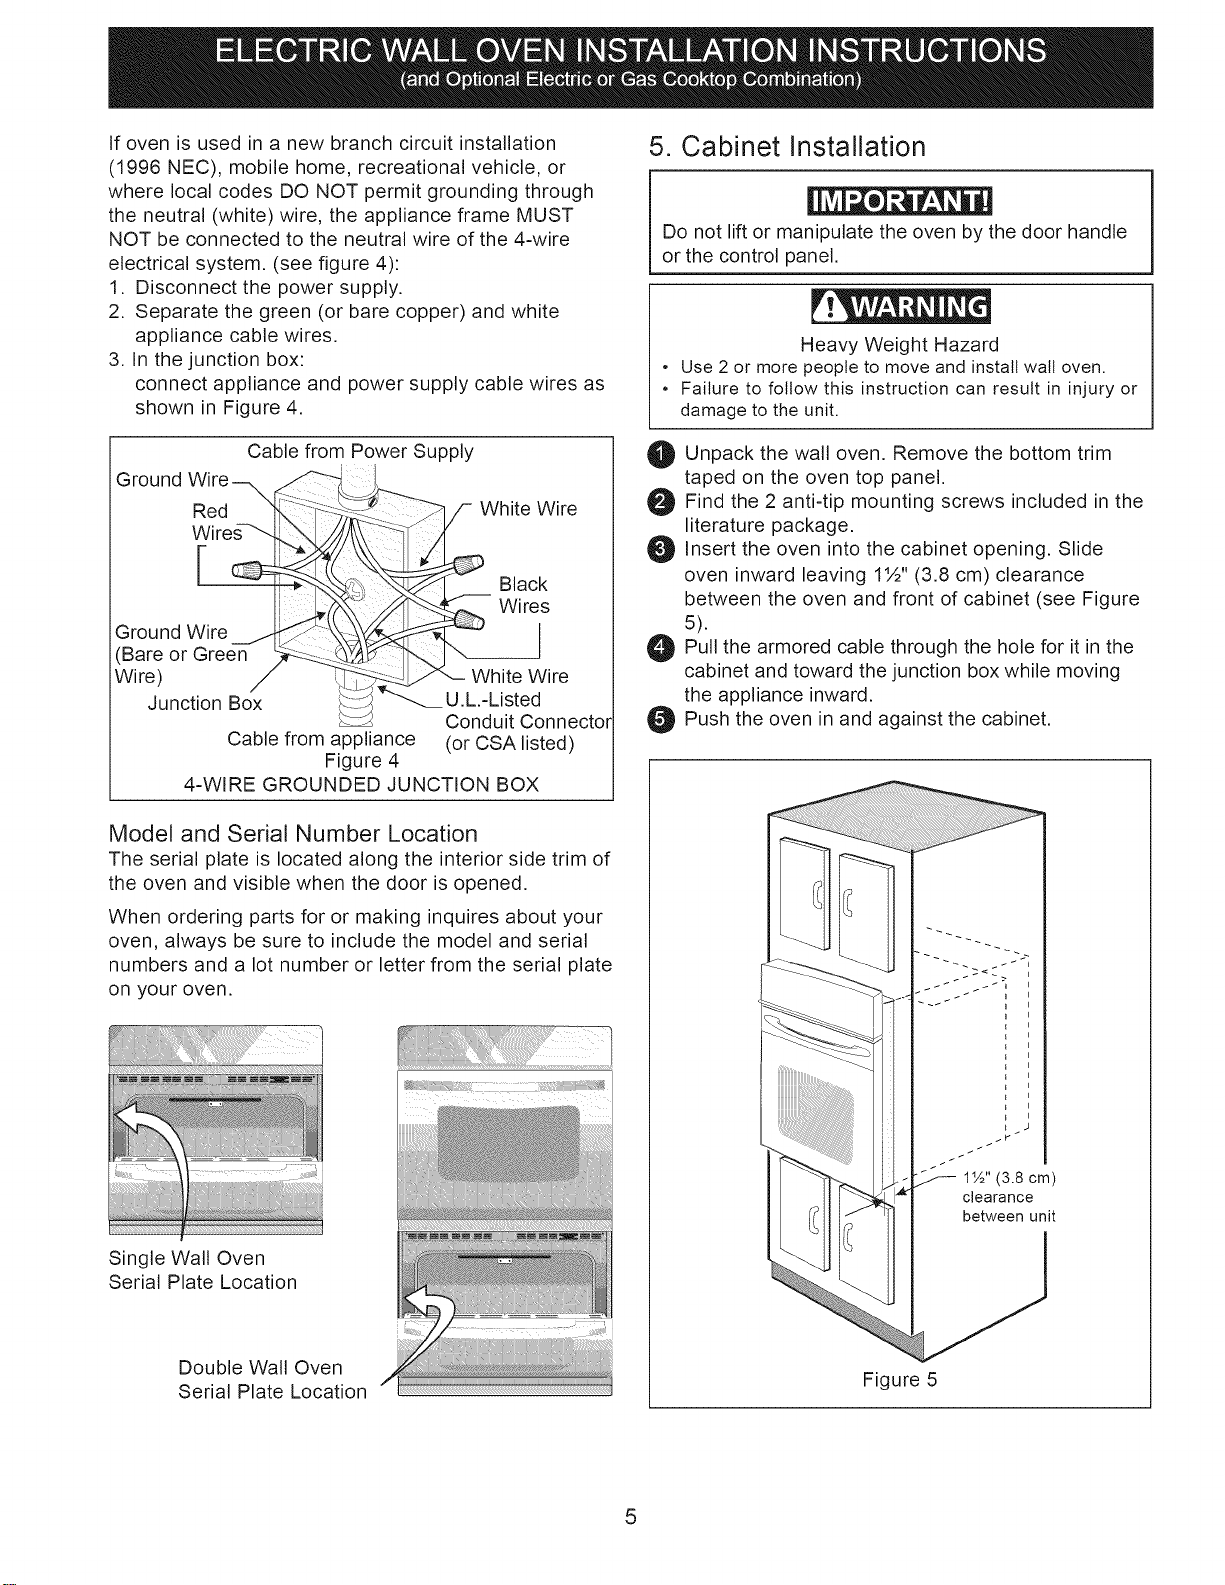
O Unpack the wall oven. Remove the bottom trim
taped on the oven top panel.
O Find the 2 included in the
anti-tip mounting
screws
literature package.
_t Insert the into the cabinet Slide
oven
opening.
oven inward leaving 1½" (3.8 cm) clearance
between the oven and front of cabinet (see Figure
5).
_Pull the armored cable through the hole for it in the
cabinet and toward the junction box while moving
the appliance inward.
_Push the in and the cabinet.
oven
against
1½" (3.8 cm)
clearance
between unit
Figure 5
5
Loading ...
Loading ...
Loading ...