MD
User Manual
2-Slice Toaster
Manuel d’Instructions
Grille-pain à 2 Tranches
Visit us at www.oster.ca
P.N. 161853
MODEL
MODÈLE
6595-033
When using your toaster, basic safety precautions should always be followed, including
the following:
READ ALL INSTRUCTIONS BEFORE USE
SAVE THESE INSTRUCTIONS
Power Cord Instructions
THIS UNIT IS FOR HOUSEHOLD USE ONLY
Short Power Supply Cord Instructions
English-1
Welcome
Congratulations on your purchase of an OSTER
®
Toaster! To learn more about OSTER
®
products,
please visit us at www.oster.ca.
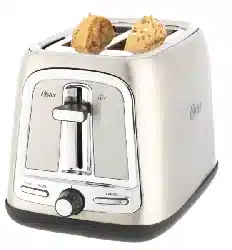
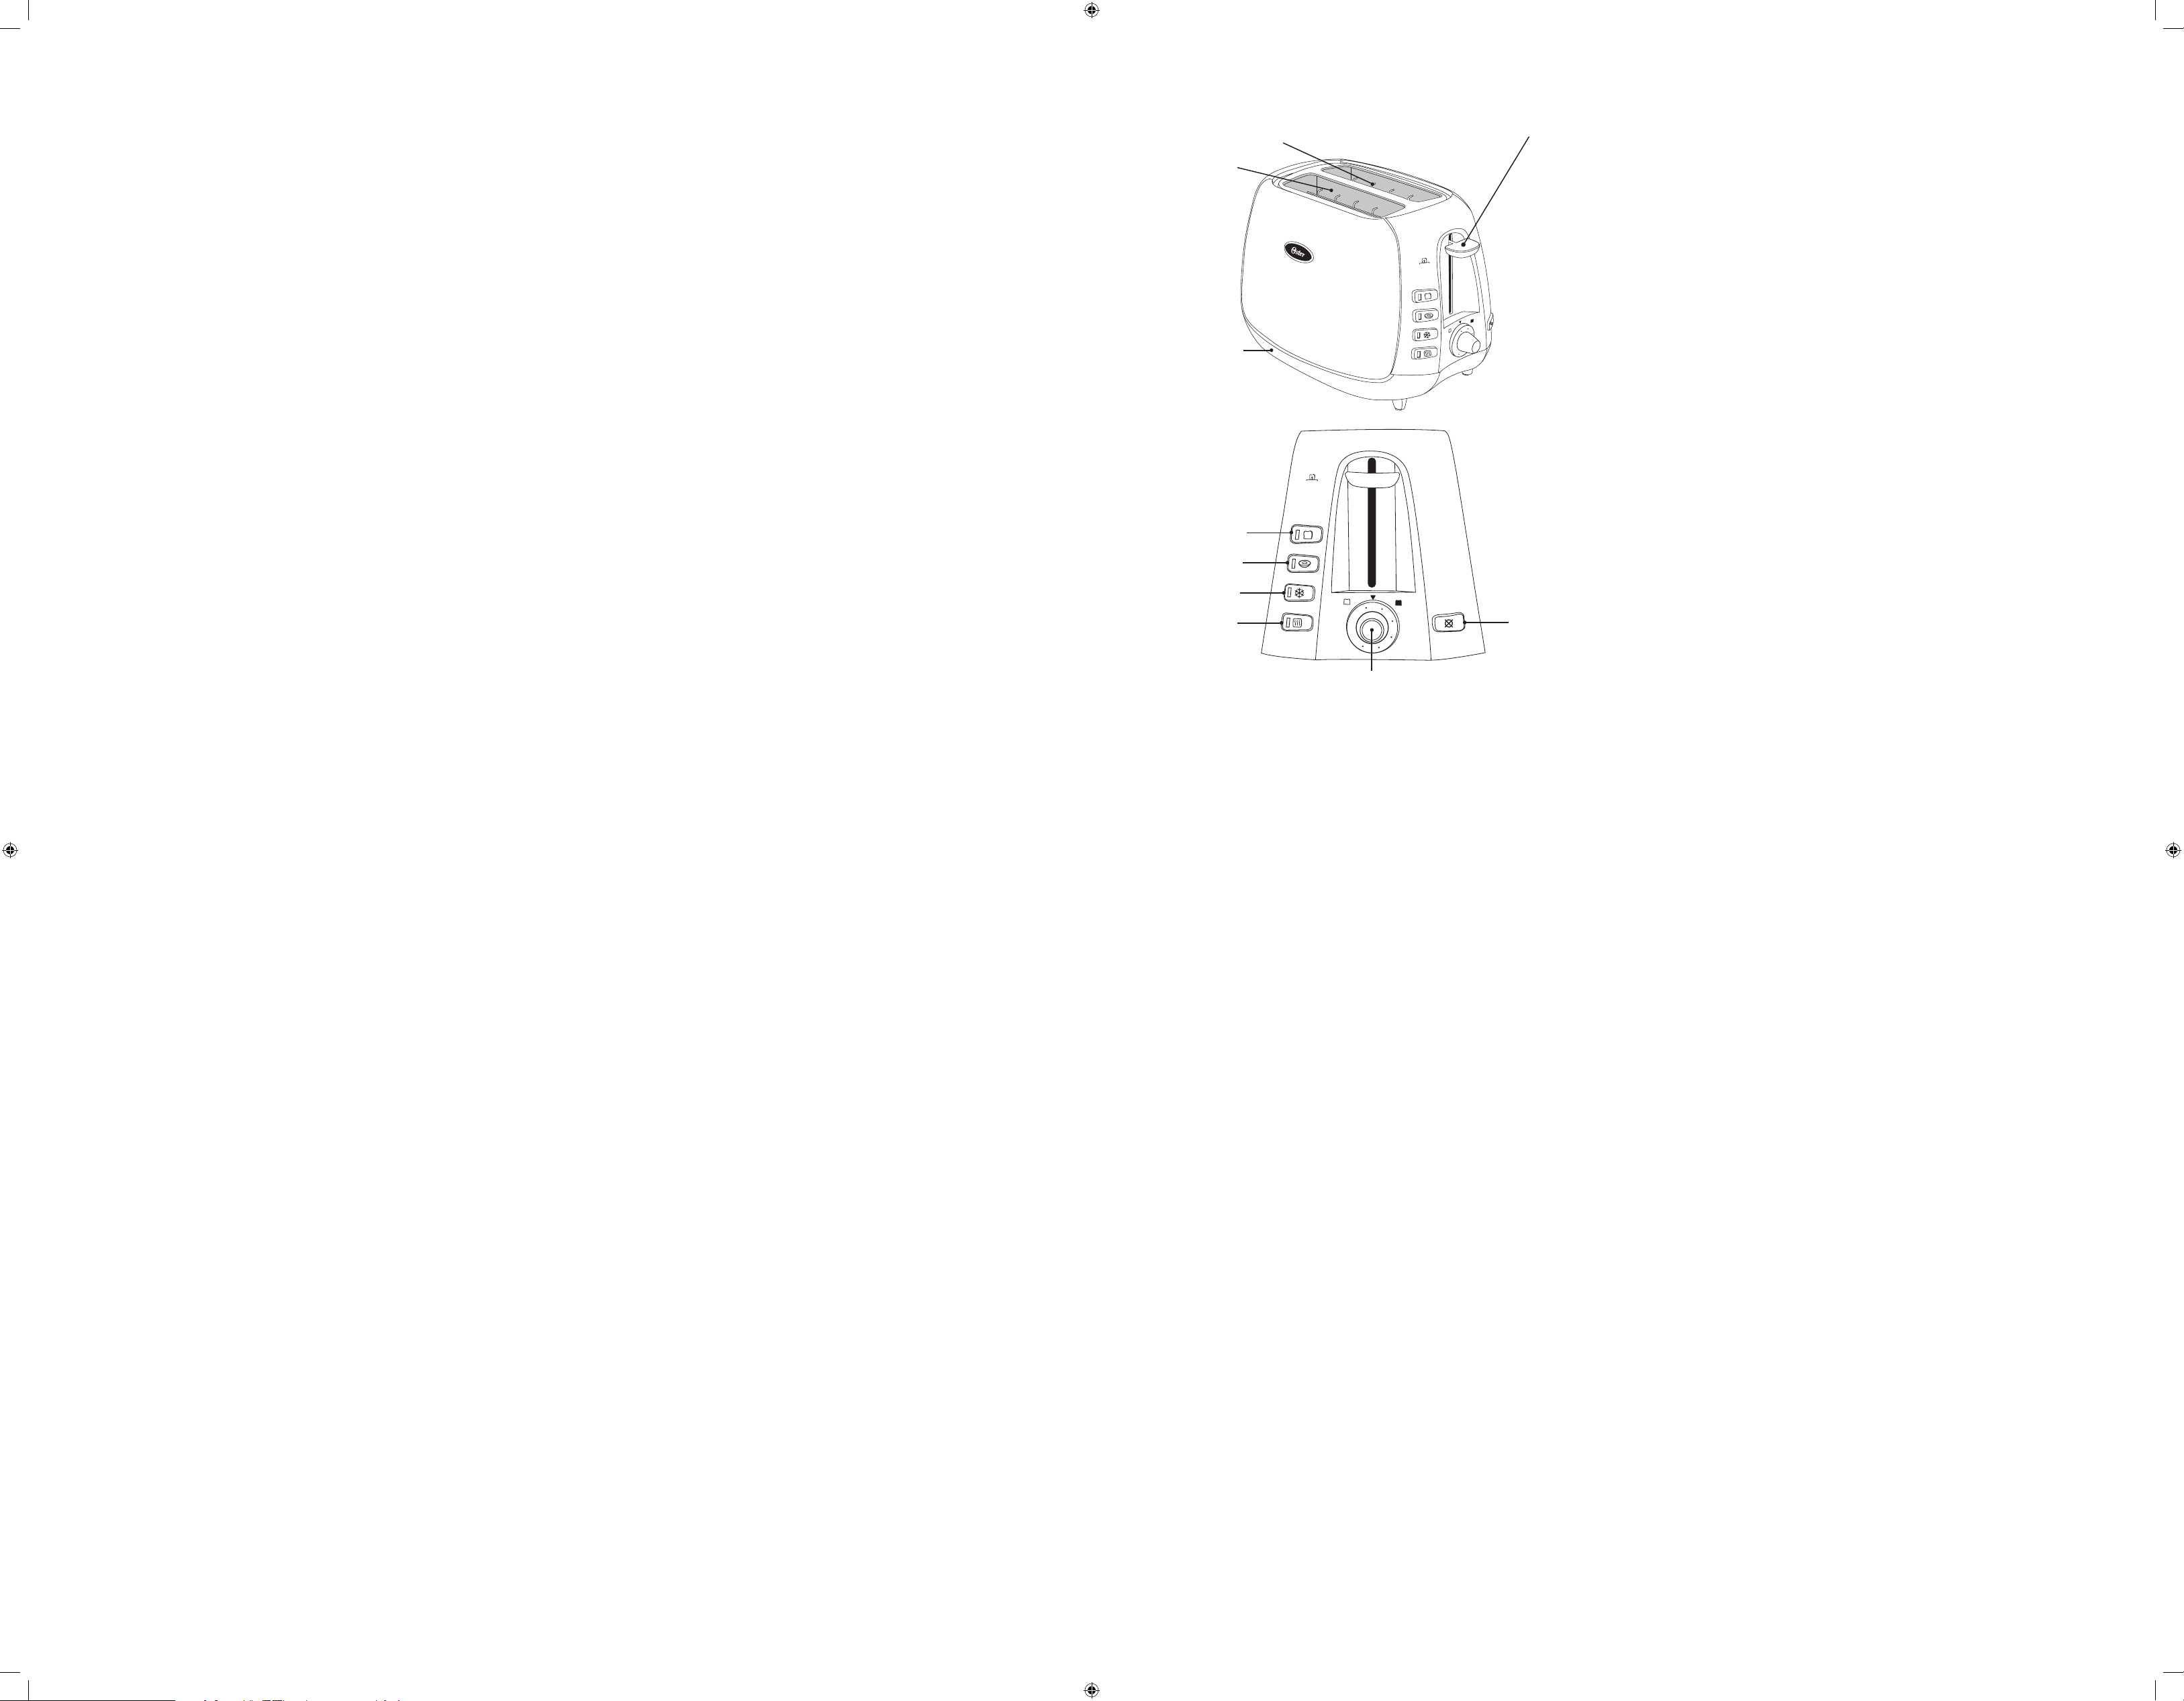
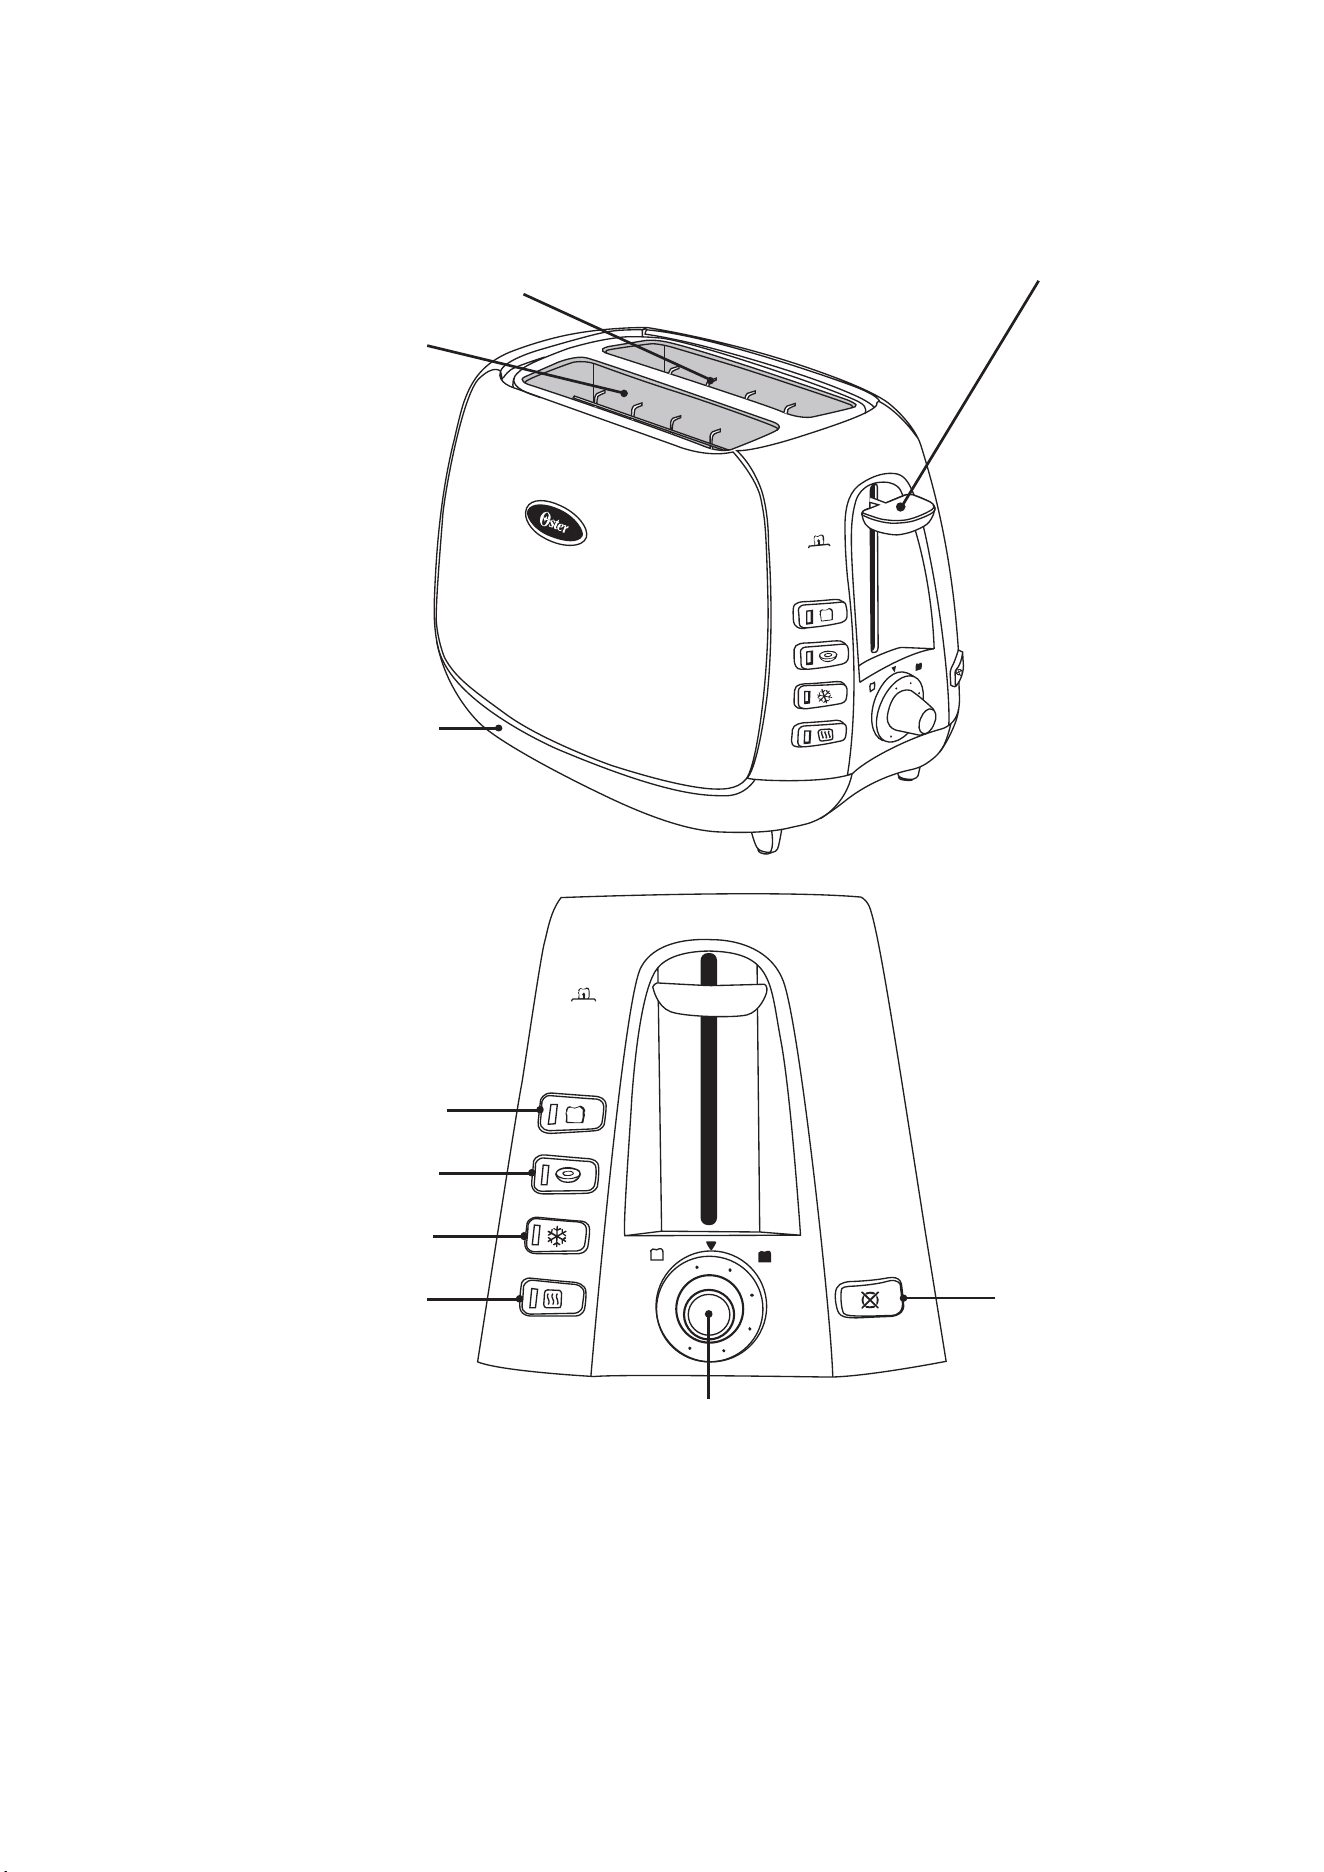
1. Lighter/Darker Knob
2. Warm Button with Indicator Light
3. Frozen Button with Indicator Light
4. Bagel Button with Indicator Light
5. Toast Button with Indicator Light
6. Cancel Button
7. Extra-Wide Bread Slots
8. Stainless Steel Bread Guides
9. Bread Carriage Lever
10. Toast Lift
11. Crumb Tray
12. Power Cord (not shown)
English-2
9/10
7
8
11
1
7
6
5
2
7
6
5
4
3
2
1
5
4
2
3
1
6
Learning About Your Toaster
Toast is the default setting if no food or function select buttons are chosen.
1. Lighter/Darker Knob –
Turn the knob to select how dark you would like your food
toasted; 1 is lightest, 7 is darkest.
2. Warm Button with Indicator Light – Press this button to warm your toasted food. The
indicator will light to confirm that “Warm” is selected.
3. Frozen Button with Indicator Light – Press this button if your food is frozen. Use this
button in combination with the Bagel and Toast buttons. The toaster will automatically
defrost your food and then toast it in one easy step. The button will light up when pressed.
4. Bagel Button with Indicator Light –
Press this button if you want to toast a bagel.
The indicator will light to confirm that “Bagel” is selected.
5. Toast Button with Indicator Light – Press this button if you want to toast bread. The
indicator will light to confirm that “Toast” is selected.
6. Cancel Button – Press the cancel buton to pop the food out of the bread slots and stop
the toasting process.
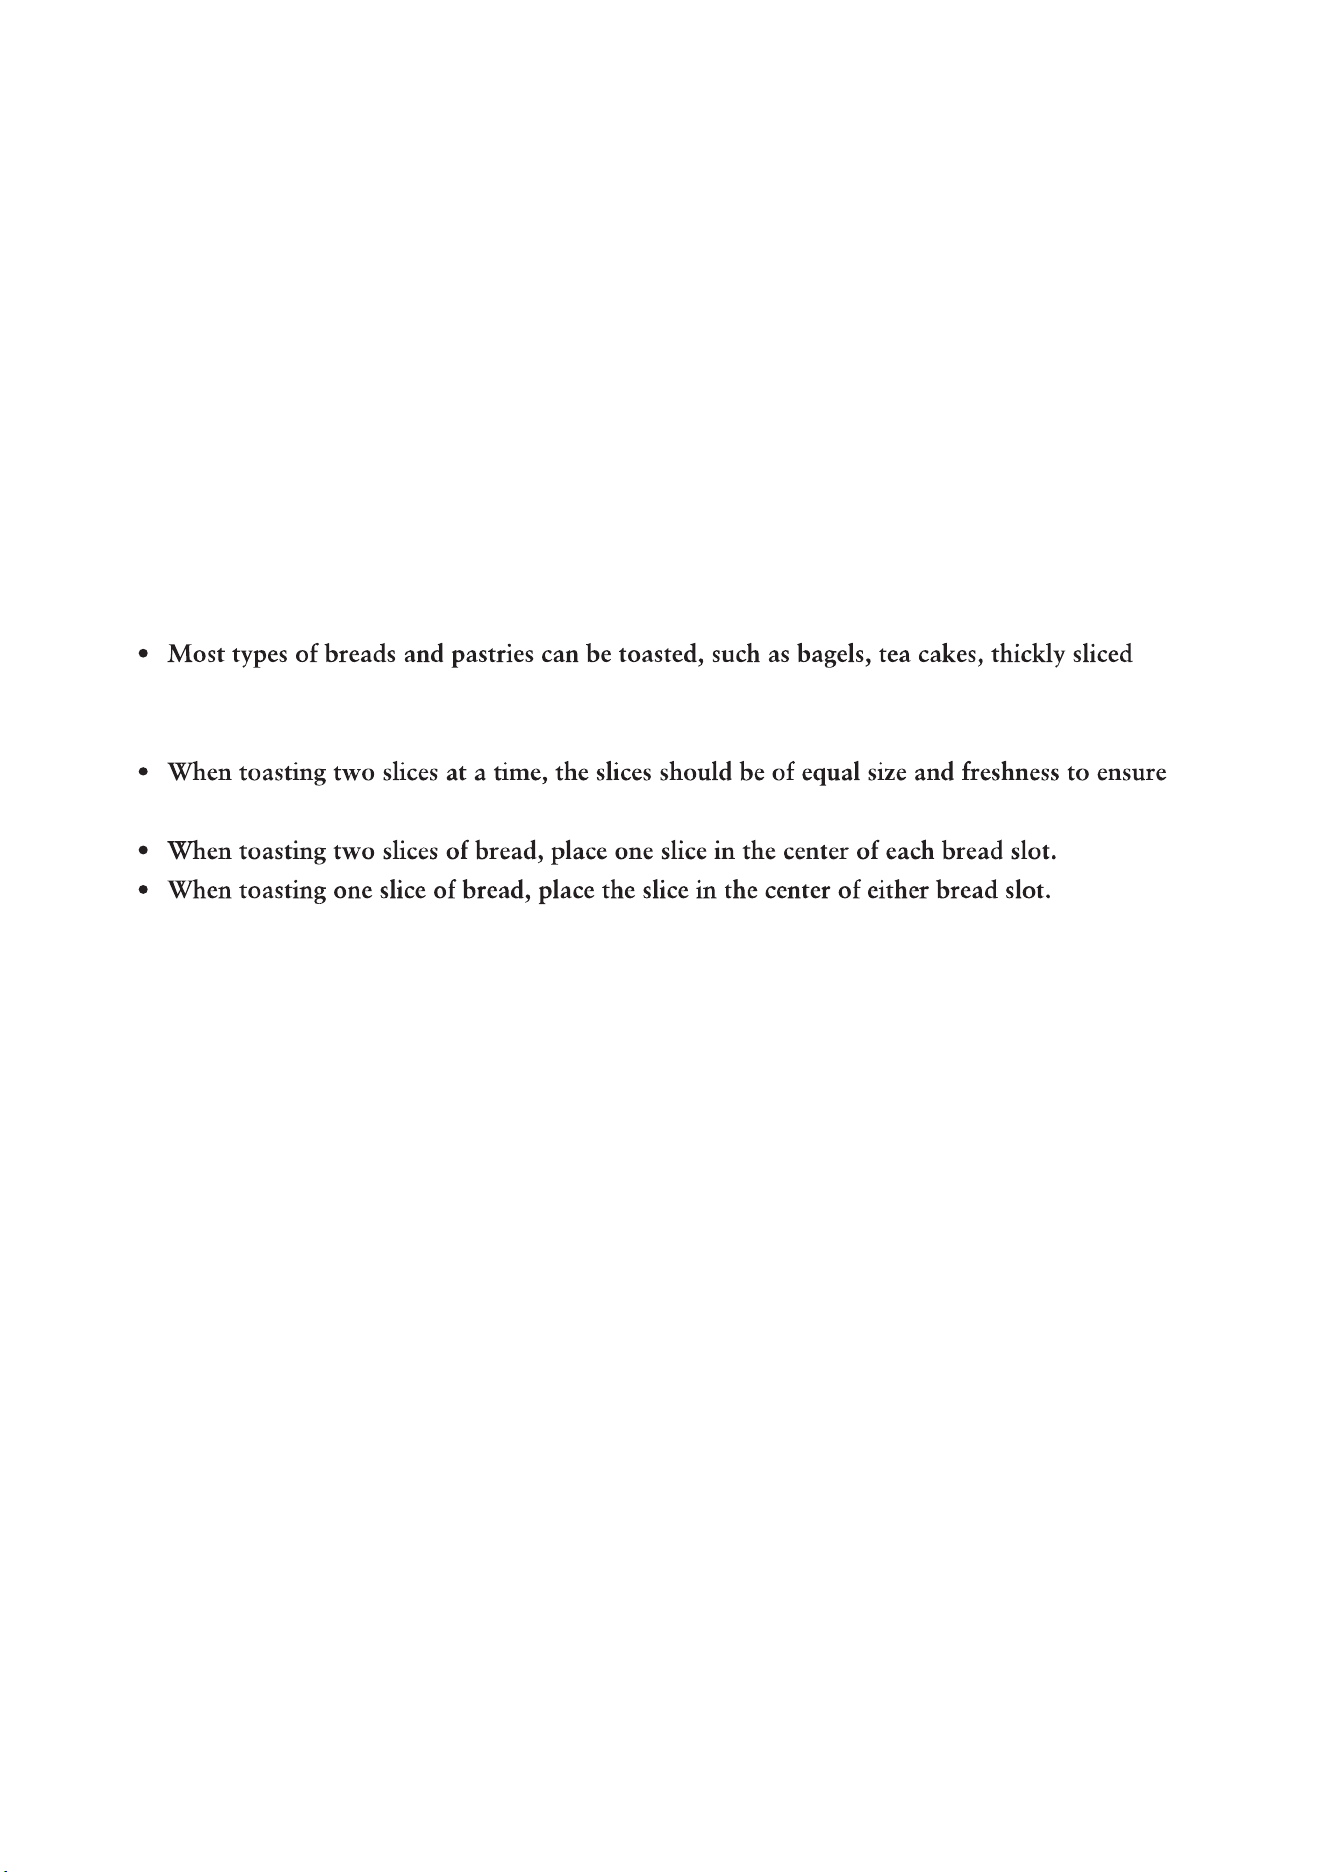
7. Extra-Wide Bread Slots – Wide slots (1.3 inches) allow you to toast bagels, thickly-
sliced homemade bread and English muffins.
8. Dual, Auto-Adjusting, Stainless Steel Bread Guides – Automatically adjust to
bread thickness for even toasting.
9. Bread Carriage Lever – Press to begin toasting your food.
10. Toast Lift – Press up on the bread carriage lever to lift food out of the bread slots.
Convenient and safe way of retrieving the smallest of toasted items.
11. Fully Removable, Crumb Tray – For convenient and easy cleanup.
12. Power Cord
13. Cord Storage – Allows you to store extra cord under the toaster and out of the way.
Preparing To Use Your Toaster for the First Time
If you are using your toaster for the first time, please be sure to:
1. Remove any stickers from the surface of the toaster and wipe the outside of your toaster
with a damp cloth.
2. Insert the removable crumb tray into the crumb tray slot.
3. Make certain that the bread carriage lever is in the uppermost position before plugging
in the toaster’s power cord.
4. Select a location for the toaster. The location should be:
5. Plug the power cord into 120 Volt, 60 Hz AC outlet.
Adjusting the power cord length
Your toaster’s cord storage area allows you to adjust the length of the power cord so that it is
the exact length you desire.
English-3
To adjust the length of the power cord:
Wrap the power cord around the cord storage posts on the base of the toaster until the cord
is the length you desire. Be certain to read “Power Cord Instructions” on Page English-1 for
safety information.
6. Without inserting any food into the bread slots, push the bread lever all the way down until
it locks. (The carriage will not lock if the toaster is not plugged into a power source.) The
first toasting process will preheat the new elements and burn off any dust which may have
accumulated during storage or manufacturing. It is normal for this burn off to create an
odor. Your OSTER
®
Toaster is now ready for use.
Using Your Toaster
Inserting the food into the bread slots and toasting:
Now you are ready to insert your food into the bread slots. Keep the following tips in mind
when inserting your food:
breads, English muffins, etc. Slices should not, however, be so thick as to jam the bread
slots.
even toasting.
After you insert the food into the bread slots:
1. Select the desired darkness setting by turning the Lighter/Darker knob.
2. Press the bread carriage lever down until it locks.The Auto-adjusting bread guides will
automatically center the food for even browning.
3. Choose between the Food Select Features or other Functions. If no food or function is cho-
sen, toast is the default setting.
Tip: Your toaster has been designed for optimum toast balance. Some elements on the in-
side of the toaster may glow more brightly than others when in use. This is part of normal
toaster operation.
After the desired level of darkness has been reached, the food will pop up automatically.
The bread carriage lever will return to its original position and the indicator lights will turn
off.
4. Carefully remove the toasted food from the bread slots.
WARNING: Toasted food can be very hot. Handle with care.
Tip: To remove food jammed in the bread slots, unplug the toaster and remove the food
once the toaster has cooled down.
WARNING: Never insert your fingers or metallic utensils into the bread slots.
English-4

Using the Food Select Feature
(Toast, Bagel)
Your OSTER
®
Toaster will adjust the light/dark range based upon the type of food you are
toasting. You must select which type of food you are toasting so that the toaster can adjust
accordingly. Toast is the default setting if no food or function select buttons are chosen.
To select the food type:
Choose between the Toast or Bagel mode.
This option will allow the toaster to adjust the time needed to toast bread according to
the shade level selected.
This option will allow the toaster to adjust the time needed to toast bagels according
to the shade level selected.
Using the Frozen Food Function
Your toaster can defrost your frozen food and then toast it. Now you can take a frozen
bagel out of the freezer and defrost and toast it – all in your toaster – all in one easy step.
To defrost and toast your food:
1. Place food into the bread carriage.
2. Press the Bread Carriage lever.
3. Press the Frozen button if the food is frozen, then select your food type by pressing
the appropriate button. If no food is selected the toaster will operate in toast mode.
4. Select the desired darkness setting by turning the Lighter/Darker knob.
Using the Warm Function
Will your toasted food be ready before you are ready to eat it? This feature will allow you
to reheat your toasted food.
To reheat your food:
1. Press the Bread Carriage lever.
2. Press the Warm button. If desired, press food select. If no food is selected the toaster will
operate in toast mode. The Warm indicator will light and the toaster will reheat your food.
Using the Cancel Function
To cancel the toast process:
Press the Cancel button. The toaster will stop toasting immediately and the food
will pop up automatically.
Cleaning Your Toaster
After use and before cleaning, Press cancel button, unplug the toaster power cord from the
power outlet and wait for the toaster to cool. Do not immerse appliance in liquids.
1. Wipe the outside of the toaster with a damp cloth and then dry it with another cloth
or paper towel. Do not use abrasive cleaners; they will damage the toaster’s finish.
WARNING: Do not use any pointed or sharp articles for cleaning the inside of the toaster;
this may damage the toaster.
2. Lightly tap the sides of the toaster to dislodge any crumbs caught in the toast chamber.
Remove the crumb tray and empty it. Wipe the tray clean with a damp cloth or place
it in the top rack of your dishwasher for cleaning. Be certain to put the crumb tray back
into the toaster before using the toaster again.
WARNING: Empty the crumb tray frequently. Crumbs will accumulate
in the crumb tray and could catch fire if not emptied periodically.
3. Wipe the surface on the top of the bread slots with a damp cloth and dry it with
another cloth or paper towel.
English-5

1 Year Limited Warranty
Sunbeam Products, Inc. doing business as Jarden Consumer Solutions or if in Canada,
Sunbeam Corporation (Canada) Limited doing business as Jarden Consumer Solutions
(collectively “JCS”) warrants that for a period of one year from the date of purchase, this
product will be free from defects in material and workmanship. JCS, at its option, will
repair or replace this product or any component of the product found to be defective during
the warranty period. Replacement will be made with a new or remanufactured product or
component. If the product is no longer available, replacement may be made with a similar
product of equal or greater value. This is your exclusive warranty. Do NOT attempt to repair
or adjust any electrical or mechanical functions on this product. Doing so will void this
warranty.
This warranty is valid for the original retail purchaser from the date of initial retail purchase
and is not transferable. Keep the original sales receipt. Proof of purchase is required to obtain
warranty performance. JCS dealers, service centers, or retail stores selling JCS products do not
have the right to alter, modify or any way change the terms and conditions of this warranty.
This warranty does not cover normal wear of parts or damage resulting from any of the
following: negligent use or misuse of the product, use on improper voltage or current, use
contrary to the operating instructions, disassembly, repair or alteration by anyone other than
JCS or an authorized JCS service center. Further, the warranty does not cover: Acts of God,
such as fire, flood, hurricanes and tornadoes.
What are the limits on JCS’s Liability?
JCS shall not be liable for any incidental or consequential damages caused by the breach of
any express, implied or statutory warranty or condition.
Except to the extent prohibited by applicable law, any implied warranty or condition of
merchantability or fitness for a particular purpose is limited in duration to the duration of the
above warranty.
JCS disclaims all other warranties, conditions or representations, express, implied, statutory or
otherwise.
JCS shall not be liable for any damages of any kind resulting from the purchase, use or misuse
of, or inability to use the product including incidental, special, consequential or similar
damages or loss of profits, or for any breach of contract, fundamental or otherwise, or for any
claim brought against purchaser by any other party.
Some provinces, states or jurisdictions do not allow the exclusion or limitation of incidental
or consequential damages or limitations on how long an implied warranty lasts, so the above
limitations or exclusion may not apply to you.
This warranty gives you specific legal rights, and you may also have other rights that vary
from province to province, state to state or jurisdiction to jurisdiction.
How To Obtain Warranty Service
In the U.S.A.
If you have any question regarding this warranty or would like to obtain warranty service,
please call 1-800-334-0759 and a convenient service center address will be provided to you.
In Canada
If you have any question regarding this warranty or would like to obtain warranty service,
please call 1-800-667-8623 and a convenient service center address will be provided to you.
In the U.S.A., this warranty is offered by Sunbeam Products, Inc. doing business as Jarden
Consumer Solutions located in Boca Raton, Florida 33431. In Canada, this warranty is offered
by Sunbeam Corporation (Canada) Limited doing business as Jarden Consumer Solutions,
located at 20 B Hereford Street, Brampton, Ontario L6Y 0M1. If you have any other problem
or claim in connection with this product, please write our Consumer Service Department.
PLEASE DO NOT RETURN THIS PRODUCT TO ANY OF THESE ADDRESSES
OR TO THE PLACE OF PURCHASE
English-6
L’utilisation d’un Grille-pain exige certaines précautions fondamentales, y compris les
suivantes:
LISEZ TOUTES LES INSTRUCTIONS AVANT D’UTILISER
L’APPAREIL
Franç ais-1
CONSERVEZ CES INSTRUCTIONS
Instructions Spéciales Quant au Cordon
CET APPAREIL EST DESTINÉ À UN
Utilisation de Corde de Prolongation
L’appareil est livré avec un cordon d’alimentation court pour réduire les
risques d’enchevêtrement ou de trébuchement accidentel. Un cordon
d’extension peut être acheté et utilisé à condition de prendre des précau-
tions. Si une rallonge électrique est utilisée, le calibre électrique indiqué sur
la rallonge devrait être au moins soit aussi grande que l’estimation électrique
de lappareil. La rallonge devrait être placée de sorte quelle ne tombe pas du
compteur ou du dessus de table là où des enfants pourraient l’attraper ou
s’accrocher accidentellement dans celle-ci.
Franç ais-2
Bienvenue
Nous vous félicitons d’avoir choisi un Grille-pain OSTER
MD
!
Pour en savoir plus sur les
produits OSTER
MD
www.oster.ca.
Franç ais-3
9/10
7
8
11
1
7
6
5
2
7
6
5
4
3
2
1
5
4
2
3
1
6

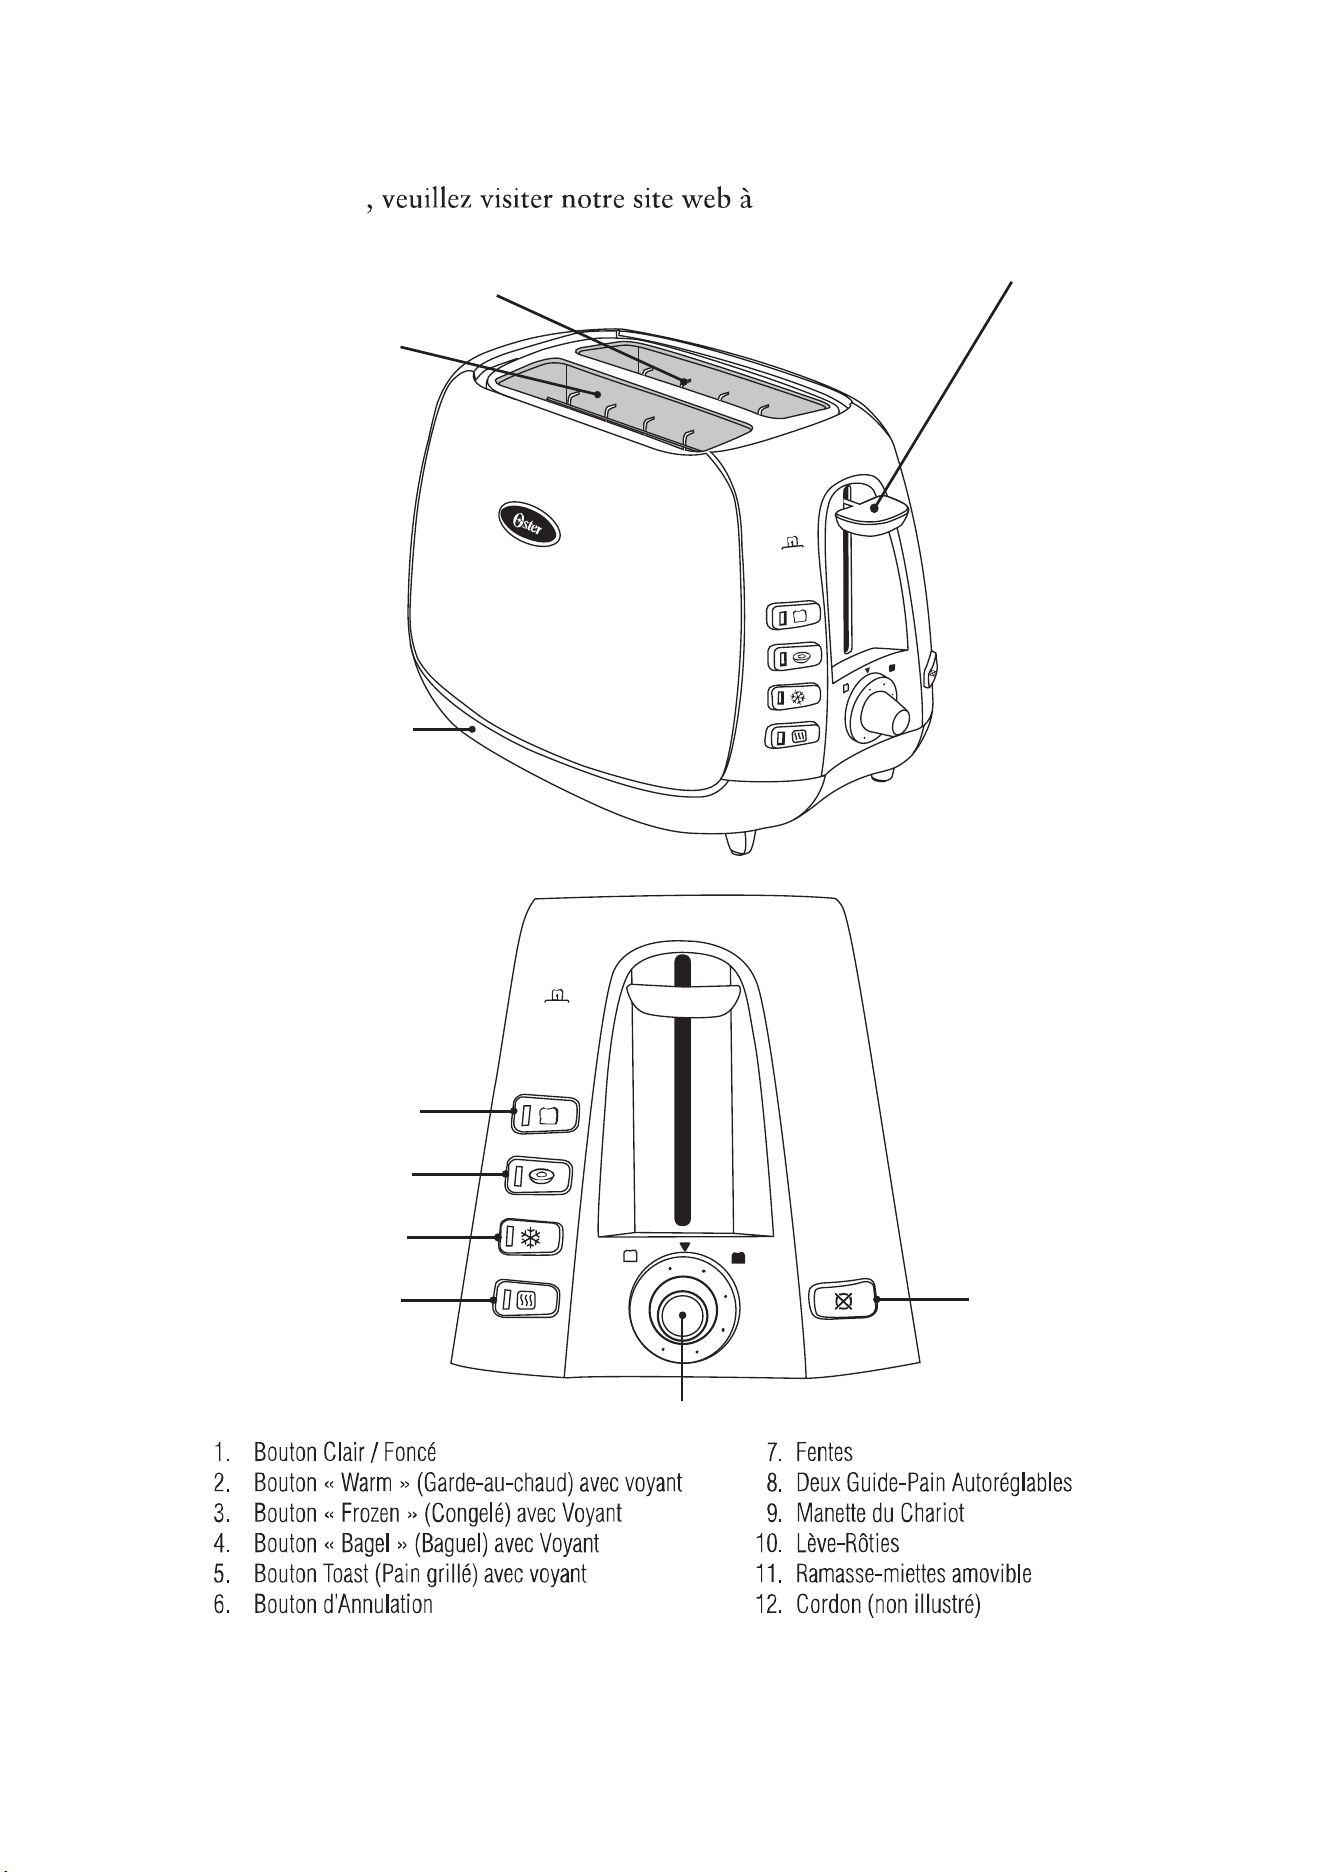
Familiarisez-Vous Avec Votre Grille-pain
Toast est le ré glage par dé faut si aucun bouton d’aliment ou de fonction
n’est choisi.
1. Bouton Clair / Foncé – Vous le tournez selon le degré de cuisson pré fé ré ; 1 est
le ré glage le plus clair et 7 le plus foncé .
2. Bouton Warm (Garde au chaud) avec voyant – Appuyez sur ce bouton pour
ré chauffer les aliments grillé s. Le voyant s’allume pour confirmer que « Warm »
(Ré chauffer) a é té sé lectionné .
3. Bouton « Frozen » (Congelé ) avec Voyant – Appuyez sur ce bouton si
l’aliment est surgelé . Utilisez ce bouton en combinaison avec le bouton « Bagel »
(Baguel) ou « Toast » (Toast). Dé congé lation et grillage se font automatiquement
en une seule opé ration. Le voyant s’allumera en appuyant sur le bouton.
4. Bouton Bagel (Baguel) avec voyant – Appuyez sur ce bouton pour griller un
baguel. Le voyant s’allume pour confirmer que Bagel (Baguel) a é té sé lectionné .
5. Bouton Toast (Pain grillé ) avec voyant – Appuyez sur ce bouton pour
griller du pain. Le voyant s’allume pour confirmer que « Bagel°» (Baguel) a é té
sé lectionné .
6. Bouton d’Annulation – Vous le pressez pour faire é jecter les aliments et
interrompre le cycle de grillage.
7. Fentes – Ont 3,3 cm (1,3 po) de largeur : acceptent baguels, tranches de pain
é paisses et pains moufflets.
8. Deux Guide-Pain Autoré glables – S’ajustent automatiquement selon l’é paisseur
des tranches.
9. Manette du Chariot – Le grillage dé bute quand vous l’abaissez.
10. Lè ve-Rô ties – Vous mettez la manette du chariot en position extra-haute pour
sortir les aliments des fentes.
11. Ramasse-miettes amovible – Pour le nettoyage commode et facile.
12. Cordon
13. Range-Cordon – Nettement rangé sous le Grille-pain, l’excé dent de cordon ne
gê ne pas.
Franç ais-4
Préparatifs pour la Toute Première Utilisation
Si vous utilisez le Grille-pain pour la toute premiè re fois :
1. Retirez les é tiquettes qui adhèrent au Grille-pain et essuyez le corps avec un linge
humide.
2. Faites glisser le ramasse-miettes amovible en place.
3. Assurez-vous que la manette du chariot est dans sa position la plus é levé e avant de
brancher le Grille-pain.
4. Dé cidez où placer le Grille-pain. Choisissez un endroit –
grille-pain ;
exemple ;
5. Branchez le cordon sur une prise de courant alternatif de 120 volts, 60 Hz.
Modification de la longueur du cordon :
Votre Grille-pain é tant pourvu d’un range-cordon, vous pouvez ajuster
Pour modifier la longueur du cordon :
sous « Instructions Spé ciales Quant au Cordon ».
6. Sans mettre quoi que ce soit dans les fentes, abaissez la manette du chariot
ayant pu s’accumuler au cours de l’entreposage. L’odeur qui se dé gage est tout
OSTER
MD
Utilisation du Grille-Pain
Pose des aliments dans les fentes et grillage :
des conseils pratiques suivants :
les brioches plates, les tranches de pain é paisses, les pains moufflets, les gaufres, et
autres. Les tranches ne doivent cependant pas ê tre si é paisses qu’elles se coincent
dans les fentes. N’oubliez pas que le grillage ordinaire est le ré glage par dé faut.
et fraîcheur pour cuire uniformé ment.
chaque fente.
fentes.
Franç ais-5
Une fois les tranches posé es dans les fentes :
1. Sé lectionnez le degré de brunissement souhaité en tournant le bouton
Clair/Foncé .
2.
Les guide-pain auto-ré glables vont centrer automatiquement les aliments pour un
brunissement uniforme.
3. Choisissez entre les diverses options d’aliments ou d’autres fonctions. Si aucun
aliment ou fonction n’est choisi, Toast (Grille-pain) est le ré glage par dé faut.
Truc : OSTER
MD
a conç u ce Grille-pain pour qu’il fournisse le grillage optimal.
Il est possible – et normal – que certaines parties des é lé ments rougeoient plus
vivement que d’autres au cours du fonctionnement.
Aprè s que le niveau dé siré de l’obscurité ait é té atteint, la nourriture sautera vers
originale et les voyants de signalisation s’é teindront.
4. Retirez prudemment les tranches des fentes.
AVERTISSEMENT : Les aliments juste grillés sont très chauds.
Agissez avec prudence.
Truc : Si un aliment se coince dans une fente, dé branchez et laissez refroidir le
Grille-pain avant de retirer l’aliment.
AVERTISSEMENT : Ne mettez jamais vos doigts ou des ustensiles
mé talliques dans les fentes.
Utilisation de la fonction Aliments
(Toast, Bagel, [Pain grillé, Baguel])
Le grille-pain OSTER
MD
Toaster ajustera le ré glage Clair/Foncé selon le type
d’aliment que vous grillez. Vous devez sé lectionner le type d’aliment que vous
voulez griller afin le grille-pain puisse se ré gler en consé quence. Toast est le
ré glage par dé faut si aucun bouton d’aliment ou de fonction n’est choisi.
Pour sélectionner le type d’aliment :
Choisir un mode parmi Toast (Pain grillé ) ou Bagel (Baguel).
s’allume. Cette option permet au grille-pain de ré gler le temps né cessaire
au grillage du pain selon le degré de brunissement sé lectionné .
Le voyant Bagel (Baguel) s’allume. Cette option é tant ré glé e, le grille-pain
ajustera la duré e grillage des baguels selon le degré de brunissement que
vous avez choisi.
Utilisation de la fonction Frozen Food (Aliments congelés)
Le Grille-pain est capable de dé congeler les aliments surgelé s puis de les griller.
Vous pouvez donc dé sormais sortir un baguel surgelé du congé lateur et le griller
dans votre Grille-pain en une seule opé ration.
Pour décongeler et griller du pain :
1. Placez le pain dans le chariot
2. Appuyez sur la manette du chariot du grille-pain.
Franç ais-6
3. Appuyez sur le bouton Frozen (Congelé ) si l’aliment est congelé puis
sé lectionnez le type d’aliment en appuyant sur le bouton correspondant.
4. Sé lectionnez le degré de brunissement souhaité en tournant le bouton
Clair/Foncé .
Utilisation de la Fonction Warm (Réchauffer)
de ré chauffer un aliment grillé /cuit.
Pour réchauffer un aliment :
1. Appuyez sur la manette du chariot du grille-pain.
2. Appuyez sur le bouton Warm (Ré chauffer). Le cas é ché ant, appuyez
sur Food Select (Aliments). Le voyant Warm (Ré chauffer) s’allume
et le grille-pain ré chauffe l’aliment.
Interruption du Grillage
Pour interrompre le cycle de grillage :
Appuyez sur le bouton d’annulation. Appuyez sur le bouton d’annulation,
Le grillage cessera immé diatement et les tranches seront automatiquement é jecté es.
N’immergez cet appareil dans aucun liquide.
Entretien du Grille-pain
Dé branchez le Grille-pain en fin d’utilisation et avant le nettoyage ;
attendez qu’il ait refroidi pour le nettoyer.
1.
l’aide d’un linge sec ou d’un essuie-tout. Ne vous servez pas de nettoyants abrasifs,
ils abîmeraient irré mé diablement le fini.
AVERTISSEMENT : N’employez pas d’articles pointus ou coupants pour nettoyer
l’intérieur, vous endommageriez le Grille-pain.
2. Tapez lé gè rement sur les cô té s du Grille-pain pour dé loger les derniè res miettes de
la chambre de grillage. Sortez le ramasse-miettes et videz-le ; essuyez-le avec un
linge humide ou bien lavez-le dans le panier supé rieur du lave-vaisselle. Remettez
le ramasse-miettes en place avant d’utiliser le Grille-pain.
AVERTISSEMENT : Videz souvent le ramasse-miettes sinon les miettes qui s’y accumu-
lent pourraient s’enflammer.
3. Essuyez la surface qui se trouve au haut des fentes avec un linge humide puis
Franç ais-7
Garantie limité e d’un an
Sunbeam Products, Inc. faisant affaires sous le nom de Jarden Consumer Solutions ou, si au
Canada, Sunbeam Corporation (Canada) Limited faisant affaires sous le nom de Jarden Consumer
remplacera ce produit ou tout composant du produit dé claré dé fectueux pendant la pé riode de
garantie. Le produit ou composant de remplacement sera soit neuf soit ré usiné. Si le produit n’est
plus disponible, il sera remplacé par un produit similaire de valeur é gale ou supé rieure. Il s’agit
de votre garantie exclusive. N’essayez PAS de ré parer ou d’ajuster toute fonction é lectrique ou
mé canique de ce produit, cela annulera cette garantie.
transfé ré e. Conservez votre facture d’achat originale. Les dé taillants et les centres de service JCS
ou les magasins de dé tail vendant les produits JCS n’ont pas le droit d’alté rer, de modifier ou de
changer de toute autre maniè re les termes et les conditions de cette garantie.
Cette garantie ne couvre pas l’usure normale des piè ces ou les dommages résultant de toute cause
suivante : utilisation né gligente ou mauvaise utilisation du produit, utilisation d’un voltage ou d’un
courant incorrects, utilisation contraire aux instructions d’utilisation, dé montage, ré paration ou
alté ration par quiconque autre que JCS ou un centre de service autorisé de JCS. En outre, la garantie ne
couvre pas : les catastrophes naturelles comme les feux, les inondations, les ouragans et les tornades.
JCS ne sera pas tenu responsable de tout dommage consé quent ou accessoire causé par la violation
de toute garantie ou condition expresse, implicite ou ré glementaire.
Sauf si cela est interdit par les lois en vigueur, toute garantie ou condition implicite de valeur
é noncé e ci-dessus.
JCS exclut toute autre garantie, condition ou représentation, expresse, implicite, réglementaire ou autre.
JCS ne sera pas tenu responsable de tout dommage de toute sorte ré sultant de l’achat, de l’usage
de profits consé quents, accessoires, particuliers ou similaires, ou pour toute violation de contrat,
partie.
Certaines provinces, é tats ou juridictions ne permettent pas d’exclusion ou de limitation pour des
dommages consé quents ou accessoires ou de limitations sur la duré e de la garantie implicite, de ce fait
Cette garantie vous donne des droits juridiques particuliers et vous pouvez é galement disposer d’autres
Comment obtenir le Service aux termes de la garantie
Aux É .U.
Si vous avez des questions concernant cette garantie ou si vous souhaitez obtenir le service aux
termes de la garantie, veuillez appeler au 1-800-334-0759 et l’adresse d’un centre de service
approprié vous sera fournie.
Au Canada
Si vous avez des questions concernant cette garantie ou si vous souhaitez obtenir le service aux
termes de la garantie, veuillez appeler au 1-800-667-8623 et l’adresse d’un centre de service
approprié vous sera fournie.
Aux É .U., cette garantie est offerte par Sunbeam Products, Inc. faisant affaires sous le nom
est offerte par Sunbeam Corporation (Canada) Limited faisant affaires sous le nom de Jarden
Consumer Solutions, situé au 20 B Hereford Street, Brampton, Ontario L6Y 0M1. Pour tout autre
VEUILLEZ NE PAS RETOURNER CE PRODUIT À AUCUNE DE CES ADRESSES
Franç ais-8

For product questions contact:
Sunbeam Consumer Service
USA: 1.800.334.0759
Canada: 1.800.667.8623
www.oster.ca
©2012 Sunbeam Products, Inc. doing business as Jarden Consumer Solutions. All
rights reserved. Imported and distributed by Sunbeam Corporation (Canada)
Limited doing business as Jarden Consumer Solutions, 20B Hereford St.,
Brampton, ON Canada L6Y 0M1 (NYSE:JAH).
Pour les questions de produit:
Sunbeam Consumer Service
É tats-Unis: 1.800.334.0759
Canada: 1.800.667.8623
www.oster.ca
©2012 Sunbeam Products, Inc. faisant affaires sous le nom de Jarden Consumer
Solutions. Tous droits ré servé s. Importé et distribué par Sunbeam
Corporation (Canada) Limited. faisant affaires sous le nom de
Jarden Consumer Solutions, 20B Hereford St.,
Brampton (ON) L6Y 0M1 (NYSE:JAH).
Printed in China Imprimé en Chine
GCDS-OST26428-ZZ
MD