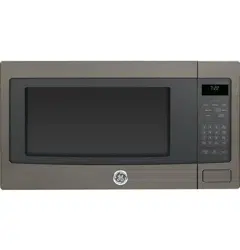
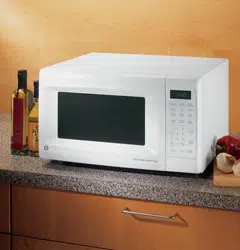
Window with Metal Shield. Screen allows cooking to be viewed while keeping microwaves confined in the oven.
Convenience Guide.
Touch Control Panel Display.
Door Latch Release. Press latch release to open door.
Removable Turntable. Turntable and support must be in place when using the oven. The turntable may be removed for cleaning.
Removable Turntable Support. The turntable support must be in place when using the oven.
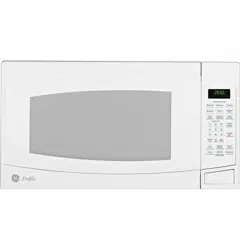
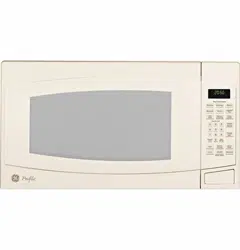
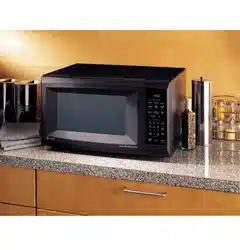
About the features of your microwave oven.
You can microwave by time or with the convenience features. Not all features on all models.
Cooking Controls
Check the Convenience Guide before you begin.
Time Features
Press
Enter
Cook Time
Amount of cooking time
Defrost Weight/Time
Press twice (Time Defrost)
Amount of defrosting time
Express Cook Press number pads (1-6)
Starts Immediately
Add 30 Sec
Starts Immediately!
Power Level
Power level 1 to 10
2.
Convenience Features
Press
Enter
Popcorn
Starts immediately!
Beverage
Starts immediately!
Reheat
Starts Immediately
Potato
Starts Immediately!
Vegetables
Press once (fresh vegetables)
Press twice (frozen vegetables)
Press three times (canned vegetables
Starts immediately!
Defrost Weight/Time
Press once (Weight Defrost
Enter food weight
MyPlate
Enter pad to select Food Code
Changing the Power Level
The power level may be entered or changed immediately after entering the feature time for Cook Time or Express Cook. the power level may also be changed during the cooking.
Press Cook Time and enter cooking time.
Press Power Level and select power level 1-10.
Press Start/Pause.
Variable power levels add flexibility to microwave cooking. The power levels on the microwave oven can be compared to the surface units on a range. Each power level gives you microwave energy a certain percent of the time. Power level 7 is microwave energy 70% of the time. Power level 3 is energy 30% of the time. Most cooking will be done on HI which gives you 100% power.
Power Level 10 will cook faster but food may need more frequent stirring, rotating or turning over. A lower setting will cook more evenly and need less stirring or rotating of the food. Some foods may have better flavor, texture or appearance if one of the lower settings is used. Use a lower power level when cooking foods that have a tendency to boil over, such as scalloped potatoes.
Rest periods (when the microwave energy cycles off) give time for the food to “equalize” or transfer heat to the inside of the food. An example of this is shown with power level 3—the defrost cycle. If microwave energy did not cycle off, the outside of the food would cook before the inside was defrosted.
Here are some examples of uses for various power levels:
Power Level 10: Fish, bacon, vegetables, boiling liquids.
Power Level 7: Gentle cooking of meat and poultry; baking casseroles and reheating.
Power Level 5: Slow cooking and tenderizing for stews and less tender cuts of meat.
Power Level 3: Defrosting; simmering; delicate sauces.
Power Level 1: Keeping food warm; softening butter.
About the time features.
Cook Time I
Allows you to microwave for any time up to 99 minutes and 99 seconds.
Power level 10 (high) is automatically set, but you may change it for more flexibility.
Press Cook Time.
Enter cooking time.
Change power level if you don’t want full power. (Press Power Level. Select a desired power level 1–10.)
Press Start/Pause.
You may open the door during Cook Time to check the food. Close the door and press Start/Pause to resume cooking.
Cook Time II
Lets you change power levels automatically during cooking. Here’s how to do it:
Press Cook Time.
Enter the first cook time.
Change the power level if you don’t want full power. (Press Power Level. Select a desired power level 1–10.)
Press Cook Time again.
Enter the second cook time.
Change the power level if you don’t want full power. (Press Power Level. Select a desired power level 1–10.)
Press Start/Pause.
At the end of Cook Time I, Cook Time II counts down.
Time Defrost allows you to defrost for a selected length of time. See the Defrosting Guide for suggested times. (Weight Defrost is explained in the Auto Feature section.)
Press Defrost twice.
Enter defrosting time.
Press Start/Pause.
When the oven signals, turn food over and break apart or rearrange pieces for more even defrosting. Shield any warm areas with small pieces of foil. The oven will continue to defrost if you don’t open the door and turn the food.
Power level is automatically set at 3, but can be changed. You can defrost small items quickly by raising the power level after entering the time. Power level 7 cuts the total defrosting time in about half; power level 10 cuts the total time to approximately 1/3. However, food will need more frequent attention than usual.
A dull thumping noise may be heard during defrosting. This is normal when oven is not operating at High power.
Defrosting Tips
Foods frozen in paper or plastic can be defrosted in the package. Closed packages should be slit, pierced or vented AFTER food has partially defrosted. Plastic storage containers should be partially uncovered.
Family-size, prepackaged frozen dinners can be defrosted and microwaved. If the food is in a foil container, transfer it to a microwavesafe dish.
For more even defrosting of larger foods, such as roasts, use Defrost Weight. Be sure large meats are completely defrosted before cooking.
Foods that spoil easily should not be allowed to sit out for more than one hour after defrosting. Room temperature promotes the growth of harmful bacteria.
When defrosted, food should be cool but softened in all areas. If still slightly icy, return to the microwave very briefly, or let it stand for a few minutes.
Express Cook
This is a quick way to set cooking time from 1-6 minutes.
Press one of the Express Cook pads (from 1-6) for 1-6 minutes of cooking at power level 10. For example, press the 2 pad for 2 minutes of cooking time.
The power level can be changed as time is counting down. Press Power Level and enter 1-10.
NOTE: Express Cook function pertains to pads 1-6 only.
Add 30 Sec
It will add 30 seconds to the time counting down each time the pad is pressed. Each touch will add 30 seconds, up to 99 minutes and 99 seconds.
The oven will start immediately when pressed.
About the auto features
Weight Defrost
Weight defrost automatically sets the defrosting tmes and power levels to give even defrosting results for meats, poultry and fish weighing up to six pounds.
Press Defrost.
Using the conversion guide, enter food weight. For example, press pads 1 and 2 for 1.2 pounds (1 pound, 3 ounces).
Press Start/Pause.
(Time Defrost is explained in the Time Features section.)
There is a cooking guide located on the inside front of the oven.
Remove meat from package and place on microwave-safe dish.
When the oven signals, turn the food over. Remove defrosted meat or shield warm areas with small pieces of foil.
After defrosting, most meats need to stand 5 minutes to complete defrosting. Large roasts should stand for about 30 minutes.
Conversion Guide
About the sensor features.
The Sensor Features detect the increasing humidity released during cooking. The oven automatically adjusts the cooking time to various types and amounts of food.
Do not use the Sensor Features twice in succession on the same food portion—it may result in severely overcooked or burnt food. Be sure to let the oven cool down for 5-10 minutes before starting the next sensor cook.
If food is undercooked after the countdown, use Cook Time for additional cooking time.
The proper containers and covers are essential for best sensor cooking.
Always use microwave-safe containers and cover them with lids or vented plastic wrap. Never use tight-sealing plastic covers— they can prevent steam from escaping and cause food to overcook.
Be sure the outside of the cooking container and the inside of the microwave oven are dry before placing food in the oven. Beads of moisture turning into steam can mislead the sensor.
To use the Popcorn feature:
NOTE: Do not use this feature twice in succession on the same food portion— it may result in severely overcooked or burnt food. Be sure to let the oven cool down for 5-10 minutes before starting the next sensor cook.
Follow package instructions, using Cook Time if the package is less than 3.0 ounces or larger than 3.5 ounces. Place the package of popcorn in the center of the microwave.
Press Popcorn. The oven starts immediately.
If you open the door while “POPCORN” is displayed, “SENSOR ERROR” will appear. It will scroll until Cancel/Off is pressed.
If food is undercooked after the countdown, use Cook Time for additional cooking time.
To use the Beverage feature:
NOTE: Do not use this feature twice in succession on the same food portion— it may result in severely overcooked or burnt food. Be sure to let the oven cool down for 5-10 minutes before starting the next sensor cook.
Press Beverage to heat an 8–10 oz. cup of coffee or other beverage.
Drinks heated with the Beverage feature may be very hot. Remove the container with care.
If food is undercooked after the countdown, use Cook Time for additional cooking time.
NOTE: Do not use this feature twice in succession on the same food portion— it may result in severely overcooked or burnt food. Be sure to let the oven cool down for 5-10 minutes before starting the next sensor cook.
To use the Reheat feature:
The Reheat feature reheats 4–36 ounces of previously cooked foods or a plate of leftovers.
Place covered food in the oven. Press Reheat. The oven starts immediately.
The oven signals when steam is sensed and the time remaining begins counting down.
Do not open the door while “REHEAT” is displayed, “SENSOR ERROR” will appear. It will scroll until Cancel/Off is pressed.
After removing food from the oven, stir, if possible, to even out the temperature. If the food is not hot enough, use Cook Time to reheat for more time. Reheated foods may have wide variations in temperature. Some areas may be extremely hot. Some Foods Not Recommended for Use With Reheat
It is best to use Cook Time for these foods:
Bread products.
Foods that must be reheated uncovered.
Foods that need to be stirred or rotated.
Foods calling for a dry look or crisp surface after reheating.
NOTE: Do not use this feature twice in succession—it may result in severely overcooked or burnt food. Be sure to let the oven cool down for 5-10 minutes before starting the next sensor cook.
To use the MyPlate feature:
Use MYPLATE feature to cook healthy food choices by servings or with sensor.
Place food in the oven and press MyPlate pad.
Enter the food code. See Cooking Guide for MyPlate below for codes.
Enter the number of servings (1-4) for codes 1-3. For Code 4-10, the oven can start with no serving selection needed.
Press Start/Pause pad.
If you open the door while the food name of MYPLATE feature is displayed, “SENSOR ERROR” will appear. It will scroll until Cancel/Off is pressed.
ChooseMyPlate.gov is one of core projects by The Center for Nutrition Policy and Promotion (CNPP), an organization of the U.S. Department of Agriculture.
Cooking Guide for MyPlate Feature
Note: Use power level 10 unless otherwise noted
NOTE: Do not use this feature twice in succession—it may result in severely overcooked or burnt food. Be sure to let the oven cool down for 5-10 minutes before starting the next sensor cook.
To use the Potato feature:
The Potato feature cooks 1 to 2 (8 oz. each) potatoes.
Pierce skin with fork and place potatoes on the turntable. If cooking three or more potatoes, arrange in a star pattern.
Press Potato. The oven starts immediately. The oven signals when steam is sensed and the time remaining begins counting down.
If you open the door while POTATO is displayed, SENSOR ERROR will appear. It will scroll until Cancel/Off is pressed.
If food is undercooked after the countdown, use Cook Time for additional cooking time.
NOTE: Do not use this feature twice in succession—it may result in severely overcooked or burnt food. Be sure to let the oven cool down for 5-10 minutes before starting the next sensor cook.
To use the Vegetable feature:
Use the Vegetable feature to cook 4–16 ounces of fresh, frozen or canned vegetables.
For fresh vegetables, add 2 tablespoons of water per serving. For frozen vegetables, follow package instructions for adding water. Cover with lid or plastic wrap. Place vegetables in the oven.
Press Vegetable once for fresh vegetables, twice for frozen vegetables or three times for canned vegetables. The oven starts immediately. The oven signals when steam is sensed and time remaining is counting down.
If you open the door while FRSH-VG, FRZ-VEG, or CAN-VEG is displayed, SENSOR ERROR will appear. It will scroll until Cancel/Off is pressed.
If food is undercooked after the countdown, use Cook Time for additional cooking time.
About other features.
The Help pad displays information and helpful hints. Press Help, then select a feature pad.
To remind you that you have food in the oven, the oven will display FOOD IS READY and beep once a minute until you either open the oven door or press Cancel/Off.
You may lock the control panel to prevent the microwave from being accidentally started or used by children
To lock or unlock the controls, press and hold Cancel/Off for about three seconds. When the control panel is locked, LOCKED will appear in the display
To turn the clock display on or off, press and hold 0 for about 3 seconds. the Display On/Off feature cannot be used while a cooking feature is in use.
Press to enter the time of day or to check the time of day while microwaving.
Press Set Clock.
Enter time of day.
Press Start or Set Clock.
In addition to starting many functions, Start/Pause allows you to stop cooking without opening the door or clearing the display. Press Start/Pause again to restart the oven
Timer On/Off operates as a minute timer and can be used at any time, even when the oven is operating.
Press Timer On/Off.
Enter the amount of time you want to count down.
Press Timer On/Off to start.
When the time is up, the oven will signal. To turn off the timer signal, press Timer On/Off.
Note: The timer indicator will be it while the timer is operating.
The beeper sound can be adjusted. Press Sound. Choose 0-1 for mute or normal.
Microwave Terms
Arcing
Arcing is the microwave term for sparks in the oven. Arcing is caused by:
Metal or foil touching the side of the oven.
Foil that is not molded to food (upturned edges act like antennas).
Metal such as twist-ties, poultry pins, goldrimmed dishes.
Recycled paper towels containing small metal pieces
Covering
Covers hold in moisture, allow for more even heating and reduce cooking time.
Venting plastic wrap or covering with wax paper allows excess steam to escape.
Shielding
In a regular oven, you shield chicken breasts or baked foods to prevent over-browning. When microwaving, you use small strips of foil to shield thin parts, such as the tips of wings and legs on poultry, which would cook before larger parts
Standing Time
When you cook with regular ovens, foods such as roasts or cakes are allowed to stand to finish cooking or to set.
Standing time is especially important in microwave cooking. Note that a microwaved cake is not placed on a cooling rack.
Venting
After covering a dish with plastic wrap, you vent the plastic wrap by turning back one corner so excess steam can escape.
Care and Cleaning
Helpful Hints
An occasional thorough wiping with a solution of baking soda and water keeps the inside fresh.
Unplug the cord before cleaning any part of this oven.
How to Clean the Inside
Walls, Floor, Inside Window, Metal and Plastic Parts on the Door
Some spatters can be removed with a paper towel; others may require a damp cloth. Remove greasy spatters with a sudsy cloth, then rinse with a damp cloth. Do not use abrasive cleaners or sharp utensils on oven walls.
To clean the surface of the door and the surface of the oven that come together upon closing, use only mild, nonabrasive soaps or detergents using a sponge or soft cloth. Rinse with a damp cloth and dry.
Never use a commercial oven cleaner on any part of your microwave.
Removable Turntable and Turntable Support
To prevent breakage, do not place the turntable into water just after cooking. Wash it carefully in warm, sudsy water or in the dishwasher. The turntable and support can be broken if dropped. Remember, do not operate the oven without the turntable and support in place
How to Clean the Outside
Do not use cleaners containing ammonia or alcohol on the microwave oven. Ammonia or alcohol can damage the appearance of the microwave.
Case: Clean the outside of the microwave with a sudsy cloth. Rinse with a damp cloth and then dry. Wipe the window clean with a damp cloth.
Control Panel and Door: Wipe with a damp cloth. Dry thoroughly. Do not use cleaning sprays, large amounts of soap and water, abrasives or sharp objects on the panel—they can damage it. Some paper towels can also scratch the control panel.
Door Surface: It is important to keep the area clean where the door seals against the microwave. Use only mild, non-abrasive detergents applied with a clean sponge or soft cloth. Rinse well.
Power Cord: If the cord becomes soiled, unplug and wash with a damp cloth. For stubborn spots, sudsy water may be used, but be certain to rinse with a damp cloth and dry thoroughly before plugging cord into outlet.
Stainless Steel (on some models)
Do not use a steel-wood pad; it will scratch the surface.
To clean the stainless steel surface, use a hot, damp cloth with a mild detergent suitable for stainless steel surfaces. Use a clean, hot, damp cloth to remove soap. Dry with a dry, clean cloth. Always scrub lightly in the direction of the grain.
Troubleshooting Tips
PROBLEM
POSSIBLE CAUSE
OVEN WILL NOT COME ON
A fuse in your home may be blown or the circuit breaker tripped. Replace fuse or reset circuit breaker.
Unplug your microwave oven, then plug it back in.
Make sure 3-prong plug on oven is fully inserted into wall receptacle.
CONTROL PANEL LIGHTED, YET OVEN WILL NOT START
Door not securely closed.
Start/Pause must be pressed after entering cooking selection.
Another selection entered already in oven and Cancel/Off not pressed to cancel it.
Make sure you have entered cooking time after pressing Cook Time.
Cancel/Off was pressed accidentally. Reset cooking program and press Start/Pause.
Make sure you entered food weight after pressing Defrost Weight.
Oven was paused accidentally. Press Start/Pause to restart the cooking program.
“SENSOR ERROR” APPEARS ON DISPLAY
During a Sensor Cooking program, the door was opened before steam could be detected. SENSOR ERROR will scroll until Cancel/Off is pressed.
Steam was not detected in maximum time. Use Cook Time to heat for more time.
“LOCKED” APPEARS ON DISPLAY
The control panel has been locked. (When the control panel is locked, an “L” will be displayed.) Press and hold Cancel/Off for about 3 seconds to unlock the control panel.
FOOD AMOUNT TOO LARGE FOR SENSOR REHEAT
Sensor Reheat is for single servings of recommended foods. Use Cook Time for large amounts of food.
Things That Are Normal With Your Microwave Oven
Steam or vapor escaping from around the door.
Light reflection around door or outer case.
Dimming oven light and change in the blower sound at power levels other than high.
Dull thumping sound while oven is operating.
TV/radio interference might be noticed while using the microwave. Similar to the interference caused by other small appliances, it does not indicate a problem with the microwave. Plug the microwave into a different electrical circuit, move the radio or TV as far away from the microwave as possible, or check the position and signal of the TV/radio antenna.
#1 What do I do if the part I need is no longer available?
Parts - If a service part or accessory is no longer available, there is not a compatible part we can substitute. - You may be able to locate the part through another source. Check for an authorized GE Appliances Parts distributor in your area who may still have the item in inventory. You may also be able to find the part by conducting an online search using the part number. Some online parts distributors or other sites that sell used or refurbished parts may still have the item in stock. - If you are unsure which part number you need, locate the model number of your appliance and find your model on our Parts and Accessories web site. From there you will be able to access assembly diagrams that identify replacement parts from each section of the appliance. If you are unable to locate your model number or find it on our Parts and Accessories site, please Contact Us for guided assistance. Appliances - When an appliance is no longer manufactured, there is always a remote possibility it could still be in stock in a dealer's inventory. Since we are unable to confirm which models remain in stock at dealer sites, use our Where to Buy site for a listing of dealers near you to contact. If the model you would like is not available with any of those dealers, try expanding your search area. - Our site provides specifications and product information on many of our appliances that are no longer manufactured. If you cannot find your model on our site, Contact Us for assistance. We can often help provide the specifications you need, or even assist you with finding a comparable model. Publications - Appliances that are 20+ years old may have limited literature availability (owner's manuals, installation instructions, energy guide labels, templates, and wiring diagrams). If you are unable to find literature for your model on our site, Contact Us for assistance. In some cases, we may be able to locate the materials.
#2 Where should returned, damaged, or unneeded parts and accessories be shipped?
In order to return damaged or unneeded parts, you need to complete the online returns process and get a Return Materials Authorization (RMA) number. Through this process, you will be given instructions on how to return the item, including the return shipping address. A RMA number is required for a return and must be visible on the return package or the return will not be processed.
#3 How do I return a part or accessory and get a replacement?
Returning a Part - If you ordered a part online that you would like to return, please start by requesting a Return Materials Authorization (RMA). Once you complete and submit the return form, you will receive a confirmation email within approximately 20 minutes. Print the shipping label included in the email and attach to the outside of your package. The label contains the RMA number and correct warehouse address for your return. To receive credit for returned part and accessories, all items must be in sellable condition. Please allow one billing cycle for your refund to be processed. Parts and accessories - May be returned for credit within 30 days from the date the part or accessory was shipped to you from our warehouse. The part or accessory may be returned for a $15 re-stocking fee between 31 and 90 days from shipment. After 90 days the part or accessory may not be returned. Return Shipping - We do not cover the cost of return shipping, but if the reason for the return is determined to be our error, we will refund the shipping cost of your original order. Need to Exchange? - If you're looking to exchange a part or accessory you purchased, complete the returns process for the current item and place a new order for the item you need.