USER MANUAL OrbitSprinkler ValveParts listing

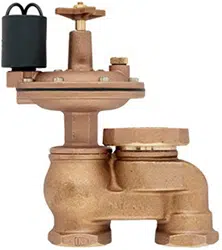
Features of the Brass Anti-Siphon Valve
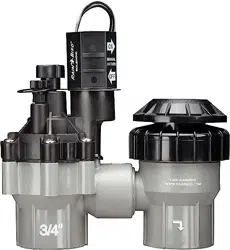
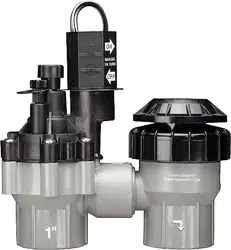
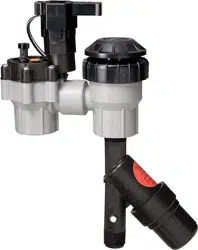
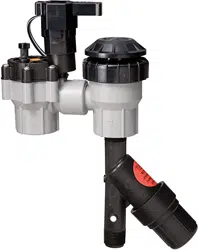
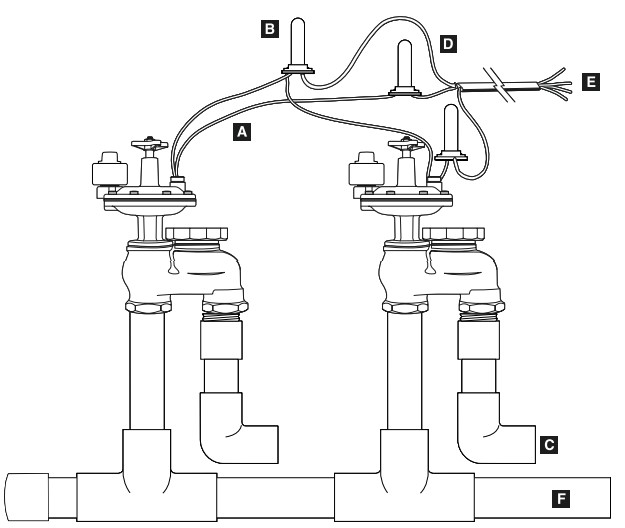
Manifold assembly
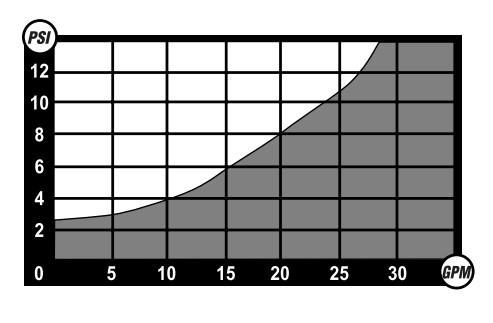
Friction Loss Chart
Installation Instructions
Attach the Valves
After flushing lines, install the valve to the manifold with an adapter or nipple. Do not over tighten. Do not use pipe joint compound. Use thread seal tape only. Note "IN" located on valve body indicates the inlet side of the valve. Valves have tapered fittings and therefore require seven to eight turns of thread seal tape to prevent leaking and to prevent the fittings from bottoming out.
Attach Sprinkler Line
Attach sprinkler lines to valve with an adapter.
Note: When using PVC Pipe, a Slip Joint Union Adapter is a good idea to make the valve easier to service in case of future modifications.
Running the Wire
With the power off, connect the valves to an Orbit® Timer (or other timer that uses a UL-approved 24-volt Class 2 Transformer as a power source). Use a multicolored, multi-strand approved jacketed sprinkler wire. Be sure the wire has at least one more strand than the number of valves in the manifold.
Run the wire to valves—usually in the same trench as the sprinkler pipe. In areas that you will be frequently digging, it is recommended you use a piece of conduit as protective covering.
Attaching the Wire
Attach a colored wire to one valve wire on the solenoid and a common wire to the other wire on the solenoid. It doesn’t matter which solenoid wire you use as the common (See Figure 3). Attach the colored wires to the corresponding zone terminal in the timer and the common wire to the common connection in the timer. Use standard sprinkler wire (20 gauge) for distances less than 800 feet & 18 gauge wire for over 800 feet. Use an Orbit® Grease Cap and Wire Nut at each valve connection (See Figure 3). Also waterproof any splices made along the run.
Close the Sprinkler Valves
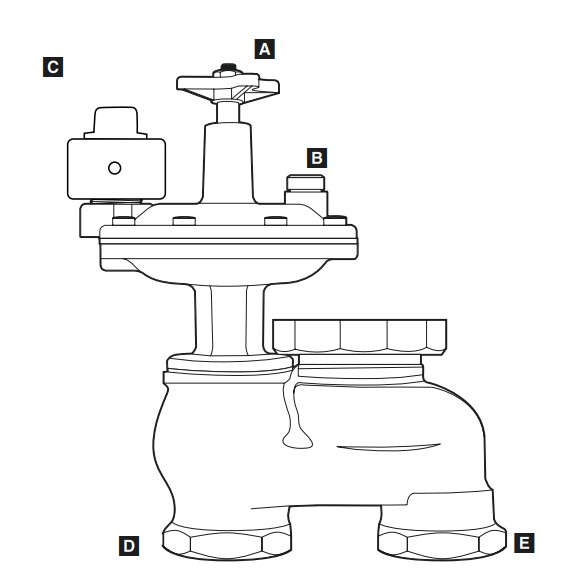
Turn the Flow Control Stem and the Manual Bleed Screw clockwise until closed. When the water is turned on, the valve will remain closed.
Test the System
After all pipe and fittings have been installed, turn the water supply on and check for leaks.
Open the Valves & Set Flow Control
Turn the Manual Bleed Screw counter-clockwise to manually open the valve (water will escape from around the Manual Bleed Screw). Open the Flow Control Stem to adjust the sprinkler heads to desired spray coverage. Close the Manual Bleed Screw. The valve will shut off in a few moments.
Note: The Flow Control Stem is not a positive shut-off. The system is now ready to be controlled electrically from the timer or manually by opening the Manual Bleed Screw.
Draining
In freezing areas, the valves and lines will need to be drained. To insure the electric valve is completely drained in the fall, turn off the main sprinkler shut-off valve and electrically run each valve dry for a few minutes. Turn timer to the “off” position.
Cautions
- Local codes specify height, location and type of Anti-Siphon Valves required. Check local codes for valve types and permit information.
- If static water pressure exceeds 80 psi, a pressure regulator should be used.
- For exterior use only. Do not use for indoor applications. Valves should be placed so water drains away from the house.
Notes
- Where possible, always protect valves with an Orbit Valve Box and place gravel in the bottom.
- Test all lines, fittings and electrical connections before burying the system.
TROUBLESHOOTING
The valve will not open electrically
First, run the valve manually: Open the Manual Bleed Screw and check to see that the Flow Control Stem is in the open position (turn counterclockwise). If the Flow Control Stem is open and the valve still will not operate electrically, check the following possibilities (close Manual Bleed Screw when manual test is complete).
CHECK IF
- The valve is installed incorrectly
- Wiring is incorrect
- There is debris in the port hole
- Defective solenoid
- Solenoid plunger is stuck
SOLUTION
- Make sure that the "IN" (indicated on the valve body) is connected to the water source.
- Check wiring at the valve and at the timer with the instructions Check to see that timer is working properly.
- Turn off water. Remove the solenoid. Push a wire or large paper clip down through the round port hole working it up and down to free any debris. Be sure the plunger and Oring are in place when reassembling.
- Turn off water. Unscrew the solenoid and replace with one from a working valve. If the valve works, replace the solenoid. Be sure the plunger and O-ring are in place when reassembling.
- Turn off water. Remove the solenoid and clean out sand and debris. Be sure the plunger and O-ring are in place when reassembling
External valve leaks
CHECK IF
- . PVC fittings going into valve installed incorrectly
- Pressure is too high
- Leaking around screws
- Leaking below solenoid
- The diaphragm is split or torn
SOLUTION
- Use thread seal tape on threads and tighten with pliers. Do not over tighten.
- Install a pressure regulator valve and set at about 80 psi.
- Turn off water. Undo the leaking screw 4 or 5 turns and retighten firmly.
- Turn off water. Tighten solenoid.
- Turn off water. Remove cap and change diaphragm.
Note: Use a filter if you will not be using culinary water in your system
LIMITED 6 YEAR WARRANTY
Orbit® Irrigation Products, Inc. warrants to its customers that its Orbit® products will be free from defects in materials and workmanship for a period of six years from date of purchase. We will replace, free of charge the defective part or parts found to be defective under normal use and service–for a period of up to six years after purchase (proof of purchase required). We reserve the right to inspect the defective part prior to replacement. Orbit® Irrigation Products, Inc. will not be responsible for consequential or incidental cost or damage caused by the product failure. Orbit® Irrigation Products, Inc.’s liability under this warranty is limited solely to the replacement or repair of defective parts.