Loading ...
Loading ...
Loading ...
INSTALLATION OF THE KEG COUPLER
Insert the keg coupler into the locking neck of the
beer keg and turn it clockwise to lock into position,
making sure the keg coupler handle is in the closed
position, with the handle up.
1. Coupler pressure release valve
2. Handle in closed position
INSTALLATION OF THE CO
2
AIR LINE HOSE
Attach the end of the coloured air line hose to the hose connection on the side of the coupler. Ensure that
the reed valve is inserted into the connection, number 4 on the image below.
If, after assembly, beer will not fl ow, ensure that the reed valve has a small hole in it. If there is no hole in
the reed valve then CO
2
cannot enter the line and the beer will not fl ow.
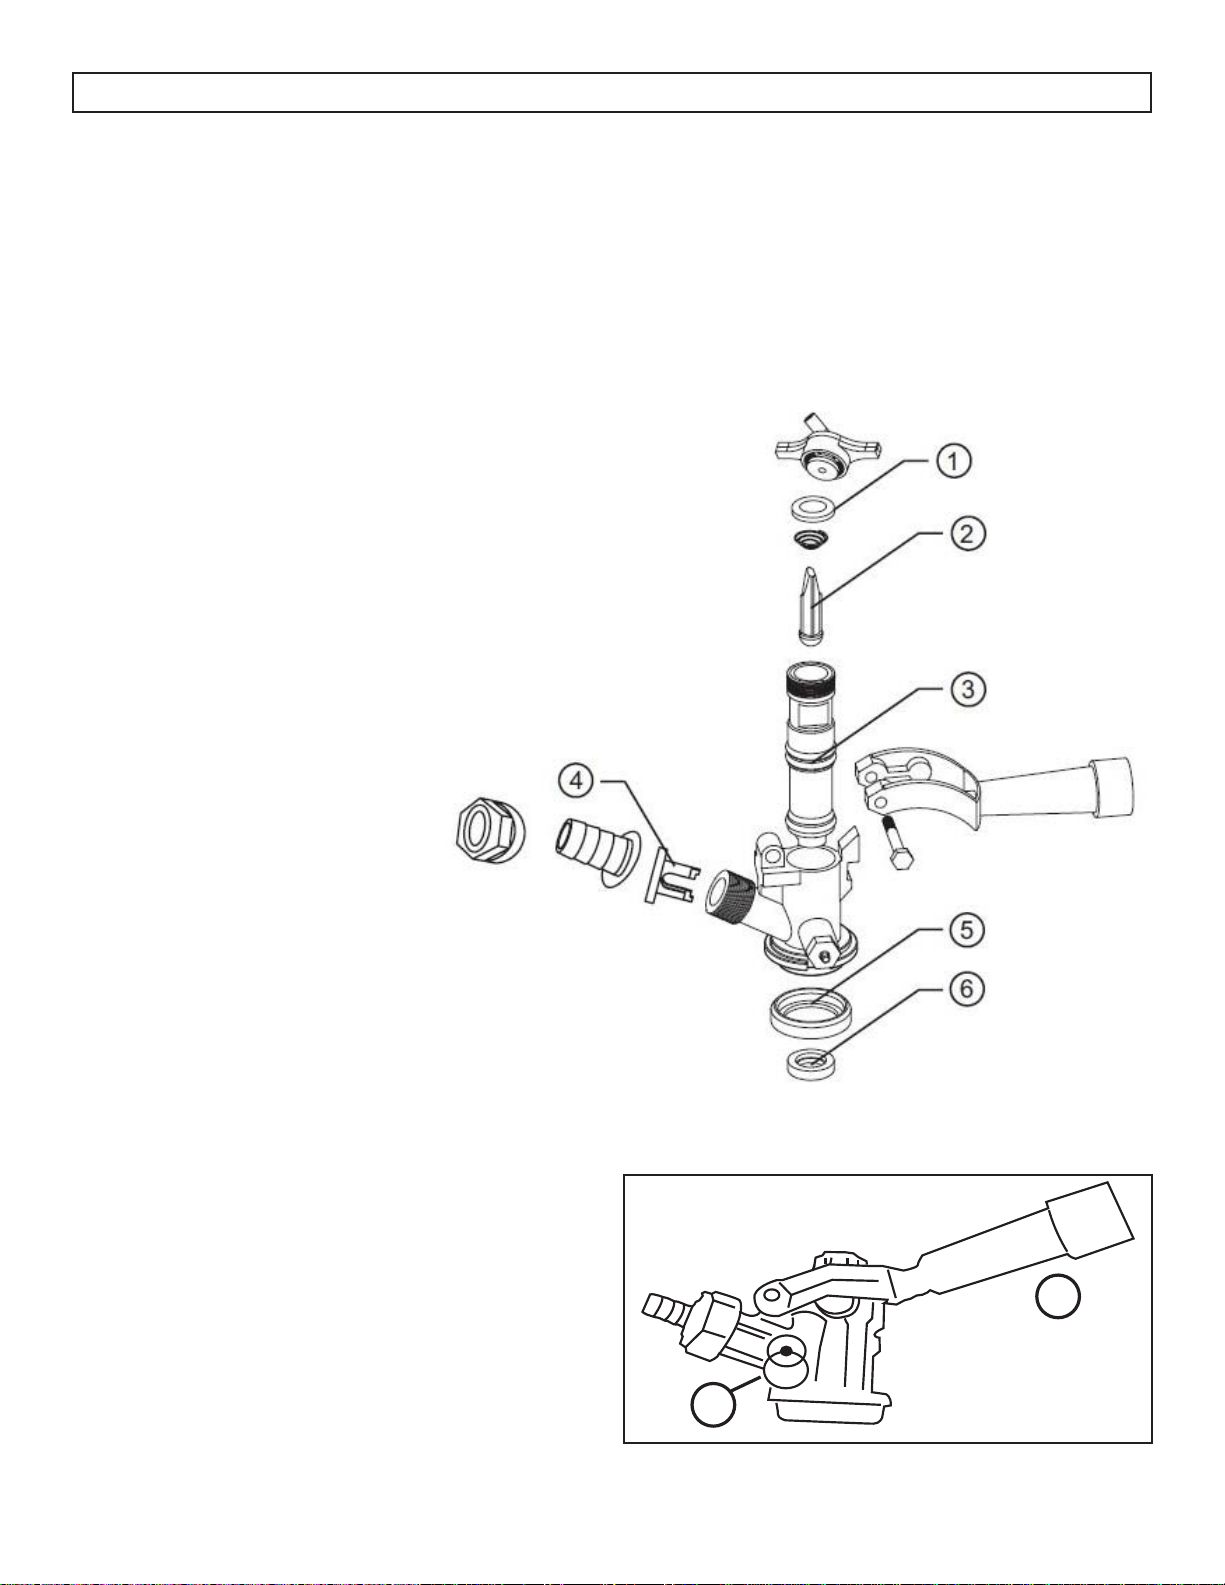
1. Valve washer
2. Check valve
3. O-type washer
4. Reed valve
5. Valve washer
6. Valve washer
CONNECTING THE BEER TOWER TO THE COUPLER
• Ensure all washers are properly inserted into the coupler,
as per the below image.
• Ensure the check valve is in place inside the coupler,
number 2 on the below image.
• Place the wing nut attached to the end of the beer line
into the top of the coupler, turning until tight.
If, after assembly, the beer is very foamy, it most likely means
that a connection in the coupler is leaking and air is entering
the lines. Double check all connections in the coupler and
replace the washers from the accessory bag as necessary.
INSTALLATION INSTRUCTIONS
1
2
9
Loading ...
Loading ...
Loading ...