Loading ...
Loading ...
Loading ...
7
Operating the appliance
These instructions apply to several appliance models. It
is possible that individual features are described that do
not apply to your appliance.
Note: Turn the extractor hood on when you start cooking
and switch it off again a few minutes after you have
finished cooking. This is the most effective way to
eliminate cooking vapor.
Control panel
Turn on the fan
Note: Always adjust the fan strength to meet current
conditions. If there is a large build-up of steam or fumes,
select a high fan setting.
Switching on
▯ Press "+" button.
The current ventilator settings are indicated by a bar
on the display panel.
▯ Press "+" or "-" keys to change the ventilator settings.
Switching off
Press the "-" button repeatedly until the ventilator
switches off.
Lighting
The lighting can be switched on and off independently of
the ventilation.
1.
Press the "Light" button.
The lighting switches on.
2.
Press the "Light" button again.
The brightness increases.
3.
Press the "Light" button a third time.
The lighting switches off.
Saturation notification
The saturation of the metal grease filter (after 30 hours of
ventilation operation) or of the activated carbon filter
(after 120 hours of ventilation operation) is indicated on
the display panel:
▯ Metal grease filter: “clean grease filter” appears on
the display panel.
▯ Activated carbon filter: “replace charcoal filter”
appears on the display panel.
If you have not yet done so, the metal mesh grease filters
should be cleaned or the activated carbon filter changed
now.
For instructions on how to clean the metal grease filters,
please refer to the Cleaning and maintenance section.
Resetting the saturation displays
▯ Metal grease filter: Press and hold the "+" button for 5
seconds.
▯ Activated carbon filter: Press and hold the "-" button
for 5 seconds.
Switching over the display for circulating-air mode
For circulating-air mode, the electronic control display
must be switched over accordingly:
▯ The extractor hood must be connected and switched
off.
▯ Press the "+" and "-" keys simultaneously until "Able"
lights up briefly on the display panel.
▯ Repeatedly press the button combination to switch the
electronic control display back to exhaust air mode.
"None" appears on the display panel.
Timer
The timer has no influence on the functions of the
exhaust hood. The duration of the timer can be set to
between 1 minute and 60 minutes. The default setting is
10 minutes.
1.
Press the “Timer” button.
10 flashes on the display panel.
2.
Set the required duration with the "+" and "-" buttons.
After 5 seconds, the time that has been set is adopted.
An audible signal sounds once the time has elapsed
and "End" appears on the display panel for 3 seconds.
Note: To switch off the timer earlier, press any button.
Fan back flow
The run-on time is ten minutes and cannot be changed.
1.
Select ventilator setting.
2.
Press "Timer" button for 3 seconds.
Once this time has elapsed, the ventilation and lighting
switch off automatically. The display shows the message
"End."
The ventilator run-on can be interrupted at any time by
pressing one of the buttons.
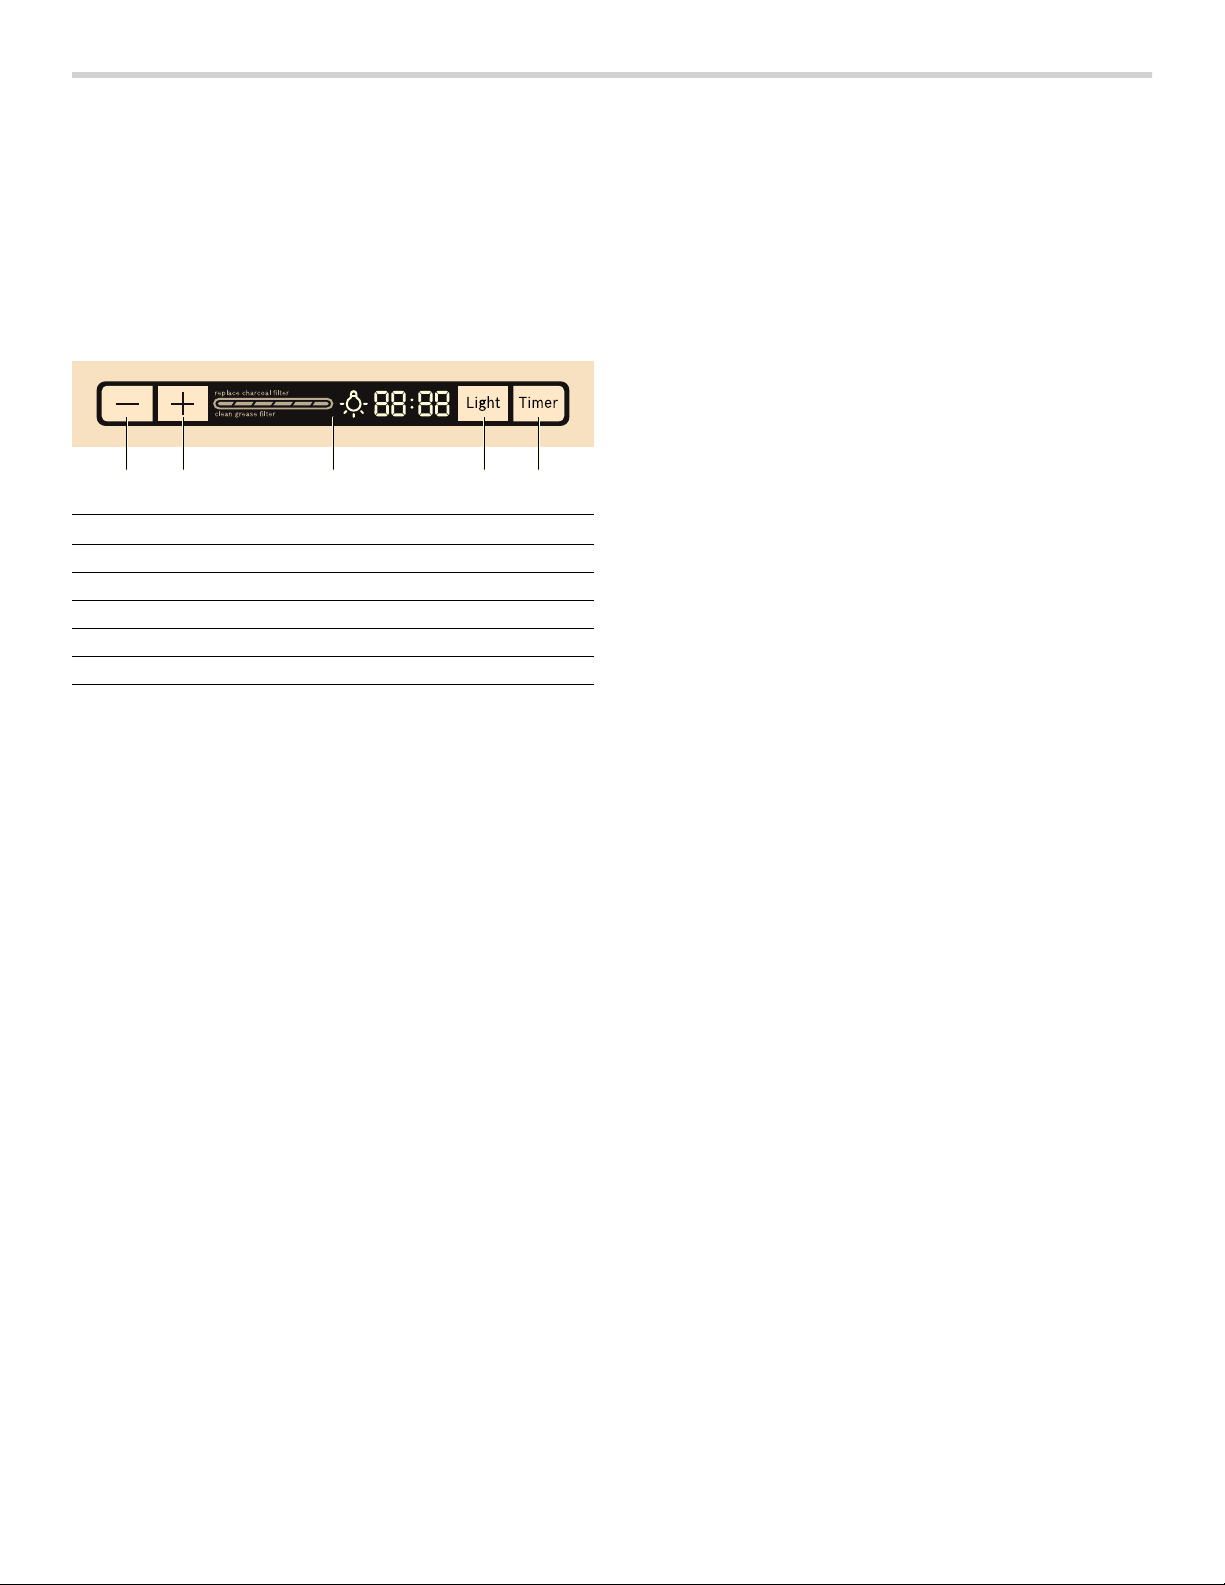
Explanation
1 Turn the fan down
2 Turn the fan up
3 Display panel
4 Switch on lighting
5 Timer
Loading ...
Loading ...
Loading ...