User Manual for DVD player
Functional overview
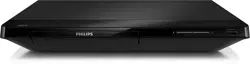
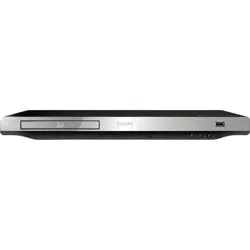
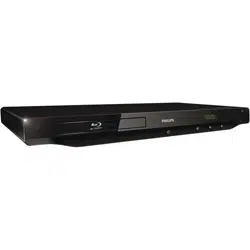
Front panel

* The unit can also be turned on by pressing this button.
1. Disc tray
2. Infrared sensor window
3.  (OPEN/CLOSE) button*
4.  (PLAY/PAUSE) button*
• Press to start playback.
• During playback, press to pause playback.
5.  (POWER) button*
6. Power-on indicator
7. USB input
Caution
• Do not connect any device other than USB memory stick or USB card reader into the USB input. (e.g. PC, external HDD, digital camera, keyboard, mouse, etc.)
• When connecting a USB memory stick, connect it directly to the USB input. Do not use a USB extension cable.
Note
• Due to new ENERGY STAR® requirements, this unit will automatically turn on the screen saver after 5 minutes of inactivity and enter standby mode after 25 minutes of inactivity.
Rear panel

1. AC power cord
2. HDMI OUT jack
Caution
• Do not touch the inner pins of the jacks on the rear panel. Electrostatic discharge may cause permanent damage to the unit.
• This unit does not have a TV RF modulator.
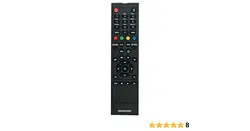
Remote control

* The unit can also be turned on by pressing these buttons.
1. (POWER) button
• Press to turn on the unit, or to switch the unit into standby mode. (To completely turn off the unit, you must unplug the AC power cord.)
2. TOP MENU button
• Blu-ray Disc™: Press to display the top menu.
• DVD: Press to display the title menu.
3.  buttons
• Press to select items or settings.
4. BACK button
• Press to return to the previously displayed menu or screen function.
5.  (REVERSE) button
• During playback, press to Fast Reverse the playback.
6.  (PLAY) button*
• Press to start playback or resume playback.
7.  (SKIP) button
• During playback, press once to return to the beginning of the current title, chapter, track or file.
• During playback, press twice to return to the previous title, chapter, track or file.
• During JPEG playback, press to return to the previous file.
8.  (STOP) button
• Press to stop playback.
9. INFO button
• Press to display the on-screen display menu.
10. REPEAT button
• Press to play back a chapter, title or disc repeatedly.
11. RED / GREEN / YELLOW / BLUE buttons*
• Press to activate shortcut keys on some BD-video functions. When a file list is shown, press to switch between pages.
12.  (HOME) button
• Press to display the home menu.
13. (OPEN/CLOSE) button*
• Press to open or close the disc tray.
14. POP MENU button
• Blu-ray Disc™: Press to display the pop menu.
• DVD: Press to display the disc menu.
15. OK button
• Press to confirm or select menu items.
16. OPTIONS button
• During playback, press to display the play menu.
17.  (FORWARD) button
• During playback, press to fast forward the playback.
• When playback is in pause, press to slow forward the playback.
18.  (SKIP) button
• During playback, press to skip to the next chapter, track or file.
• When playback is in pause mode, press to forward the playback picture by picture.
19.  (PAUSE) button
• Press to pause playback.
20. AUDIO button
• Press to select the audio channel (such as audio languages) on a disc.
21. SUBTITLE button
• Press to select subtitles on a disc.
Note
- Use the included remote control. Remote-control operation on any other remote control, such as a universal remote control, is not guaranteed.
- Make sure the component code on your universal remote control is set to our brand. Refer to the instruction book accompanying your remote control for more details.
■ Installing the batteries in the remote control
Install 2 AAA (1.5 V) batteries matching the polarity indicated inside battery compartment of the remote control.

Caution
Incorrect use of batteries can result in hazards such as leakage and bursting. Please follow the guidelines below:
- Lithium or ni-cad and ni-mh rechargeable batteries are not recommended to use for remote control.
- Do not mix different types of batteries such as alkaline and standard (carbon-zinc).
- Do not mix new and old batteries together.
- Do not use different kinds of batteries together. Although they may look similar, different batteries may have different voltages.
- Make sure that the + and - ends of each battery match the indications in the battery compartment.
- Remove batteries from battery compartment, when the remote is not going to be used for a month or more.
- When disposing of used batteries, please comply with governmental regulations or environmental public rules that apply in your country or area.
- Do not recharge, short-circuit, heat, burn or disassemble batteries.
■ Using the remote control
Remote control usage guidelines:
• Make sure that there are no obstacles between the remote control and the infrared sensor window on the unit.
• Remote operation may become unreliable if strong sunlight or fluorescent light is shining on the infrared sensor window of the unit.
• Remote controls of different devices can interfere with each other. Avoid using a remote control from another device which is located close to the unit.
• Replace the batteries when you notice a fall-off in the operating range of the remote control.
• The maximum operable ranges from the unit are as follows.
– Line of sight: approx. 23 feet (7 m)
– Either side of the center: approx. 16 feet (5 m) within 30°
– Above: approx. 16 feet (5 m) within 15°
– Below: approx. 10 feet (3 m) within 30°

Guide to on-screen display
■ Home menu
When you turn on the unit, the home menu will appear automatically. Otherwise, press (HOME) .

1. “Disc”: Initiates playback of inserted disc, displays a list of tracks / files or the media filter menu.
2. “USB”: Displays a list of tracks / files on the connected USB memory stick or the media filter menu For a list of supported file formats, refer to → (page 17).
3. “Setup”: Accesses the setup menu
■ Setup menu

1. Category
2. Menus / Options: Displays options for the highlighted item on the left whenever available
■ Play menu
During playback, press [OPTIONS] to display the play menu. e.g.) Blu-ray Disc™

Connections
Connection to a TV
■ HDMI connection (Supports up to 1080i(*1), 1080p(*2), 1080p/24(*3) resolution.)

(*1) 1080i: Outputs video data with a frame rate of 30 frames per second.
(*2) 1080p: Outputs video data with a frame rate of 60 frames per second.
(*3) 1080p/24: Outputs video data with a frame rate of 24 frames per second.
- Do not tilt the connector when inserting it into the HDMI jack, and make sure the shapes of the jack and the connector are matched.
- When connected to an HDCP incompatible display device, the picture will not be displayed properly.
- Use an HDMI cable with the HDMI logo (a certified HDMI cable) for this connection. High Speed HDMI cable (also known as HDMI category 2 cable) is recommended for better compatibility.
Note
- If the TV receives no audio / video signal after properly connecting the unit and the TV with an HDMI cable, it may be the TV. Please refer to the TV's user's manual.
- If the TV receives no audio signal after properly connecting the unit and the TV with an HDMI cable, make sure the TV input is not an HDMI-DVI input terminal.
Connection to an audio system
- When you change the connections, all devices should be turned off.
- When connecting the unit to an external audio system, refer to the user manual for setup/configuration help.
■ HDMI audio connection

HDMI audio output

*1 If there is secondary audio or Interactive audio, it will be output in Dolby Digital.
*2 Only the core substream is decoded.
*3 If there is secondary audio or Interactive audio, it will be output in DTS.
Note
- If the connected device is not compatible with HDMI Bitstream, audio will be output as multi LPCM or 2-channel down-mixed LPCM depending on the capability of the connected device even if you select “Bitstream” in “HDMI Audio” setting.
- If “HDMI Audio” is set to “Bitstream” and this unit is connected to a Bitstream compatible device, only primary audio of the BD-Video will be output. (Secondary audio and button sounds will not be output.)
- In order to configure “HDMI Audio” settings, the following conditions must be met:
– “Voice Guide” is set to “Off”.
– This unit is not in resume-on-stop mode. If this unit is in resume-on-stop mode, remove the disc to enable configuration.
Basic playback
Playing back a disc

1. Insert a disc (refer to “How to insert a disc” → (page 20)).
• For Blu-ray Disc™ / DVD / AVCHD / audio CD or a disc containing only one type of file, playback will start automatically. If not, press  (PLAY) .
• When photo / music files are contained on the disc, the file list will be displayed (see step 2). Even if the content type is of one type only, the file list screen will still be displayed.
• Some discs may show a title or a disc menu. In this case, refer to “Using the title / disc / pop menu” → (page 22).
• “BD-ROM Data(USB) Check” message may be displayed while loading a Blu-ray Disc™.
2. Select the type of the file you want to play back, then press [OK].

• File list screen will appear.
To skip to the next title / chapter / track / file: Press (SKIP) .
To skip to the previous title / chapter / track / file: Press (SKIP) .
To pause playback: Press (PAUSE) .
To return to normal playback: Press (PLAY) .
To stop playback: Press (STOP) .
Playback will be in resume-on-stop mode.
■ Resume-on-stop mode

While the disc icon is selected on the home screen, pressing [OK] or (PLAY) will resume playback. Pressing [OK] while the message “To playback from the beginning, press [OK]” is displayed will start playback from the beginning of the currently selected title.

While the disc icon is selected on the home screen, pressing [OK] or (PLAY) will resume playback. Pressing [OK] while the message “To playback from the beginning, press [OK]” is displayed will start playback from the beginning of the first track on the Audio CD.

When you press (PLAY) or [OK] next time, the playback will start from the point where it has been stopped.
Note
- Playback will also stop and the home menu will appear when you press (HOME) .
- For BD-Java application, the resume-on-stop may not be available.
- For BD / DVD / AVCHD / Audio CD, except for photo / music files, resume-on-stop mode remains in effect even after power is turned off. It will be canceled once the disc is ejected.
- Discs containing AVCHD and photo / music files will be played back as AVCHD.
- CDs/DVDs containing FLAC (.flac) or WAV (.wav) files with high frequency and large quantization bit rates may not play properly.
- With regard to the multi-border BD-RE/-R, additionally recorded sections cannot be recognized.
- With regard to the multi-border DVD-RW/-R, additionally recorded sections may not be recognized.
Note for photo playback
- Every press of
 will turn the image by 90 degrees when an image is displayed.
- Some unplayable folders or files may be listed due to the recording status.
- High-resolution photo files take longer to be displayed.
- Progressive JPEG files (JPEG files saved in progressive format) cannot be played back on this unit.
Playing back contents from a USB memory stick

You can play back JPEG / PNG / FLAC / WAV files stored on a USB memory stick. With the USB memory stick, you can also enjoy the following functions. For a list of supported file formats, refer to → (page 17).
• Special additional contents for BD-ROM. (For more information about the special additional contents, refer to the instruction book that came with the disc.)

1. Connect a USB memory stick.
2. Press(HOME) .
3. Use to select “USB”, then press [OK].
4. Follow step 2 in “Playing back a disc” → (page 21).
Caution
- Do not disconnect the USB memory stick or switch the unit to standby mode while contents on the USB memory stick are being accessed. It may result in malfunction or loss of the stick's data.
- If you connect a USB memory stick or SD memory card via a USB card reader or USB hub, BD-ROM data will be written onto the first connected card or device. Connecting a USB memory stick directly to this unit is recommended.
- Occasionally, SD memory cards / Micro SD memory cards will not be recognized when using certain adapters. In such cases, try a different USB adapter.
Note
• The resume information will be cleared when;
– the USB memory stick is disconnected.
– the unit is switched to standby mode.
• If a folder / file name contains an unrecognizable character, the folder / file name will not be displayed.
• This unit can read JPEG / PNG / FLAC / WAV files and AVCHD on an SD memory card by using USB card reader.
Using the title / disc / pop menu

Some BD-videos, DVD-videos or AVCHD files may contain a title menu which describes the contents of the disc, or a disc menu which guides you through the available functions on the disc.
- With such discs, a title menu or a disc menu may appear automatically when you insert the disc. Otherwise, press [TOP MENU] or [POP MENU] to call up the menu. Refer to the disc's manual on how to navigate through the menu.
Note
- Menus vary among discs. Refer to the information accompanying the disc for details.
- [TOP MENU] or [POP MENU] may not work with some discs.
Special playback
Fast forward / fast reverse

1. During playback, press (PLAY) . Then press (FORWARD) . Every time you press (FORWARD) , the playback speed changes at 4 different levels.
2. Press (PLAY) to return to normal playback.
Note
• Slow reverse is not available.
Step by step playback

1. In pause mode, press (SKIP) repeatedly. Every time you press (SKIP) , playback will advance one step at a time.
2. Press (PLAY) to return to normal playback.
Note
• Step by step reverse is not available.
Repeat playback
Available repeat functions vary depending on the disc.
■ Using [REPEAT]
1. During playback, press [REPEAT].
2. Use [ /
/  to select the desired repeat mode.
• You can also change the repeat mode by pressing [REPEAT] repeatedly.
■ Using [OPTIONS]
1. During playback, press [OPTIONS] to display the play menu.
2. Use[/ to select “Repeat” then press [OK].
3. Use[/ to select the desired repeat mode.
| REPEAT MODE |
AVAILABLE MEDIA |
| Chapter repeat The current chapter will be played back repeatedly. |
 |
| Title repeat The current title will be played back repeatedly. |
 |
| Track repeat The current track or file will be played back repeatedly. |
 |
| All repeat All tracks in the media will be played back repeatedly |
 |
4. Press [OPTIONS] to exit.
Note
- The repeat setting will be cancelled when you stop playback.
- Repeat setting may be unavailable with some Blu-ray™ discs
Shuffle / random playback
Available shuffle and random functions vary depending on the disc.
- During playback, press [OPTIONS] to display the play menu.
- Use[/ to select “Mode”, then press [OK].
- Use [/ to select the desired playback mode, then press [OK].
| SHUFFLE / RANDOM MODE |
AVAILABLE MEDIA |
| Shuffle playback Plays all songs or photo / music files in the current folder one at a time in random order. |
 |
| Random playback Plays all songs or photo / music files in the current folder repeatedly in random order. |
 |
4. Press [OPTIONS] to exit.
Slide show

- Follow steps 1 and 2 in “Playing back a disc” → (page 21).
- Open the folder which contains the desired photo files.
- Use [to select a desired file to be played back, then press (PLAY) or [OK].
An image will be played back from the selected file.
4. Press (STOP) to stop playback.
Note
- Large-size photo files take time to load before being displayed on the screen
Troubleshooting
| Problem |
Tip |
| No power. |
- Check the AC power cord, if it is properly connected.
- Try another power outlet.
- Unplug the AC power cord, and wait for about 5-10 seconds. Plug it back in and attempt to power on the unit.
|
| No sound or picture. |
- Make sure both the TV and Blu-ray Disc™ player are turned on.
- Confirm the connections to the TV are made properly as shown in the “Connections” → (page 13).
- Check to see whether the connected TV or another device supports HDCP. (This unit will not output a video signal unless the other device supports HDCP.)
|
| No reaction to the remote control |
- Reduce the distance to infrared sensor window.
- Confirm that the player's AC power cord is plugged into a power outlet.
- Check the batteries in the remote control and make sure they are inserted properly by + or - symbols.
- Please check IR signal. Refer to “IR signal check” → (page 45)
|
| No audio / video signal on the display device via HDMI cable. |
- If the unit is connected to a non-certified HDMI device, the audio / video signal will not output to that device.
- Make sure the display device is on the correct input / video source.
- Perform an HDMI hotplug: Disconnecting the HDMI cable from the display device, turn on both devices, and replug the HDMI cable back in.
- Check with the TV manufacturer, if there are any software updates available for the TV.
- Check to see if the HDMI cable is a certified version.
|
| No high-definition video signal on the TV screen. |
- Does the disc contain high-definition video? High-definition video is only available when the disc contains it.
- Does the TV support high-definition video? High-definition video is only available when the TV supports it
|
| Distorted picture. |
- Sometimes a small amount of picture distortion may appear. This is not a malfunction.
|
| Completely distorted picture or black / white picture with Blu-ray Disc™ / DVD. |
- Make sure the disc is compatible with this unit.
|
| No sound or distorted sound. |
- Adjust the volume.
- Check to see if the speakers are connected correctly.
- Check the HDMI connection.
- Make sure the HDMI cable is not plugged into an HDMI-DVI adapter or projector which does not handle digital sound.
- Check the settings in the “Audio” menu
|
| Picture freezes momentarily during disc playback. |
- Check the disc for fingerprints / scratches and clean with a soft cloth wiping from the center to the outer edge.
|
| Cannot play back a disc. |
- Make sure that the disc is playable on this unit.
- Check the region code of the disc. This unit supports the following region codes.
– Blu-ray Disc™: “A”
– DVD: “ALL” or “1”
- For DVD-RW/-R, make sure that the disc is finalized.
- Clean the disc.
- Is the disc a newer title? This problem may be solved by software update. Refer to “Software update” → (page 38).
|
| “BD-ROM Data(USB) Check” message appears when attempting to play a Blu-ray Disc™ |
- Connect a USB memory stick first, then insert the Blu-ray Disc™.
– Upon loading a Blu-ray Disc™, this unit will check the USB Memory Stick used to save necessary information for playback of some BD-ROM discs.
|
| A music / photo file does not play. |
- Confirm that the file type is supported. Refer to → (page 17) for the compatible file extensions.
- The file may be corrupted. Check to see if it is playable on a PC or other devices.
|
| No return to start-up screen when disc is removed. |
- Soft reset this unit by turning it off for 30 seconds, then on again.
- To completely reset the unit, press and hold (POWER) on the front panel for 10 seconds to shut down the unit or unplug the AC power cord from the AC outlet for 5-10 seconds.
|
 will appear on the TV screen will appear on the TV screen |
The operation is not possible |
| Buttons do not work or the unit stops responding. |
To soft reset the unit, press and hold(POWER) on the front panel for 10 seconds to shut down the unit or to hard reset the unit by unplugging the AC power cord from the AC outlet for 5-10 seconds. |
| The unit does not respond to some operating commands during playback. |
The operations may be prohibited by the disc. Refer to the instructions for the disc. |
| The unit cannot read Blu-ray Disc™ / DVD / CD. |
- Condensation? (Let the unit sit and dry for 1 or 2 hours)
- Check to see if the disc is compatible with this unit. (Refer to → (page 16).)
- Wipe dirt off the disc from the center to the outside or replace the disc. Refer to Cleaning discs” → (page 45).
|
| Scene shooting angle does not switch. |
- Angles cannot be switched for Blu-ray Disc™ / DVD which do not contain multiple angles. In some cases multiple angles are only recorded for specific scenes.
|
| Playback does not start when a title is selected. |
- Check the settings in “Parental Control” menu.
|
| Error message appears when I select “Auto” in the “Menu Language”. |
- Make sure that the unit is connected to a TV that is compatible with HDMI CEC and the “EasyLink” is set to “On”.
- This error message may appear when your TV's OSD language is not supported by this unit.
|
| Cannot play back AVCHD file. |
- This unit cannot play back stand-alone AVCHD files (*.m2ts, *.mts or *.m2t) written to a DVD. The DVD containing AVCHD files must have a proper file and folder structure meeting AVCHD format specifications. Please use AVCHD compliant device / software to burn or copy AVCHD files to DVD. (Please refer to user manuals of the device / software for more information.)
|
| The capacity of the USB memory stick decreased. |
- Data may be written on the USB memory stick when a BD-video uses the virtual package feature while a USB memory stick is connected to the unit.
|
| Cannot play back a MPEG-2 video and audio from the USB memory stick. |
- MPEG-2 is not compatible with this unit.
|
| Cannot read the contents on the USB memory stick. |
- The USB memory stick is not compatible with this unit or the contents may be damaged.
- Try and turn off the unit, then turn it back on.
- To soft reset the unit, press and hold (POWER) on the front panel for 10 seconds to shut down the unit or to hard reset the unit by unplugging the AC power cord from the AC outlet for 5-10 seconds.
|
| Cannot play back BD-Video. |
- Connect a USB memory stick (256MB or more of available memory) which is formatted on this unit. Some discs require memory when playing back content.
- Do not disconnect the USB memory stick during playback.
|
| Cannot play back 3D. |
- 3D Blu-ray™ discs are not supported by this unit.
|
| Cannot load a Blu-ray Disc™ (stuck in “Loading…” mode) and cannot open the disc tray to eject the disc |
- Unplug unit from AC outlet for 20 seconds. Plug unit back in and press the
 (OPEN/CLOSE) on the unit to eject the disc (OPEN/CLOSE) on the unit to eject the disc
|
| Cannot read a USB memory stick. |
- The format of the USB memory stick is not compatible with this unit. If the USB memory stick has been formatted on a PC or another device, the file system may be incompatible with this unit. This unit supports the FAT16 / FAT32 file systems.
|
| Cannot play back photo files from a disc. |
- Make sure that the disc was recorded in the UDF, ISO9660 or JOLIET format.
|
| Cannot find a photo file. |
- Make sure that the file extension is .jpg / .JPG / .jpeg / .JPEG. / .png / or .PNG.
|
| Cannot play back music files from a disc. |
- Make sure that the disc was recorded in the UDF, ISO9660 or JOLIET format.
- Confirm that the bitrate and sampling frequency are compatible with this unit. (Refer to → (page 17))
|
| Cannot find a music file |
- Make sure that the file extension is FLAC or WAV for music files
|
| Music files play choppy. |
- CDs / DVDs containing FLAC (.flac) / WAV (.wav) files with high frequency and large quantization bit rates may not play properly. In such cases, copy the music files to a Blu-ray Disc™ or USB memory stick, then try playing.
|
| No audio signal from surround system of the audio system. |
- Make sure the audio system is turned on.
- Check the input mode on the audio system if it is on the correct channel.
- Check if the surround system is compatible with either Bitstream or LPCM. If not sure, please check the user manual or contact the surround manufacturer. Once confirmed, check the setting in the “Setup” of this unit.
- Increase the volume level of the surround system.
|
Note
- Do not attempt to repair the Blu-ray Disc™ player yourself. This may cause severe injury, irreparable damage to your Blu-ray Disc™ player and void your warranty.
- Please have your Blu-ray Disc™ player model and serial number available before contacting us. These numbers are available on the cabinet, as well as on the packaging.
Maintenance
■ Servicing
• Please refer to relevant topics in “Troubleshooting” → (page 41) before returning the product.
• If this unit becomes inoperative, do not try to correct the problem by yourself. There are no user-serviceable parts inside. Eject the disc (if possible), disconnect the USB memory stick (if connected to the unit), place the unit into standby mode, unplug the AC power plug, and please contact: 1-866-202-5960 or visit :philips/support
■ Cleaning the cabinet
• Wipe the front panel and other exterior surfaces of the unit with a soft cloth.
• Never use a solvent, thinner, benzene or alcohol to clean the unit. Do not spray insecticide liquid near the unit. Such chemicals may discolor the surface or damage the unit.
■ Cleaning discs
• When a disc becomes dirty, clean it with a cleaning cloth. Wipe the disc from the center to outside. Do not wipe in a circular motion.
• Do not use solvents such as benzine, thinner, commercially available cleaners, detergent, abrasive cleaning agents or antistatic spray intended for analog records.
■ Cleaning the disc lens
• If this unit still does not perform properly although you referred to relevant sections and “Troubleshooting” →(page 41) in this user manual, the laser optical pickup unit may be dirty. Consult your dealer or an authorized service center for inspection and cleaning of the laser optical pickup unit.
■ Disc handling
• Handle the discs so that fingerprints and dust do not adhere to the surfaces of the discs.
• Always store the disc in its protective case when it is not used.
• Note that discs with special shapes (heart-shaped discs, octagonal discs, etc.) cannot be played back on this unit. Do not attempt to play such discs, as they may damage the unit.
■ IR signal check
If the remote control does not work properly, you can test IR signal using a digital camera (including a cellphone with a built-in camera) to see if the remote control sends out the infrared signal.
1. Turn on the digital camera.
2. Direct a digital camera to the remote control, then press and hold any button on the remote control.
• If infrared light appears on the digital camera display, the remote control is working.

Note
• Some cameras have an IR filter and will not display the IR signal.