Loading ...
Loading ...
Loading ...
31
Installation
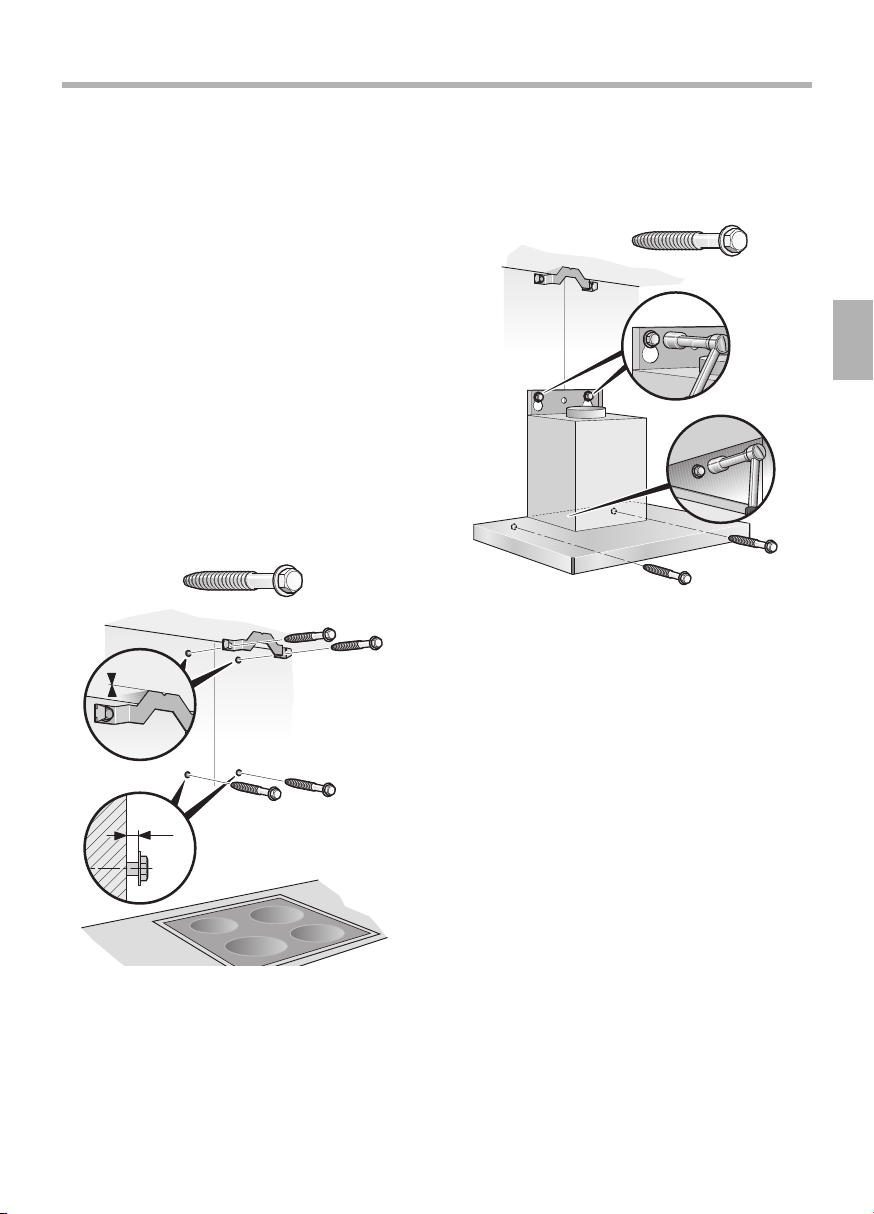
Installation preparations
1. Mark a centre line on the wall from the
ceiling to the lower edge of the extractor
hood.
2. Using the enclosed template, mark
positions for the screws and, to facilitate
attachment, the contour of the attachment
area.
The lower edge of the template
corresponds to the lower edge of the
extractor hood.
3. Drill 4x 8 mm holes for attachment of the
extractor hood and 2x 8 mm holes for the
xing bracket for the ue duct and press in
wall plugs ush with the wall.
4. Screw on the xing bracket for the ue
duct.
5. Screw in the 2 middle screws as an
installation aid, leaving them projecting by
approx. 5 mm.
Attachment
1. Remove the protective lm from the
extractor hood. Attach the extractor hood,
align and screw tightly into place.
2. Connect the pipes (see ”Connecting
pipes”).
3. Connect to the power supply (see
”Electrical connection”).
5
0
Loading ...
Loading ...
Loading ...