Loading ...
Loading ...
INSTALLING THE BASE AND SPIKES FOR
THE SP-EFS73 FLOORSTANDING SPEAKER
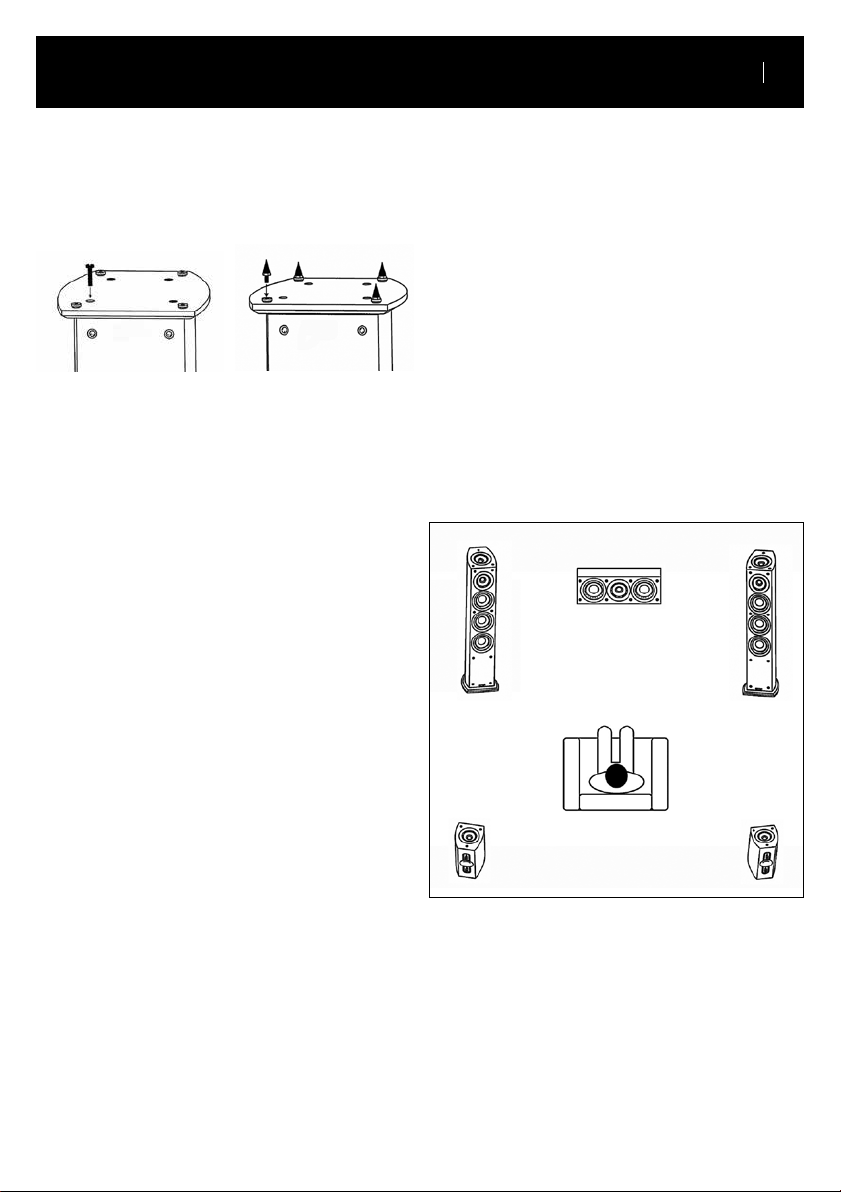
Included in the SP-EFS73 carton are (1) base, (4) screws,
(4) spikes and (4) nuts. First, carefully lay the speaker on
its side supported by a cushion, and attach the base to the
bottom of the speaker using (4) screws, as shown below left.
(Screwdriver is not included.)
PLACEMENT AND FINE TUNING
Correct placement of your speakers is the most important
thing you can do to get the best possible sound quality from
them. Take time to experiment with positioning according to
the guidelines below.
Whether the speakers are used in the front or rear surround
channels, the tweeter (which is in the center of the midrange
driver on the front of the speaker) should be positioned
near ear level and the loudspeakers separated a distance
approximately equal to the listening distance. Angling the
loudspeakers inward towards the listener seated in the center
will improve the image stability for non-central listeners.
Close proximity to a side or rear wall will enhance the bass
performance, although too close (particularly a corner
location) and the bass may be unnaturally high and image
performance may be degraded. Best results will be obtained
when the loudspeaker is placed approximately 2 feet from
the wall. If a corner location is unavoidable, try to position
the loudspeaker so that the distance to the rear wall is not
equal to the distance to the side wall.
The included spikes will help stabilize the SP-EFS73 if the
speaker is placed on thick carpet. However, we do not
recommend using the spikes if you have wood, tile, stone or
linoleum oors, because the spikes may damage the oor.
To install the spikes, thread one nut on to each spike so the
nut is about halfway down on the spike. Now thread one
spike into each of the threaded holes in the base, with the
spikes pointing upward as shown above on right. (They’ll
be pointing downward when you turn the speaker back
over.) Adjust the height of the spikes so that all four spikes
rmly contact the ooring underneath the carpet, and use
the nuts to lock down the height adjustments.
www.pioneerelectronics.com
3
English
Loading ...
Loading ...
Loading ...