Loading ...
Loading ...
Loading ...
5
ASSEMBLY
INSTRUCTIONS
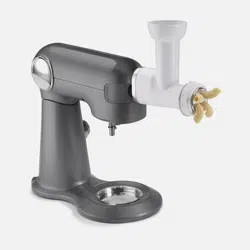
1. Insert the feed screw, metal
end first, into the front end of
the pasta extruder body.
Rotate until the plastic X on
the feed screw lines up with
the X-shaped groove inside
the pasta extruder body.
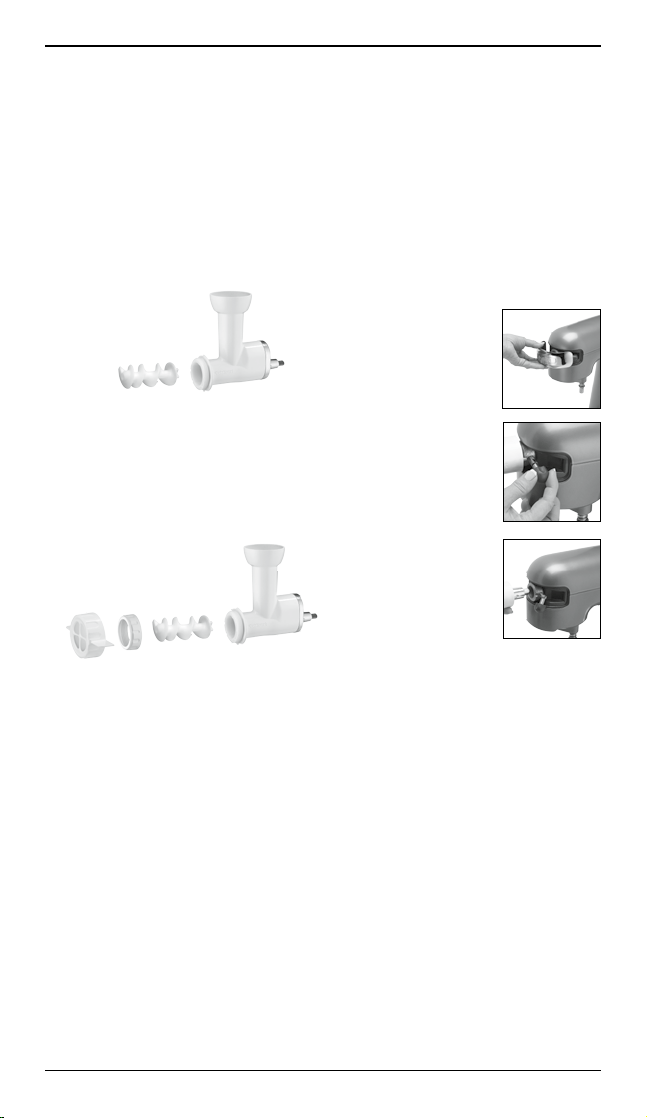
2. Fit one of the pasta plates on
top of the feed screw. Make
sure that the notches on the
four sides of the pasta plate
slide securely onto the four
grooves on the front end of
the body.
3. Fit the ring nut over the pasta
plate and turn it clockwise
until it is secured to the body.
4. Attach the pasta cutter by
sliding it over the ring nut and
aligning the two notches on
the side of the cutter with the
two grooves on the pasta
extruder body. Push in firmly,
and while pushing firmly, turn
the cutter clockwise to
secure. It should move freely
around the pasta plate and
extruder body.
5. To sw it ch the pasta plate, first
remove the pasta cutter, then
the ring nut and current pasta
plate, then follow assembly
instructions 2 to 4 with the
new pasta plate. Make sure
there is no pasta dough
obstructing the round groove
located in the center of the
feed screw.
ATTACHING TO
STAND MIXER
1. Make sure Stand Mixer is OFF.
2. Gently pull outlet
cover off front
of mixer head to
remove.
3. Turn the Stand
Mixer attachment
knob counter-
clockwise until
outlet opening is
unobstructed.
4. Insert the
assembled
extruder
attachment
into the outlet
opening, lining
up the square metal hub on
the extruder with the square
indentation in the outlet
opening.
5. Turn the Stand Mixer
attachment knob clockwise to
secure to mixer.
OPERATION
1. Prepare pasta dough as
directed by recipe, letting it
rest in the refrigerator until it is
ready to be extruded.
2. Cut dough into 1-inch pieces.
Cover with plastic wrap or
a damp paper towel so it
doesn’t dry out.
Loading ...
Loading ...
Loading ...