Loading ...
Loading ...
Loading ...
10 INSTALLATION PROCEDURE
1. The bench cutout should be made as per cutout
dimensions in Figure 4.
2. Adjacent walls, cupboards and protection for
combustible materials.
Ensure that the appliance is installed in accordance
with clauses 6.2.5 and 6.10.1.1 of AS/NZS 5601.1, or
clauses 6.9.1 and 6.9.5 of AS/NZS 5601.2 with regard
to clearances to combustible surfaces and materials,
and clearances to rangehoods and exhaust fans.
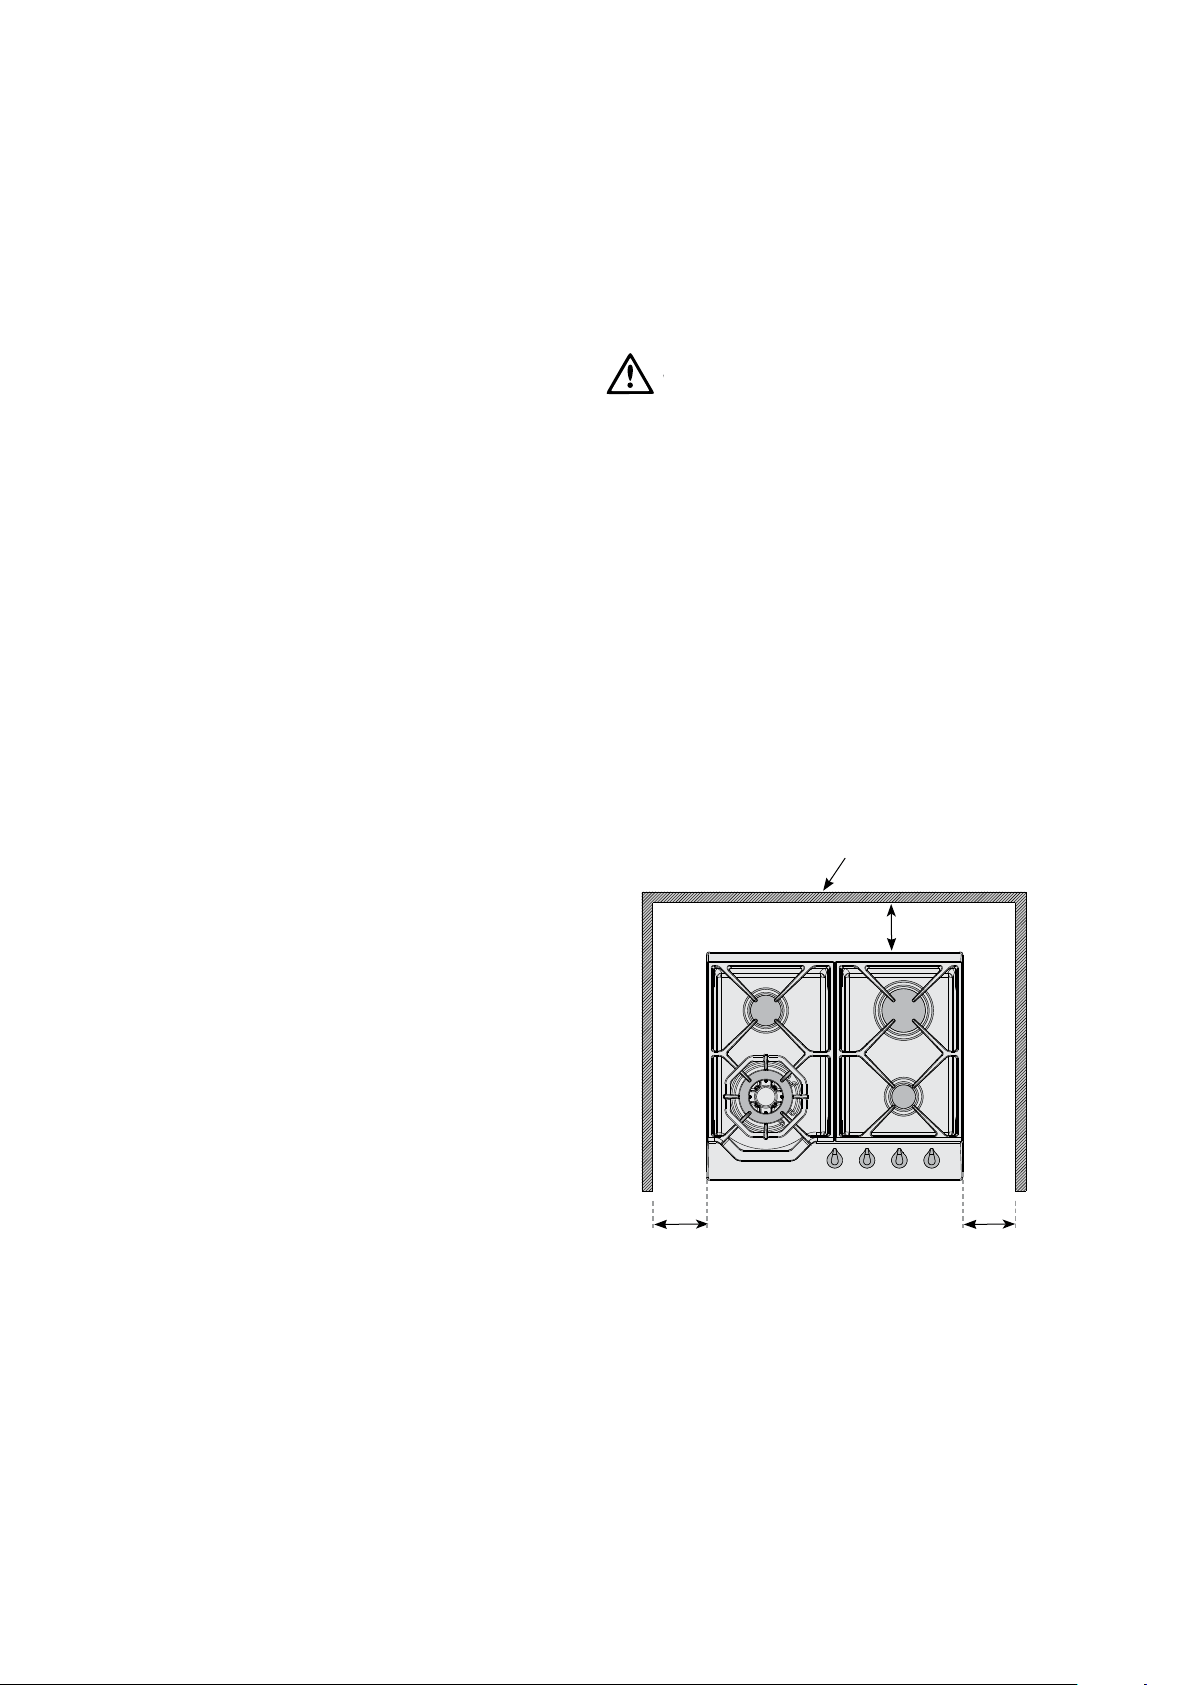
To ensure clearances of 200mm from burners to
vertical combustible surfaces observe the minimum
dimensions shown in Figure 5.
Rangehoods and exhaust fans shall be installed
in accordance with the manufacturer’s relevant
instructions. However, in no case shall the clearance
between the highest part of the hob of the gas
cooking appliance and a range hood be less than
600mm or, for an overhead exhaust fan, 750mm.
Clearances to combustible surfaces may be reduced
if combustible surfaces are protected in accordance
with clause 6.10.1.2 of AS/NZS 5601.1, or clause 6.9.2
of AS/NZS 5601.2.
3. Optional Barrier
A barrier can be installed to prevent accidental
contact with the cooktop base, where the base of
the cooktop is accessible from below (i.e. inside a
cupboard, etc). An impression has been incorporated
into the base to ensure a minimum clearance of 15mm
is maintained between the base and the barrier.
This barrier may be made of any non-combustible,
rigid material.
Note: For Stainless Steel models, an alternative to the
above is to purchase a barrier shield from Electrolux
spare parts (P/No. ACC 072) which can be fitted
directly to the underside of the product. This shield
protects the user from accidently touching certain
areas of the product.
Barrier protection is not necessary if the product
is installed above an underbench oven or similar
appliance and/or if the cupboard construction is such
that the underside of the cooktop is not accessible.
4. For Glass models a FOAM SEAL has been provided
and is to be applied along the perimeter of the hob.
5. For Stainless Steel models MASTIC TAPE has been
provided and is to be placed around the bench
cutout as specified in Figure 6. Take care to ensure
that the seals meet without overlapping.
6. Fit the pull down clamps supplied to ensure that the
cooktop cannot move after installation.
7. On Stainless Steel models remove any excess seal
visible after installation.
• Place the seals supplied around the bench cut-out
as shown in Figure 6, taking care that the seals meet
without overlapping.
• Fit the pull-down clamps supplied to ensure that the
cooktop cannot move after installation.
WARNING
WARNING
Failure to fix the cooktop to the bench could result
in loosening of the gas connection through movement of
the cooktop and a gas leak may result.
• Use the 4 clamps and screws supplied in the parts
bag for 4 burner models, and 6 clamps and screws
for 5 burner models.
• To assemble, attach the clamps to each corner
of the burner box via the screws provided.
• Fix the clamps as shown in Figure 7.
• Remove excess seal.
• If the benchtop is less than the standard 33mm
thickness, use a packer between the bench and
the pull down clamps to ensure the cooktop is
properly secured.
INSTALLATION PROCEDURE
combustible surface
GE
F
Figure 5 - Distance to
Combustible surfaces
NOTE: Distances shown to adjacent walls/surfaces are for
the distance to a combustible surface. If the surface is not
combustible the measurement can be smaller than
that shown.
Loading ...
Loading ...
Loading ...