Loading ...
Loading ...
Loading ...
INSTALLATION INSTRUCTIONS
REQUIRED TOOLS
• Screwdrivers: Phillips and fl at head.
• Power Drill: 3.2mm (1/8in.) diameter drill bit
• Pencil
• Measuring Tape
• Scissors
• Carpenter’s Level
ACCESSORIES
The following accessories are included with
the appliance and should be used during the
installation.
1. 13 mm (1/2 inch) screws (x7)
2. 9.5 mm (3/8 inch) screws (x4) (Factory installed
on some models.)
3. Safety Lock
4. Adhesive foam seal
5. Regular foam seal
6. “L” shaped mounting bracket (Factory installed
on some models.)
7. Bracket for wood windows (x2)
8. Bracket for vinyl windows (x2)
9. Weather stripping (x5)
10. Foam insert (x2)
11. Side curtains (x2)
1
2
3
4
5
6
7
8
9
10
11
ASSEMBLY
Note: Images in this manual are for instructional
purposes only. The actual shape of the appliance
may vary slightly.
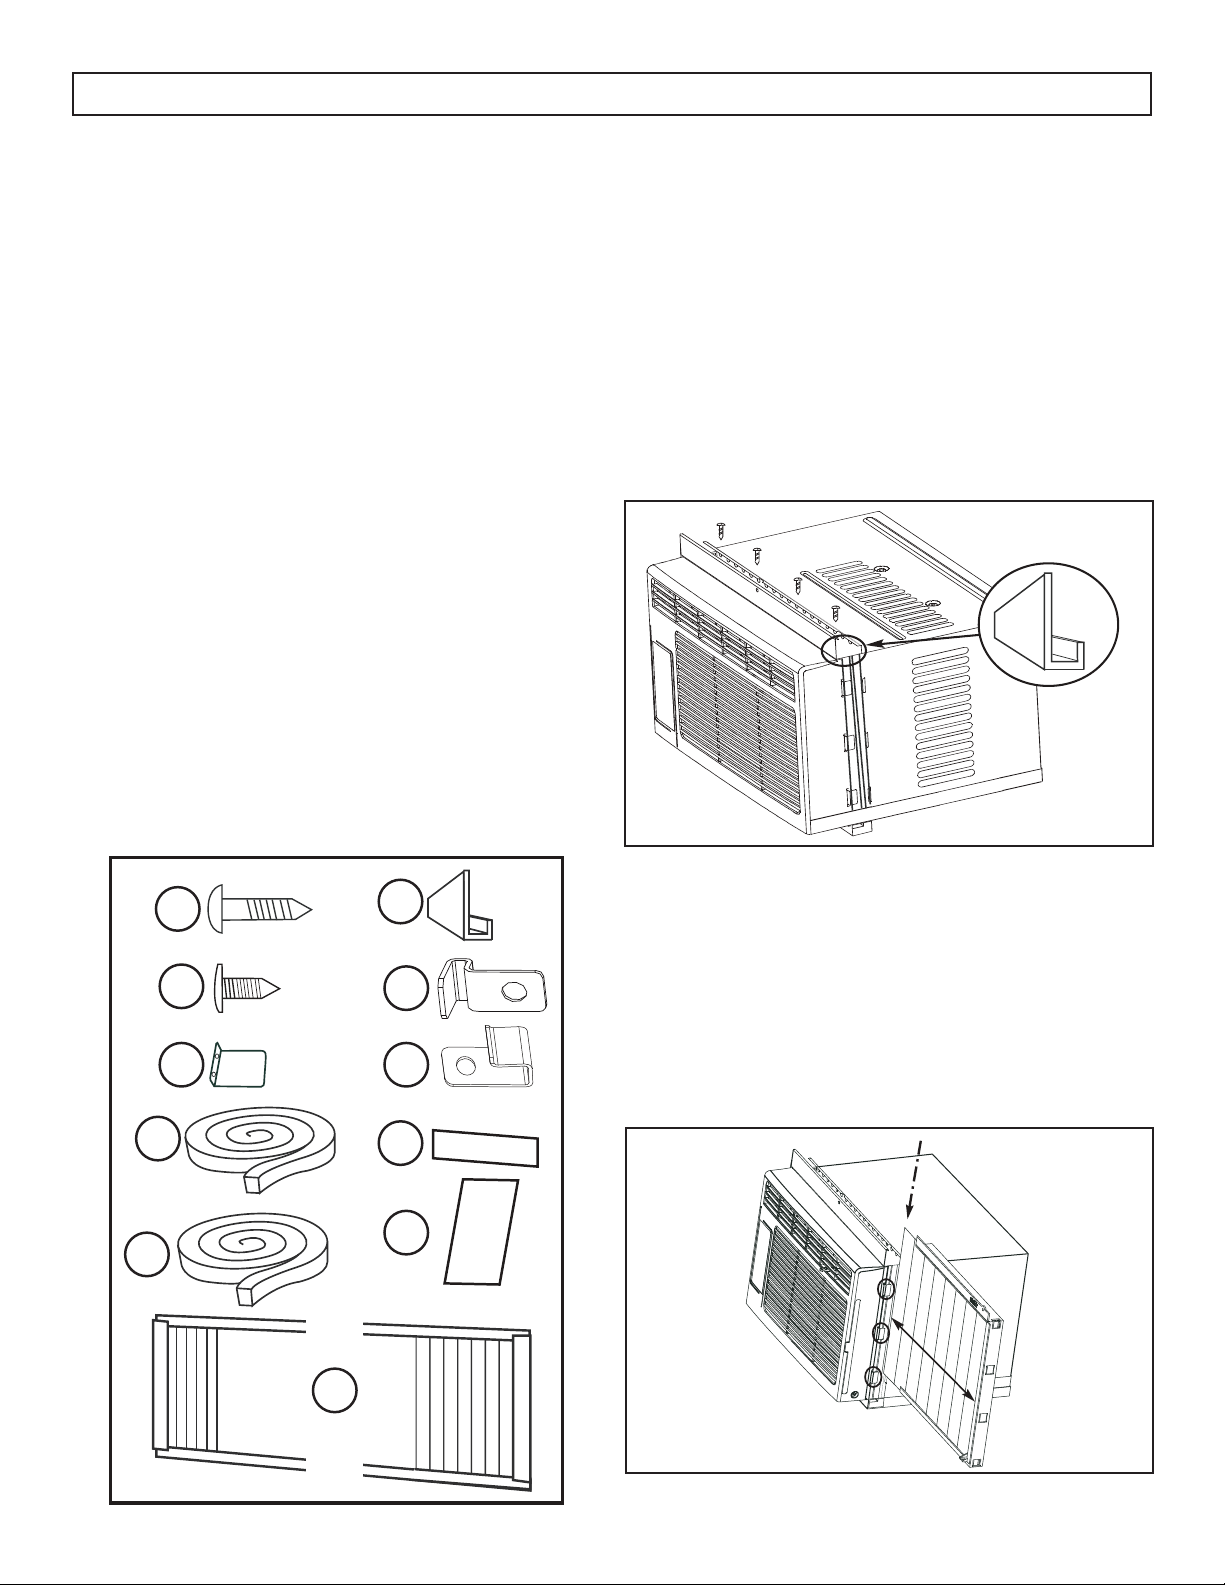
Install the “L” Shaped Bracket
Attach the “L” shaped bracket to the top of the
cabinet as shown below using the provided 9.5 mm
(3/8 inch) screws (x4).
Note: The “L” shaped bracket may come factory
installed on some models.
Install the Side Curtains
Attach the side curtains to the cabinet by sliding the
curtain frame into the side channel of the cabinet as
shown below.
The curtains are labeled “left” and “right on the
frames. This refers to the left and right sides of the
appliance when facing the front of the appliance.
8
Loading ...
Loading ...
Loading ...