Loading ...
Loading ...
Loading ...
6
en
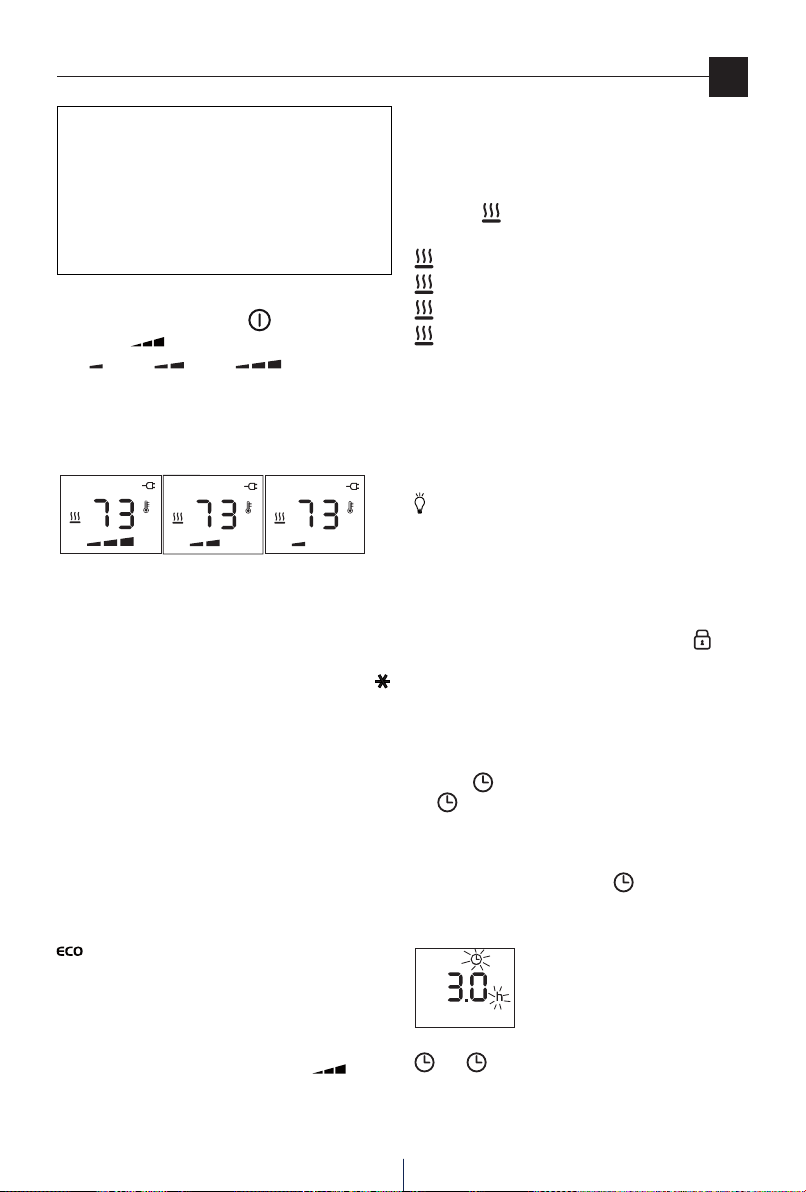
Heating function
To turn the appliance on, press the (B) button.
Press button (C) to set the required power level:
MIN ( ); MED ( ); MAX ( ).
To select the desired temperature, press button + or - (E
or D). By pushing the + or - button once, the temperature
(shown on the display) will increase or decrease by 1°F or 1°C.
Holding the + or - button depressed the value will increase
o decrease rapidly.
The appliance allows to set a temperature of 41°F (5°C) and a
range from 50°F to 82°F (10°C to 28°C).
Anti-freeze function
Setting the temperature to 41°F (5°C), the appliance will
activate the Antifreeze function. The display will show the
symbol, in this way the appliance will turn on automatically,
at the max power, only if the room temperature falls below
41°F (5°C), to prevent freezing conditions. If you wish to go
back to the Heating function, press the "+" button once.
Note: in this function the power level settings are not able to
be adjusted, unit will run at MAX.
Eco function
When this function is active the appliance automatically sets
the most appropriate power level to guarantee optimum
comfort while reducing energy consumption. To activate this
function press the "ECO" (H) button. The display will show
symbol.
If the selected temperature is much higher then the actual
room temperature, the appliance will start automatically and
rapidly to heat the room.
The appliance will automatically select the most convenient
power level (
MAX-MED-MIN-OFF).
If MAX power level has been selected using the
button,
the appliance will cycle between: MAX-MED-MIN-OFF.
If MED power level has been selected, the appliance will cycle
between:
MED-MIN-OFF.
If MIN power level has been selected, the appliance will cycle
between:
MIN-OFF.
Working indicator
The symbol indicates the heating status by means of its
colors.
RED: the unit is heating at the maximum power.
YELLOW: the unit is heating at the medium power.
GREEN: the unit is heating at the minimum power.
absent: the unit is not heating.
Brightness of the display
The appliance allows two dierent brightness settings for the
display. The highest is active when any key button is pressed.
After a few seconds of keyboard inactivity, the brightness will
decrease to the operating brightness level.
This lower level can be adjusted by means of the light button
(G). Press the light button repeatedly till the desired
brightness is reached (three brightness levels available).
Key lock
In order to avoid accidental operation, you can lock the
keyboard using the keylock function.
To activate this function press buttons + and - together for
at least 3 seconds. The display shows the symbol
and a
double acoustic signal will be emitted. To disactivate the
function proceed in the same way.
Timer function
This function can be activated in two dierent ways.
Delayed start: With the appliance o, press the timer
button (F) .
The symbol is displayed ashing together with the hours
left before the appliance comes on. Change the hours using
the + and - buttons, then wait a few seconds for the program
to be stored.
The display will return to o and the
symbols remains on.
When the programmed time has elapsed, the appliance will
come on with the previous settings.
Delayed stop: with the appliance on, press the timer button
. The symbol is displayed ashing together with the
hours left before the appliance goes o. Change the hours
using the + and - buttons, then wait a few seconds for the
Your product is equipped with a polarized alternating
current line plug (a plug having one prong wider than the
others). This plug will t into the power outlet only one
way. This is a safety feature. If you are unable to insert the
plug fully into the outlet, try reversing the plug. If the plug
should still fail to t, contact your electrician to replace
your obsolete outlet. Do not attempt to modify the plug to
bypass this safety feature.
Use
Loading ...
Loading ...