Loading ...
Loading ...
Loading ...
49-80520-9 17
INSTALLATION INSTRUCTIONS
Installation Instructions
5
INSTALL CEILING BRACKET
The ceiling bracket must be installed when the duct
cover is used to span 24” or more height above
the hood. The bracket will hold the decorative duct
cover in place at the top.
NOTE: The ceiling bracket is not required when
using only the 12” section of the duct cover.
• Install the 2 small screws into the sides of the
duct bracket. Remove the screws. Pre-tapping the
holes will insure ease of final installation.
• Match center notch on the bracket to the
centerline on the wall and flush against the ceiling.
• Mark the 2 screw hole locations.
• Drill 2/8” pilot holes in marked bracket location.
• If pilot holes do not enter studs, enlarge the holes
to 3/8” and install wall fastener anchors.
• Secure the bracket to the rear wall with wood
screws and washers. Use wall anchors if needed.
NOTE: Bracket has 2 sets of holes. Use larger holes
for wall fasteners or wood screws with washers. Use
smaller holes for wood screws with washers.
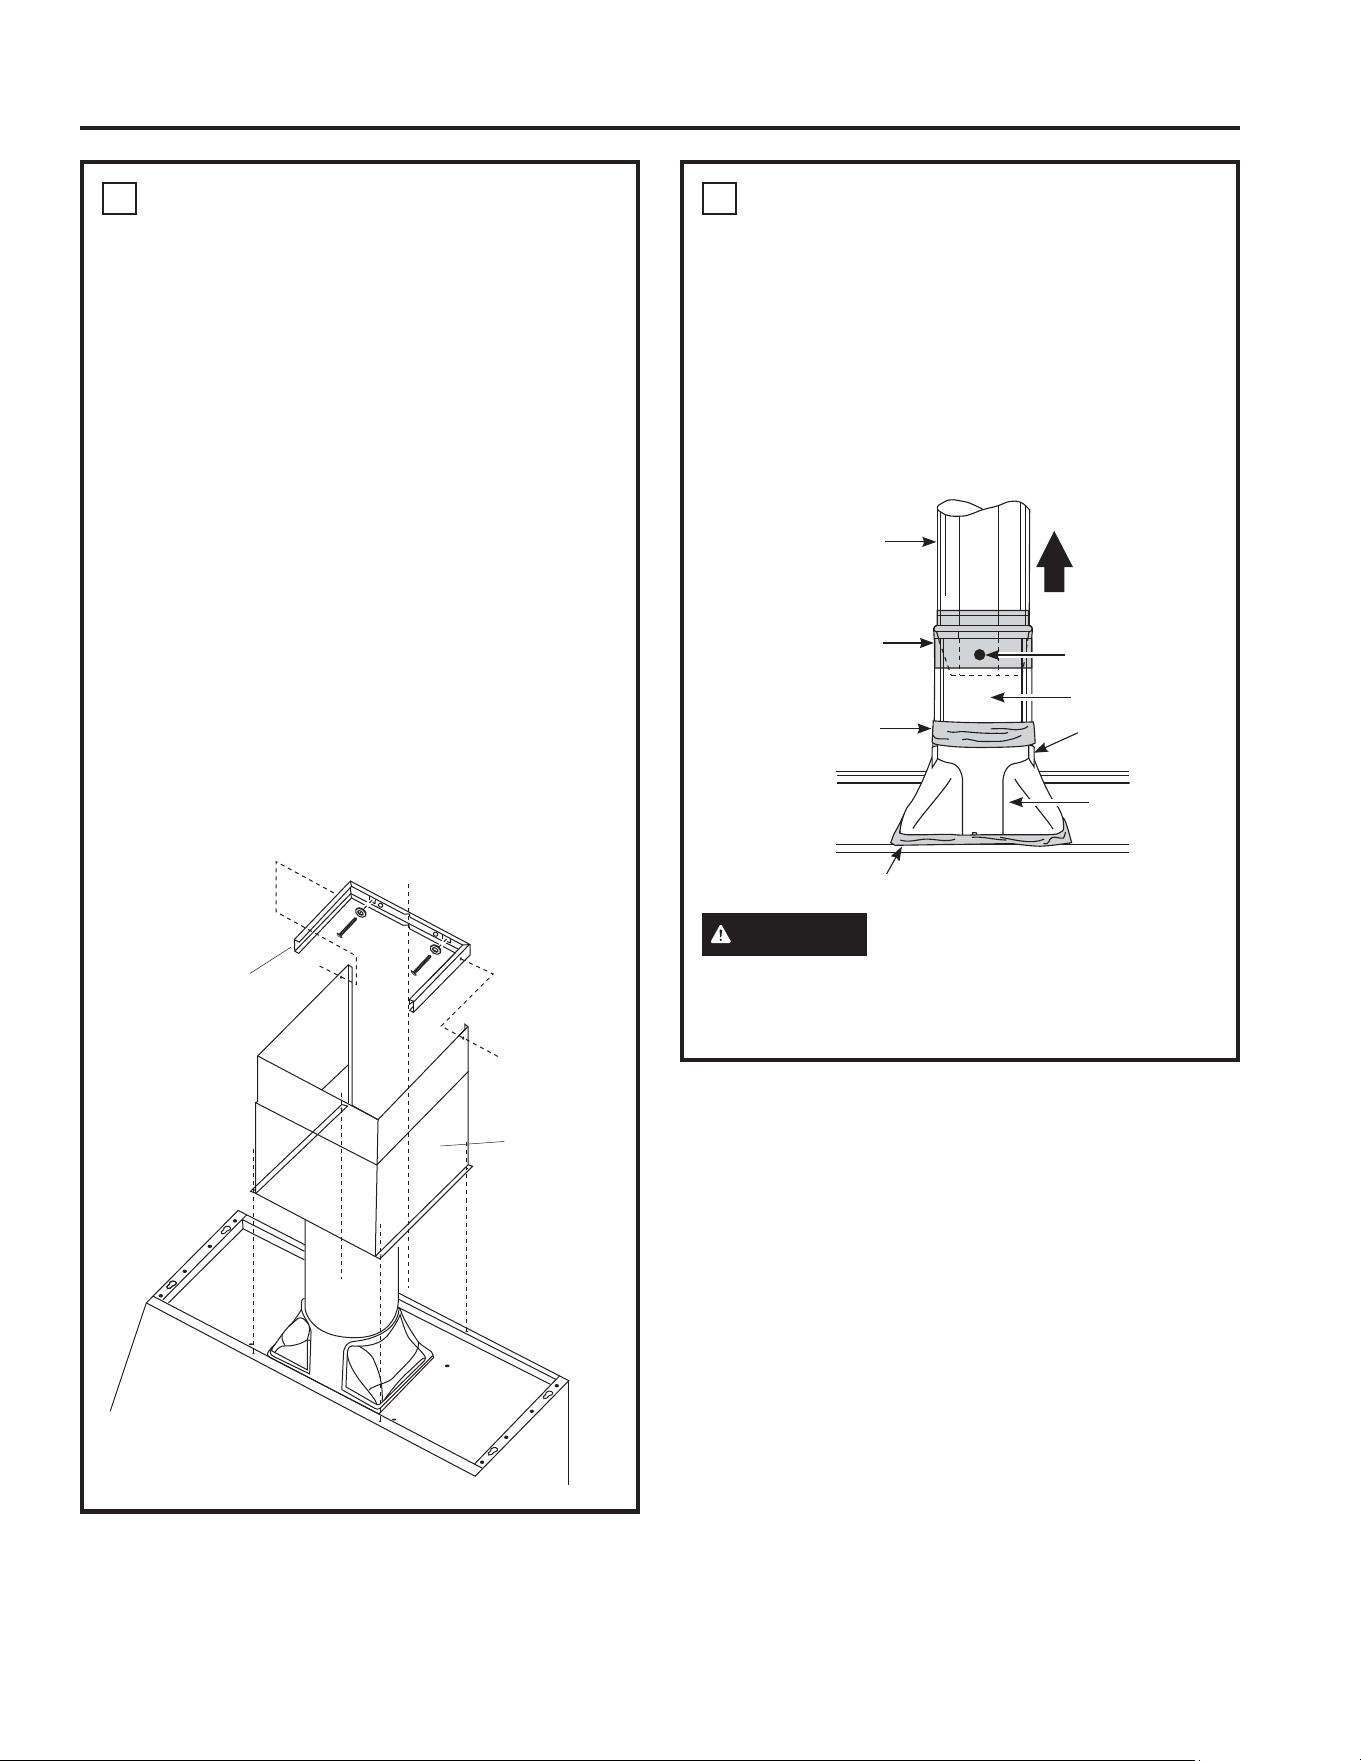
6
CONNECT DUCTWORK
• Push duct over the end of the transition until it
reaches the stop tabs.
• Install ductwork, making connections in direction
of airflow as illustrated.
• Secure joints in ductwork with sheet metal screws.
• Wrap all duct joints with duct tape for an airtight
seal.
• Use duct tape to seal the flange connection
CAUTION
Do not use sheet metal screws at
the transition to ductwork connection. Doing se will
prevent proper damper operations. Seal connection
with tape only.
Install Ceiling
Bracket When
Duct Cover is
Used to Span
24” or more
See Step
9 to Install
Duct Cover.
Duct Stops
Duct Tape Over
Seam and Screw
Duct Tape
Only for Proper
Operation of
Damper
Duct Tape Over Flange
Air Flow
House
Ductwork
Transition
Ductwork
Screw
Loading ...
Loading ...
Loading ...