Loading ...
Loading ...
Loading ...
9
English
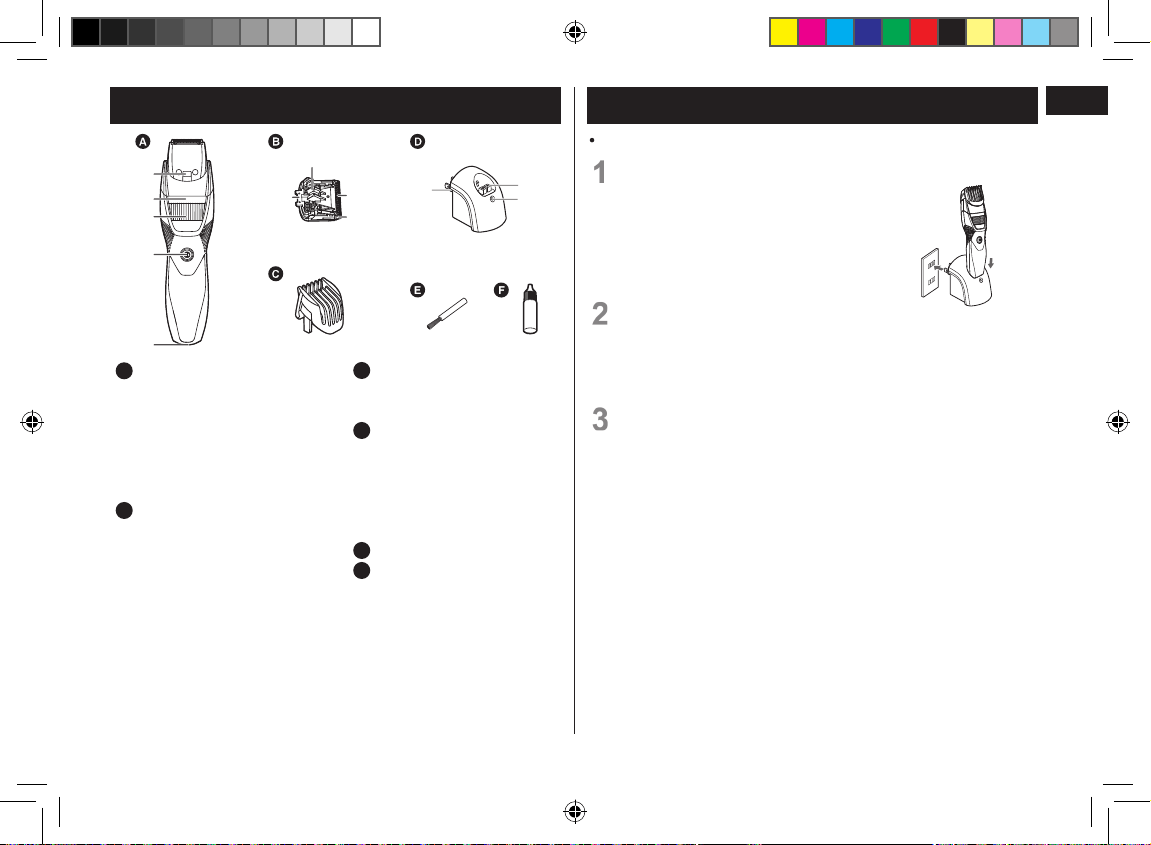
Parts identication
a
c
b
d
e
g
h
f
i
k
l
j
A
Main body
a
Water inlet
b
Trimming height indicator
c
Dial (Height adjustment
control)
d
Power switch
e
Appliance socket
B
Blade
f
Cleaning lever
g
Moving blade
h
Stationary blade
i
Mounting hook
C
Comb attachment for
beard
(1 mm (1/32˝ ) to
10 mm (13/32˝ ) )
D
AC adaptor (RE9-93)
j
Power plug
k
Charging plug
l
Charge indicator
lamp
Accessories
E
Cleaning brush
F
Oil
Charging the trimmer
Make sure that the trimmer is turned off.
1
Place the trimmer on the AC
adaptor.
• Plug the trimmer into the AC adaptor
until it clicks into place.
• Remove the trimmer with one hand
while pressing the AC adaptor with the
other hand.
1
2
2
Insert the power plug into a
household outlet.
• The charging time differs depending on the rated voltage.
(See page 16.)
• Check that the charge indicator lamp glows.
3
Disconnect the plug after charging is completed.
(for safety and to reduce energy usage)
• The charge indicator lamp continues to glow after
charging is complete. There is no indication to show that
“charging is complete”.
Notes
• To keep charging the battery will not affect battery
performance.
• If there is noise from the radio or other sources while
using or charging the product, move to a different
location to use the product.
• When the appliance is not used for 6 months or more,
the battery will weaken (leak battery uid, etc.). Fully
charge the battery once every 6 months.
中南美向.indb 9 17/4/6 下午5:45
Loading ...
Loading ...
Loading ...