Loading ...
Loading ...
Loading ...
N C
M Y
AFTER-SALES SERVICE
Before you call the After-sales Service:
1. Re-start the cooking hob, to check whether
correct operation has been restored.
2. If the malfunction persists, call the After-sales
Service.
Give the following information:
x
type of malfunction;
x
model of c ooking hob;
x
service number (i.e., the number that follows
the word SERVICE on the rating plate under
the cooking hob and on the guarantee paper);
x
your complete address;
x
your telephone number and area code.
l
INSTALLATION
Technical information for installer
This cooking hob can be embedded in a
worktop 20 to 50 mm thick.
If another appliance is not fitted under the
cooking hob, insert a separator panel, at a
distance of at least 90 mm from the cooking
hob bottom.
x
If a vertical piece of furniture is installed,
there must be a gap of at least 00 mm
between it and the edge of the cooking
hob.
x
Before installing the cooking h ob, remove the
plastic film that protects it, if present.
The outer surfaces of the furniture or appliances
adjoining the cooking hob must be heat resistant
(heat protection “Y” , according to standards EN
60335-2-6).
x
Installation must comply with current local safety
regulations.
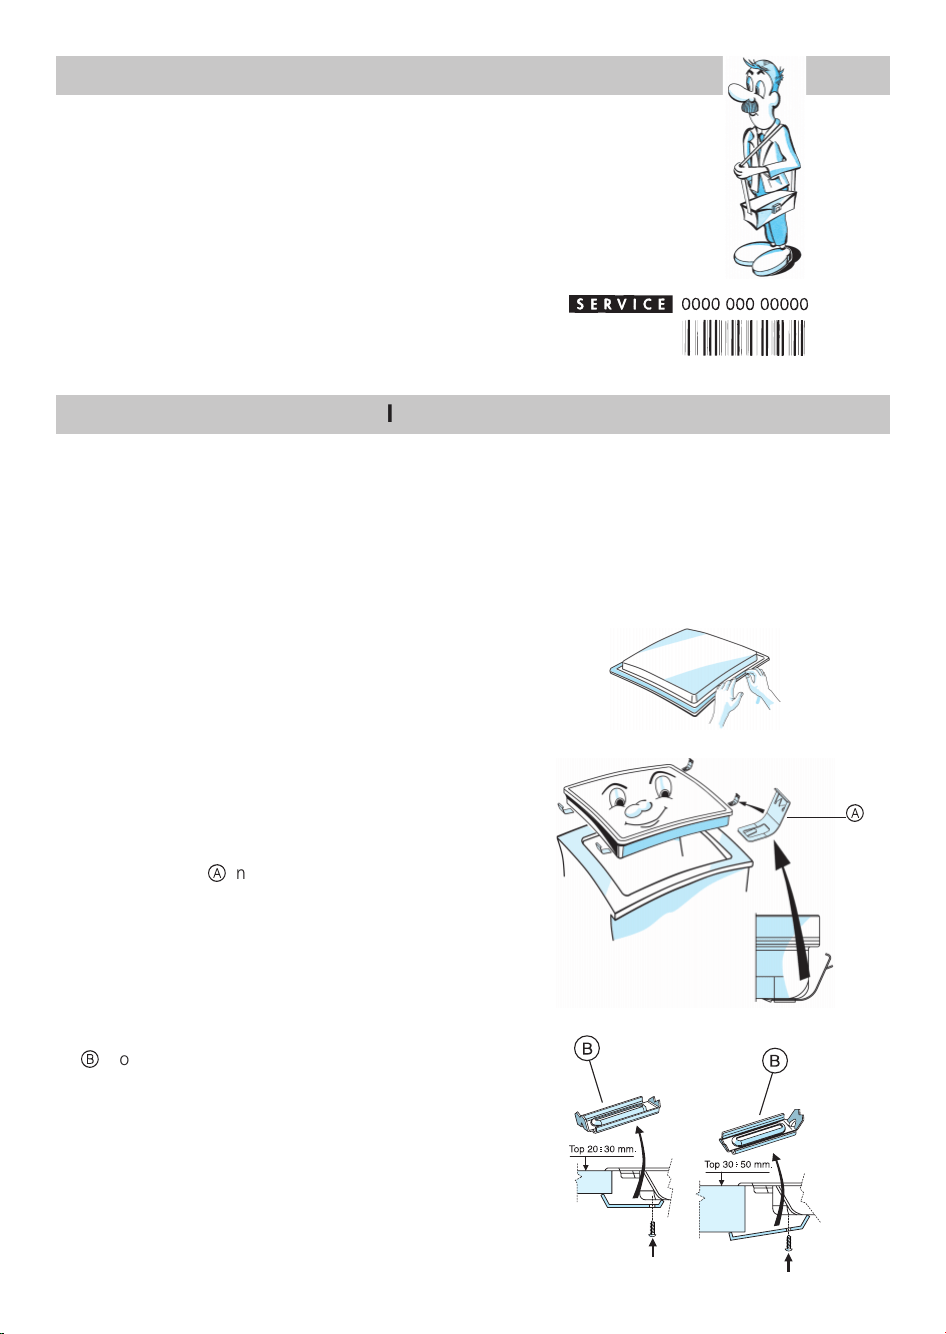
Installation of cooking hob
x
Apply the supplied gasket to the cooking
hob (unless it has already been fitted), after
having cleaned its surface as shown i n the
figure.
A
- If the worktop is made out of wood, use
the springs supplied.
1. Fit the 4 springs
a
into the relevant seat under
the box.
2. Make an opening in the worktop, respecting the
dimensions indicated in the enclosed product
description sheet.
3. Install the cooking hob in the worktop.
B
- If the worktop is made out of marble or
other materials (plastics, ceramics or stone), the
cooking hob must be fixed by means of brackets
b
, to be ordered from the After-Sales Service
(code 489 30 8528).
1. Align the brackets with the bores and fix them
with the screws.
2. Make an opening in the worktop, respecting the
dimensions indicated in the product description
sheet.
3. Install the cooking hob in the worktop.
a
11
11
Loading ...