Loading ...
Loading ...
Loading ...
10
Right-Hand Side Drawer Glide
■ To raise the drawer front, turn screw (B) counterclockwise.
■ To lower the drawer front, turn screw (B) clockwise.
6. Insert the Phillips screwdriver into screw (A), and turn
clockwise to tighten the drawer front.
7. Close the refrigerated drawer to check the alignment. Repeat
steps 2 through 6 until the drawer fronts are level.
Step 2 - Adjust the Drawer Fronts Side to Side
IMPORTANT: Each refrigerated drawer can be adjusted
side to side on both the left and right side.
1. With the drawers closed, identify the drawer that is not
aligned.
2. Open the drawer to its full extension. Grasp the sides of the
interior bin, and then lift it up and out to remove. (See Step 1
for further details.)
3. Locate the drawer glide brackets. (See Step 1 for further
details.)
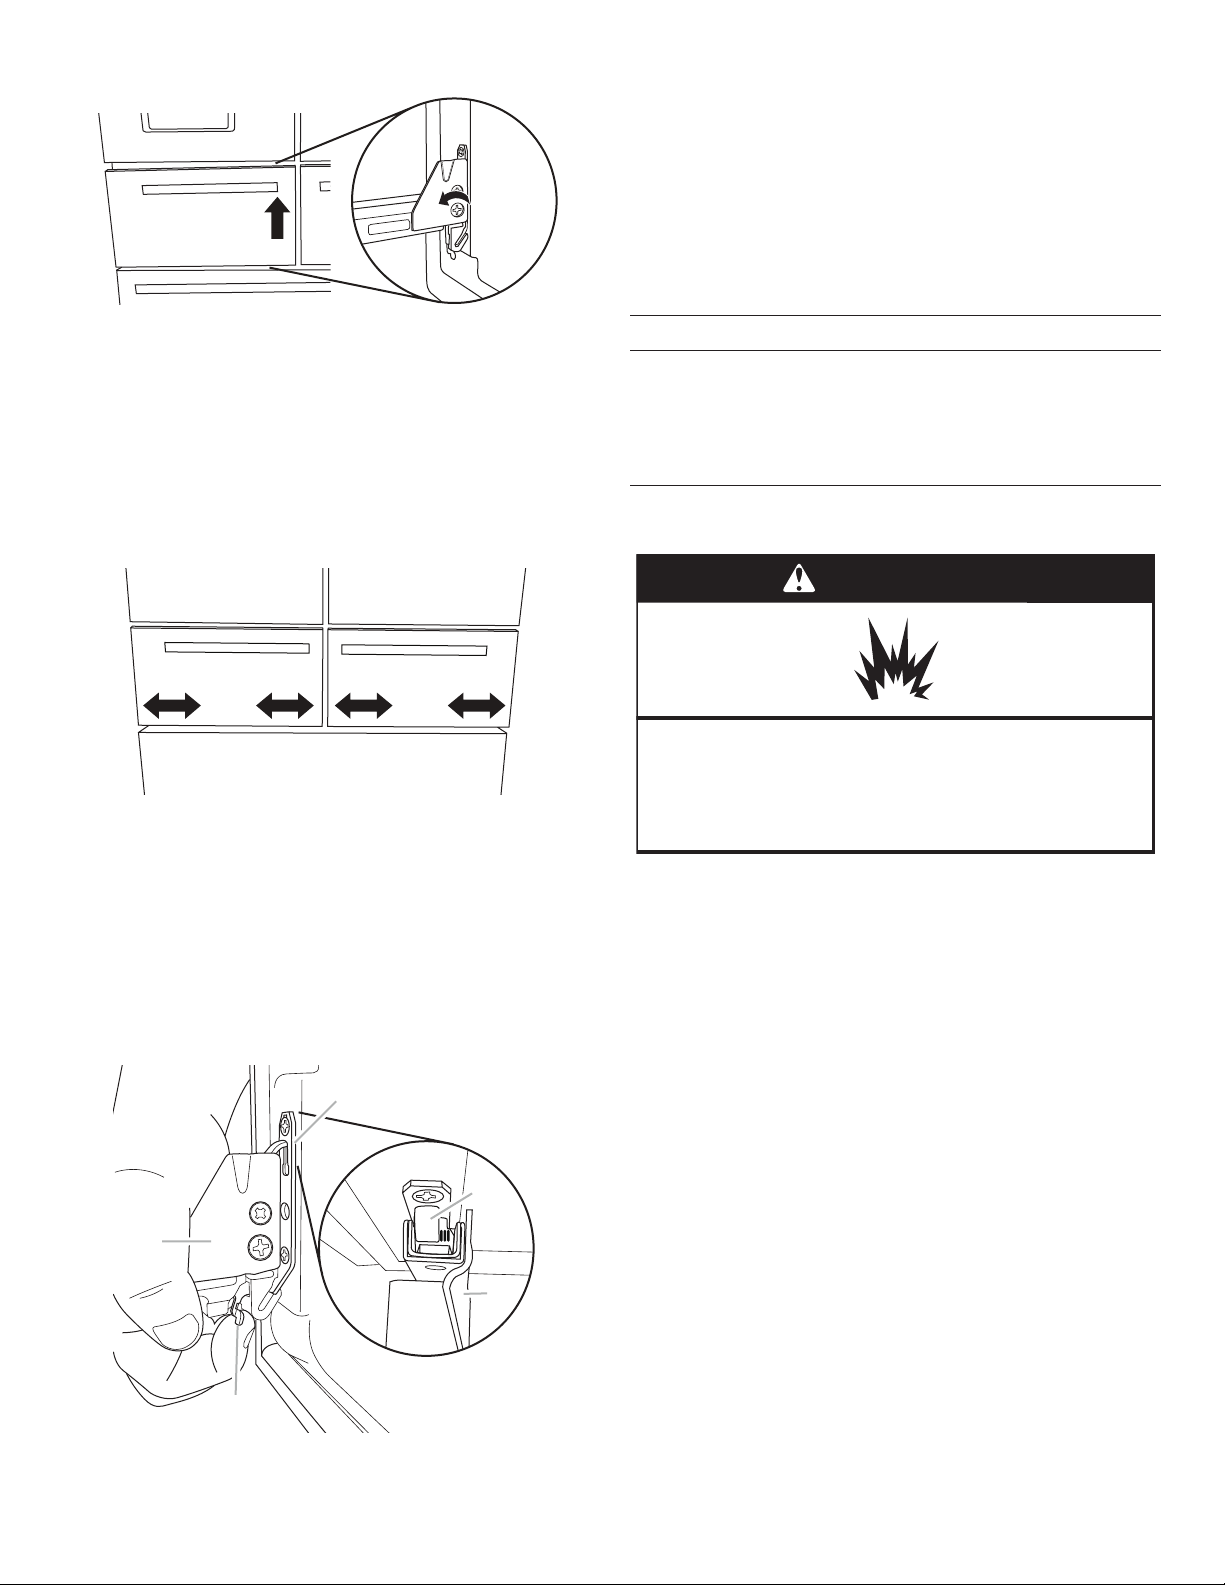
4. Starting with the glide bracket closest to the vertical gap,
press and hold the release lever (C) up. With your other hand,
lift the door clip (A) from the bracket (B).
5. Reposition the clip (A) onto the glide bracket (B) in the
direction you want to move the drawer front. Make sure that
the glide bracket is vertically level.
6. Release the lever (C) to lock the glide bracket into position.
7. Repeat steps 3 through 6 for the other side of the drawer
front.
NOTE: Adjust the clip (A) on the top of the second glide
bracket (B) so that it is in the same position as the side you
adjusted rst.
8. Close the drawer and visually inspect the gap. Repeat steps 2
though 7 until the drawer fronts are aligned.
Final Steps
1. Replace the interior drawer bins.
NOTE: The bins must be placed into the drawers correctly so
that the refrigerated drawers will close and operate properly.
See “Remove and Replace Drawer Fronts.”
2. Close the refrigerated drawers.
Location Requirements
IMPORTANT: This appliance is intended to be used in household
and similar applications such as.
■ Staff kitchen areas in shops, ofces and other working
environments.
■ Farm houses and by clients in hotels, motels and other
residential type environments.
■ Bed and breakfast type environments.
■ Catering and similar non-retail applications.
NOTE: If the manufacturer wants to limit the use of the appliance
to less than the above, this has to be clearly stated in the
instructions.
To ensure proper ventilation for your refrigerator, allow for a
1/2" (1.25 cm) of space on each side and at the top. Allow for a
1" (2.54 cm) space behind the refrigerator. If your refrigerator
has an ice maker, allow extra space at the back for the water line
connections. When installing your refrigerator next to a xed wall,
leave a 3³⁄4" (9.5 cm) minimum space between the refrigerator and
wall to allow the door to swing open.
A
B
C
B
A
A. Drawer front clip
B. Drawer glide bracket
C. Release lever
WARNING
Explosion Hazard
Keep ammable materials and vapors, such as
gasoline, away from refrigerator.
Failure to do so can result in death, explosion, or re.
Loading ...
Loading ...
Loading ...