User Guide
Dishwasher
LEARN MORE
In an effort to conserve natural resources, this dishwasher includes a condensed User Guide. Complete User Instructions can be downloaded
at www.kitchenaid.com/customer-service/manuals.
For future reference, please make a note of your product model and serial numbers. These can be located on
a label in the tub along the left outer edge.
Model Number________________________________ Serial Number______________________________________
Register your dishwasher at www.kitchenaid.com. In Canada, register your dishwasher at www.kitchenaid.ca.
Para una version de estas instrucciones en español, visite www.kitchenaid.com.
You can be killed or seriously injured if you don’t immediately follow instructions.
You can be killed or seriously injured if you don’t follow instructions.
All safety messages will tell you what the potential hazard is, tell you how to reduce the chance of injury, and tell you what can happen if the
instructions are not followed.
Your safety and the safety of others are very important.
We have provided many important safety messages in this manual and on your appliance. Always read and obey all safety messages.
This is the safety alert symbol.
This symbol alerts you to potential hazards that can kill or hurt you and others.
All safety messages will follow the safety alert symbol and either the word “DANGER” or “WARNING.”
These words mean:
DANGER
WARNING
IMPORTANT SAFETY INSTRUCTIONS
WARNING: When using the dishwasher, follow basic precautions, including the following:
SAVE THESE INSTRUCTIONS
■
Read all instructions before using the dishwasher.
■ Use the dishwasher only for its intended function.
■ Use only detergents or rinse agents recommended for use in a
dishwasher, and keep them out of the reach of children.
■ When loading items to be washed:
1) Locate sharp items so that they are not likely to damage the
door seal; and
2) Load sharp knives with the handles up to reduce the risk of
cut-type injuries.
■ Do not wash plastic items unless they are marked “dishwasher
safe” or the equivalent. For plastic items not so marked, check
the manufacturer's recommendations.
■ Do not touch the heating element during or immediately after use.
■ Do not operate the dishwasher unless all enclosure panels are
properly in place.
■ Do not tamper with controls.
■ Do not abuse, sit on, or stand on the door, lid, or dish racks of
the dishwasher.
■
To reduce the risk of injury, do not allow children to play in or
on the dishwasher.
■ Under certain conditions, hydrogen gas may be produced in a
hot water system that has not been used for two weeks or
more. HYDROGEN GAS IS EXPLOSIVE. If the hot water system
has not been used for such a period, before using the
dishwasher turn on all hot water faucets and let the water flow
from each for several minutes. This will release any
accumulated hydrogen gas. As the gas is flammable, do not
smoke or use an open flame during this time.
■ Remove the door or lid to the washing compartment
when removing an old dishwasher from service or
discarding it.
W11133227C
1
2
KEY USAGE TIPS
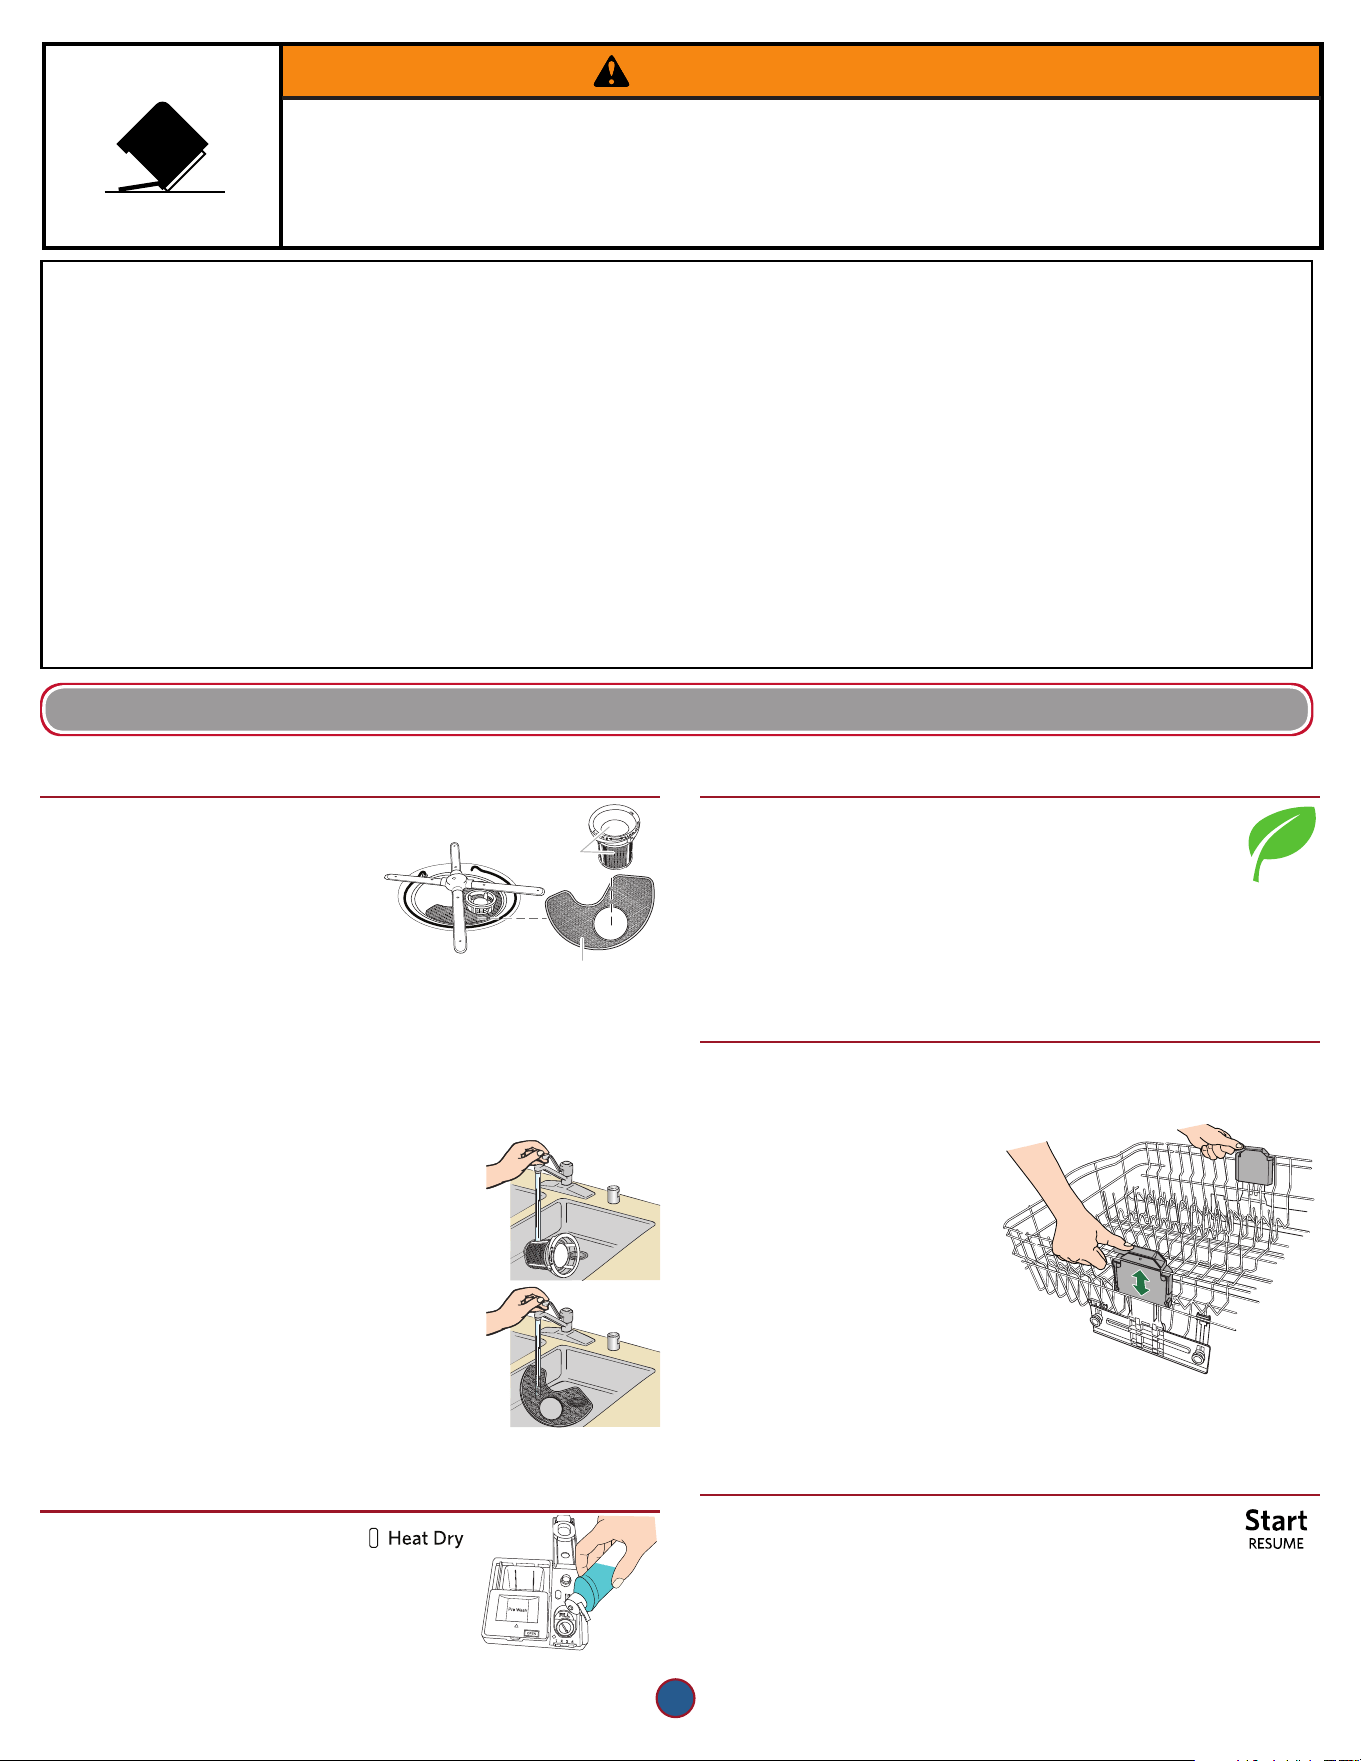
Filtration system and maintenance
Your dishwasher has the latest
technology in dishwasher ltration.
This ltration system minimizes
sound and optimizes water and
energy conservation while providing
superior cleaning.
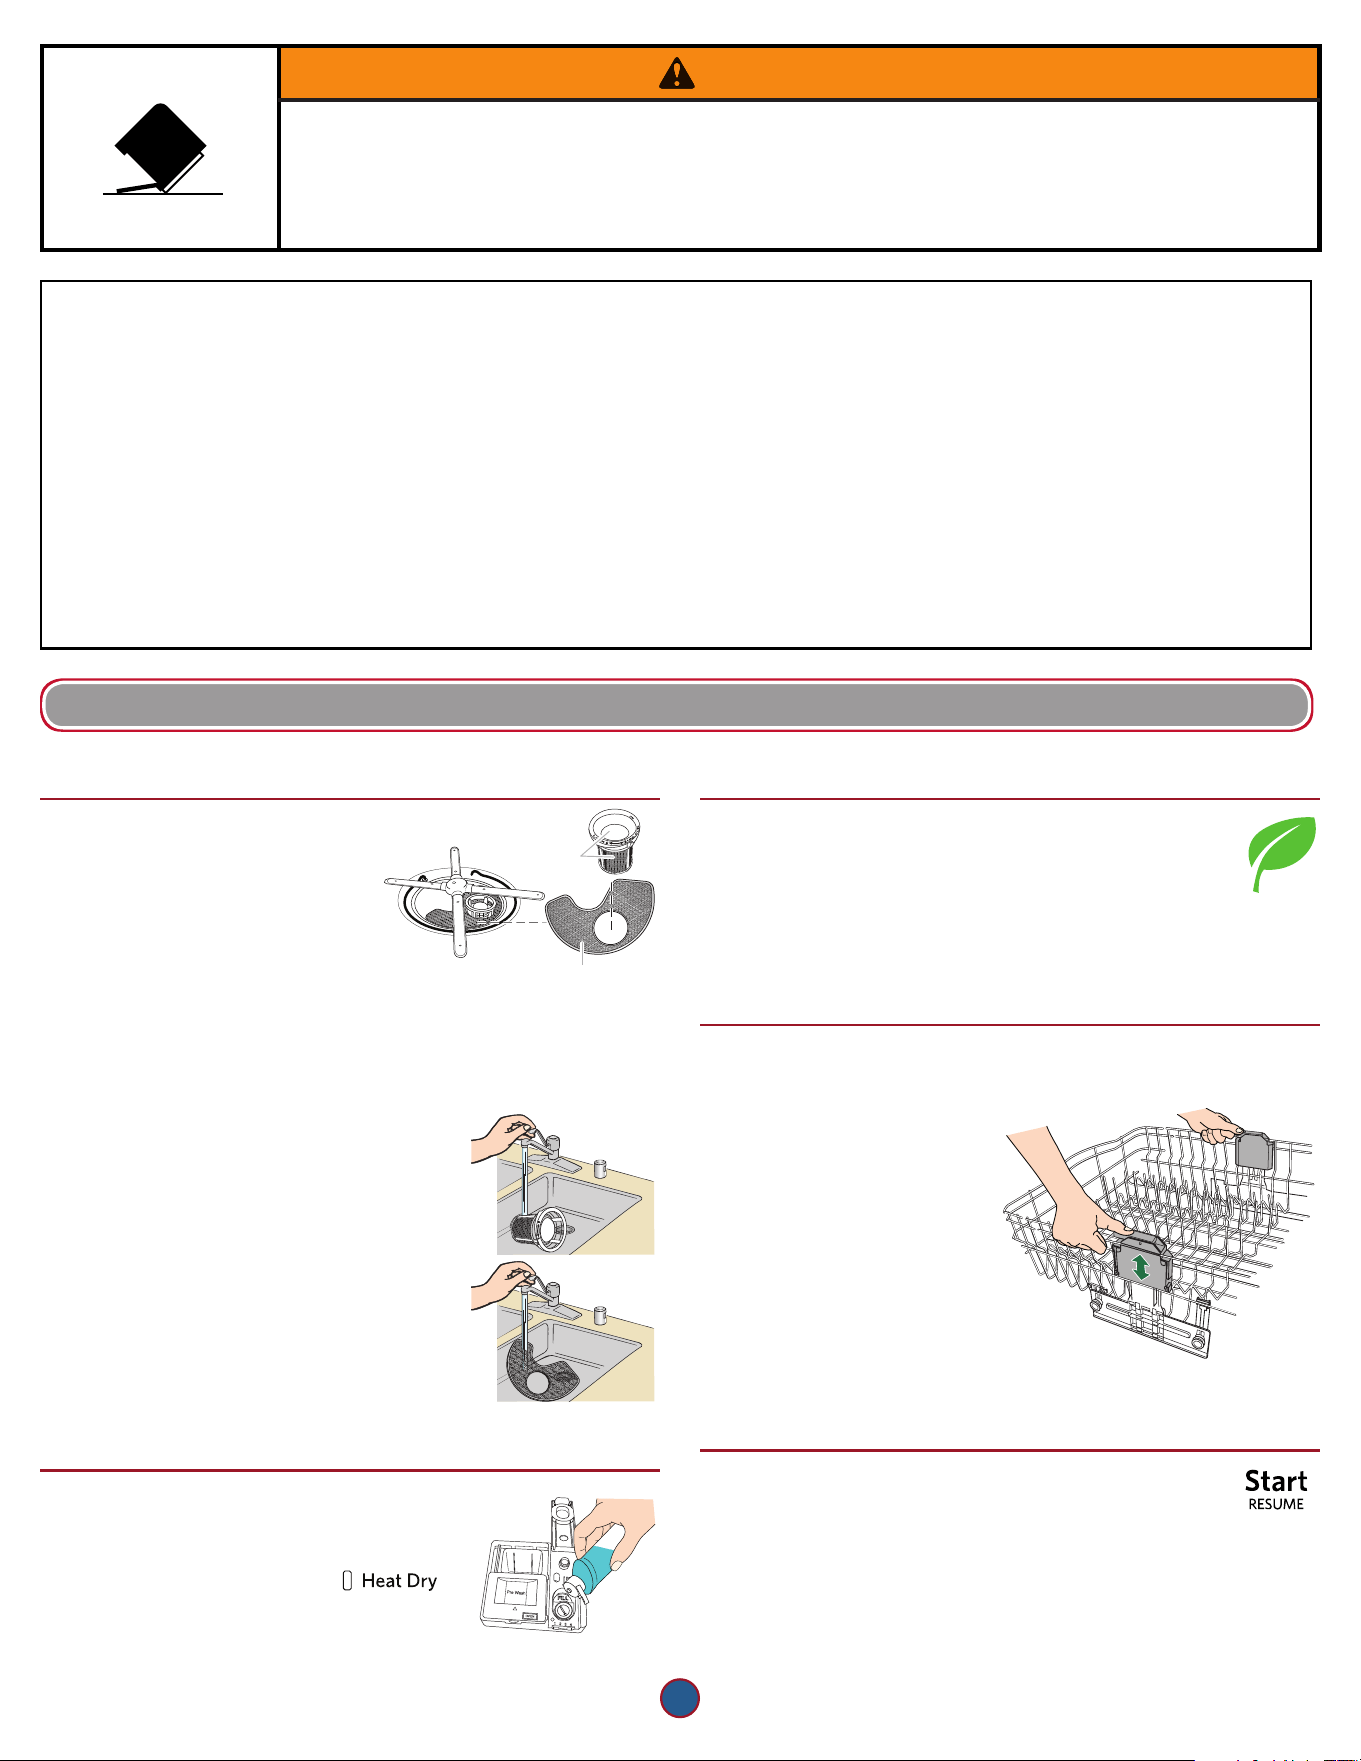
The lter system consists of two
parts, an upper lter assembly
and lower lter.
IMPORTANT: To avoid damage to dishwasher, do not operate your
dishwasher without lters properly installed. Be sure lower lter is
securely in place and upper lter assembly is locked into place. If
upper assembly turns freely, it is not locked into place.
The lters may need to be cleaned when:
■ Visible objects or soils are on upper
lter assembly.
■ Dishes feel gritty to the touch.
See the “Filtration System” section in the full
online User Instructions for complete removal
and maintenance schedule.
IMPORTANT: Do not use a wire brush,
scouring pad, etc., as they may damage
the lters.
Rinse lter under running water until soils are
removed. If you have hard to remove soils or
calcium deposits because of hard water, a soft
brush may be required.
P
U
S
H
D
O
W
N
&
T
U
R
N
L
O
C
K
U
N
L
O
C
K
Drying – Rinse aid is essential
You must use a drying agent
such as a rinse aid for good
drying performance. Rinse
aid along with the Heat Dry,
Extended Heat Dry option
will provide best drying and
avoid excessive moisture in
dishwasher interior.
SLIDE
Energy efficiency
Energy efciency is gained by extending cycle time and
reducing the amount of wattage and water used during
your dishwasher’s cycle. For exceptional cleaning, cycles
are longer due to the soak and pauses.
Efcient dishwashers run longer to save water and energy,
just as driving a car slower saves on gas. Your rst cycle will
run longer to calibrate the optical water sensor.
Premium Top Rack Adjuster
You can raise or lower the top rack to t tall items in either the top
or bottom rack. Adjusters are located on each side of the top rack.
To raise the rack:
Press both rack adjuster thumb
levers and lift the rack until it is
in the up position and level.
To lower the rack:
Press both rack adjuster thumb
levers and slide the rack to its
down position and level.
NOTE: The top rack must
be level.
Touch START/RESUME every time you
add a dish
IMPORTANT: If anyone opens the door (such as, for
adding a dish, even during the Delay option), Start/Resume
must be touched each time to resume the cycle.
Push the door rmly closed within 4 seconds of touching
Start/Resume. If the door is not closed within 4 seconds, the
Start keypad light will ash, an audible tone will be heard, and
the cycle will not start.
Upper lter
assembly
Lower lter
Tip Over Hazard
Do not use dishwasher until completely installed.
Do not push down on open door.
Doing so can result in serious injury or cuts.
WARNING
GROUNDING INSTRUCTIONS
SAVE THESE INSTRUCTIONS
■
For a grounded, cord-connected dishwasher:
The dishwasher must be grounded. In the event of a
malfunction or breakdown, grounding will reduce the risk of
electric shock by providing a path of least resistance for
electric current. The dishwasher is equipped with a cord
having an equipment-grounding conductor and a grounding
plug. The plug must be plugged into an appropriate outlet
that is installed and grounded in accordance with all local
codes and ordinances.
WARNING:
Improper connection of the equipment-
grounding conductor can result in a risk of electric shock.
Check with a qualified electrician or service representative if
you are in doubt whether the dishwasher is properly
grounded. Do not modify the plug provided with the
dishwasher; if it will not fit the outlet, have a proper outlet
installed by a qualified electrician.
■
For a permanently connected dishwasher:
The dishwasher must be connected to a grounded metal,
permanent wiring system, or an equipment-grounding
conductor must be run with the circuit conductors and
connected to the equipment-grounding terminal or lead on
the dishwasher.

3
OPERATING YOUR DISHWASHER
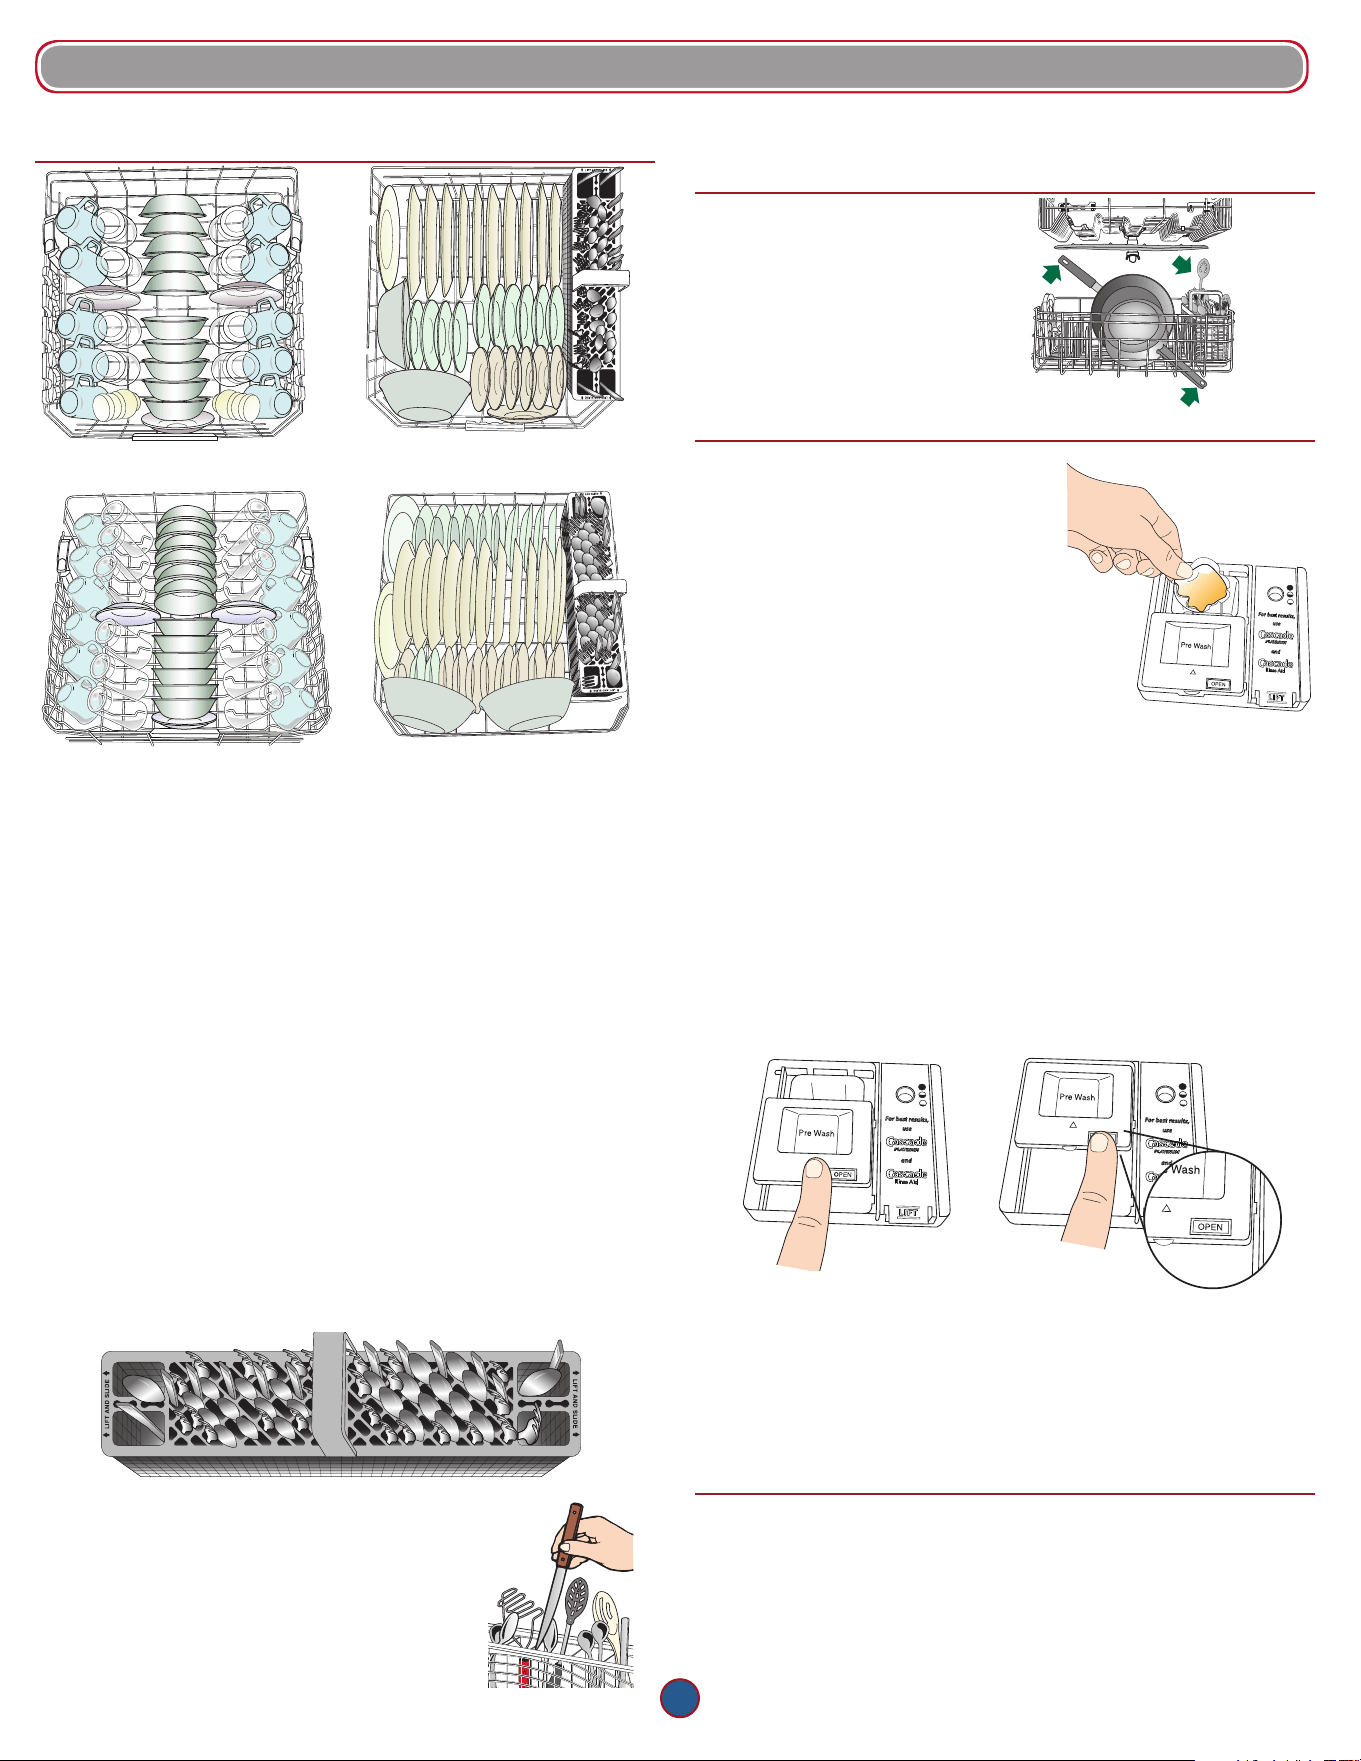
1. Prepare and load the dishwasher
10-place load – upper rack 10-place load – lower rack
12-place load – upper rack 12-place load – lower rack
IMPORTANT: Remove leftover food, bones, toothpicks, and other hard
items from dishes. Remove labels from containers before washing.
■ Make sure when the dishwasher door is closed no items are
blocking detergent dispenser.
■ Items should be loaded with soiled surfaces facing down and
inward to the spray as shown in the graphics above. This will
improve cleaning and drying results. Angle dirtiest dish surface
downward, allowing space for water to ow up through rack and
between dishes.
■ Avoid overlapping items, like bowls or plates that may trap food.
■ Place plastics, small plates, and glasses in upper rack.
■ Wash only items marked “dishwasher safe.”
■ To avoid thumping/clattering noises during operation, load dishes
so they do not touch one another. Make sure lightweight load
items are secured in racks.
■ Use the slots in the covers and suggested loading patterns
to keep your silverware separated for optimum wash.
■ If your silverware does not t into the designated
slots, lift and slide covers off to remove them and
mix silverware types to keep them separated.
■ When loading silverware, always place sharp
items pointing down and avoid “nesting”
as shown.
2. Check that all arms spin freely
Items in the rack can block
the spray arms.
3. Add detergent
Premeasured Detergents
High-quality premeasured tablets
and packs are recommended for
improved performance.
Quality tablets and packs have been
proven better than powder, liquid, or gel
detergents at reducing lming on dishes.
Using tablets and packs over time will
start to reduce or eliminate white lm.
They are suitable for all water hardness
and soil levels. Also, by using a rinse aid,
you can minimize repeat buildup of white
lm (not all packs and tablets contain
rinse aid). Always place premeasured
detergents in main compartment and
close lid.
NOTE: Follow instructions on the package when using other
dishwasher detergent types. See the complete User Instructions
for more details about powders, liquids, and gels.
■ Use automatic dishwasher detergent only. Add detergent just
before starting a cycle.
■ Fresh automatic dishwasher detergent results in better cleaning.
Store tightly closed detergent container in a cool, dry place.
To close lid To open lid
SLIDE
SLIDE
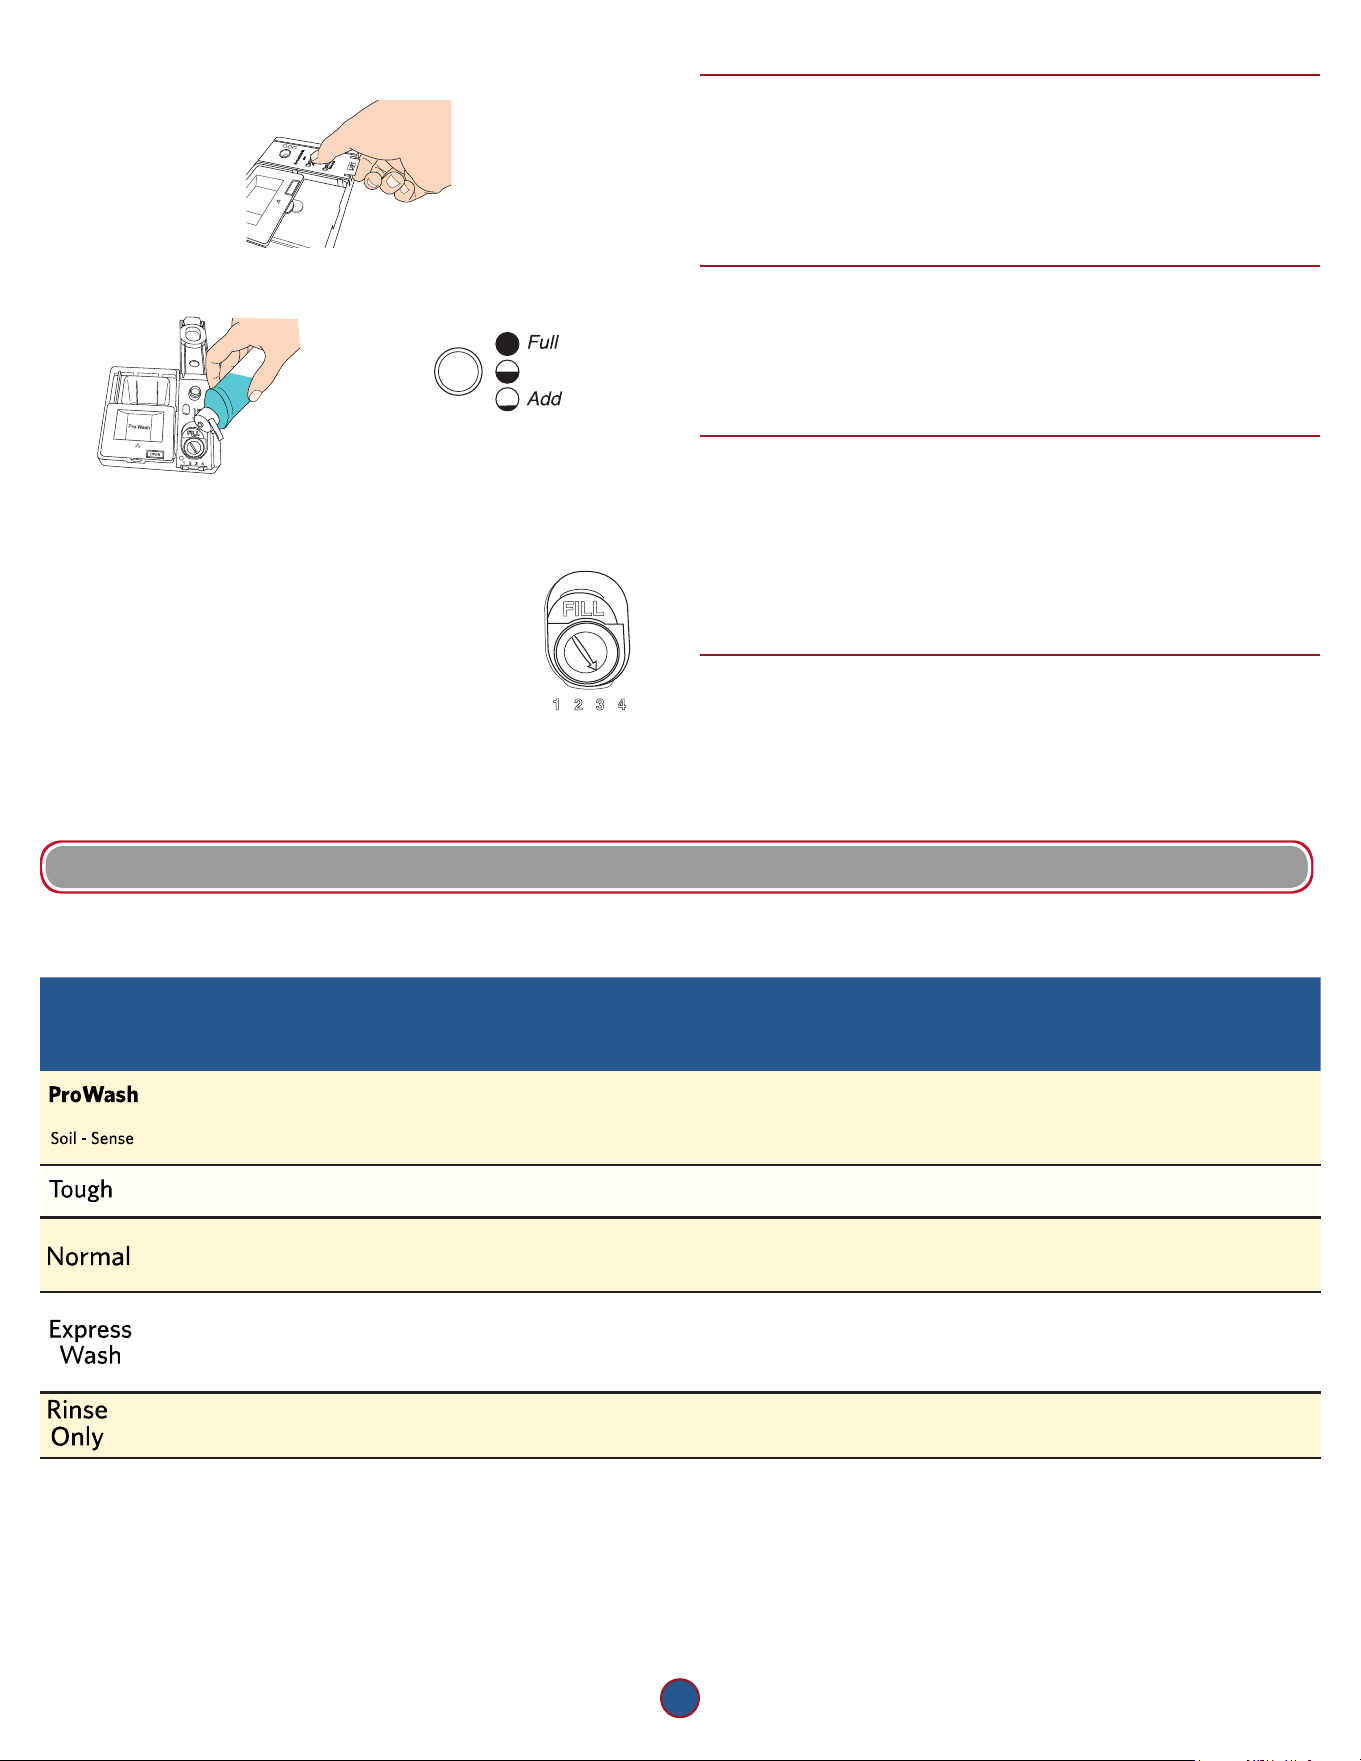
Place selected detergent in
the dispenser. Place nger,
as shown, and slide lid closed.
Press rmly until it clicks.
Push OPEN, as shown,
and the lid will slide open.
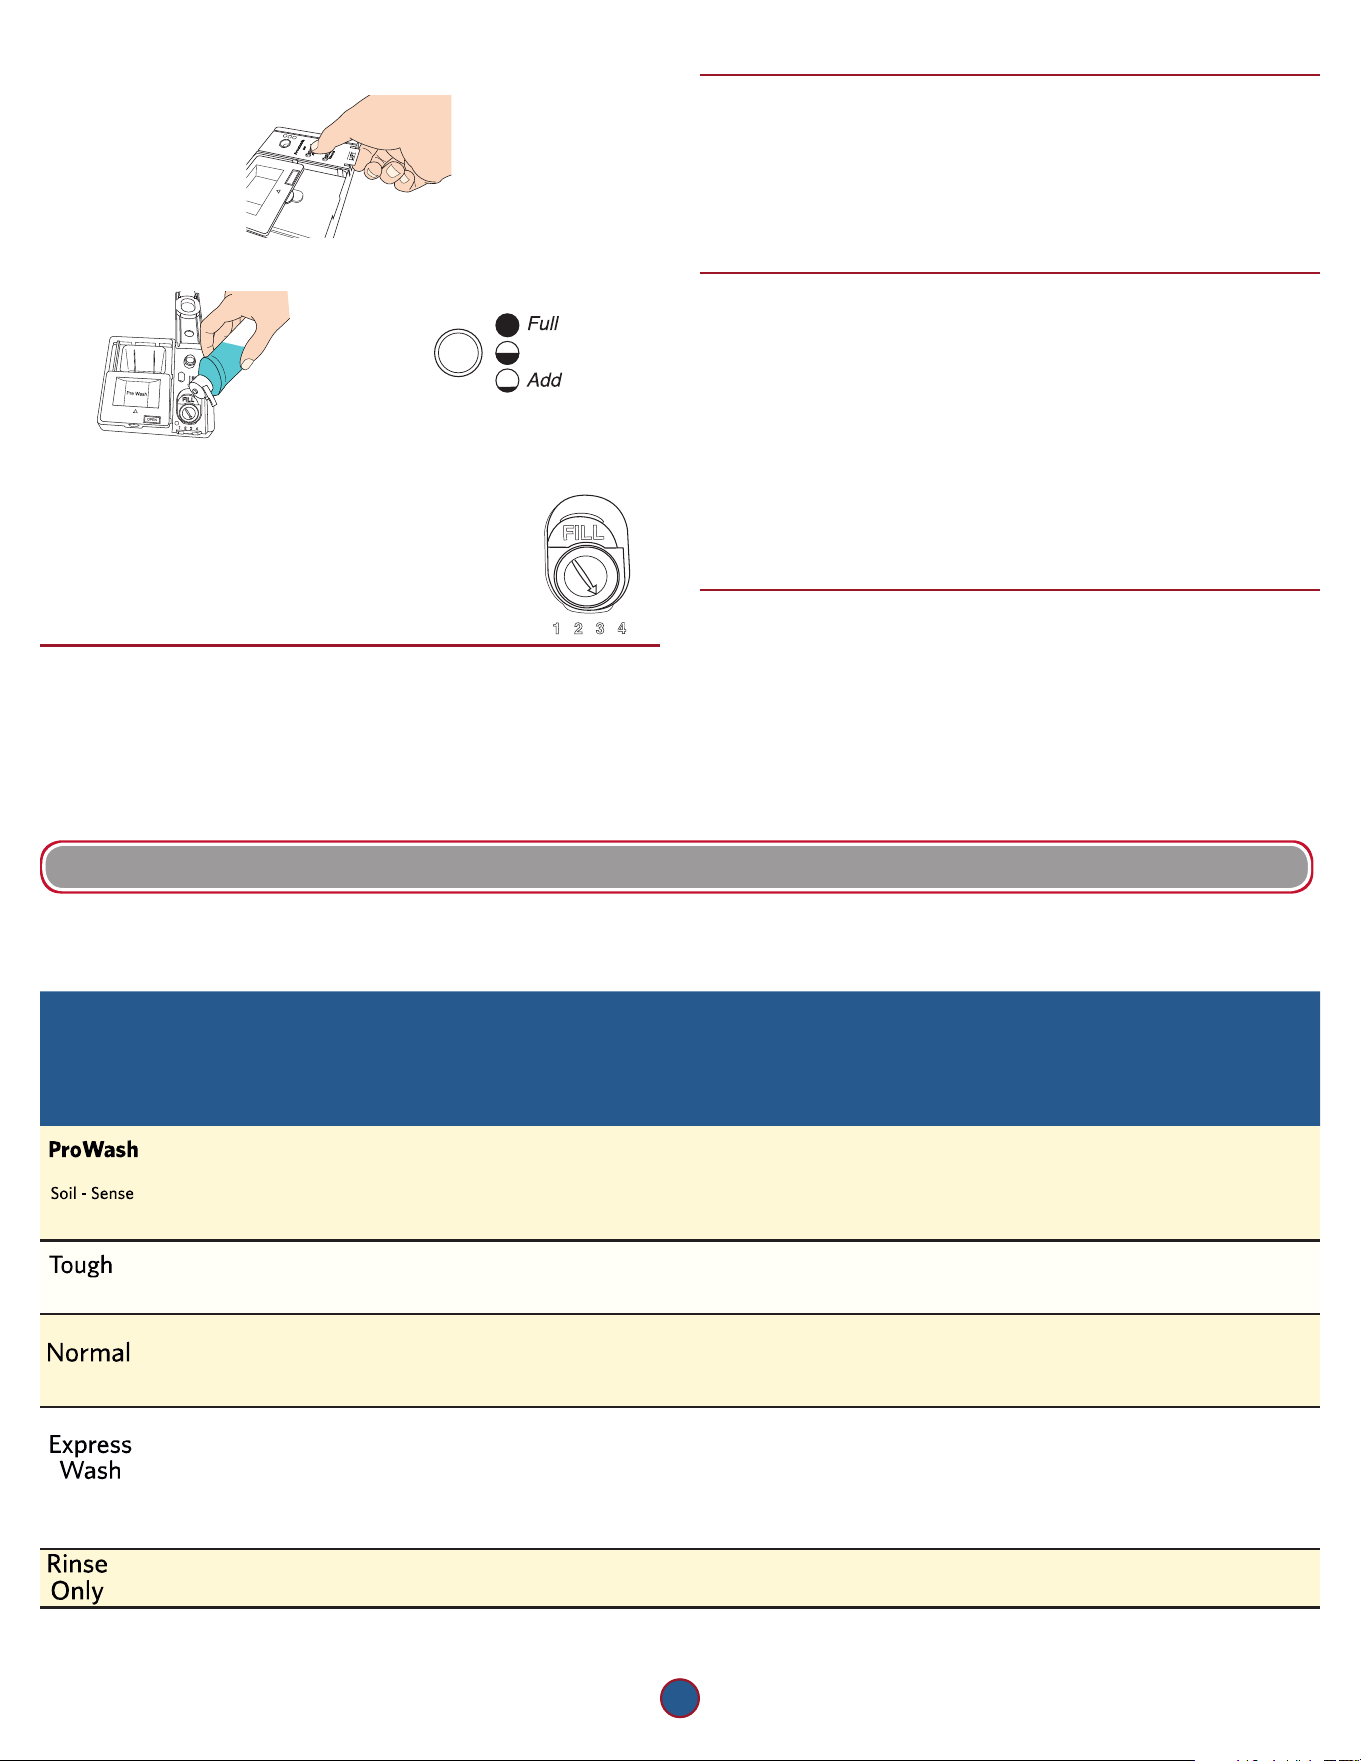
4. Add rinse aid
■ Your dishwasher is designed to use rinse aid for good drying
performance. Without rinse aid, your dishes and dishwasher
interior will have excessive moisture. The heating and drying
options will not perform as well without rinse aid.
■ Rinse aid keeps water from forming droplets that can dry as spots
or streaks. It also improves drying by allowing water to drain off
of dishes after nal rinse. Rinse aid does not adhere to dishware,
and when used, it is dispensed during each cycle.
SLIDE
4
■ To add rinse aid, open the dispenser lid by gently pushing in
the center of the lid with your thumb while lifting up on the edge.
Pre Wash
OPEN
SLIDE
■ Pour rinse aid into the opening until the indicator level shows
that it is full.
SLIDE
■ Close dispenser by pushing down gently on the lid.
NOTE: For most water conditions, the factory setting will give
good results.
If you are experiencing poor drying performance, try
a higher setting. Turn the arrow adjuster to the next
higher number to increase the amount of rinse aid.
5. Select a cycle
Efcient dishwashers run longer to save water and energy, just as
driving a car slower saves on gas. Typical cycle time is approximately
2
1
/
2
hours but can take less or more time to complete depending
on selections. Push door rmly closed and touch START to repeat
the same cycle and options as in the previous wash cycle, or select
another cycle appropriate for your load. See the Cycle Guide.
6. Select options
You can customize your cycles by selecting the options desired. See
the Cycle Guide. If you change your mind, touch the option keypad
again to turn off the option. Not all options are available for every
cycle. If an invalid option is selected for a given cycle, the lights will
ash. Adding options may increase the cycle time.
7. Start or resume a cycle
NOTE: If needed, run hot water at the sink nearest your dishwasher
until water is hot. Turn off water. With door rmly closed, touch START.
IMPORTANT: If the door is opened for more than a few seconds after
the cycle is started (even during the Delay time), the Start keypad
must be touched again after the door is closed. If Start keypad is not
touched, the Start keypad light with ash, and audible tone will be
heard, and cycle will not resume.
8. Follow the progress of your dishwasher
The display will indicate cycle progress such as Washing, Drying,
Clean, and Sanitized. The cycle has completed when the Clean light
is lit. Refer to the Control chart in the Cycle Guide section for
operation of the Sanitized indicator.
CYCLE GUIDE
IMPORTANT: The sensor in your dishwasher monitors the soil level. Cycle time and/or water usage can vary as the sensor adjusts the cycle for
the best wash performance. If the incoming water is less than the recommended temperature or food soils are heavy, the cycle will automatically
compensate by adding time, heat, and water as needed.
CYCLES ESTIMATED
WASH TIME*
W/O OPTIONS
(HR:MIN)
WATER USAGE
GALLONS
(LITERS)
This cycle senses the load size, soil amount, and toughness of soil, to adjust the cycle
for improved cleaning, using only the amount of water and energy needed.
The ProWash™ cycle is automatically selected if you rst touch the Start keypad.
Includes a heated drying option.*
2:10 to 3:15 3.38 to 7.4
(12.8 to 28.0)
Use for hard-to-clean, heavily soiled pots, pans, casseroles, and regular tableware.
Includes a heated drying option.
2:45 to 3:25 7.4 (28.0)
This cycle is recommended for daily, regular, or typical use to completely wash and dry
a full load of normally soiled dishes. This dishwasher’s government energy certications
were based on the Normal cycle with only the Heat Dry option selected.**
2:00 to 3:10 2.4 to 7.4
(9.09 to 28.0)
For fast results, the Express Wash will clean dishes using slightly more water and energy.
For improved drying, select a heated drying option.
NOTE: Some detergents are not recommended for short wash cycles, please refer
to your detergent packaging for more information. Includes a heated drying option.
0:55 to 1:05 7.87 (29.8)
Use for rinsing dishes, glasses, and silverware that will not be washed right away.
Do not use detergent.
0:18 2.0 (7.5)
*The government energy certications are not based on this cycle. See the Normal cycle description for the government energy certication
cycle. Using the ProWash™ cycle may increase your energy usage.
**No other washing and drying temperature options were selected, and the dishwasher was not subjected to truncated testing. Rinse aid was
not used, and there was no detergent used in the prewash.
5
OPTIONS CAN BE
SELECTED
WITH
WHAT IT DOES ADDED TIME
TO CYCLE
(HR:MIN)
ADDED
WATER
GALLONS
(LITERS)
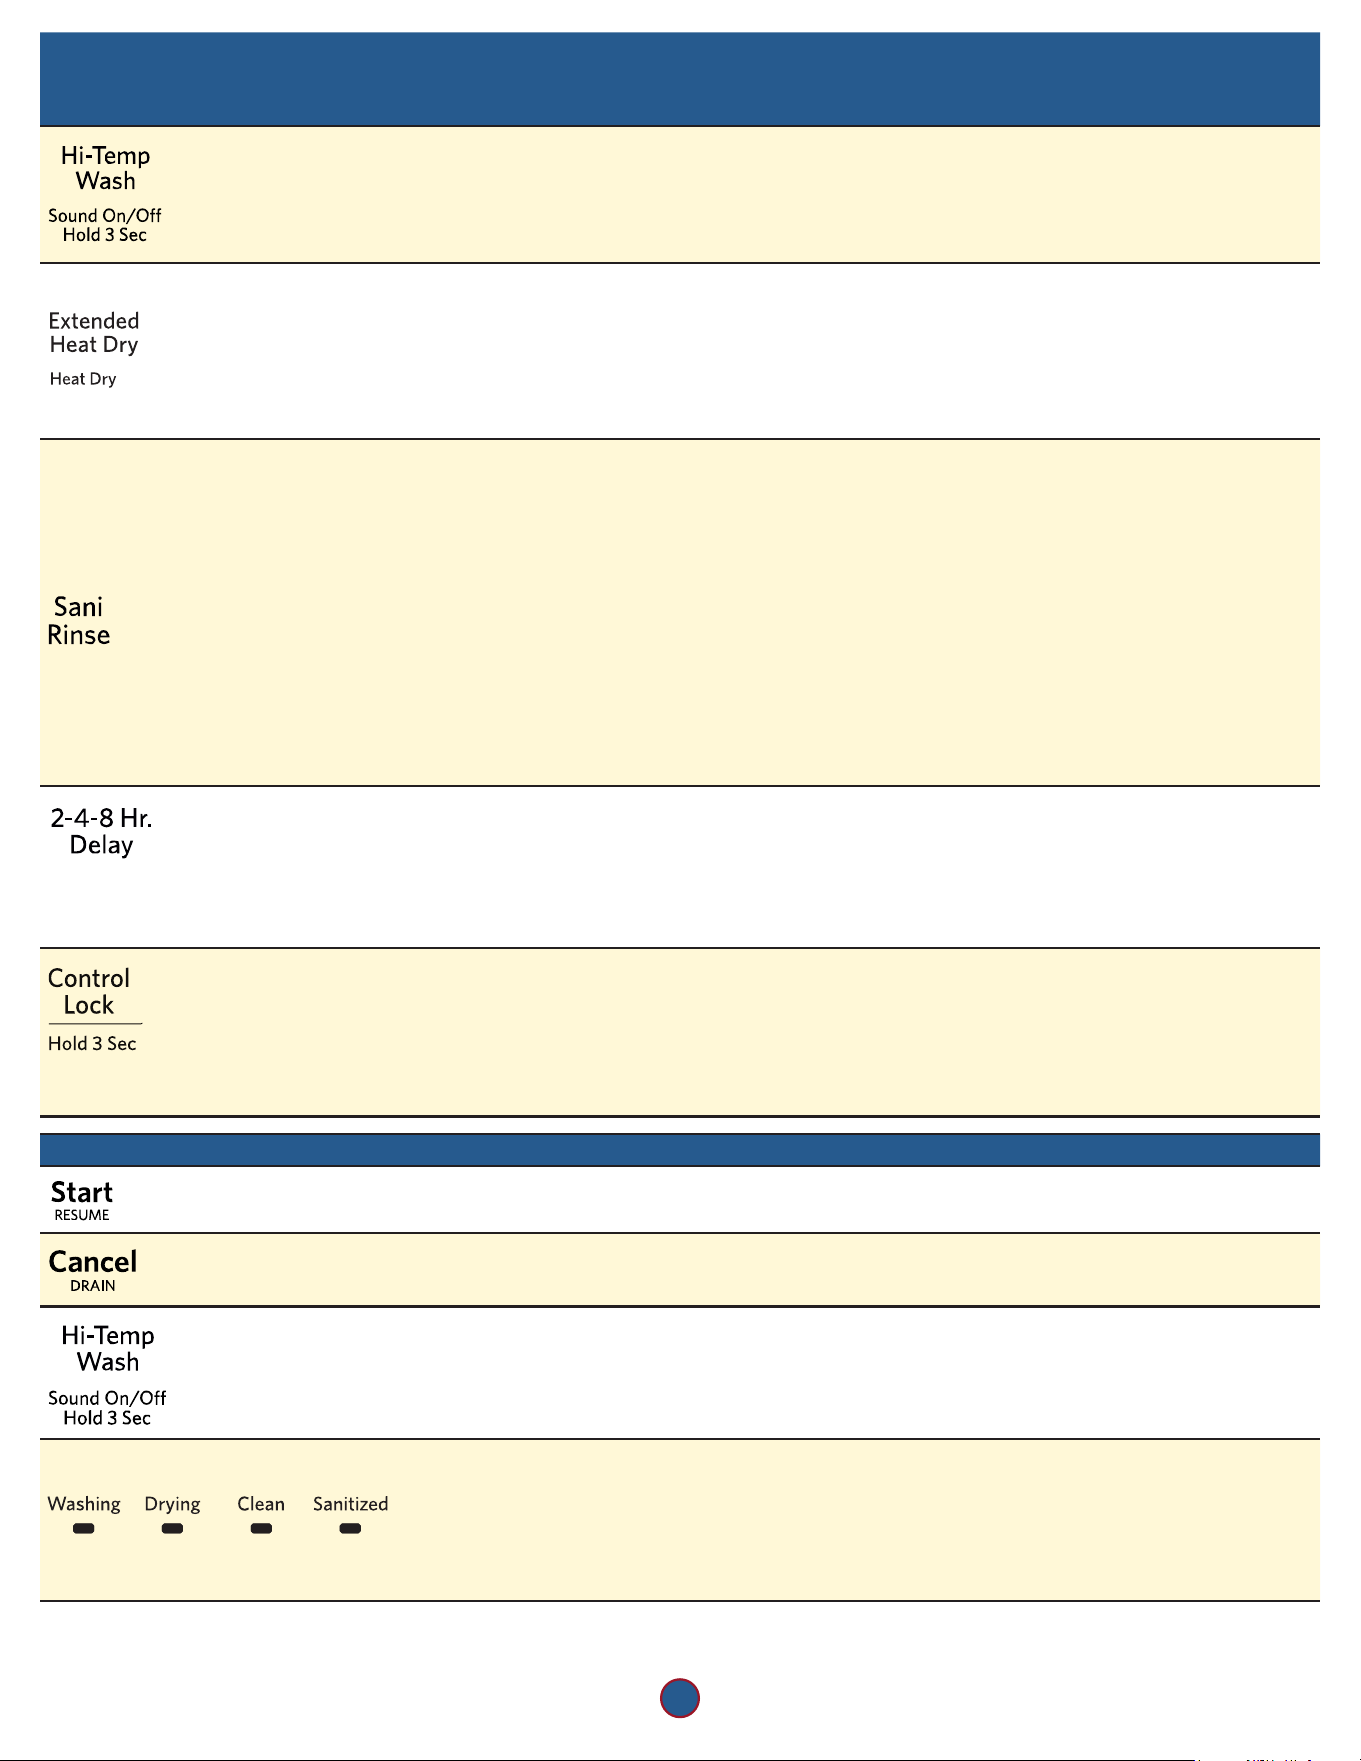
Raises the main wash temperature to improve
cleaning for loads containing tough, baked-on
food.
ProWash™
Normal
Raises the main
wash temperate
up to 135°F (57°C).
0:00 to 0:30 0 to 3.0
(0 to 11.2)
Dries dishes with heat. This option, with the
use of rinse aid, will provide the best drying
performance. Plastic items are less likely to
deform when loaded in the top rack. Turn the
Heat Dry option off for an air dry.
Available
with any
cycle except
Rinse Only
Activates the heating
element at the end of
a wash cycle to speed
drying times. Heat Dry
defaults to On when
any cycle is selected,
except for Express
Wash and Rinse Only.
Heat Dry:
0:10 to 0:50
Extended
Heat Dry
(includes Heat
Dry time):
0:40 to 1:20
0
Sanitizes dishes and glassware in accordance
with NSF International NSF/ANSI Standard 184
for Residential Dishwashers. Certied residential
dishwashers are not intended for licensed food
establishments. Only sanitizing cycles have
been designed to meet the requirements of the
NSF/ANSI 184 performance standard for soil
removal and for sanitization efcacy. There is
no intention, either directly or indirectly, that all
cycles on a NSF/ANSI 184 certied dishwasher
meet the NSF/ANSI 184 performance standard
for soil removal and for sanitization efcacy.
The Sani Rinse indicator glows at the end of the
cycle if the Sani Rinse option was successfully
completed. If the indicator does not activate, it
is probably due to the cycle being interrupted.
ProWash™
Normal
Increases the main
wash temperature from
105°F (41°C) to 140°F
(60°C) and the nal
rinse from 140°F (60°C)
to 155°F (68°C).
0:00 to 2:20 1.2 to 6.2
(4.8 to 23.3)
Runs the dishwasher at a later time or during
off-peak electrical hours. Select a wash cycle
and options. Touch the Delay keypad. Touch
START/RESUME. Close the door rmly.
NOTE: Anytime the door is opened (such as, to
add a dish), the Start/Resume keypad must be
touched again to resume the delay countdown.
Available
with any
cycle
Delays the start
of a cycle to the
specied time.
0
Use the Control Lock option to avoid unintended use of dishwasher between cycles, or cycle and option changes during
a cycle.
To turn on Control Lock, touch and hold CONTROL LOCK for 3 seconds. Control Lock light will stay on for a short time,
indicating that it is activated. When the Lock indicator is lit, all keypad selections are disabled. If you touch any keypad
selection while your dishwasher is locked, the light ashes three times. The dishwasher door can still be opened/closed
while the controls are locked.
To turn off Control Lock, touch and hold CONTROL LOCK for 3 seconds. Control Lock light turns off.
CONTROL PURPOSE COMMENTS
To start or resume
a wash cycle.
If the door is opened during a cycle or the power is interrupted, the Start/Resume
indicator ashes. Cycle will not resume until the door is closed and Start is touched.
To cancel a wash
cycle after it has
been started
Close the door rmly. Touch and hold CANCEL/DRAIN for 3 seconds. The
dishwasher starts a 2-minute drain (if needed). Let dishwasher drain completely.
To turn the
audible tones
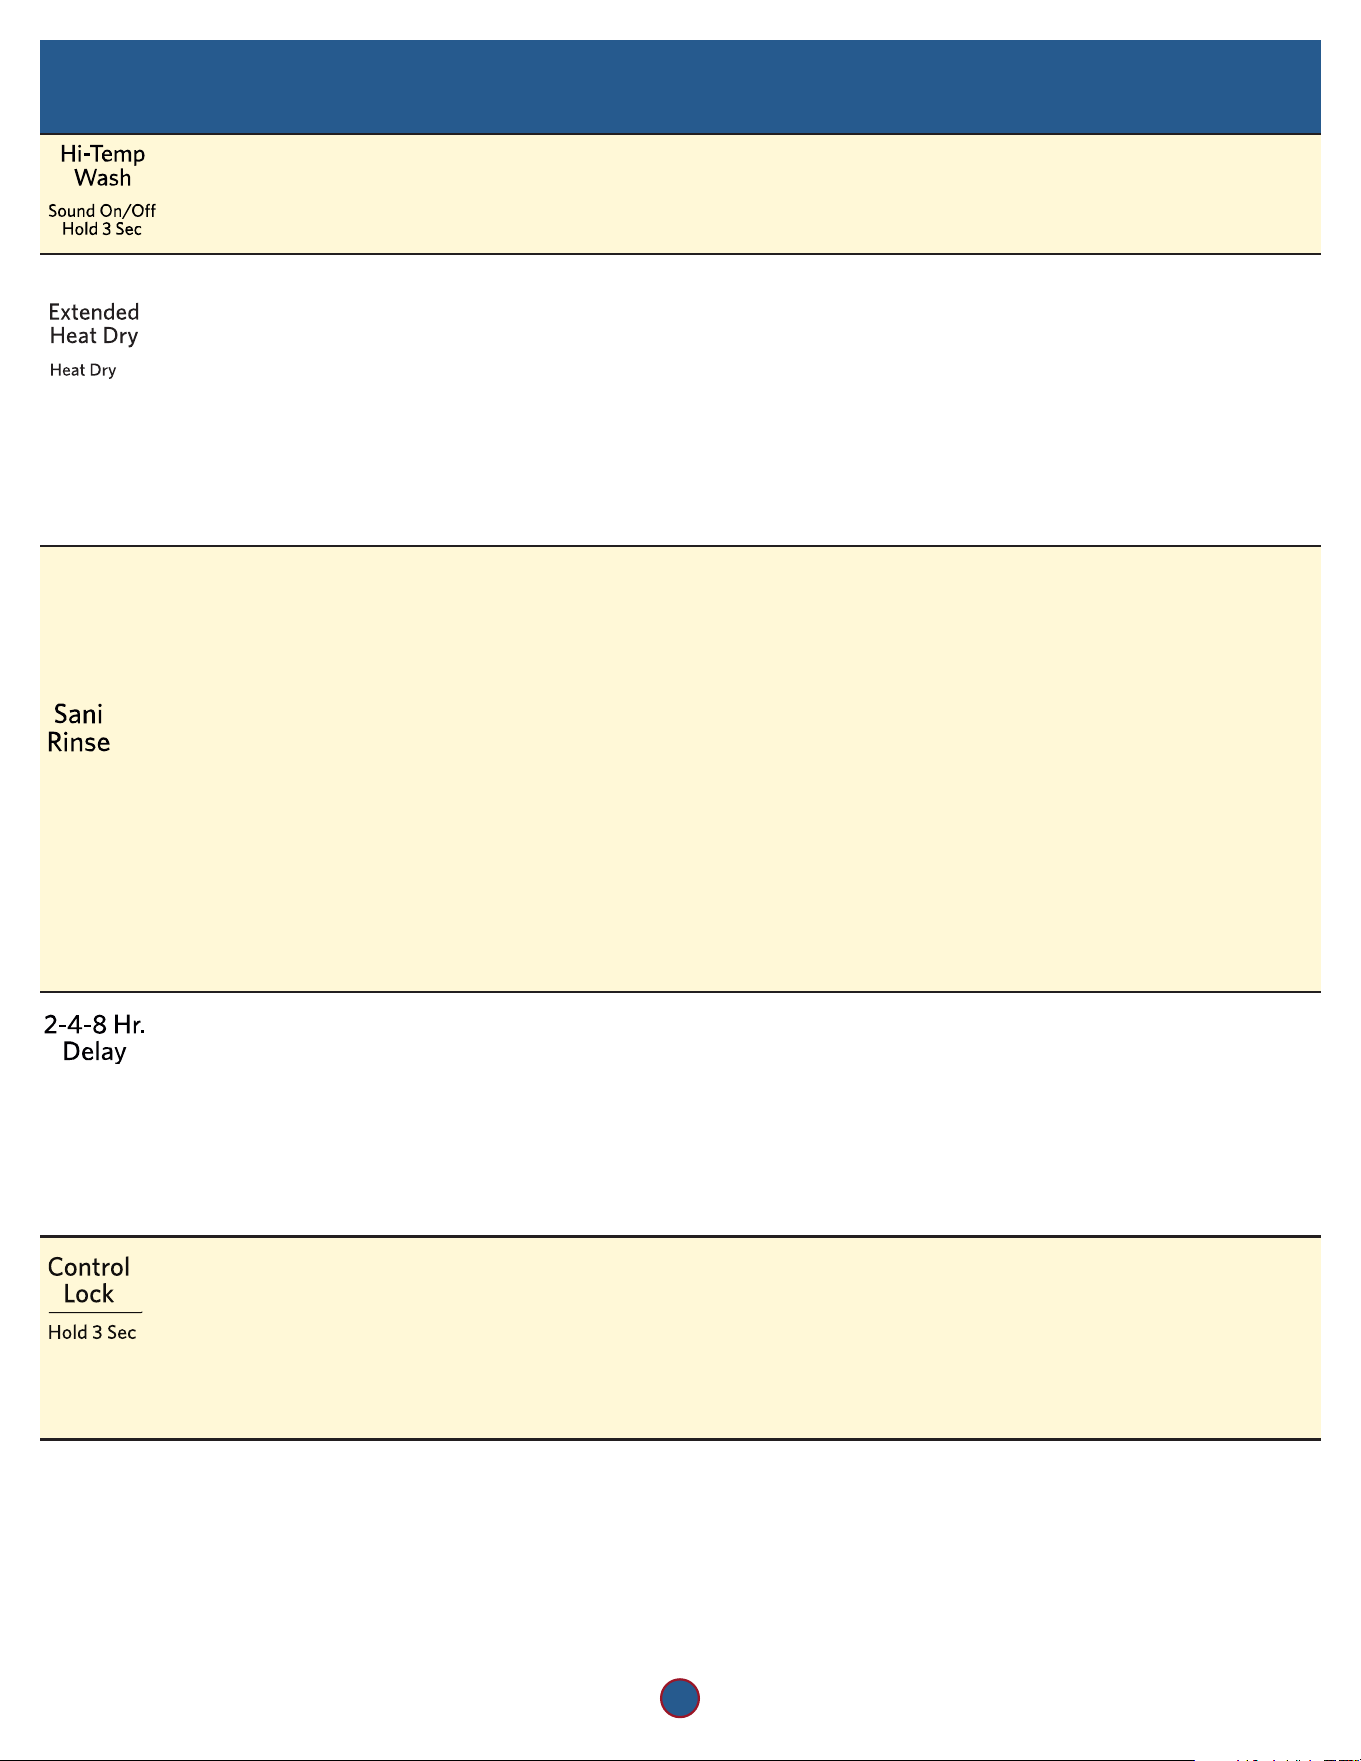
on or off.
Touch and hold HI-TEMP WASH for 3 seconds to turn the audible tones on or
off. Only audible tones for conrming keypad touches can be turned on/off.
Important audible tones, such as indicating a cycle has been interrupted, cannot
be deactivated.
To indicate the
stauts of the
cycle.
The display will indicate cycle progress such as Washing, Drying, Clean, and
Sanitized. The cycle has completed when the Clean light is lit.
If you select the Sani Rinse option, when the cycle is nished, the Sanitized
indicator glows. If the dishwasher did not properly sanitize your dishes, the
Sanitized indicator ashes at the end of the cycle. This can happen if the cycle is
interrupted or if water could not be heated to required temperature. The light goes
off when you open and close door or touch CANCEL.

6
DISHWASHER CARE
Cleaning the Exterior
Clean the exterior of the dishwasher with only a soft, damp cloth,
and mild detergent. If your dishwasher has a stainless steel exterior,
it may have a coating that is resistant to ngerprints. Avoid using
abrasive cleaning products on the exterior of the dishwasher.
Cleaning and Maintaining the Interior
Many detergents may leave white spots or a white residue on
dishware and on the interior of the dishwasher. Over time this residue
can become unsightly and could affect dishwasher performance.
Use of a dishwasher cleaning product, such as affresh
®
Dishwasher
Cleaner, can help to remove the residue. Monthly use of affresh
®
Dishwasher Cleaner is recommended to help maintain the dishwasher.
Follow package directions.
NOTE: KitchenAid recommends the use of high-quality, premeasured
detergent tablets or packs and the use of rinse aid for dishwasher
cleaning and daily care.
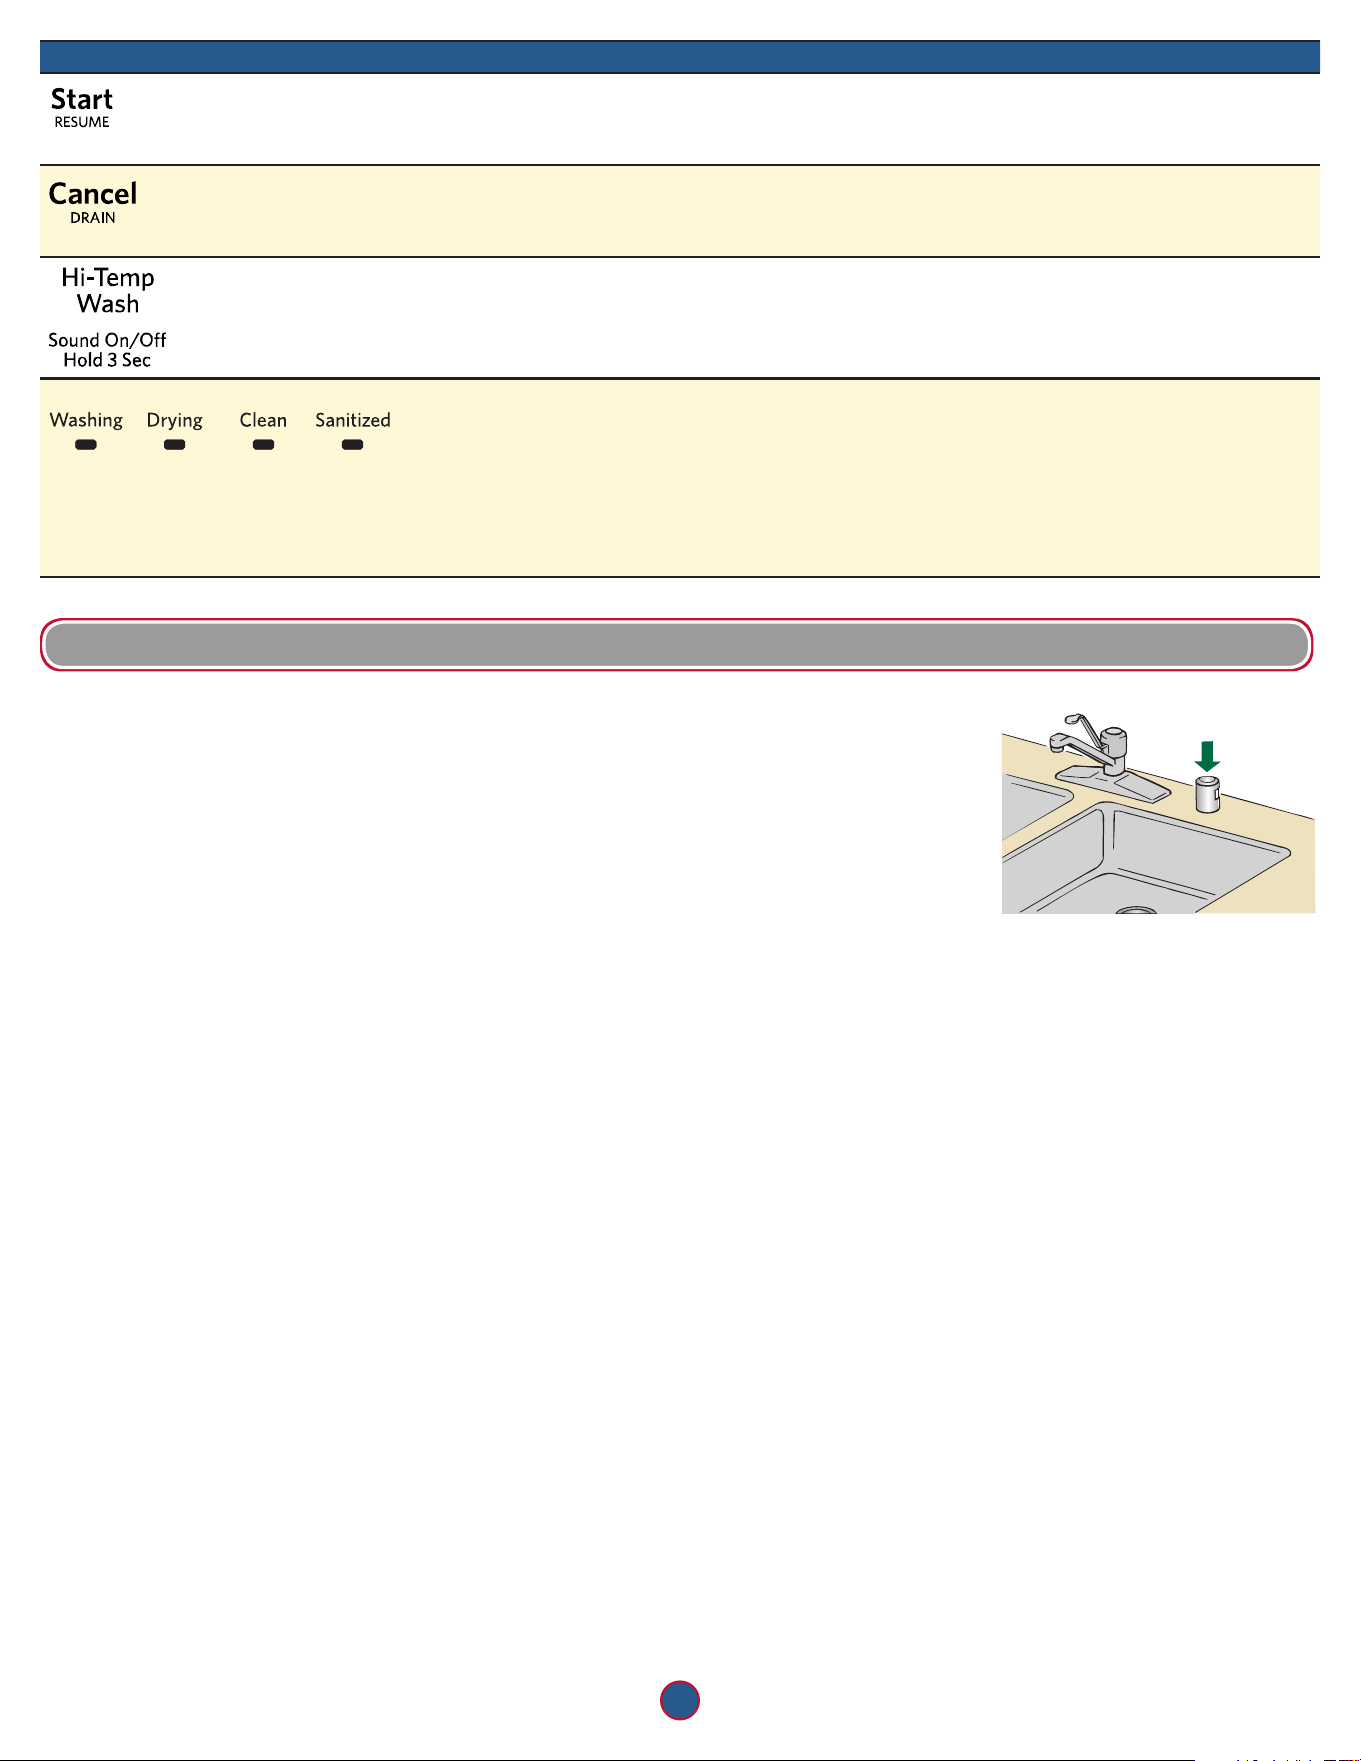
If you have a drain air gap,
check and clean it if the
dishwasher isn’t draining well.
To Reduce Risk of Property
Damage During Vacation or
Extended Time Without Use:
■ When you will not be using
the dishwasher during the
summer months, turn off
the water and power supply
to the dishwasher.
■ Make sure the water supply lines are protected against freezing
conditions. Ice formations in the supply lines can increase water
pressure and cause damage to your dishwasher or home. Damage
from freezing is not covered by the warranty.
■ When storing your dishwasher in the winter, avoid water
damage by having your dishwasher winterized by authorized
service personnel.

7
TROUBLESHOOTING
First try the solutions suggested here. If you need further assistance or more recommendations that may help you to avoid a service call, refer to
the warranty page in this manual or visit producthelp.kitchenaid.com. In Canada, visit kitchenaid.ca. For internet connectivity questions, in the
U.S.A. or Canada, call 1-877-559-2603.
Contact us by mail with any questions or concerns at the address below:
In the U.S.A.:
KitchenAid Brand Home Appliances
Customer eXperience Center
553 Benson Road
Benton Harbor, MI 49022-2692
In Canada:
KitchenAid Brand Home Appliances
Customer eXperience Centre
200 - 6750 Century Ave.
Mississauga, Ontario L5N 0B7
Please include a daytime phone number in your correspondence.
IF YOU EXPERIENCE RECOMMENDED SOLUTIONS
The Clean light
is ashing
Check the following:
■ Was the cycle interrupted? Touch START/RESUME and close the door within 4 seconds.
■ Is the overll protection oat able to move up and down freely? Press down to release.
■ Be sure the water supply is turned on to the dishwasher. (This is very important following the new installation
of your dishwasher.)
■ Check for suds in the dishwasher. For more information on suds, see the “Dishwasher does not clean
completely” section.
Dishes do not
dry completely
NOTE: Plastic and items with nonstick surfaces are difcult to dry because they have a porous surface which
tends to collect water droplets. Towel drying may be necessary.
Use of rinse aid along with the Heat Dry option is needed for proper drying.
Proper loading of items can affect drying.
■ For improved results, place items on the more slanted side of the rack.
Glasses and cups with concave bottoms hold water. This water may spill onto other items when you are
unloading the dishwasher.
■ Unload the bottom rack rst.
Spotting/Filming NOTES:
■ Liquid rinse aid is necessary for drying and to reduce spotting.
■ Use the correct amount of detergent. If using powder or liquid/gel products, use package instructions.
Conrm that the cloudiness is removable by soaking the item in white vinegar for 5 minutes. If the cloudiness
disappears, it is due to hard water. Adjust the amount of detergent and rinse aid. See the “Dishwasher Care”
section. If it does not come clear, it is due to etching.
Be sure the incoming water temperature is set at 120°F (49°C).
Try using the Hi-Temp Wash or Sani Rinse option.
To remove spotting, see the “Dishwasher Care” section.
Dishwasher does not
clean completely
Be sure the dishwasher is loaded correctly. Improper loading can greatly decrease the washing performance.
See the “Operating Your Dishwasher” section.
Check lter to ensure it is properly installed. Ensure the water intake screen on the oor of the dishwasher is not
plugged with food or debris. Clean if required.
Select the proper cycle for the type of soils. The ProWash™ cycle can be used for tougher loads.
Be sure the incoming water temperature is at least 120°F (49°C).
Use the proper amount of fresh detergent. More detergent is needed for heavier-soiled loads and hard
water conditions.
Scrape food from dishes prior to loading (do not prerinse).
If foam or suds are detected by the dishwasher sensing system, the dishwasher may not operate properly
or may not ll with water.
Suds can come from:
■ Using the incorrect type of detergent, such laundry detergent, hand soap, or dish detergent for hand-washing
dishes.
■ Not replacing the rinse aid dispenser cap after lling (or relling) the rinse aid dispenser.
■ Using an excessive amount of dishwasher detergent.

03/17
IF YOU NEED SERVICE:
1. Before contacting us to arrange service, please determine whether your product requires repair. Some questions can be addressed without
service. Please take a few minutes to review the Troubleshooting section of the Use and Care Guide or visit producthelp.kitchenaid.com.
2. All warranty service is provided exclusively by our authorized KitchenAid Service Providers. In the U.S. and Canada, direct all requests for
warranty service to:
KitchenAid Customer eXperience Center
In the U.S.A., call 1-800-422-1230. In Canada, call 1-800-807-6777.
If outside the 50 United States or Canada, contact your authorized KitchenAid dealer to determine whether another warranty applies.
KITCHENAID
®
DISHWASHER
LIMITED WARRANTY
ATTACH YOUR RECEIPT HERE. PROOF OF PURCHASE IS REQUIRED
TO OBTAIN WARRANTY SERVICE.
Please have the following information available when you call the
Customer eXperience Center:
■ Name, address, and telephone number
■ Model number and serial number
■ A clear, detailed description of the problem
■ Proof of purchase, including dealer or retailer name and address
LIFETIME LIMITED WARRANTY
WHAT IS COVERED WHAT IS NOT COVERED
FIRST YEAR LIMITED WARRANTY (PARTS AND LABOR)
For one year from the date of purchase, when this major appliance is
installed, operated, and maintained according to instructions attached to
or furnished with the product, KitchenAid brand of Whirlpool Corporation
or Whirlpool Canada LP (hereafter “KitchenAid”) will pay for factory
specified replacement parts and repair labor to correct defects in materials
or workmanship that existed when this major appliance was purchased
or, at its sole discretion, replace the product. In the event of product
replacement, your appliance will be warranted for the remaining term of
the original unit’s warranty period.
SECOND THROUGH FIFTH YEAR LIMITED WARRANTY
(CERTAIN COMPONENT PARTS ONLY – LABOR NOT INCLUDED)
In the second through fifth years from the date of original purchase, when
this major appliance is installed, operated, and maintained according to
instructions attached to or furnished with the product, KitchenAid will pay
for factory specified replacement parts for the following components to
correct non-cosmetic defects in materials or workmanship in these parts
that prevent function of this major appliance and that existed when this
major appliance was purchased. This is a limited five year warranty on the
below named parts only and does not include repair labor.
■ Nylon dish racks ■ Electronic controls
LIFETIME LIMITED WARRANTY (STAINLESS STEEL TUB
AND INNER DOOR LINER ONLY)
For the lifetime of the product from the date of original purchase, when
this major appliance is installed, operated, and maintained according to
instructions attached to or furnished with the product, KitchenAid will pay
for factory specified replacement parts and repair labor for the following
components to correct non-cosmetic defects in materials or workmanship
that existed when this major appliance was purchased:
■ Stainless steel tub ■ Inner door liner
YOUR SOLE AND EXCLUSIVE REMEDY UNDER THIS LIMITED
WARRANTY SHALL BE PRODUCT REPAIR AS PROVIDED HEREIN.
Service must be provided by a KitchenAid designated service company.
This limited warranty is valid only in the United States or Canada and
applies only when the major appliance is used in the country in which it
was purchased. This limited warranty is effective from the date of original
consumer purchase. Proof of original purchase date is required to obtain
service under this limited warranty.
1. Commercial, non-residential, multiple-family use, or use inconsistent
with published user, operator, or installation instructions.
2. In-home instruction on how to use your product.
3. Service to correct improper product maintenance or installation,
installation not in accordance with electrical or plumbing codes, or
correction of household electrical or plumbing (e.g., house wiring,
fuses, or water inlet hoses).
4. Consumable parts (e.g., light bulbs, batteries, air or water filters,
preservation solutions).
5. Defects or damage caused by the use of non-genuine KitchenAid
parts or accessories.
6. Damage from accident, misuse, abuse, fire, floods, acts of God,
or use with products not approved by KItchenAid.
7. Repairs to parts or systems to correct product damage or defects
caused by unauthorized service, alteration, or modification of the
appliance.
8. Cosmetic damage including scratches, dents, chips, and other
damage to the appliance finishes, unless such damage results
from defects in materials and workmanship and is reported to
KitchenAid within 30 days.
9. Discoloration, rust, or oxidation of surfaces resulting from caustic
or corrosive environments including, but not limited to, high salt
concentrations, high moisture or humidity, or exposure to chemicals.
10. Pickup or delivery. This product is intended for in-home repair.
11. Travel or transportation expenses for service in remote locations
where an authorized KitchenAid servicer is not available.
12. Removal or reinstallation of inaccessible appliances or built-in
fixtures (e.g., trim, decorative panels, flooring, cabinetry, islands,
countertops, drywall) that interfere with servicing, removal,
or replacement of the product.
13. Service or parts for appliances with original model/serial numbers
removed, altered, or not easily determined.
The cost of repair or replacement under these excluded
circumstances shall be borne by the customer.
DISCLAIMER OF IMPLIED WARRANTIES
IMPLIED WARRANTIES, INCLUDING ANY IMPLIED WARRANTY OF MERCHANTABILITY OR IMPLIED WARRANTY OF FITNESS FOR A
PARTICULAR PURPOSE, ARE LIMITED TO FIVE YEARS OR THE SHORTEST PERIOD ALLOWED BY LAW. Some states and provinces do not allow
limitations on the duration of implied warranties of merchantability or fitness, so this limitation may not apply to you. This warranty gives you specific
legal rights, and you also may have other rights that vary from state to state or province to province.
DISCLAIMER OF REPRESENTATIONS OUTSIDE OF WARRANTY
KitchenAid makes no representations about the quality, durability, or need for service or repair of this major appliance other than the representations
contained in this warranty. If you want a longer or more comprehensive warranty than the limited warranty that comes with this major appliance, you
should ask KitchenAid or your retailer about buying an extended warranty.
LIMITATION OF REMEDIES: EXCLUSION OF INCIDENTAL AND CONSEQUENTIAL DAMAGES
YOUR SOLE AND EXCLUSIVE REMEDY UNDER THIS LIMITED WARRANTY SHALL BE PRODUCT REPAIR AS PROVIDED HEREIN. KITCHENAID
SHALL NOT BE LIABLE FOR INCIDENTAL OR CONSEQUENTIAL DAMAGES. Some states and provinces do not allow the exclusion or limitation of
incidental or consequential damages, so these limitations and exclusions may not apply to you. This warranty gives you specific legal rights, and you
also may have other rights that vary from state to state or province to province.
W11133227C
®
/™ ©2019. Used under license in Canada. All rights reserved.
07/19
Guide d'utilisation
Lave-vaisselle
EN SAVOIR PLUS
An de conserver les ressources naturelles, ce lave-vaisselle comprend un guide d’utilisation rapide. Les instructions d’utilisation complètes
peuvent être téléchargées auwww.kitchenaid.com/customer-service/manuals.
Pour référence ultérieure, consignez par écrit les numéros de modèle et de série de votre produit. Ceux-ci se trouvent sur l'étiquette de la
cuve, sur la paroi externe gauche.
Numéro de modèle________________________________ Numéro de série______________________________________
Enregistrez le lave-vaisselle sur www.kitchenaid.com. Au Canada, enregistrez votre lave-vaisselle sur www.kitchenaid.ca.
Para una version de estas instrucciones en español, visite www.kitchenaid.com.
Risque possible de décès ou de blessure grave si vous ne suivez pas
immédiatement les instructions.
Risque possible de décès ou de blessure grave si vous ne suivez pas
les instructions.
Tous les messages de sécurité vous diront quel est le danger potentiel et vous disent comment réduire le risque de blessure et ce qui peut
se produire en cas de non-respect des instructions.
Votre sécurité et celle des autres est très importante.
Nous donnons de nombreux messages de sécurité importants dans ce manuel et sur votre appareil ménager. Assurez-vous de
toujours lire tous les messages de sécurité et de vous y conformer.
AVERTISSEMENT
DANGER
IMPORTANTES INSTRUCTIONS DE SÉCURITÉ
AVERTISSEMENT : Lors de l’utilisation du lave-vaisselle, suivre les précautions élémentaires dont les suivantes :
CONSERVEZ CES INSTRUCTIONS
■
Lire la totalité des instructions avant d’utiliser le
lave-vaisselle.
■ N’utiliser le lave-vaisselle que pour laver la vaisselle.
■
Utiliser les détersifs ou agents de rinçage recommandés pour
lave-vaisselle et les garder hors de la portée des enfants.
■ Lorsque vous chargez le lave-vaisselle :
1) Placer les objets coupants de façon qu’ils ne puissent
endommager le joint de la porte; et
2) Placer les couteaux le manche vers le haut de façon à ne
pas vous couper.
■ Ne pas laver d’articles en plastique à moins qu’ils ne soient
marqués “Peut aller au lave-vaisselle” ou l’équivalent. Si
l’article ne porte aucune indication, vérifier auprès du
fabricant.
■ Ne pas toucher l’élément chauffant pendant le
fonctionnement ou immédiatement après.
■ Ne pas faire fonctionner le lave-vaisselle si tous les panneaux de
l’enceinte ne sont pas en place.
■
Ne pas jouer avec les commandes.
■
Ne pas abuser, vous asseoir ni monter sur la porte,
le couvercle ou les paniers du lave-vaisselle.
■ Pour éviter tout risque d’accident, ne pas laisser les enfants jouer
dans ou sur le lave-vaisselle.
■ Sous certaines conditions, de l’hydrogène peut se former dans un
réseau d’eau chaude inutilisé depuis deux semaines ou plus.
L’HYDROGÈNE EST UN GAZ EXPLOSIBLE. Si le système d’eau
chaude n’a pas été utilisé depuis un certain temps, laisser couler
l’eau chaude des robinets pendant quelques minutes avant de
faire fonctionner le lave-vaisselle. Cette mesure permettra à
l’hydrogène de s’évaporer. Ce gaz étant inflammable, ne pas
fumer ni utiliser de flamme nue pendant cette période.
■ Enlever la porte ou le couvercle du compartiment de lavage
lorsque vous remplacez ou mettez au rebut un vieux
lave-vaisselle.
W11133227C
1
2
CONSEILS ÉLÉMENTAIRES D’UTILISATION
Système de filtration et entretien
Ce lave-vaisselle est équipé de la plus récente
technologie en matière de ltration.
Ce système de ltration minimise le
niveau sonore et optimise la
consommation d'eau et d'énergie tout
en offrant une performance de
nettoyage supérieure.
Le système de ltration comporte
deux parties, un ltre supérieur et
un ltre inférieur.
IMPORTANT: An d'éviter d'endommager le lave-vaisselle, ne pas le
faire fonctionner sans que les ltres ne soient correctement installés.
S'assurer que le ltre inférieur est bien en place et que le ltre supérieur
est bien emboîté. Si le ltre supérieur tourne librement, cela signie
qu'il n'est pas bien emboîté.
Les ltres devront peut-être être nettoyés lorsque :
■ On remarque des objets ou saletés sur
le ltre supérieur.
■ Les plats sont rugueux au toucher.
Voir la section “Système de ltration” dans les
instructions d'utilisation complètes en ligne pour
savoir comment éliminer totalement ces saletés
ou connaître la fréquence de nettoyage à adopter.
IMPORTANT: Ne pas utiliser de brosse
métallique, de tampon à récurer, ou d'objets
similaires car ils peuvent endommager les ltres.
Rincer le ltre sous l'eau courante jusqu'à ce que
les saletés soient éliminées. Si l'on remarque la
présence de saletés ou de dépôts de calcaire
causés par l'eau dure difciles à éliminer, l'emploi
d'une brosse douce sera peut-être nécessaire.
P
U
S
H
D
O
W
N
&
T
U
R
N
L
O
C
K
U
N
L
O
C
K
Séchage : l’agent de rinçage est essentiel
Il faut utiliser un agent de séchage
(tel un agent de rinçage) pour
obtenir un bon séchage. Un agent
de rinçage combiné à l'option
Heat Dry (séchage avec chaleur),
Extended Heat Dry (séchage
prolongé) offrira une performance
de séchage idéale et permettra
d'éviter une humidité excessive à
l'intérieur du lave-vaisselle.
SLIDE
Économies d’énergie
Pour réaliser des économies d’énergie, la durée du programme
est prolongée, et la puissance et le volume d’eau utilisés par
le programme du lave-vaisselle sont réduits. Les périodes de
trempage et de pause prolongent la durée des programmes
pour un nettoyage exceptionnel.
Les lave-vaisselle éconergiques fonctionnent plus longtemps pour
économiser de l’eau et de l’énergie, tout comme une vitesse de
conduite réduite permet d’économiser du carburant. Le calibrage du
capteur optique entraînera l'allongement du premier programme utilisé.
Réglages du panier supérieur de luxe
Il est possible d’élever ou d’abaisser le panier supérieur pour charger
de grands articles dans le panier supérieur ou inférieur. Des régleurs
sont situés de chaque côté du panier supérieur.
Pour lever le panier:
Appuyer sur les deux régleurs
du panier et soulever le panier
jusqu’à ce qu’il soit en position
haute et d’aplomb.
Pour abaisser le panier:
Appuyer sur les deux régleurs
du panier et faire glisser le panier
jusqu’à sa position basse et
d’aplomb.
REMARQUE: Le panier
supérieur doit être de niveau.
Appuyer sur la touche START/RESUME
(mise en marche/reprise) chaque fois que
l'on ajoute un plat.
IMPORTANT: Si l'on ouvre la porte par exemple pour
ajouter un plat (même pendant le fonctionnement de
l'option Delay [mise en marche différée]), il faut appuyer
chaque fois sur Start/Resume (mise en marche/reprise) pour
poursuivre le programme.
Bien fermer la porte dans un délai de 4 secondes après avoir appuyé
sur Start/Resume (mise en marche/reprise). Si l’on ne ferme pas la
porte dans les 4secondes qui suivent, le témoin de la touche Start
clignote, un signal sonore retentit et le programme ne démarre pas.
Filtre
supérieur
Filtre inférieur
Risque de basculement
Ne pas utiliser le lave-vaisselle jusqu’à ce qu’il soit complètement installé.
Ne pas appuyer sur la porte ouverte.
Le non-respect de ces instructions peut causer des blessures graves ou des coupures.
AVERTISSEMENT
■
Pour un lave-vaisselle relié à la terre, branché
avec un cordon :
Le lave-vaisselle doit être relié à la terre. En cas d'un
mauvais fonctionnement ou d'une panne, la mise à
terre réduira le risque d'un choc électrique en
fournissant le moins de résistance pour le courant
électrique. Le lave-vaisselle est équipé d'un cordon
avec un conducteur pour relier les appareils à la
terre. La fiche doit être branchée sur une prise
appropriée, installée et reliée à la terre conformément
aux codes et règlements locaux.
AVERTISSEMENT : La connexion incorrecte du conducteur
pour relier les appareils à la terre peut causer le risque de choc
électrique. Vérifier avec un électricien compétent ou un représentant
de service si vous avez des doutes si le lave-vaisselle est
correctement relié à la terre. Ne pas modifier la fiche fournie avec le
lave-vaisselle; si elle n'entre pas dans la prise, faire installer une prise
appropriée par un électricien compétent.
■
Pour un lave-vaisselle branché en permanence :
Le lave-vaisselle doit être branché à un système d'installation
électrique permanent en métal relié à la terre, ou un conducteur pour
relier les appareils à la terre doit être relié avec les conducteurs du
circuit et branché à une borne pour relier les appareils à la terre ou au
cordon d'alimentation électrique avec le lave-vaisselle.
INSTRUCTIONS DE MISE À LA TERRE
CONSERVEZ CES INSTRUCTIONS
3
UTILISATION DU LAVE-VAISSELLE
1. Préparation et chargement du lave-vaisselle
Disposition pour 10 couverts –
panier supérieur
Disposition pour 10 couverts –
panier inférieur
Disposition pour 12 couverts –
panier supérieur
Disposition pour 12 couverts –
panier inférieur
IMPORTANT: Enlever les restes alimentaires, os, cure-dents et autres
articles durs de la vaisselle. Enlever les étiquettes des récipients avant
de les laver.
■ Vérier qu’aucun article ne bloque le distributeur de détergent
lorsque la porte du lave-vaisselle est fermée.
■ Charger les articles dans le panier en orientant la surface sale vers
le bas et vers l'intérieur (e bras d'aspersion), tel qu’indiqué dans les
illustrations ci-dessus. Ceci améliorera les résultats de nettoyage
et de séchage. Orienter les surfaces de vaisselle les plus sales vers
le bas et laisser sufsamment d'espace entre les articles pour que
l'eau puisse circuler entre chaque panier et entre les articles de
vaisselle.
■ Éviter le chevauchement d’articles tels que bols ou assiettes
pouvant retenir les aliments.
■ Placer les articles de plastique, les petites assiettes et les verres
dans le panier supérieur.
■ Laver uniquement les articles expressément “lavables au
lave-vaisselle”.
■ Pour éviter les bruits de choc et d’entrechoque durant le
fonctionnement, charger les articles de manière à ce qu’ils ne se
touchent pas. S'assurer que les articles légers sont bien retenus
dans les paniers.
■ Utiliser les fentes des couvercles et les suggestions de chargement
pour séparer les couverts et obtenir un lavage optimal.
■ Si vos couverts ne conviennent pas aux
encoches prévues, relever et retirer les
couvercles, et mélanger les types de
couverts
pour les tenir séparésles uns des autres.
■ Lors du chargement des couverts,
toujours charger les articles acérés
pointés vers le bas et éviter d’imbriquer
les articles (voir l’illustration).
2. Vérifier que les bras d'aspersion tournent
librement
Les articles du panier peuvent
entraver les bras d’aspersion.
3. Ajouter le détergent
Détergents pré-mesurés
Pour de meilleurs résultats, utiliser des
pastilles et des sachets pré-mesurés de
qualité supérieure.
Il est prouvé que les pastilles ou sachets
de qualité réduisent plus efcacement
la formation de pellicule sur la vaisselle
que les détergents liquides, en poudre
ou en gel. Grâce à l’utilisation régulière
de pastilles et sachets, la pellicule
blanche commencera à diminuer ou à
disparaître. Ces formats conviennent
parfaitement, peu importe la dureté de
l’eau et le niveau de saleté. L’utilisation
d’un agent de rinçage peut aussi contribuer à réduire la formation de
pellicule blanche (les pastilles et sachets ne contiennent pas tous un
agent de rinçage). Toujours placer les détergents pré-mesurés dans le
compartiment principal et fermer le couvercle.
REMARQUE: Lors de l’utilisation d’un autre type de détergent,
procéder conformément aux instructions indiquées sur l’emballage.
Consulter les instructions d’utilisation complètes pour obtenir plus
de renseignements sur les poudres, liquides et gels.
■ Utiliser uniquement du détergent pour lave-vaisselle automatique.
Verser le détergent juste avant de démarrer un programme.
■ Pour de meilleurs résultats de lavage, il est recommandé d’utiliser
un détergent à lave-vaisselle automatique frais. Conserver le
récipient du détergent bien fermé dans un lieu sec et frais.
Fermeture du couvercle Ouverture du couvercle
SLIDE
SLIDE
Verser le détergent sélectionné
dans le distributeur. Placer
votre doigt, comme illustré, et
faire glisser le couvercle pour
le fermer. Appuyer fermement
jusqu’à ce qu’un déclic se fasse
entendre.
Appuyer sur OPEN (ouverture),
comme illustré, pour ouvrir le
couvercle.
4. Ajout d’agent de rinçage
■ Ce lave-vaisselle est conçu pour utiliser un agent de rinçage
an d’obtenir un séchage satisfaisant. Sans agent de rinçage,
la vaisselle et l'intérieur du lave-vaisselle seront trop humides.
Les options de chaleur et de séchage ne fonctionneront pas de
manière optimale sans agent de rinçage.
■ Un agent de rinçage empêche l’eau de former des gouttelettes qui
peuvent laisser des taches ou des coulées en séchant. Il améliore
également le séchage en permettant à l’eau de s’écouler de la
vaisselle après le rinçage nal. L’agent de rinçage ne colle pas
aux articles de vaisselle, et lorsqu’utilisé, il est distribué pendant
chaque programme.
SLIDE
4
■ Pour ajouter de l'agent de rinçage, ouvrir le distributeur en
appuyant doucement sur le centre du couvercle avec le pouce, et
en soulevant sur le bord.
Pre Wash
OPEN
SLIDE
■ Verser l'agent de rinçage dans l'ouverture jusqu'à ce que
l'indicateur signale que le distributeur est plein
SLIDE
■ Fermer le distributeur en appuyant doucement sur le couvercle.
REMARQUE: Pour la plupart des types d’eau, le réglage effectué
à l’usine donne de bons résultats.
Si la performance de séchage est mauvaise, essayer
un réglage plus élevé. Tourner le régleur à èche sur
le chiffre plus élevé suivant pour ajouter davantage
d’agent de rinçage.
5. Sélectionner un programme
Les lave-vaisselle éconergiques fonctionnent plus longtemps pour
économiser de l’eau et de l’énergie, tout comme une vitesse de
conduite réduite permet d’économiser du carburant. La durée
normale d'un programme est d'environ 2
1
/
2
heures, mais ce temps
peut varier en fonction des sélections effectuées. Bien fermer la
porte et appuyer sur START (mise en marche) pour répéter le même
programme et les options comme au programme de lavage précédent
ou sélectionner un autre programme approprié pour la charge de
vaisselle. Voir le guide des programmes.
6. Sélection des options
Il est possible de personnaliser les programmes en sélectionnant
les options désirées. Voir le guide des programmes. En cas de
changement d’idée, appuyer de nouveau sur la touche Option
pour l’annuler. Toutes les options ne sont pas disponibles sur tous
les programmes. Si l’on sélectionne une option invalide pour un
programme donné, les témoins clignotent. Ajouter des options peut
faire augmenter la durée d’un programme.
7. Démarrer ou reprendre un programme
REMARQUE: Au besoin, laisser couler l’eau du robinet le plus
proche du lave-vaisselle jusqu’à ce qu’elle soit chaude. Fermer le
robinet. Avec la porte bien fermée, appuyer sur START (mise en
marche).
IMPORTANT: Si la porte est ouverte pour plus de quelques
secondes après la mise en marche du programme (même pendant
le délai de mise en marche différée), il faudra appuyer sur le bouton
Start (mise en marche) à nouveau après que la porte est fermée. Si
l’on n’appuie pas sur la touche Start (mise en marche), le témoin de
la touche Start clignote, un signal sonore retentit et le programme ne
démarre pas.
8. Suivi de l’avancement d’un programme
du lave-vaisselle
L’afchage indique la progression du programme: lavage, séchage,
propre, assaini. Le programme est terminé lorsque le témoin de
vaisselle propre est allumé. Se référer au tableau des commandes
dans la section Guide des programmes pour le fonctionnement du
témoin Sanitized (assainissement).
GUIDE DES PROGRAMMES
IMPORTANT: Le détecteur incorporé au lave-vaisselle contrôle le degré de saleté. La durée du programme et/ou la consommation d'eau
peuvent varier selon les ajustements effectués au programme par le détecteur, an d'assurer une performance de lavage optimale. Si la
température de l'eau d'arrivée est inférieure à celle recommandée ou que la vaisselle est très sale, le programme compense automatiquement
en allongeant la durée du programme et en augmentant la quantité d'eau et le niveau de chaleur, au besoin.
PROGRAMMES TEMPS DE
LAVAGE
APPROX.*
SANS
OPTIONS
(HR:MIN)
CONSOMMATION
D’EAU EN GALLONS
(LITRES)
Ce programme détecte la taille de la charge, la quantité et le degré de saleté pour
adapter le programme à ces paramètres et garantir un nettoyage amélioré en utilisant
uniquement la quantité d’eau et d’énergie nécessaire. Le programme ProWash™ est
automatiquement sélectionné lorsqu’on appuie d’abord sur Start (mise en marche).
Comprend une option de séchage avec chaleur.*
02:10 à 03:15 3,38 à 7,4
(12,8 à 28,0)
Utiliser ce programme pour les casseroles, les poêles, les cocottes et la vaisselle
ordinaire difciles à nettoyer et très sales.
Comprend une option de séchage avec chaleur.
02:45 à 03:25 7,4 (28,0)
Ce programme est recommandé lors d’une utilisation quotidienne ou régulière pour
laver et sécher une pleine charge de vaisselle normalement sale. La certication
énergétique gouvernementale de ce lave-vaisselle est basé sur le programme normal
avec seulement l’option Heat Dry (séchage avec chaleur).**
02:00 à 03:10 2,4 à 7,4
(9,09 à 28,0)
Pour des résultats rapides, Express Wash (lavage rapide) nettoie la vaisselle en utilisant
légèrement plus d'eau et d'énergie. Pour un meilleur séchage, sélectionner une option
de séchage avec chaleur.
REMARQUE: Certains détergents ne sont pas recommandés pour les programmes
de lavage courts, se reporter à l’emballage du détergent pour plus de renseignements.
Comprend une option de séchage avec chaleur.
00:55 à 01:05 7,87 (29,8)
Utiliser ce programme pour rincer la vaisselle, les verres et les couverts qui ne seront
pas lavés immédiatement. Ne pas utiliser de détergent.
0:18 2,0 (7,5)
* La certication énergétique gouvernementale est basée sur ce programme. Consulter la description du programme normal pour utiliser la certication énergétique gouvernementale.
Utiliser le programme ProWash™ peut augmenter la consommation d’énergie.
**Aucune autre option de température de lavage et de séchage n’a été sélectionnée, et les évaluations n’ont pas été tronquées. Aucun agent de rinçage n’a été utilisé et aucun détergent
pendant le prélavage.
5
OPTIONS
PEUT ÊTRE
SÉLECTIONNÉ
AVEC
DESCRIPTION
TEMPS
AJOUTÉ AU
PROGRAMME
(HR:MIN)
GALLONS D’EAU
SUPPLÉMENTAIRES
(LITRES)
Augmente la température principale de lavage
pour améliorer le nettoyage des charges
comportant des résidus difciles à nettoyer,
ayant adhéré pendant la cuisson.
ProWash™
Normal
Augmente la
température du
lavage principal
en la portant à
135°F (57°C).
0:00 à 0:30 0 à 3,0
(0 à 11,2)
Sèche la vaisselle à l’air chaud. Cette option,
associée à un agent de rinçage, offrira la
meilleure performance de séchage. Les articles
en plastique sont moins susceptibles de se
déformer si on les place dans le panier à
vaisselle supérieur. Pour faire sécher les articles
à l’air, désactiver l'option Heat Dry (séchage
avec chaleur).
Disponible
pour tous les
programmes,
sauf Rinse
Only (rinçage
uniquement)
Active l’élément de
chauffage à la n d’un
programme de lavage
pour réduire les temps
de séchage. L’option
Heat Dry (séchage
avec chaleur) est
activée par défaut
lorsqu’un programme
est sélectionné
(n’importe quel
programme sauf 1
Hour Wash [lavage en
1 heure]).
Heat Dry
(séchage avec
chaleur) :
0:10 à 0:50
Extended
Heat Dry
(inclus le
temps de Heat
Dry) :
00:40 à 01:20
0
Assainit la vaisselle et la verrerie conformément
à la norme internationaleNSF/ANSI184 pour
lave-vaisselle à usage domestique. Les
lave-vaisselle à usage domestique certiés
ne sont pas destinés aux établissements de
restauration agréés. Seuls les programmes
d’assainissement ont été conçus pour répondre
aux exigences de la norme NSF/ANSI184
pour l’élimination de la saleté et l’efcacité de
l’assainissement. Tous les programmes d’un
lave-vaisselle homologué NSF/ANSI184 n’ont
pas été conçus dans l’objectif direct ou indirect
de répondre aux exigences de la norme NSF/
ANSI184 pour l’élimination de la saleté et
l’efcacité de l’assainissement.
À la n du programme, le témoin indicateur
Sani Rinse s’allume si l’option Sani Rinse
(rinçage avec assainissement) a fonctionné
correctement. Si le témoin ne s’active pas, cela
est probablement dû au fait que le programme a
été interrompu.
ProWash™
Normal
Fait passer la
température du lavage
principal de 105 °F
(41 °C) à 140 °F
(60 °C) et celle du
rinçage nal de
140 °F (60 °C) à
155 °F (68°C).
0:00 à 2:20 1,2 à 6,2
(4,8 à 23,3)
Diffère le fonctionnement du lave-vaisselle ou
le fait démarrer pendant les heures creuses.
Choisir un programme de lavage et des options.
Appuyer sur la touche Delay (mise en marche
différée). Appuyer sur la touche START/RESUME
(mise en marche/reprise). Bien fermer la porte.
REMARQUE: Chaque fois que l’on ouvre la
porte (pour ajouter un plat, par exemple), il faut
de nouveau appuyer sur la touche Start/Resume
(mise en marche/reprise) pour que le compte à
rebours reprenne.
Disponible
pour tous les
programmes
Diffère le démarrage
d’un programme
jusqu’à l’heure
spéciée.
0
Utiliser l'option Control Lock (verrouillage des commandes) pour éviter le démarrage involontaire du lave-vaisselle entre deux
programmes ou un changement de programme et d’options durant un programme.
Pour activer le verrouillage, appuyer sur CONTROL LOCK (verrouillage des commandes) pendant 3secondes. Le témoin de
verrouillage des commandes s’allume durant un court instant pour indiquer que l’option est activée. Lorsque le témoin lumineux
Lock (verrouillage) est allumé, toutes les touches de sélection sont désactivées. Si on appuie sur une touche de sélection alors que
le lave-vaisselle est verrouillé, le témoin lumineux clignote trois fois. Il reste possible d’ouvrir ou de fermer la porte du
lave-vaisselle lorsque les commandes sont verrouillées.
Pour annuler le verrouillage, appuyer sur CONTROL LOCK (verrouillage des commandes) pendant 3secondes. Le témoin lumineux
Control Lock (verrouillage des commandes) s’éteint.
6
ENTRETIEN DU LAVE-VAISSELLE
Nettoyage de l’extérieur
Nettoyer l’extérieur du lave-vaisselle seulement avec un chiffon doux et
humide et un détergent doux. Si le lave-vaisselle possède une surface
extérieure en acier inoxydable, il se peut que cette dernière soit
recouverte d’une pellicule résistante aux traces de doigts. Ne pas
utiliser de produits nettoyants abrasifs sur la surface extérieure du
lave-vaisselle.
Nettoyage et entretien de l’intérieur
Plusieurs détergents peuvent laisser des taches ou résidus blancs sur
la vaisselle ou l’intérieur du lave-vaisselle. Avec le temps, ces résidus
peuvent devenir indésirables et nuire au bon fonctionnement du
lave-vaisselle. Utiliser un produit comme le nettoyant pour lave-vaisselle
affresh
®
peut aider à éliminer ces résidus. Une utilisation mensuelle du
nettoyant pour lave-vaisselle affresh
®
est recommandé pour aider à
entretenir le lave-vaisselle. Suivre les indications sur l’emballage.
REMARQUE: KitchenAid recommande des pastilles ou des sachets
de détergent prémesuré de grande qualité, ainsi que de l’agent de
rinçage pour effectuer le nettoyage du lave-vaisselle et pour une
utilisation quotidienne.
Inspecter et nettoyer le dispositif
anti-refoulement, le cas échéant,
si le lave-vaisselle ne se vidange
pas correctement.
Pour réduire le risque de
dommages matériels durant
les vacances ou une période
d’inutilisation prolongée :
■ Si l’on n’utilise pas le
lave-vaisselle pendant l’été,
couper l’arrivée d’eau et
l’alimentation électrique du lave-vaisselle.
■ S’assurer que les tuyaux d’alimentation en eau sont protégés
contre le gel. La formation de glace dans les canalisations
d’arrivée d’eau peut entraîner une élévation de la pression en
eau et endommager le lave-vaisselle ou le domicile. La garantie
de l’appareil ne couvre pas les dommages imputables au gel.
■ Lors du remisage du lave-vaisselle pendant l’hiver, éviter tout
dommage lié à l’eau en faisant hivériser le lave-vaisselle par
un fournisseur de services agréé.
COMMANDE FONCTION COMMENTAIRES
Pour démarrer ou
poursuivre
un programme
de lavage.
Si l’on ouvre la porte durant un programme ou si une panne de courant se produit,
le témoin lumineux Start/Resume (mise en marche/reprise) clignote. Le programme
ne reprend pas tant que la porte n'est pas fermée et que l'on n'a pas appuyé sur
Start (mise en marche).
Pour annuler un
programme de
lavage après son
démarrage
Bien fermer la porte. Appuyer sur CANCEL/DRAIN (annulation/vidange) pendant
3 secondes. Le lave-vaisselle commence une vidange de 2 minutes (au besoin).
Laisser le lave-vaisselle évacuer l’eau complètement.
Pour activer
ou désactiver
les signaux
sonores.
Appuyer sur la touche HI-TEMP WASH (lavage à haute température) pendant
3 secondes pour activer ou désactiver les signaux sonores. Seuls les signaux
sonores de conrmation d’activation de touches peuvent être activés/désactivés.
Les signaux sonores importants, tels ceux indiquant l’interruption d’un
programme, ne peuvent pas être désactivés.
Pour indiquer la
progression du
programme.
L’afchage indique la progression du programme: lavage, séchage, propre, assaini.
Le programme est terminé lorsque le témoin de vaisselle propre est allumé.
Lorsque l'on sélectionne l’option Sani-Rinse (rinçage avec assainissement), le
témoin Sanitized (assainissement) s’allume dès que le programme est terminé.
Si le lave-vaisselle n’a pas bien assaini la vaisselle, le témoin indicateur Sanitized
(assainissement) clignote à la n du programme. Ceci peut se produire si le
programme a été interrompu ou si l’eau n’a pas pu être sufsamment chauffée
pour atteindre la température requise. Le témoin s’éteint lorsqu’on ouvre et ferme
la porte ou que l’on appuie sur CANCEL (annulation).

7
DÉPANNAGE
Essayez d’abord les solutions suggérées ici. Pour obtenir de l’aide ou des recommandations supplémentaires pour éviter un appel de service,
reportez-vous à la page de garantie de ce guide ou visitez producthelp.whirlpool.com. Au Canada, visitez le site Web kitchenaid.ca. Pour
toute question au sujet de la connexion Internet, aux É.U. comme au Canada, composez le 1877559-2603.
Il est possible d’adresser ses commentaires ou questions par courrier à l’adresse ci-dessous:
Aux États-Unis:
KitchenAid Brand Home Appliances
Customer eXperience Center
553 Benson Road
Benton Harbor, MI 49022-2692
Au Canada:
KitchenAid Brand Home Appliances
Customer eXperience Centre
200 – 6750 Century Ave.
Mississauga, Ontario L5N 0B7
Veuillez indiquer dans votre correspondance un numéro de téléphone où l’on peut vous joindre dans la journée.
SI LES PROBLÈMES
SUIVANTS
SURVIENNENT
SOLUTIONS RECOMMANDÉES
Le témoin lumineux
"Clean"
(propre) clignote
Vérier ce qui suit:
■ Le programme a-t-il été interrompu? Appuyer sur START/RESUME et fermer la porte dans les 4 secondes qui
suivent.
■ Le dispositif de protection contre le débordement peut-il monter et descendre librement? Appuyer pour le libérer.
■ Vérier que le robinet d'eau d'alimentation du lave-vaisselle est ouvert. (Ceci est très important si le lave-vaisselle
vient d'être installé.)
■ Vérier l’absence de mousse dans le lave-vaisselle. Pour plus d’informations sur la production de mousse par
l’appareil, voir la section "Le lave-vaisselle ne nettoie pas complètement la vaisselle".
La vaisselle n’est pas
complètement sèche
REMARQUE: Le plastique et les articles à revêtement anti-adhésif sont difciles à sécher, car leur surface est poreuse et
a tendance à recueillir les gouttelettes d’eau. Un séchage au torchon peut être nécessaire.
L'utilisation d'un agent de rinçage avec l'option Heat Dry (séchage avec chaleur) est nécessaire pour un séchage correct.
Un bon chargement des articles peut affecter le séchage.
■ Pour de meilleurs résultats, placer ces articles sur le côté le plus incliné du panier.
Les verres et les tasses à fond concave retiennent l’eau. Cette eau peut éclabousser d'autres articles lors du
déchargement du lave-vaisselle.
■ Décharger le panier inférieur en premier.
Taches/Pellicule sur la
vaisselle
REMARQUE:
■ Un agent de rinçage liquide est nécessaire pour le séchage et pour réduire les taches.
■ Utiliser la bonne quantité de détergent. Si des produits en poudre ou en liquide/gel sont utilisés, suivre les
instructions de l’emballage.
Vérier que les traces ne sont pas permanentes en trempant l’article dans du vinaigre blanc pendant 5minutes. Si
les traces disparaissent, c’est qu’elles sont causées par l’eau dure. Modier la quantité de détergent et d’agent de
rinçage. Voir la section “Entretien du lave-vaisselle”. Si les traces ne disparaissent pas, cela signie qu'elles sont
dues à des attaques.
Vérier que la température d’eau d’entrée est réglée à 120°F (49°C).
Essayer d'utiliser l’option Hi-Temp Wash (lavage à haute température) ou Sani Rinse (rinçage avec assainissement).
Pour éliminer les taches, voir la section “Entretien du lave-vaisselle”.
Le lave-vaisselle
ne nettoie pas
complètement la
vaisselle
Vérier que le lave-vaisselle est correctement chargé. Un mauvais chargement peut réduire considérablement
la performance de lavage. Voir la section “Utilisation du lave-vaisselle”.
Inspecter le ltre pour s’assurer qu’il est bien installé. S’assurer que le ltre d’entrée d’eau situé dans le fond
du lave-vaisselle n’est pas bouché par des aliments ou des débris. Nettoyer au besoin.
Sélectionner le programme le mieux adapté au type de saletés. Le programme ProWash™ (lavage pro) peut être
utilisé pour les charges difciles à nettoyer.
Vérier que la température de l’eau d’entrée est d’au moins 120°F (49°C).
Utiliser la bonne quantité de détergent frais. Un supplément de détergent est nécessaire pour les charges très sales
et en présence d’une eau dure.
Éliminer les aliments sur la vaisselle en la grattant avant de la charger (ne pas pré-rincer).
Si le système de détection du lave-vaisselle détecte la présence de mousse, il est possible que le lave-vaisselle
ne fonctionne pas correctement ou ne se remplisse pas d’eau.
La production de mousse peut avoir été causée par:
■ L'emploi du mauvais type de détergent comme un produit de lessive, un savon pour les mains ou un liquide
à vaisselle pour laver les plats à la main.
■ Le fait de ne pas avoir réinstallé le couvercle du distributeur d’agent de rinçage après l’avoir rempli d’agent
de rinçage (qu’il s’agisse d’un premier remplissage ou de remplissages subséquents).
■ L’utilisation d’une quantité excessive de détergent pour lave-vaisselle.

W11133227C
®
/™ ©2019. Utilisé sous licence au Canada. Tous droits réservés. 07/19
SI VOUS AVEZ BESOIN DE SERVICE :
1. Avant de nous contacter pour obtenir un dépannage, veuillez déterminer si des réparations sont nécessaires pour votre produit. Certains
problèmes peuvent être résolus sans intervention de dépannage. Prenez quelques minutes pour parcourir la section Dépannage du guide
d'utilisation et d'entretien ou rendez-vous sur le site kitchenaid.ca.
2. Tout service sous garantie doit être effectué exclusivement par nos fournisseurs de dépannage autorisés KitchenAid. Aux É.-U. et au Canada,
dirigez toutes vos demandes de service sous garantie au :
Centre d’eXpérience de la clientèle KitchenAid
Aux É.-U., composez le 1 800 422-1230. Au Canada, composez le 1 800 807 -6777.
Si vous résidez à l'extérieur du Canada et des 50 États des États-Unis, contactez votre marchand KitchenAid autorisé pour déterminer si une autre
garantie s'applique.
GARANTIE LIMITÉE À VIE
CE QUI EST COUVERT CE QUI N’EST PAS COUVERTE
GARANTIE LIMITÉE DURANT LA PREMIÈRE ANNÉE
(PIÈCES ET MAIN D’ŒUVRE)
Pendant un an à compter de la date d’achat, lorsque ce gros appareil
ménager est installé, utilisé et entretenu conformément aux instructions
jointes au produit ou fournies avec, la marque KitchenAid de Whirlpool
Corporation ou Whirlpool Canada, LP (ci-après désignées “KitchenAid”)
paiera pour les pièces de rechange spéciées par l’usine et pour la
main-d’œuvre pour corriger les vices de matériaux ou de fabrication qui
existaient déjà lorsque ce gros appareil ménager a été acheté. S’il est
remplacé, l’appareil sera couvert pour la période restant à couvrir de la
garantie limitée d’un an du produit d’origine.
GARANTIE LIMITÉE DE LA DEUXIÈME À LA CINQUIÈME ANNÉE
(CERTAINS COMPOSANTS UNIQUEMENT –
MAIN- D’OEUVRE NON COMPRISE)
De la deuxième à la cinquième année inclusivement à compter de la
date d’achat initiale, lorsque ce gros appareil ménager est installé,
utilisé et entretenu conformément aux instructions jointes au produit ou
fournies avec, KitchenAid, à sa seule discrétion, remplacera l'appareil
ou paiera pour les pièces de rechange spéciées par l’usine concernant
les composants suivants pour corriger les défauts non esthétiques
de matériau ou de fabrication desdites pièces qui empêchent le gros
appareil de fonctionner et qui étaient déjà présentes lorsque ce gros
appareil ménager a été acheté. La présente garantie est une garantie
limitée de 5 ans sur les pièces énumérées ci-dessous et elle ne
comprend pas la main-d’œuvre de réparation.
■ Paniers à vaisselle en nylon ■ Commandes électroniques
GARANTIE LIMITÉE À VIE (CUVE EN ACIER INOXYDABLE
ET PAROI INTERNE DE LA PORTE UNIQUEMENT)
Pendant toute la durée de vie de l’appareil à compter de sa date
d’achat initial, lorsque ce gros appareil ménager est utilisé et entretenu
conformément aux instructions jointes à ou fournies avec le produit,
KitchenAid paiera pour les pièces de rechange spéciées par l’usine
pour corriger les défauts non esthétiques de matériaux ou de fabrication
qui existaient déjà lorsque ce gros appareil ménager a été acheté pour
les pièces suivantes :
■ Cuve en acier inoxydable ■ Paroi interne de la porte
LE SEUL ET EXCLUSIF RECOURS DU CLIENT DANS LE CADRE DE LA
PRÉSENTE GARANTIE LIMITÉE CONSISTE EN LA RÉPARATION PRÉVUE
PAR LA PRÉSENTE. Le service doit être fourni par une compagnie
de service désignée par KitchenAid. Cette garantie limitée est valide
uniquement aux États-Unis ou au Canada et s’applique exclusivement
lorsque le gros appareil ménager est utilisé dans le pays où il a été acheté.
La présente garantie limitée est valable à compter de la date d’achat initial
par le consommateur. Une preuve de la date d’achat initial est exigée pour
obtenir un dépannage dans le cadre de la présente garantie limitée.
1. Usage commercial, non résidentiel ou par plusieurs familles, ou
non-respect de l’utilisateur, de l’opérateur ou des instructions
d’installation.
2. Visite d’instruction à domicile pour montrer à l’utilisateur comment
utiliser l’appareil.
3. Visites de service pour rectier une installation ou un entretien fautifs
du produit, une installation non conforme aux codes d’électricité ou
de plomberie ou la rectication de l’installation électrique ou de la
plomberie du domicile (ex : câblage électrique, fusibles ou tuyaux
d’arrivée d’eau du domicile).
4. Pièces consomptibles (ex : ampoules, batteries, ltres à air ou à
eau, etc.).
5. Défauts ou dommages résultant de utilisation de pièces ou
accessoires KitchenAid non authentiques.
6. Dommages causés par : accident, mauvaise utilisation, abus,
incendie, inondations, catastrophe naturelle ou l’utilisation de
produits non approuvés par KitchenAid.
7. Réparations aux pièces ou systèmes dans le but de rectier un
dommage ou des défauts résultant d’une réparation, altération ou
modication non autorisée faite à l’appareil.
8. Défauts d’apparence, notamment les éraures, traces de choc,
ssures ou tout autre dommage subi par le ni de l’appareil ménager,
à moins que ces dommages ne résultent de vices de matériaux ou
de fabrication et ne soient signalés à KitchenAid dans les 30 jours
suivant la date d’achat.
9. Décoloration, rouille ou oxydation des surfaces résultant
d’environnements caustiques ou corrosifs incluant des
concentrations élevées de sel, un haut degré d’humidité ou une
exposition à des produits chimiques (exemples non exhaustifs).
10. Enlèvement ou livraison. Ce produit est conçu pour être réparé à
l’intérieur du domicile.
11. Frais de déplacement et de transport pour le dépannage/la réparation
dans une région éloignée où une compagnie de service KitchenAid
autorisée n’est pas disponible.
12. Retrait ou réinstallation d’appareils inaccessibles ou de dispositifs
préinstallés (ex : garnitures, panneaux décoratifs, plancher, meubles,
îlots de cuisine, plans de travail, panneaux de gypse, etc.) qui
entravent le dépannage, le retrait ou le remplacement du produit.
13. Service et pièces pour des appareils dont les numéros de série et de
modèle originaux ont été enlevés, modiés ou ne peuvent pas être
facilement identiés.
Le coût d’une réparation ou d’un remplacement dans le cadre de ces
circonstances exclues est à la charge du client.
CLAUSE D’EXONÉRATION DE RESPONSABILITÉ AU TITRE DES GARANTIES IMPLICITES
LES GARANTIES IMPLICITES, Y COMPRIS LES GARANTIES APPLICABLES DE QUALITÉ MARCHANDE OU D’APTITUDE À UN USAGE
PARTICULIER, SONT LIMITÉES À CINQ ANS OU À LA PLUS COURTE PÉRIODE AUTORISÉE PAR LA LOI. Certains États et certaines provinces ne
permettent pas de limitation sur la durée des garanties implicites de qualité marchande ou d’aptitude à un usage particulier, de sorte que la limitation
ci-dessus peut ne pas être applicable dans votre cas. Cette garantie vous confère des droits juridiques spéciques et vous pouvez également jouir
d’autres droits qui peuvent varier d’une juridiction à l’autre.
EXONÉRATION DE RESPONSABILITÉ DANS LES DOMAINES NON COUVERTS PAR LA GARANTIE
KitchenAid décline toute responsabilité au titre de la qualité, de la durabilité ou en cas de dépannage ou de réparation nécessaire sur ce gros appareil
ménager autre que les responsabilités énoncées dans la présente garantie. Si vous souhaitez une garantie plus étendue ou plus complète que la
garantie limitée fournie avec ce gros appareil ménager, adressez-vous à KitchenAid ou à votre détaillant pour obtenir les modalités d’achat d’une
garantie étendue.
LIMITATION DES RECOURS; EXCLUSION DES DOMMAGES FORTUITS OU INDIRECTS
LE SEUL ET EXCLUSIF RECOURS DU CLIENT DANS LE CADRE DE LA PRÉSENTE GARANTIE LIMITÉE CONSISTE EN LA RÉPARATION PRÉVUE
PAR LA PRÉSENTE. KITCHENAID N’ASSUME AUCUNE RESPONSABILITÉ POUR LES DOMMAGES FORTUITS OU INDIRECTS. Certains États
et certaines provinces ne permettent pas l’exclusion ou la limitation des dommages fortuits ou indirects de sorte que ces limitations et exclusions
peuvent ne pas être applicables dans votre cas. Cette garantie vous confère des droits juridiques spéciques et vous pouvez également jouir d’autres
droits qui peuvent varier d’une juridiction à l’autre.
03/17
GARANTIE LIMITÉE
DES LAVE-VAISSELLE
KITCHENAID
®
ATTACHEZ ICI VOTRE REÇU DE VENTE. UNE PREUVE D’ACHAT EST OBLIGATOIRE
POUR OBTENIR L’APPLICATION DE LA GARANTIE.
Lorsque vous appelez le centre d’eXpérience de la clientèle, veuillez garder à disposition
les renseignements suivants :
■ Nom, adresse et numéro de téléphone
■ Numéros de modèle et de série
■ Une description claire et détaillée du problème rencontré
■ Une preuve d’achat incluant le nom et l’adresse du marchand ou du détaillant