Loading ...
Loading ...
Loading ...
Safety Instructions Operating Instructions Care and Cleaning Installation Instructions Troubleshooting Tips Customer Service
11
Installation of the warming drawer.
Read these instructions completely and carefully.
Before You Begin
IMPORTANT: Save these instructions for the
local electrical inspector’s use.
IMPORTANT: OBSERVE ALL GOVERNING CODES
AND ORDINANCES.
NOTE TO INSTALLER: Leave these instructions
with the appliance after installation is completed.
NOTE TO CONSUMER: Keep this Owner’s
Manual and Installation Instructions for
future use.
NOTE: This appliance must be properly
grounded.
NOTE: Insure that the power cord does not
contact the hot surfaces on the bottom of
ovens, cooktops, or any other appliance.
Tools Needed
■2 x4 or 2 x 2 lumber for runners and brace
■Wood screws and adhesive or other hardware
for installing runners or shelf to support
warmer drawer.
Runners must be level, rigidly mounted and capable of
supporting 150 pounds.
■Saw
■Level
■Drill and 1/16″bit
■Phillips screwdriver
Custom Panel Kits
ZXD27B—
This kit provides for the installation of a
custom front panel on 27″wide models.
ZXD30B—
This kit provides for the installation of a
custom front panel on 30″wide models.
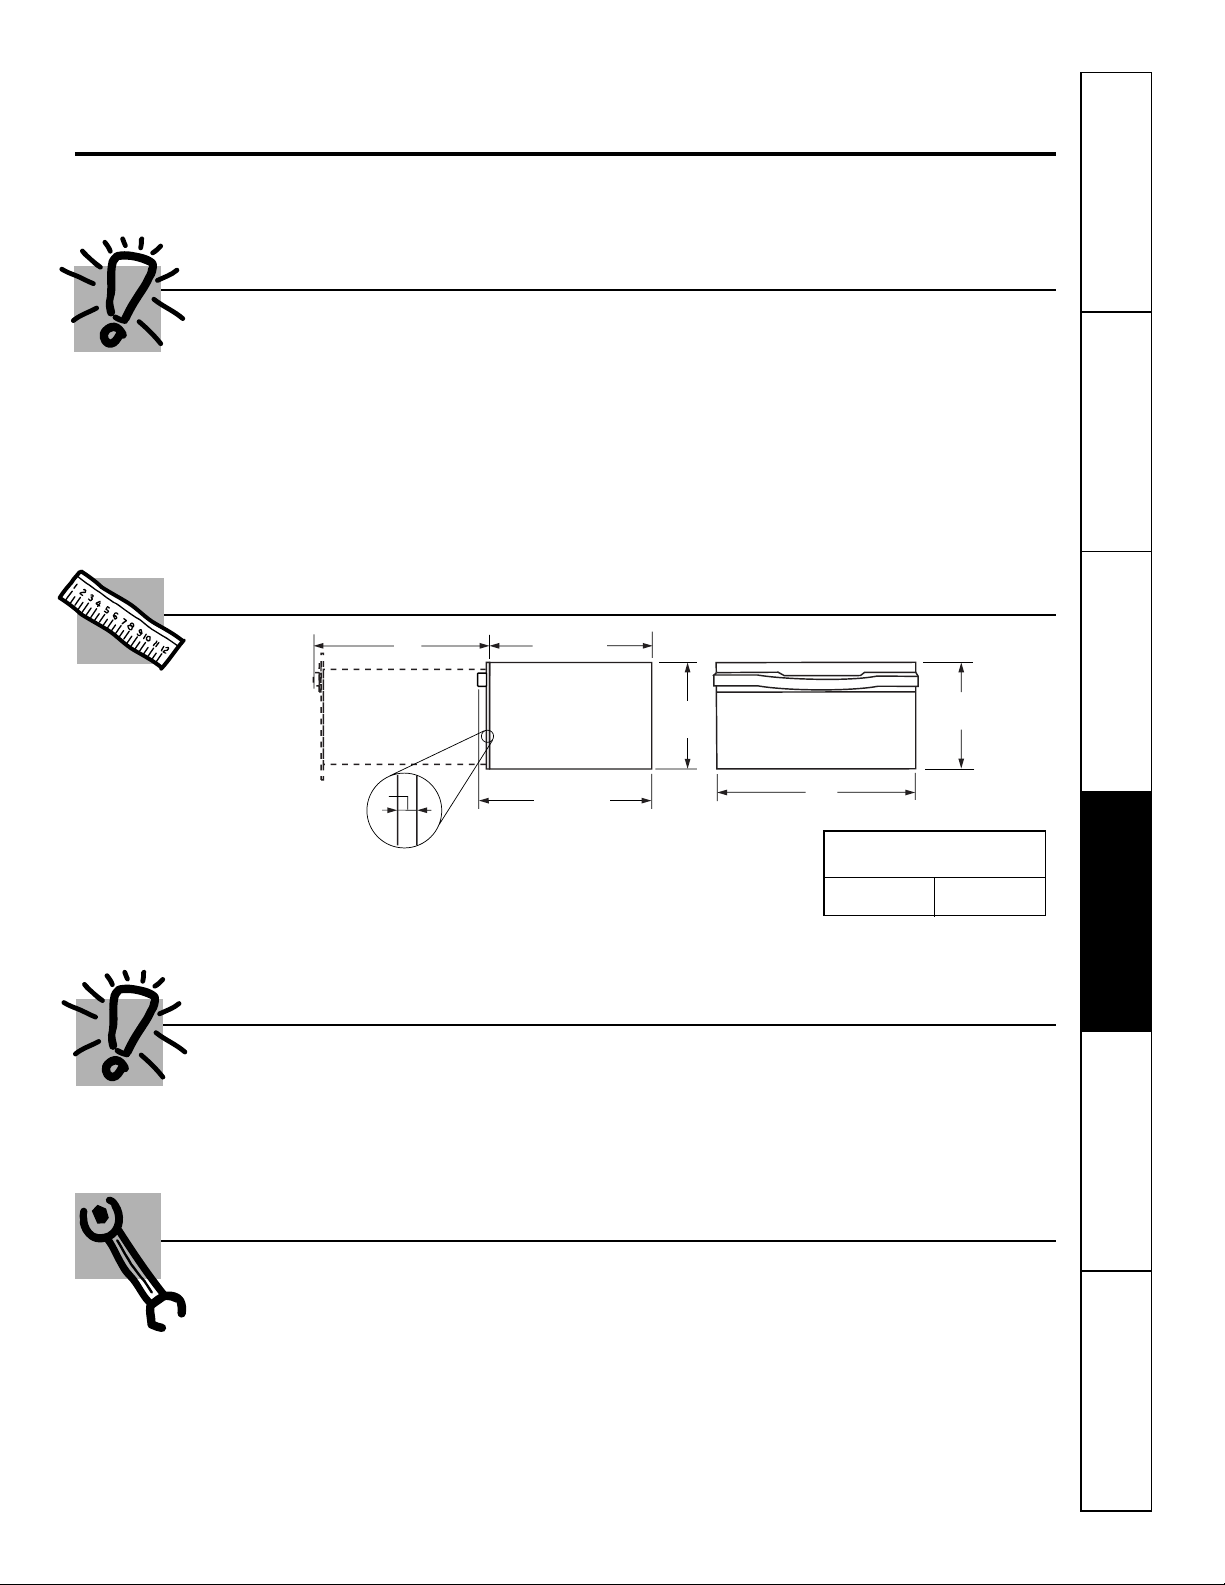
Product Dimensions
27″ 23
1
⁄4″
9″
1″
A
10
1
⁄2″
26
1
⁄4″
Including handle
Dimension A
27
″
Drawer 30
″
Drawer
26
3
⁄
4
″
30
″
Loading ...
Loading ...
Loading ...