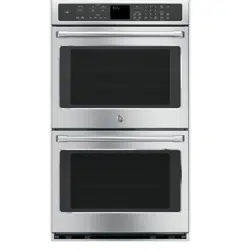
GE Café' CT9550SH6SS Series 30" Built-In Double Convection Wall Oven

User Manual

For CT9550SH6SS. Additionally, the document applies to other GE - General Electric models: PT7050, PT9050, CT9050, PT7550, PT9550

PDF File Manual, 48 pages, Read Online | Download pdf file

CT9550SH6SS photo
background
Write the model and serial
numbers here:
Model # _________________
Serial # _________________
You can find them on a label on
the side trim or on the front of the
(lower) oven behind the oven door.
ESPAÑOL
Para consultar una version en
español de este manual de
instrucciones, visite nuestro sitio de
internet GEAppliances.com.
OWNER’S MANUAL
WALL OVEN
Direct Air Convection Built-In Electric
49-80754-2 10-16 GEA
SAFETY INFORMATION .......... 2
WARRANTY ........................ 6
ASSISTANCE / ACCESSORIES ... 7
USING THE OVEN
Oven Controls .......................... 8
Special Features ........................10
Sabbath (SAbbAtH) .....................12
Oven Racks ............................13
Aluminum Foil and Oven Liners ...........14
Cookware ..............................14
Cooking Modes .........................15
Probe .................................16
Cooking Guide .........................17
CARE AND CLEANING
Control Panel ..........................18
Oven Exterior ..........................18
Stainless Steel Surfaces. . . . . . . . . . . . . . . . . .18
Oven Interior ...........................18
Oven Racks ............................19
Maintenance ..........................20
TROUBLESHOOTING TIPS ....... 22
GE is a trademark of the General Electric Company. Manufactured under trademark license.
PT7050 - 30" Single Wall Oven
PT9050 - 30" Single Wall Oven
CT9050 - 30" Single Wall Oven
PT7550 - 30" Double Wall Oven
PT9550 - 30" Double Wall Oven
CT9550 - 30" Double Wall Oven
Loading page 2...
Loading page 3...
Loading page 4...
Loading page 5...
Loading page 6...
Loading page 7...
Loading page 8...
Loading page 9...
Loading page 10...
Loading page 11...
Loading page 12...
Loading page 13...
Loading page 14...
Loading page 15...
Loading page 16...
Loading page 17...
Loading page 18...
Loading page 19...
Loading page 20...
Loading page 21...
Loading page 22...
Loading page 23...
Loading page 24...
Loading page 25...
Loading page 26...
Loading page 27...
Loading page 28...
Loading page 29...
Loading page 30...
Loading page 31...
Loading page 32...
Loading page 33...
Loading page 34...
Loading page 35...
Loading page 36...
Loading page 37...
Loading page 38...
Loading page 39...
Loading page 40...
Loading page 41...
Loading page 42...
Loading page 43...
Loading page 44...
Loading page 45...
Loading page 46...
Loading page 47...
Loading page 48...

User Manual - Transcript

  • Page 1 - English - : Write the model and serial numbers here Model Serial You can find them on a label on the side trim or on the front of the lower oven behind the oven door ESPAÑOL Para consultar una version en español de este manual de instrucciones visite nuestro sitio de internet GEAppliancescom OWNERS MANUAL WALL OVEN Direct Air Convection BuiltIn Electric 49807542 1016 GEA SAFETY INFORMATION 2 WARRANTY 6 ASSISTANCE ACCESSORIES 7 USING THE OVEN Oven Controls 8 Special Features 10 Sabbath SAbbAtH 12 Oven Racks 13 Aluminum Foil and Oven Liners 14 Cookware 14 Cooking Modes 15 Probe 16 Cooking Guide 17 CARE AND CLEANING Control Panel 18 Oven Exterior 18 Stainless Steel Surfaces 18 Oven Interior 18 Oven Racks 19 Maintenance 20 TROUBLESHOOTING TIPS 22 GE is a trademark of the General Electric Company Manufactured under trademark license PT7050 30quot Single Wall Oven PT9050 30quot Single Wall Oven CT9050 30quot Single Wall Oven PT7550 30quot Double Wall Oven PT9550 30quot Double Wall Oven CT9550 30quot Double Wall Oven
  • Page 2 - English - : 2 49807542 READ AND SAVE THESE INSTRUCTIONS IMPORTANT SAFETY INFORMATION READ ALL INSTRUCTIONS BEFORE USING THE APPLIANCE SAFETY INFORMATION STATE OF CALIFORNIA PROPOSITION 65 WARNINGS WARNING This product contains one or more chemicals known to the State of California to cause cancer birth defects or other reproductive harm Selfclean electric ovens Self clean ovens can cause low level exposure to some of the Proposition 65 substances including carbon monoxide during the cleaning cycle Exposure to these substances can be minimized by opening a window or using a ventilation fan or hood WARNING GENERAL SAFETY INSTRUCTIONS Ŷ 8VHWKLVDSSOLDQFHRQOIRULWVLQWHQGHGSXUSRVHDV described in this Owners Manual ŶHVXUHRXUDSSOLDQFHLVSURSHUOLQVWDOOHGDQG grounded by a qualified installer in accordance with the provided installation instructions ŶRQRWDWWHPSWWRUHSDLURUUHSODFHDQSDUWRIRXU oven unless it is specifically recommended in this manual All other servicing should be performed by a qualified technician ŶHIRUHSHUIRUPLQJDQVHUYLFHGLVFRQQHFWWKH power supply at the household distribution panel by removing the fuse or switching off the circuit breaker ŶRQRWOHDYHFKLOGUHQDORQH²FKLOGUHQVKRXOGQRW be left alone or unattended in an area where an appliance is in use They should never be allowed to climb sit or stand on any part of the appliance Ŷ CAUTION RQRWVWRUHLWHPVRILQWHUHVW to children in cabinets above an oven children climbing on the oven to reach items could be seriously injured Ŷ8VHRQOGUSRWKROGHUV²PRLVWRUGDPSSRWKROGHUV RQKRWVXUIDFHVPDUHVXOWLQEXUQVIURPVWHDPR QRWOHWSRWKROGHUVWRXFKKRWKHDWLQJHOHPHQWVR not use a towel or other bulky cloth in place of pot holders Ŷ 1HYHUXVHRXUDSSOLDQFHIRUZDUPLQJRUKHDWLQJ the room Ŷ RQRWWRXFKWKHKHDWLQJHOHPHQWVRUWKHLQWHULRU surface of the oven These surfaces may be hot enough to burn even though they are dark in color XULQJDQGDIWHUXVHGRQRWWRXFKRUOHWFORWKLQJ or other flammable materials contact any interior area of the oven allow sufficient time for cooling first Other surfaces of the appliance may become hot enough to cause burns Potentially hot surfaces include the oven vent opening surfaces near the opening and crevices around the oven door Ŷ RQRWKHDWXQRSHQHGIRRGFRQWDLQHUV3UHVVXUH could build up and the container could burst causing an injury Ŷ RQRWXVHDQWSHRIIRLORUOLQHUWRFRYHUWKH oven bottom or anywhere in the oven except as described in this manual Oven liners can trap heat or melt resulting in damage to the product and risk of shock smoke or fire Ŷ YRLGVFUDWFKLQJRULPSDFWLQJJODVVGRRUVRUFRQWURO SDQHOVRLQJVRPDOHDGWRJODVVEUHDNDJHR not cook on a product with broken glass Shock fire or cuts may occur Ŷ ampRRNPHDWDQGSRXOWUWKRURXJKO²PHDWWRDWOHDVW an internal temperature of 160F and poultry to at least an internal temperature of 180F Cooking to these temperatures usually protects against foodborne illness WARNING Read all safety instructions before using the product Failure to follow these instructions may result in fire electrical shock serious injury or death
  • Page 4 - English - : 4 49807542 The remote enable equipment installed on this oven has been tested and found to comply with the limits for DampODVVGLJLWDOGHYLFHSXUVXDQWWRSDUWRIWKHampamp Rules These limits are designed to a provide reasonable protection against harmful interference in a residential installation This equipment generates uses and can radiate radio frequency energy and if not installed and used in accordance with the instructions may cause harmful interference to radio communications However there is no guarantee that LQWHUIHUHQFHZLOOQRWRFFXULQDSDUWLFXODULQVWDOODWLRQI this equipment does cause harmful interference to radio or television reception which can be determined by turning the equipment off and on the user is encouraged to try to correct the interference by one or more of the following measures Ŷ5HRULHQWRUUHORFDWHWKHUHFHLYLQJDQWHQQD ŶQFUHDVHWKHVHSDUDWLRQEHWZHHQWKHHTXLSPHQWDQG receiver ŶampRQQHFWWKHHTXLSPHQWLQWRDQRXWOHWRQDFLUFXLW different from that to which the receiver is connected ŶampRQVXOWWKHGHDOHURUDQHSHULHQFHGUDGLR79 technician for help b accept any interference received including interference that may cause undesired operation of the device Note that any changes or modifications to the wireless communication device installed on this oven that are not expressly approved by the manufacturer could void the users authority to operate the equipment READ AND SAVE THESE INSTRUCTIONS WARNING SELFCLEANING OVEN SAFETY INSTRUCTIONS Cont Ŷ HIRUHRSHUDWLQJWKHVHOIFOHDQFFOHZLSHJUHDVH and food soils from the oven Excessive amount of grease may ignite leading to smoke damage to your home Ŷ IWKHVHOIFOHDQLQJPRGHPDOIXQFWLRQVWXUQWKH oven off and disconnect the power supply Have it serviced by a qualified technician Ŷ RQRWFOHDQWKHGRRUJDVNHW7KHGRRUJDVNHWLV essential for a good seal Care should be taken not to rub damage or move the gasket Ŷ RQRWXVHRYHQFOHDQHUV1RFRPPHUFLDORYHQ cleaner or oven liner protective coating of any kind should be used in or around any part of the oven IMPORTANT SAFETY INFORMATION READ ALL INSTRUCTIONS BEFORE USING THE APPLIANCE SAFETY INFORMATION
  • Page 6 - English - : 6 49807542 WARRANTY Staple your receipt here Proof of the original purchase date is needed to obtain service under the warranty Thank You IRURXUSXUFKDVHRIDSSOLDQFHVUDQGDSSOLDQFH Register Your Appliance Register your new appliance online at your convenience wwwgeappliancescomserviceandsupportregister Timely product registration will allow for enhanced communication and prompt service under the terms of your warranty should the need arise You may also mail in the preprinted registration card included in the packing material GE Electric Range Warranty GEAppliancescom All warranty service is provided by our Factory Service Centers or an authorized Customer Care technician To schedule service online visit us at wwwgeappliancescomserviceandsupport or call GE Appliances at 800GECARES 8004322737 Please have your serial number and your model number available when calling for service Servicing your appliance may require the use of the onboard data port for diagnostics This gives a GE Appliances factory service technician the ability to quickly diagnose any issues with your appliance and helps GE Appliances improve its SURGXFWVESURYLGLQJSSOLDQFHVZLWKLQIRUPDWLRQRQRXUDSSOLDQFHIRXGRQRWZDQWRXUDSSOLDQFHGDWDWREH sent to GE Appliances please advise your technician not to submit the data to GE Appliances at the time of service What GE Appliances will not cover Ŷ Service trips to your home to teach you how to use the product Ŷ PSURSHULQVWDOODWLRQGHOLYHURUPDLQWHQDQFH Ŷ DLOXUHRIWKHSURGXFWLILWLVDEXVHGPLVXVHG modified or used for other than the intended purpose or used commercially Ŷ 5HSODFHPHQWRIKRXVHIXVHVRUUHVHWWLQJRIFLUFXLW breakers Ŷ DPDJHWRWKHSURGXFWFDXVHGEDFFLGHQWILUH floods or acts of God Ŷ QFLGHQWDORUFRQVHTXHQWLDOGDPDJHFDXVHGE possible defects with this appliance Ŷ DPDJHFDXVHGDIWHUGHOLYHU Ŷ 3URGXFWQRWDFFHVVLEOHWRSURYLGHUHTXLUHGVHUYLFH Ŷ 6HUYLFHWRUHSDLURUUHSODFHOLJKWEXOEVHFHSWIRU lamps EXCLUSION OF IMPLIED WARRANTIES ltRXUVROHDQGHFOXVLYHUHPHGLVSURGXFWUHSDLUDVSURYLGHGLQWKLVLPLWHGDUUDQWQLPSOLHGZDUUDQWLHV including the implied warranties of merchantability or fitness for a particular purpose are limited to one year or the shortest period allowed by law This warranty is extended to the original purchaser and any succeeding owner for products purchased for home use ZLWKLQWKH86IWKHSURGXFWLVORFDWHGLQDQDUHDZKHUHVHUYLFHEDSSOLDQFHVXWKRULHG6HUYLFHULVQRWDYDLODEOH you may be responsible for a trip charge or you may be required to bring the product to an Authorized GE Appliances 6HUYLFHORFDWLRQIRUVHUYLFHQODVNDWKHZDUUDQWHFOXGHVWKHFRVWRIVKLSSLQJRUVHUYLFHFDOOVWRRXUKRPH Some states do not allow the exclusion or limitation of incidental or consequential damages This warranty gives you specific legal rights and you may also have other rights which vary from state to state To know what your legal rights are consult your local or state consumer affairs office or your states Attorney General Warrantor GE Appliances Extended Warranties Purchase a GE Appliances extended warranty and learn about special discounts that are available while your warranty is still in effect You can purchase it online anytime at wwwgeappliancescomserviceandsupportshopforextendedserviceplanshtm or call 8006262224 during normal business hours GE Appliances Service will still be there after your warranty expires For the period of GE Appliances will replace One year From the date of the original purchase Any partRIWKHUDQJHZKLFKIDLOVGXHWRDGHIHFWLQPDWHULDOVRUZRUNPDQVKLSXULQJWKLV limited oneyear warranty GE Appliances will provide free of charge all labor and inhome service to replace the defective part
  • Page 7 - English - : 49807542 7 ASSISTANCE ACCESSORIES Have a question or need assistance with your appliance Accessories Looking For Something More GE Appliances offers a variety of accessories to improve your cooking and maintenance experiences To place an order visit us online at wwwGEAppliancePartscom86RUwwwGEAppliancesca Canada or call 8006262002868006611616 Canada The following products and more are available Accessories 6PDOOURLOHU3DQôóò³ 86ampDQDGD DUJHURLOHU3DQôóò³ 86ampDQDGD URLOHU3DQó³ 861RWDYDLODEOHLQampDQDGD Parts Oven racks Part numbers vary by model Oven elements Part numbers vary by model LJKWEXOEV 3DUWQXPEHUVYDUEPRGHO Probe Part numbers vary by model Cleaning Supplies ampLWUX6KLQH6WDLQOHVV6WHHOLSHV ampHUDPDUWH6WDLQOHVV6WHHOSSOLDQFHampOHDQHU 30 UDSKLWHXEULFDQW 7 7KHODUJHEURLOHUSDQGRHVQRWILWLQUDQJHV 7KHEURLOHUSDQGRHVQRWILWLQZDOORYHQVGURSLQVRUUDQJHV Carefully grasp a corner of the protective shipping film with your fingers and slowly peel it from the appliance VXUIDFHRQRWXVHDQVKDUSLWHPVWRUHPRYHWKHILOP Remove all of the film before using the appliance for the first time To assure no damage is done to the finish of the product the safest way to remove the adhesive from packaging tape on new appliances is an application of a household liquid dishwashing detergent Apply with a soft cloth and allow to soak NOTE 7KHDGKHVLYHPXVWEHUHPRYHGIURPDOOSDUWVW cannot be removed if it is baked on How to Remove Protective Shipping Film and Packaging Tape Schedule Service Expert GE Appliances repair service is only one step away from your door Schedule your service online at wwwgeappliancescomservice andsupport or call GE Appliances at 800GECARES 8004322737 during normal business hours Parts and Accessories QGLYLGXDOVTXDOLILHGWRVHUYLFH their own appliances can have parts or accessories sent GLUHFWOWRWKHLUKRPHV960DVWHUampDUGDQGLVFRYHU cards are acceptedOrder online today 24 hours every day or by phone at 8006262002 during normal business hours QVWUXFWLRQVFRQWDLQHGLQWKLVPDQXDOFRYHUSURFHGXUHV to be performed by any user Other servicing generally should be referred to qualified service personnel Caution must be exercised since improper servicing may cause unsafe operation Real Life Design Studio GE Appliances supports the 8QLYHUVDOHVLJQFRQFHSWRISURGXFWVVHUYLFHVDQG environments that can be used by people of all ages VLHVDQGFDSDELOLWLHVHUHFRJQLHWKHQHHGWRGHVLJQ for a wide range of physical and mental abilities and LPSDLUPHQWVRUGHWDLOVRISSOLDQFHV8QLYHUVDO HVLJQDSSOLFDWLRQVLQFOXGLQJNLWFKHQGHVLJQLGHDVIRU people with disabilities check out our website today RUWKHKHDULQJLPSDLUHGSOHDVHFDOO7amp 8008334322 Contact Us Contact us on our website with all the details including your phone number or write to General Manager Customer Relations GE Appliances Appliance Park Louisville KY 40225 Try the GE Appliances website wwwgeappliancescomserviceandsupport 24 hours a day any day of the year For greater convenience and faster service you can now download Owners Manuals order parts or even schedule service online
  • Page 8 - English - : 8 49807542 1 Convection Cooking Modes Convection cooking modes use increased air circulation to improve performance The type of benefit depends on the mode Your oven has the following convection cooking modes DNHDNH0XOWL5DFN5RDVWURLOLURLORDQG URLOampULVS6HHWKHampRRNLQJ0RGHVVHFWLRQIRUPRUH information 2 Traditional Cooking Modes Your oven has the IROORZLQJWUDGLWLRQDOFRRNLQJPRGHVDNHURLOLURLO R3URRIDQGDUP6HHWKHampRRNLQJ0RGHVVHFWLRQIRU more information 3 Clean Your oven has two cleaning modes Self Clean and Steam Clean See the Cleaning the Oven section for important information about using these modes 4 Start Must be pressed to start any cooking cleaning or timed function 5 CancelOff ampDQFHOVRYHQRSHUDWLRQVHFHSWWKH clock and timer 6 Cook Time Counts down cooking time and turns off the oven when the cooking time is complete Press the Cook Time pad use the number pads to program a cooking time in hours and minutes then press Start 7KLVFDQRQOEHXVHGZLWK7UDGLWLRQDODNHampRQYHFWLRQ DNHampRQYHFWLRQDNH0XOWLDQGampRQYHFWLRQ5RDVW 7 Clock Sets the oven clock time Press the Clock pad and the number pads to program the clock Make sure to select AM or PM Press Start to save the time 8 Timer RUNVDVDFRXQWGRZQWLPHU3UHVVWKHTimer pad and the number pads to program the time in hours and minutes Press the Start pad The oven will continue to operate when the timer countdown is complete To turn the timer off press the Timer pad 9 Delay Time HODVZKHQWKHRYHQZLOOWXUQRQ8VH this to set a time when you want the oven to start Press the Delay Time pad and use the number pads to program the time of day for the oven to turn on Press the desired cooking mode and temperature then press Start A cook time may also be programmed if desired This can only be XVHGZLWK7UDGLWLRQDODNHampRQYHFWLRQDNHampRQYHFWLRQ DNH0XOWL5DFNampRQYHFWLRQ5RDVWDQG6HOIampOHDQ NOTE KHQXVLQJWKHGHODWLPHIHDWXUH foods that VSRLOHDVLO²VXFKDVPLONHJJVILVKVWXIILQJVSRXOWU DQGSRUN²VKRXOGQRWEHDOORZHGWRVLWIRUPRUHWKDQ hour before or after cooking Room temperature promotes WKHJURZWKRIKDUPIXOEDFWHULDHVXUHWKDWWKHRYHQ light is off because heat from the bulb will speed harmful bacteria growth 10 Probe Monitors internal food temperature and turns the oven off when the food reaches the programmed WHPSHUDWXUHQVHUWWKHSUREHSURJUDPWKHFRRNLQJPRGH and program the probe temperature See the Cooking Modes section for more information The probe can only EHXVHGZLWK7UDGLWLRQDODNHampRQYHFWLRQDNHDQG Convection Roast 11 Oven Lights Turns the oven lights on or off 12 Remote Enable on some models CONNECTING YOUR OVEN Off Oven is not connected Open the app then press and hold Remote Enable pad for 5 seconds to begin the connecting process Slow flash Oven is in discovery mode and looking for a network Rapid flash An error occurred during the connecting process Solid Oven is connected to the network and can be remotely controlled by a connected mobile device when in operation but it cannot be started remotely REMOTE STARTING YOUR OVEN To be able to start the oven remotely press the Remote Enable pad and the REMOTE icon will turn on in the display The oven can now be remotely started with a connected device Opening an oven door or turning off the oven will turn off the REMOTE icon The REMOTE icon must be lit to start the oven remotely The REMOTE icon is not required to change the oven settings or to turn the oven off After using the oven remember to verify that the REMOTE icon is lit if you wish to start the oven remotely in the future 13 Lock Controls RFNVRXWWKHFRQWUROVRWKDWSUHVVLQJ the pads does not activate the controls Press and hold the Lock Controls pad for three seconds to lock or unlock the control CancelOff is always active even when the control is locked Cook Time Cancel Off Remote Enable Lock Controls Start Bake Bake Convection Traditional Bake Multi Rack Broil HiLoCrisp Broil HiLo Proof Warm Roast Timer OnOff Self Clean Steam Clean Oven Lights Probe Set Clock AMPM Delay Time AMPM Hold 3 Sec Single Wall Oven USING THE OVEN Oven Controls REMOTE 11 10 12 13 Control button shapes are representative your oven may have alternate button shapes
  • Page 9 - English - : 49807542 Double Wall Oven 1 Upper Oven and Lower Oven HVLJQDWHVZKLFK oven to use Press the Upper Oven or Lower Oven pad to select an oven then press the desired cooking mode pad The oven control will default to the upper oven 2 Convection Cooking Modes Convection cooking modes use increased air circulation to improve performance The type of benefit depends on the mode Your oven has the following convection cooking modes DNHDNH0XOWL5DFN5RDVWURLOLURLORDQG URLOampULVS6HHWKHampRRNLQJ0RGHVVHFWLRQIRUPRUH information 3 Traditional Cooking Modes Your oven has the IROORZLQJWUDGLWLRQDOFRRNLQJPRGHVDNHURLOLURLO R3URRIDQGDUP6HHWKHampRRNLQJ0RGHVVHFWLRQIRU more information 4 Clean Your oven has two cleaning modes Self Clean and Steam Clean See the Cleaning the Oven section for important information about using these modes 5 Start Must be pressed to start any cooking cleaning or timed function 6 CancelOff ampDQFHOVRYHQRSHUDWLRQVHFHSWWKH clock and timer 7 Cook Time Counts down cooking time and turns off the oven when the cooking time is complete Press the Cook Time pad use the number pads to program a cooking time in hours and minutes then press Start 7KLVFDQRQOEHXVHGZLWK7UDGLWLRQDODNHampRQYHFWLRQ DNHampRQYHFWLRQDNH0XOWLDQGampRQYHFWLRQ5RDVW 8 Clock Sets the oven clock time Press the Clock pad and the number pads to program the clock Make sure to select AM or PM Press Start to save the time 9 Timer RUNVDVDFRXQWGRZQWLPHU3UHVVWKHTimer pad and the number pads to program the time in hours and minutes Press the Start pad The oven will continue to operate when the timer countdown is complete To turn the timer off press the Timer pad 10 Delay Time HODVZKHQWKHRYHQZLOOWXUQRQ8VH this to set a time when you want the oven to start Press the Delay Time pad and use the number pads to program the time of day for the oven to turn on Press the desired cooking mode and temperature then press Start A cook time may also be programmed if desired This can only be XVHGZLWK7UDGLWLRQDODNHampRQYHFWLRQDNHampRQYHFWLRQ DNH0XOWL5DFNampRQYHFWLRQ5RDVWDQG6HOIampOHDQ NOTE KHQXVLQJWKHGHODWLPHIHDWXUH foods that VSRLOHDVLO²VXFKDVPLONHJJVILVKVWXIILQJVSRXOWU DQGSRUN²VKRXOGQRWEHDOORZHGWRVLWIRUPRUHWKDQ hour before or after cooking Room temperature promotes WKHJURZWKRIKDUPIXOEDFWHULDHVXUHWKDWWKHRYHQ light is off because heat from the bulb will speed harmful bacteria growth 11 Probe Monitors internal food temperature and turns the oven off when the food reaches the programmed temperature Select upper or lower insert the probe program the cooking mode and program the probe temperature See the Cooking Modes section for more information The probe can only be used with Traditional DNHampRQYHFWLRQDNHDQGampRQYHFWLRQ5RDVW 12 Oven Lights Turns the oven lights on or off 13 Remote Enable on some models CONNECTING YOUR OVEN Off Oven is not connected Open the app then press and hold Remote Enable pad for 5 seconds to begin the connecting process Slow flash Oven is in discovery mode and looking for a network Rapid flash An error occurred during the connecting process Solid RWKRYHQVDUHFRQQHFWHGWRWKHQHWZRUNDQG can be remotely controlled by a connected mobile device when in operation but cannot be started remotely REMOTE STARTING YOUR OVEN To be able to start the oven remotely press the Remote Enable pad and the REMOTE icon will turn on in the display Either oven can now be remotely started with a connected device Opening any oven door or turning off either oven will turn off the REMOTE icon The REMOTE icon must be lit to start the oven remotely The REMOTE icon is not required to change the oven settings or to turn either oven off After using the oven remember to verify that the REMOTE icon is lit if you wish to start an oven remotely in the future 14 Lock Controls RFNVRXWWKHFRQWUROVRWKDWSUHVVLQJ the pads does not activate the controls Press and hold the Lock Controls pad for three seconds to lock or unlock the control CancelOff is always active even when the control is locked Cook Time Lower Oven Remote Enable Lock Controls Start Bake Bake Convection Upper Oven Traditional Bake Multi Rack Broil HiLoCrisp Broil HiLo Proof Warm Roast Timer OnOff Timer OnOff Self Clean Steam Clean Oven Light Oven Light Upper Oven Lower Oven Upper Oven Lower Oven Cancel Off Probe Set Clock AMPM Delay Time AMPM Cancel Off Upper Oven Hold 3 Sec USING THE OVEN Oven Controls REMOTE 13 14 Control button shapes are representative your oven may have alternate button shapes
  • Page 10 - English - : 10 49807542 To change the Special Features settings follows these guidelines Press and hold the Traditional Bake and Traditional Broil pads for 3 seconds simultaneously KHQRXHQWHUWKHVSHFLDOIHDWXUHVPRGH Ŷ The numbers 2 and 8 act as up and down to scroll thru the features and their settings Ŷ The numbers 4 and 6 act as right and left to change back and forth from scrolling thru the features to changing the feature settings Ŷ The number 5 acts as an enter pad Press and hold the Traditional Bake and Traditional Broil pads for 3 seconds simultaneously to exit the special feature mode 1 Press and hold the Traditional Bake and Traditional Broil pads for 3 seconds simultaneously to enter special features mode 2 Press the number 2 pad until the display reads ³833UW3R6WGRXEOHZDOORYHQVZLOOKDYHD selection for both the upper and lower ovens 3 Press the number 6 pad to change the special feature setting 4 Press the number 2 or 8 pads to either increase or decrease the temperature in one degree Fahrenheit increments up to 35º F or down to 35º F 5 Press the number 5 pad to save your desired change 6 Press the number 4 pad to return to the other features 7 Press and hold the Traditional Bake and Traditional Broil pads for 3 seconds simultaneously to exit the special feature mode Example Adjusting the Oven Temperature Special Features USING THE OVEN Special Features There are numerous special features that are controlled using the number key pad Ŷ HJUHHDKUHQKHLWRUampHOVLXVWHPSHUDWXUHGLVSOD Ŷ End tone Cycle End Tone Ŷ 6RXQG7RQH9ROXPH Ŷ Setting Clock Setting Ŷ Auto Recipe Auto Recipe Conversion IRUampRQYHFWLRQDNLQJ Ŷ 12hr shutoff 12 Hour Shutoff Ŷ Sabbath Sabbath mode Ŷ Temp Offset Adjust the oven temperature RXEOHRYHQVKDYHXSSHUDQGORZHURSWLRQV Ŷ LJKWDU7XUQVWKHOLJKWLQGLFDWRURQRURII Ŷ HIDXOW5HVHWFRQWUROWRIDFWRUVHWWLQJV Cook Time Set Clock AMPM Enter Cook Time Set Clock AMPM
  • Page 11 - English - : 49807542 11 Fahrenheit or Celsius dEGrEE Your oven control is set to use Fahrenheit temperature units but can be changed to use Celsius temperature units if preferred Cycle End Tone End tonE This is the tone that signals the end of a timer You can change it to be one tone bEEP or a continuous repeating tone Con bEEP Tone Volume SoUnd This feature allows the oven tone volume to be adjusted EHWZHHQLVWGGHIDXOWRDQGR Clock Setting SEttinG This feature specifies how the time of day will be displayed Options are for a standard 12hour clock with AM and PM selections 12 Hr 24hour military time display 24 Hr or for no display oFF Auto Recipe Conversion AUto rECiPE KHQXVLQJampRQYHFWLRQDNHRUampRQYHFWLRQDNH Multi cooking modes Auto Recipe conversion will automatically reduce the programmed cooking WHPSHUDWXUH1RWHWKDWWKLVRSWLRQGRHVQRWFRQYHUW convection baking times only temperatures 12hour Shutoff 12 Hr SHUtoFF KHQWKLVIHDWXUHLVWXUQHGRQWKHRYHQZLOODXWRPDWLFDOO turn off after 12 continuous hours of use Adjust the Oven Temperature UPPEr tEP oFFSEt Upper and Lower on some models This feature allows the oven temperature to be adjusted XSWRKRWWHURUGRZQWRFRROHU8VHWKLV feature if you believe your oven temperature is too hot or too cold and wish to change it For double oven models the upper and lower ovens are adjusted separately UPPEr tEP OFFSET and LoEr tEP oFFSEt This DGMXVWPHQWDIIHFWV7UDGLWLRQDODNHampRQYHFWLRQDNH DQGampRQYHFWLRQDNH0XOWL5DFNPRGHV Light Bar LiGHt bAr on some models This feature uses a light bar between the door and the control panel for easy visual indication of preheat and cook time status This feature can be turned on or off in the special features of your oven This feature works with ampRQYHFWLRQDNHampRQYHFWLRQDNH0XOWLampRQYHFWLRQ URLOampRQYHFWLRQ5RDVW7UDGLWLRQDODNH7UDGLWLRQDO URLODUP3URRI6HOIampOHDQampRRN7LPHDQG7LPHU On a double wall oven the notification lighting indicates WKHVWDWXVRIWKHXSSHURYHQRQOHORZLVDGHVFULSWLRQ of the different light conditions OFF1RRYHQRUWLPHUIXQFWLRQ is running or the feature has been turned off in special features PULSING BAR The oven is pre heating The light bar will pulse until the oven set temperature has been reached PROGRESS BARLOOVORZO progress to a fully lit bar as the timer counts down NOTEIWKHCook Time button is used the light bar DQGWKHRYHQZLOOWXUQRIIZKHQWKHWLPHUHDFKHVHURI Timer button is used the light bar will remain solid when time reaches zero SOLID BAR The oven is at the set temperature andor function or your kitchen timer is complete NOTE The progress bar for timed functions takes priority over the solid or pulsating functions if both are being used at the same time Default dEFAULt This feature resets all of the special features to the default settings originally on the oven USING THE OVEN Special Features Special Features cont
  • Page 12 - English - : 12 49807542 Sabbath SAbbAtH USING THE OVEN Sabbath SAbbAtH Sabbath mode disables the oven lights the oven light will not turn on when the door is opened and the notification OLJKWEDUZLOOEHGLVDEOHGDOOVRXQGVWKHFRQWUROZLOOQRWEHHSZKHQDSDGLVSUHVVHGampRQYHFWLRQPRGHVURLO PRGHVDUP3URRIDQGDOOWLPHIXQFWLRQV6DEEDWKPRGHFDQRQOEHXVHGZLWK7UDGLWLRQDODNH7KLVIHDWXUH FRQIRUPVWRWKH6WDUHZLVK6DEEDWKUHTXLUHPHQWV NOTEIDSRZHURXWDJHRFFXUVGXULQJZKHQWKHRYHQLVLQ6DEEDWK0RGHWKHXQLWZLOOUHWXUQWR6DEEDWK0RGH when power is restored Enter the Sabbath Mode Press the Traditional Bake and Traditional Broil pads DWWKHVDPHWLPHDQGKROGIRUWKUHHVHFRQGV8VHWKH number 2 or 8 pad to scroll thru the special features RSWLRQVWR³6EEWDQGWKHQSUHVVWKHQXPEHUSDG to allow the number 2 or 8 pad to change the Sabbath IHDWXUHVHWWLQJIURP³RWR³RQ Press the number 5 pad to enter the selection Press and hold the Traditional Bake and Traditional Broil pads for 3 seconds to exit special features mode The icon will appear in the display to signify that the unit is in Sabbath Mode The clock will not be displayed 1RWHWKDWLIRXKDYHDGRXEOHZDOORYHQZKHQRX place the control into Sabbath mode both ovens are now in Sabbath mode and available for cooking Start a Sabbath Bake Press Traditional Bake The control will default the temperature to 350F but you can use the number pads to enter a temperature between 170ºF and 550ºF and press Start1RVRXQGZLOOEHJLYHQZKHQWKHNHVDUH pressed At a random time between 30 seconds and 1 minute the icon will appear in the display indicating the oven is running For double wall ovens both ovens can be used while in Sabbath mode Press the Upper Oven or Lower Oven pad prior to pressing Traditional BakeGHIDXOWWKH upper oven is selected if the Upper Oven or Lower OvenSDGLVQRWSUHVVHGILUVWIXVLQJERWKRYHQV please wait until one oven indicates it is running before starting the second oven Adjust the Temperature During a Sabbath Bake Press Traditional Bake use the number pads to enter a new temperature between 170ºF and 550ºF and press Start1RVRXQGZLOOEHJLYHQZKHQWKHNHVDUH pressed Since no feedback is given during temperature change an oven thermometer can be used to confirm temperature changes For double wall ovens press the Upper Oven or Lower Oven pad prior to pressing Traditional BakeGHIDXOW the upper oven is selected if the Upper Oven or Lower OvenSDGLVQRWSUHVVHGILUVWIXVLQJERWKRYHQV please wait until one oven indicates it is running before starting or turning off the second oven Timed Bake During Sabbath IRXZLVKWRXVHWKHampRRN7LPHIHDWXUHWREDNHLQWKH oven and then have the oven automatically turn off do not enter Sabbath mode You will need to change the Cycle End Tone from a continuous beep to a single EHHSWXUQWKH7RQH9ROXPHRIIDQGWXUQWKHRYHQOLJKW on using the control panel or remove the light bulb Then you can program the oven for the desired cook time in bake Exit the Sabbath Mode To end a bake cycle press CancelOff The icon will change to the icon indicating that the oven has turned off Press the Traditional Bake and Traditional Broil pads DWWKHVDPHWLPHDQGKROGIRUWKUHHVHFRQGV8VHWKH number 2 or 8 pad to scroll thru the special features RSWLRQVWR³6EEWDQGWKHQSUHVVWKHQXPEHU6 pad to allow the number 2 or 8 pad to change the Sabbath IHDWXUHVHWWLQJIURP³RQWR³R Press the number 5 pad to enter the selection Press and hold the Traditional Bake and Traditional Broil pads for 3 seconds to exit special features mode The clock will be displayed again indicating the oven is out of Sabbath Mode
  • Page 13 - English - : 49807542 13 Oven Racks USING THE OVEN Oven Racks Your oven has six rack positions Recommended rack positions for various types of foods are provided in the Cooking Guide Adjusting rack position is one way to impact cooking results For example if you would prefer darker tops on cakes muffins or cookies try moving IRRGRQHUDFNSRVLWLRQKLJKHUIRXILQGIRRGVDUHWRR brown on top try moving them down next time KHQEDNLQJZLWKPXOWLSOHSDQVDQGRQPXOWLSOHUDFNV HQVXUHWKHUHLVDWOHDVWòEHWZHHQSDQVWRDOORZ sufficient space for air to flow Oven Racks Your oven may have extension racks andor traditional flat racks To avoid possible burns place the racks in the desired position before you turn the oven on Extension Racks Extension racks have an install feature that locks into the rack supports guides on both sides Once the install feature is locked into place always pull the rack out by its upper front rail to its full extension stop position when placing or removing cookware IHWHQVLRQUDFNVDUHGLIILFXOWWRHWHQGOXEULFDWHWKH racks with the graphite lubricant provided with your oven Remove the rack from the oven remove debris in the slide tracks with a paper towel shake the graphite lubricant and place 4 small drops on the two bottom tracks of the left and right sides Open and close the rack several times to distribute the lubricant To order additional graphite lubricant read the Assistance and Accessories section at the beginning of this manual To Remove An Extension Rack 1 Make sure the rack is pushed all the way into the oven 2 Grasp the rack by both its upper front rail and its lower handles on two sides and lift straight up to unlock the rack from the rack supports 3 Firmly holding onto both the upper front rail and lower handles on both sides pull the rack forward Grasp the rack on both sides if necessary Then remove it from the oven To Replace An Extension Rack 1 Place the rear portion of the rack onto the rack supports guides as shown in the picture 2 Hold the upper front rail and lower handles and push the rack all the way in until the install feature locks into the front rack support IHWHQVLRQUDFNVDUHGLIILFXOWWRUHSODFHRUUHPRYHZLSH WKHRYHQUDFNVXSSRUWVZLWKFRRNLQJRLORQRWZLSHRLO on the rack slides The oven has 6 rack positions 8SSHUURQW5DLO Handle Handle Handle Handle 8SSHUURQW5DLO LIWWRXQORFN from the rack support QVWDOOHDWXUH Front Rack RFN Hold the upper front rail and lower handles and push the rack all the way in until the install fea ture locks on the front support 8SSHUURQW5DLO
  • Page 14 - English - : 14 49807542 Traditional Flat Racks The racks have stops so that when placed correctly on the supports they will stop before coming completely out DQGZLOOQRWWLOWKHQSODFLQJDQGUHPRYLQJFRRNZDUH pull the rack out until it stops To Remove a Rack Pull it toward you tilt the front end up and pull it out To Replace a Rack Tilt the front of the rack up hook the rear locating posts under the rack supports push the rack back past the stoppers and lower it into position Push the rack all the way in IIODWUDFNVDUHGLIILFXOWWRVOLGHDQGRUUHPRYHSODFH some cooking oil on a soft cloth or paper towel and rub onto the sides of the rack and each rack support Oven Racks cont USING THE OVEN2YHQ5DFNVOXPLQXPRLODQG2YHQLQHUVampRRNZDUH Flat Rack CAUTION Use caution when removing a rack from lowest position as door may be hot Stopper Rack Support RFDWLQJ Post CAUTION Do not use any type of foil or oven liner to cover the oven bottom These items can trap heat or melt resulting in damage to the product and risk of shock smoke or fire Damage from improper use of these items is not covered by the product warranty RLOPDEHXVHGWRFDWFKVSLOOVESODFLQJDVKHHWRQDORZHUUDFNVHYHUDOLQFKHVEHORZWKHIRRGRQRWXVHPRUH IRLOWKDQQHFHVVDUDQGQHYHUHQWLUHOFRYHUDQRYHQUDFNZLWKDOXPLQXPIRLOHHSIRLODWOHDVWIURPRYHQZDOOV to prevent poor heat circulation Aluminum Foil and Oven Liners Cookware Cookware Guidelines The material finish and size of cookware affect baking performance DUNFRDWHGDQGGXOOSDQVDEVRUEKHDWPRUHUHDGLO than light shiny pans Pans that absorb heat more readily can result in a browner crisper and thicker crust IXVLQJGDUNDQGFRDWHGFRRNZDUHFKHFNIRRGHDUOLHU WKDQPLQLPXPFRRNWLPHIXQGHVLUDEOHUHVXOWVDUH obtained with this type of cookware consider reducing oven temperature by 25º F next time Shiny pans can produce more evenly cooked baked goods such as cakes and cookies Glass and ceramic pans heat slowly but retain heat well These types of pans work well for dishes such as pies and custards Air insulated pans heat slowly and can reduce bottom browning HHSFRRNZDUHFOHDQWRSURPRWHHYHQKHDWLQJ
  • Page 15 - English - : 49807542 15 Cooking Modes USING THE OVEN Cooking Modes Your new oven has a variety of cooking modes to help you get the best results These modes are described below Refer to the Cooking Guide section for recommendations for specific foods Remember your new oven may perform differently than the oven it is replacing Baking and Roasting Modes Select a mode for baking and roasting based on the type DQGTXDQWLWRIIRRGRXDUHSUHSDULQJKHQSUHSDULQJ baked goods such as cakes cookies and pastries always preheat the oven first Follow recipe recommendations for IRRGSODFHPHQWIQRJXLGHOLQHVDUHSURYLGHGFHQWHUIRRG in the oven Traditional Bake The traditional bake mode is intended for single rack cooking This mode uses heat primarily from the lower element but also from the upper element to cook food To use this mode press the Bake pad under Traditional enter a temperature and then press Start Preheating is generally recommended when using this mode Convection Bake with Direct Air 7KHampRQYHFWLRQDNHPRGHLVLQWHQGHGIRUVLQJOHUDFN cooking This mode uses heat from the lower element and also the upper and rear elements along with air movement directly down from the top of the oven to enhance evenness Your oven is equipped with Auto Recipe Conversion so it is not necessary to convert the temperature when using this mode To use this mode press the Bake pad under Convection enter a temperature and then press Start Preheating is generally recommended when using this mode Convection Bake Multi Rack 7KHampRQYHFWLRQDNH0XOWL5DFNPRGHLVLQWHQGHGIRU baking on multiple racks at the same time This mode uses heat primarily from the rear element but also heat from the upper and lower elements along with air movement from the convection fan to enhance cooking evenness Your oven is equipped with Auto Recipe Conversion so it is not necessary to convert the temperature when using WKLVPRGHDNLQJWLPHPLJKWEHVOLJKWOORQJHUIRUPXOWLSOH racks than what would be expected for a single rack To use this mode press the Bake Multi Rack pad under Convection enter a temperature and then press Start Always preheat when using this mode Convection Roast with Direct Air The Convection Roast mode is intended for roasting whole cuts of meat on a single rack This mode uses heat from the lower upper and rear elements along with air movement directly down from the top of the oven to improve browning DQGUHGXFHFRRNLQJWLPHWLVQRWQHFHVVDUWRFRQYHUW temperature Check food earlier than the recipe suggested time when using this mode or use the probe To use this mode press the Roast pad under Convection enter a temperature and then press StartWLVQRWQHFHVVDUWR preheat when using this mode Broiling Modes Always broil with the door closed The broil element in this oven is very powerful Monitor food closely while broiling 8VHFDXWLRQZKHQEURLOLQJRQXSSHUUDFNSRVLWLRQVDV placing food closer to the broil element increases smoking spattering and the possibility of fats igniting Broiling on rack position 6 is not recommended Try broiling foods that you would normally grill Adjust rack positions to adjust the intensity of the heat to the food Place foods closer to the broil element when a seared surface and rare interior is desired Thicker foods and foods that need to be cooked through should be broiled on a rack SRVLWLRQIDUWKHUIURPWKHEURLOHURUEXVLQJ7UDGLWLRQDOURLO RRUampRQYHFWLRQURLORRUEHVWSHUIRUPDQFHFHQWHU food below the broil heating element Traditional Broil Hi 7KH7UDGLWLRQDOURLOLPRGHXVHVLQWHQVHKHDWIURP WKHXSSHUHOHPHQWWRVHDUIRRGV8VHURLOLIRUWKLQQHU cuts of meat andor foods you prefer less done on the interior To use this mode press the Broil pad once under Traditional and then press StartWLVQRWQHFHVVDUWR preheat when using this mode Traditional Broil Lo 7KH7UDGLWLRQDOURLORPRGHXVHVOHVVLQWHQVHKHDWIURP the upper element to cook food thoroughly while also SURGXFLQJVXUIDFHEURZQLQJ8VHURLORIRUWKLFNHUFXWV of meat andor foods that you would like cooked all the way through To use this mode press the Broil pad twice under Traditional and then press StartWLVQRWQHFHVVDU to preheat when using this mode Convection Broil Hi with Direct Air 7KHampRQYHFWLRQURLOLPRGHXVHVLQWHQVHKHDWIURPWKH upper element along with air movement directly down from the top of the oven for improved searing and browning To use this mode press the Broil pad once under Convection and then press Start For best results preheat 5 minutes when using this mode Convection Broil Lo with Direct Air 7KHampRQYHFWLRQURLORPRGHXVHVOHVVLQWHQVHKHDWIURP the upper element along with air movement directly down from the top of the oven To use this mode press the Broil pad twice under Convection and then press Start For best results preheat 5 minutes when using this mode Convection Broil Crisp with Direct Air 7KHampRQYHFWLRQURLOampULVSPRGHLVLQWHQGHGDVDILQLVKLQJ mode at the end of a cooking cycle to add surface browning to a dish such as a casserole or a roast To use this mode press the Broil pad three times under Convection and then press Start Monitor food closely to prevent over browning
  • Page 16 - English - : 16 49807542 Proof Proof mode is designed for rising fermenting and proofing bread doughs Press the Proof pad and then press Start Cover dough well to prevent drying out UHDGZLOOULVHPRUHUDSLGOWKDQDWURRPWHPSHUDWXUH Warm DUPPRGHLVGHVLJQHGWRNHHSKRWIRRGVKRWIRUXSWR hours To use this mode press the Warm pad then press Start Cover foods that need to remain moist and do not cover foods that should be crisp Preheating is not required RQRWXVHZDUPWRKHDWFROGIRRGRWKHUWKDQFULVSLQJ FUDFNHUVFKLSVRUGUFHUHDOWLVDOVRUHFRPPHQGHGWKDW food not be kept warm for more than 2 hours USING THE OVEN Cooking Modes Probe Cooking Modes Cont Probe WARNING Consuming undercooked food can result in foodborne illness Use probe according to the following instructions to ensure all portions of the food reach minimum safe cooking temperatures Recommendations for minimum safe food temperatures can be found at wwwfoodsafetygov or wwwIsItDoneYetgov Internal food temperature is frequently used as an indicator of doneness especially for roasts and poultry The Probe mode monitors the internal food temperature and turns the oven off when the internal food temperature reaches the programmed temperature Always check the temperature at multiple locations in the food with a food thermometer after cooking to ensure that all portions of the food have reached the minimum safe internal temperature for that food Proper Probe Placement After preparing the meat and placing it on the cooking pan follow these instructions for proper probe placement Ŷ QVHUWWKHSUREHLQWRWKHIRRGVRWKDWWKHWLSRIWKH probe will rest in the center of the thickest part of the food For best performance the probe should EHIXOOLQVHUWHGLQWRWKHIRRGIWKHSUREHLVQRW located properly it may not accurately measure the temperature of the coolest portion of the food Some foods particularly small items are not well suited for cooking with the probe due to their shape or size Ŷ 7KHSUREHVKRXOGQRWWRXFKERQHIDWRUJULVWOH Ŷ RUZKROHSRXOWULQVHUWWKHSUREHLQWRWKHWKLFNHVW part of the breast Ŷ RUERQHOHVVURDVWVLQVHUWWKHSUREHLQWRWKHFHQWHU of the roast Ŷ RUERQHLQKDPRUODPELQVHUWWKHSUREHLQWRWKH center of the lowest large muscle or joint Ŷ RUFDVVHUROHVRUGLVKHVVXFKDVPHDWORDILQVHUWWKH probe into the center of the dish Ŷ RUILVKLQVHUWWKHSUREHIURPMXVWDERYHWKHJLOOLQWR the meatiest area parallel to the backbone Probe Usage To use the probe without preheating QVHUWWKHSUREHLQWRWKHIRRGVHH3URSHU3UREH Placement 2 Place the food in the oven and connect the probe into the probe outlet in the oven 3 Program the desired probe and cooking mode settings by pressing the Probe pad and entering the desired internal food temperature then pressing the cook mode pad Traditional Bake Convection Bake or Convection Roast and entering the desired cooking temperature The maximum internal food temperature that you can set is 200F To use the probe with preheating 1 Press the desired cook mode Traditional Bake Convection Bake or Convection Roast pad and enter the desired cooking temperature QVHUWWKHSUREHLQWRWKHIRRGVHH3URSHU3UREH Placement 3 Once the oven is preheated place the food in the oven and connect the probe to the probe outlet PDNLQJVXUHLWLVIXOOLQVHUWHG8VHFDXWLRQWKHRYHQ walls and probe outlet are hot 4 Program the probe temperature by pressing the Probe pad and entering the desired internal food temperature The maximum internal food temperature that you can set is 200 F Probe Care Guidelines NOTE some double oven models have a probe in the upper oven only Ŷ 8VHRISUREHVRWKHUWKDQWKHRQHSURYLGHGZLWKWKLV product may result in damage to the probe Ŷ 8VHWKHKDQGOHVRIWKHSUREHDQGSOXJZKHQLQVHUWLQJ and removing them from the meat and outlet Ŷ 7RDYRLGGDPDJLQJRXUSUREHGRQRWXVHWRQJVWR pull on the cable when removing it Ŷ 7RDYRLGEUHDNLQJWKHSUREHPDNHVXUHIRRGLV completely defrosted before inserting the probe Ŷ 7RSUHYHQWSRVVLEOHEXUQVGRQRWXQSOXJWKHSUREH from the outlet until the oven has cooled Ŷ 1HYHUOHDYHWKHSUREHLQVLGHWKHRYHQGXULQJDVHOIRU steam clean cycle Ŷ RQRWVWRUHWKHSUREHLQWKHRYHQ
  • Page 18 - English - : 18 49807542 HVXUHHOHFWULFDOSRZHULVRIIDQGDOOVXUIDFHVDUHFRROEHIRUHFOHDQLQJDQSDUWRIWKHRYHQ Control Panel WVDJRRGLGHDWRZLSHWKHFRQWUROSDQHODIWHUHDFKXVH Clean with mild soap and water or vinegar and water rinse with clean water and polish dry with a soft cloth RQRWXVHDEUDVLYHFOHDQVHUVVWURQJOLTXLGFOHDQVHUV plastic scouring pads or oven cleaners on the control SDQHO²WKHZLOOGDPDJHWKHILQLVK Oven Exterior RQRWXVHRYHQFOHDQHUVDEUDVLYHFOHDQVHUVVWURQJ liquid cleansers steel wool plastic scouring pads or cleaning powders on the interior or exterior of the oven Clean with a mild soap and water or vinegar and water solution Rinse with clean water and dry with a soft cloth KHQFOHDQLQJVXUIDFHVPDNHVXUHWKDWWKHDUHDW room temperature and not in direct sunlight IVWDLQRQWKHGRRUYHQWWULPLVSHUVLVWHQWXVHDPLOG abrasive cleaner and a spongescrubber for best results Spillage of marinades fruit juices tomato sauces and basting liquids containing acids may cause discoloration DQGVKRXOGEHZLSHGXSLPPHGLDWHOHWKRWVXUIDFHV cool then clean and rinse Oven Interior The interior of your new oven can be cleaned manually or by using the Steam Clean or Self Clean modes Spillage of marinades fruit juices tomato sauces and basting liquids containing acids may cause discoloration DQGVKRXOGEHZLSHGXSLPPHGLDWHOHWKRWVXUIDFHV cool then clean and rinse Manual Cleaning RQRWXVHRYHQFOHDQHUVDEUDVLYHFOHDQHUVVWURQJ liquid cleansers steel wool scouring pads or cleaning powders on the interior of the oven Clean with a mild soap and water or vinegar and water solution Rinse with FOHDQZDWHUDQGGUZLWKDVRIWFORWKKHQFOHDQLQJ surfaces make sure that they are at room temperature Steam Clean Mode Steam clean is intended to clean small spills using water and a lower cleaning temperature than SelfClean To use the Steam Clean feature wipe grease and soils from the oven Pour one cup of water into the bottom of the oven Close the door Press the Steam Clean pad and then press Start The oven door will lock You can not open the door during the 30 minute steam clean as this will decrease the steam clean performance At the HQGRIWKHVWHDPFOHDQFFOHWKHGRRUZLOOXQORFNLSH out any excess water and any remaining soil Self Clean Mode 5HDG6HOIampOHDQLQJ2YHQ6DIHWQVWUXFWLRQVDWWKH beginning of this manual before using Self Clean Mode IMPORTANT The health of some birds is extremely sensitive to the fumes given off during the selfcleaning cycle of any range Move birds to another well ventilated room Self clean uses very high temperatures to clean the oven interior The oven door will lock when using this feature HIRUHRSHUDWLQJWKHVHOIFOHDQFFOHZLSHXSJUHDVH and soils from the oven Remove all items from the oven other than enameled dark color racks Shiny or silver racks the meat probe and any cookware or other items should all be removed from the oven before initiating a self clean cycle Close the door Press the Self Clean pad and a default selfclean time is displayed The clean time can be changed to any time between 300 and 500 hours by using the number pads to enter a different time and pressing Start For heavily soiled ovens the PDLPXPKRXUFOHDQWLPHLVUHFRPPHQGHGIRXZLVK to use the default time press the Start pad immediately after pressing the Self Clean pad The oven will turn off automatically when the self clean cycle is complete The door will stay locked until the oven has cooled down After the oven has cooled down wipe any ash out of the oven On double oven models you can set a clean cycle in both ovens at the same time The last oven set will automatically delay its start until the end of the first ovens clean cycle Stainless Steel Surfaces on some models RQRWXVHDVWHHOZRROSDGLWZLOOVFUDWFKWKHVXUIDFH To clean the stainless steel surface use warm sudsy water or a stainless steel cleaner or polish Always wipe the surface in the direction of the grain Follow the cleaner instructions for cleaning the stainless steel surface To inquire about purchasing cleaning products including stainless steel appliance cleaner or polish read the Assistance and Accessories sections at the beginning of this manual CARE AND CLEANING Cleaning The Oven
  • Page 19 - English - : 49807542 Oven Racks CARE AND CLEANING Probe The temperature probe may be cleaned with soap and water or a soapfilled scouring pad Cool the temperature probe before cleaning Scour stubborn spots with a soap filled scouring pad rinse and dry To order additional temperature probes read the Assistance and Accessories sections at the beginning of this manual Ŷ RQRWLPPHUVHWKHWHPSHUDWXUHSUREHLQZDWHU Ŷ RQRWVWRUHWKHWHPSHUDWXUHSUREHLQWKHRYHQ Ŷ RQRWOHDYHWKHWHPSHUDWXUHSUREHLQVLGHWKHRYHQ during a self or steam clean cycle The racks that were provided with your oven dark enameled racks not shiny may remain in the oven during the selfcleaning cycle without being damaged To manually clean racks use warm soapy water Make sure not to wash the rack slides on an extension rack IUDFNVEHFRPHPRUHGLIILFXOWWRUHPRYHIURPWKHRYHQ put some vegetable oil on a soft cloth or paper towel and UXERQWRWKHRYHQUDFNVXSSRUWVRQRWZLSHWKHRLORQ an extension rack slide Periodically after several selfclean cycles the extension rack slides may need to be lubricated using the graphite lubricant shipped with your wall oven To order additional graphite lubricant read the Assistance and Accessories sections at the beginning of this manual 1 Remove extension rack from the oven See the Extension Oven Racks section 2 Fully extend the rack on a table or countertop 1HZVSDSHUPDEHSODFHGXQGHUQHDWKWKHUDFNIRU easy clean up IWKHUHLVGHEULVLQWKHVOLGHWUDFNVZLSHLWDZD using a paper towel NOTE Any graphite lubricant wiped away must be replaced 4 Shake the graphite lubricant before opening it Starting with left slide mechanism of the rack place four 4 small drops of lubricant on the two 2 bottom tracks of the slide close to the bearing carriers 5 Repeat for the right slide mechanism of the rack 6 Open and close the rack several times to distribute the lubricant 7 Replace the cap on the lubricant and shake it again Turn the rack over and repeat steps 3 4 5 and 6 8 Close the rack turn rack rightsideup and place in the oven See the Extension Oven Racks section 5HSHDWDERYHVWHSVIRUHDFKUDFN NOTERQRWVSUDZLWKFRRNLQJVSUDRURWKHUOXEULFDQW sprays
  • Page 20 - English - : 20 49807542 WARNING SHOCK OR BURN HAZARDHIRUHUHSODFLQJRYHQOLJKWEXOEGLVFRQQHFWWKHHOHFWULFDOSRZHUWRWKH oven at the main fuse or circuit breaker panel Failure to do so may result in electric shock or burn CAUTION BURN HAZARD The glass cover and bulb should be removed when cool Touching hot glass with bare hands or a damp cloth can cause burns Oven Light Replacement LVFRQQHFWSRZHUDWWKHPDLQIXVHRUFLUFXLWEUHDNHU panel 2 Remove oven racks 3 Slide a flat blade screwdriver between the housing and the glass light cover 4 Support the glass light cover with two fingers to prevent the cover from falling to the bottom of the RYHQHFDUHIXOQRWWRFKLSWKHRYHQFRDWLQJ 5 Gently twist the screwdriver blade to loosen the glass light cover 6 Remove the glass light cover 7 Remove the bulb by firmly grasping and sliding the bulb straight out until the two prongs have cleared the ceramic holder RQRWWRXFKWKHJODVVRIWKHQHZUHSODFHPHQWEXOE ZLWKRXUILQJHUVWZLOOFDXVHWKHEXOEWRIDLOZKHQLW lights Grasp the replacement bulb with a clean towel or facial tissue with the prongs facing down Align the two prongs in the ceramic holder pressing gently until the bulb is securely in the ceramic socket 6OLGHWKHSURWHFWLYHOHQVLQWRWKHKROGHUDQGSXVKXQWLO the clips snap into the housing 10 Reconnect power LiftOff Oven Door 7KHGRRULVYHUKHDYHFDUHIXOZKHQUHPRYLQJDQGOLIWLQJWKHGRRU RQRWOLIWWKHGRRUEWKHKDQGOH To remove the door 1 Fully open the door 2 Pull the hinge locks down toward the door frame to the unlocked position A tool such as a small flat blade screwdriver may be required 3 Firmly grasp both sides of the door at the top 4 Close door to the door removal position The door VKRXOGEHRSHQDSSURLPDWHOZLWKQRREVWUXFWLRQ above the door LIWGRRUXSDQGRXWXQWLOERWKKLQJHDUPVDUHFOHDURI the slots To replace the door 1 Firmly grasp both sides of the door at the top 2 Starting on the left side with the door at the same angle as the removal position seat the indentation of the hinge arm into the bottom edge of the hinge slot The notch in the hinge arm must be fully seated into the bottom of the slot Repeat for right side XOORSHQWKHGRRUIWKHGRRUZLOOQRWIXOO RSHQWKH indentation is not seated correctly in the bottom edge of the slot 4 Push the hinge locks up against the front frame of the oven cavity to the locked position 5 Close the oven door Removal position Hinge lock Slot Pull hinge locks down to unlock Push hinge locks up to lock Hinge lock Hinge arm QGHQWDWLRQ RWWRP edge of slot Hinge arm CARE AND CLEANING Maintenance
  • Page 22 - English - : 22 49807542 Save time and money Review the charts on the following pages first and you may not need to call for service Problem Possible Cause What To Do My new oven doesnt cook like my old one Is something wrong with the temperature settings Your new oven has a different cooking system from your old oven and therefore may cook differently than your old oven For the first few uses follow your recipe times DQGWHPSHUDWXUHVFDUHIXOOIRXVWLOOWKLQN your new oven is too hot or too cold you can adjust the temperature yourself to meet your specific cooking preference See the Special Features Section to adjust the oven temperature NOTE7KLVDGMXVWPHQWDIIHFWV7UDGLWLRQDODNH ampRQYHFWLRQDNHDQGampRQYHFWLRQDNH0XOWL temperatures it will not affect Convection Roast 7UDGLWLRQDOURLOampRQYHFWLRQURLORUampOHDQ Food does not bake properly Oven controls improperly set See the Cooking Modes section Rack position is incorrect or rack is not level See the Cooking Modes section and Cooking Guide Incorrect cookware or cookware of improper size being used See the Cookware section Oven temperature needs adjustment See the Special Features section Ingredient substitution Substituting ingredients can change the recipe outcome Food does not broil properly Oven controls improperly set Make sure you select the appropriate broil mode NOTE Convection crisp is not for broiling foods Improper rack position being used See the Cooking Guide for rack location suggestions Food being cooked in a hot pan Make sure cookware is cool Cookware not suited for broiling 8VHDSDQVSHFLILFDOOGHVLJQHGIRUEURLOLQJ Aluminum foil used on the broiling pan and grid has not been fitted properly and slit as recommended IXVLQJDOXPLQXPIRLOFRQIRUPWRSDQVOLWV In some areas the power voltage may be low Preheat the broil element for 10 minutes Oven temperature too hot or too cold Oven temperature needs adjustment See the Special Features section Oven does not work or appears not to work A fuse in your home may be blown or the circuit breaker tripped Replace the fuse or reset the circuit breaker Oven controls improperly set 6HHWKH8VLQJWKH2YHQVHFWLRQ Oven is in Sabbath Mode 9HULIWKDWWKHRYHQLVQRWLQ6DEEDWK0RGH6HH the Special Features section Crackling or popping sound This is the sound of the metal heating and cooling during both the cooking and cleaning functions This is normal Why is my range making a quotclickingquot noise when using my oven Your range has been designed to maintain a tighter control over your ovens temperature You may hear your ovens heating elements quotclickquot on and off more frequently than in older ovens to achieve better results during baking broiling convection and selfclean cycles This is normal Clock and timer do not work A fuse in your home may be blown or the circuit breaker tripped Replace the fuse or reset the circuit breaker TROUBLESHOOTING TIPS Troubleshooting tips HIRUHRXFDOOIRUVHUYLFH
  • Page 23 - English - : 49807542 23 TROUBLESHOOTING TIPS Troubleshooting tips HIRUHRXFDOOIRUVHUYLFH Problem Possible Cause What To Do Oven light does not work Light bulb is loose or defective Tighten or replace bulb Pad operating light is broken Call for service Oven will not self clean The temperature is too high to set a self clean operation Allow the oven to cool and reset the controls Oven controls improperly set See the Cleaning the Oven section Excessive smoking during clean cycle Excessive soil or grease Press the CancelOff pad Open the windows to rid the URRPRIVPRNHDLWXQWLOWKHLOCKED light goes off LSHXSWKHHFHVVVRLODQGUHVHWWKHFOHDQFFOH Excessive smoking during broiling Food too close to burner element RZHUWKHUDFNSRVLWLRQRIWKHIRRG Oven door will not open after a clean cycle Oven too hot Allow the oven to cool below locking temperature Oven not clean after a clean cycle Oven controls improperly set See the Cleaning the Oven section Oven was heavily soiled Clean up heavy spillovers before starting the clean cycle Heavily soiled ovens may need to selfclean again or for a longer period of time quotDOOR quot flashes in the display The selfclean cycle has been selected but the door is not closed ampORVHWKHRYHQGRRUDLWIRURYHQGRRUWRILQLVK locking quotDOOR quot will flash while the oven door is locking to start selfclean and steam clean This is normal quotDOOR quot light is on when you want to cook The oven door is locked because the temperature inside the oven has not dropped below the locking temperature Press the CancelOff pad Allow the oven to cool F and a number or letter flash in the display You have a function error code Press the CancelOff pad Allow the oven to cool for one hour Put the oven back into operation If the function code repeats LVFRQQHFWDOOSRZHUWRWKHRYHQIRUDWOHDVWVHFRQGV DQGWKHQUHFRQQHFWSRZHUIWKHIXQFWLRQHUURUFRGH repeats call for service Display goes blank A fuse in your home may be blown or the circuit breaker tripped Replace the fuse or reset the circuit breaker The clock is turned off See the Special Features section Oven is in Sabbath Mode 9HULIWKDWWKHRYHQLVQRWLQ6DEEDWK0RGH See the Special Features section Power outage clock flashes Power outage or surge 5HVHWWKHFORFNIWKHRYHQZDVLQXVHRXPXVWUHVHW it by pressing the CancelOff pad setting the clock and resetting any cooking function Burning or oily odor emitting from the vent This is normal in a new oven and will disappear in time To speed the process set a selfclean cycle for a minimum of 3 hours See the Cleaning the Oven section Strong odor An odor from the insulation around the inside of the oven is normal for the first few times the oven is used This is temporary and will go away after several uses or a selfclean cycle Fan noise A cooling fan may automatically turn on This is normal The cooling fan will turn on to cool LQWHUQDOSDUWVWPDUXQIRUXSWRKRXUVDIWHUWKH oven is turned off My oven door glass appears to be quottintedquot or have a quotrainbowquot color Is this defective No The inner oven glass is coated with a heat barrier to reflect the heat back into the oven to prevent heat loss and keep the outer door cool while baking 7KLVLVQRUPDO8QGHUFHUWDLQOLJKWRUDQJOHVRXPD see this tint or rainbow color
  • Page 24 - English - : 24 49807542 TROUBLESHOOTING TIPS Troubleshooting tips HIRUHRXFDOOIRUVHUYLFH Problem Possible Cause What To Do Sometimes the oven takes longer to preheat to the same temperature Cookware or food in oven The cookware or food in the oven will cause the oven to take longer to preheat Remove items to reduce preheat time Number of racks in oven Adding more racks to the oven will cause the oven to take longer to preheat Remove some racks Different cooking modes The different cooking modes use different preheat methods to heat the oven for the specific cooking mode Some modes will take longer than others ie convection bake multi Oven will not work remotely Router issues no wireless signal etc For assistance with oven wireless network connectivity SOHDVHFDOO Oven is not connected 3ULQWHGLQWKH8QLWHG6WDWHV
  • Page 25 - Spanish - : MANUAL DEL PROPIETARIO Escriba los números de modelo y de serie aquí Nº de Modelo Nº de Serie Los podrá encontrar en una etiqueta en el borde lateral o en el frente del horno inferior detrás de la puerta del horno HORNO DE PARED Eléctrico con Convección Directa de Aire Incorporada 49807542 1016 GEA INFORMACIÓN DE SEGURIDAD 2 GARANTÍA 6 ASISTENCIA ACCESORIOS 7 USO DEL HORNO Controles del Horno 8 Funciones Especiales 10 Modo Sabático SAbbAtH 12 Estantes del Horno 13 Papel de Aluminio y Cobertores del Horno 14 Utensilios 14 Modos de Cocción 15 Probe Sonda 16 Guía de Cocción 17 CUIDADO Y LIMPIEZA Panel de Control 18 Exterior del Horno 18 Superficies de Acero Inoxidable 18 Interior del Horno 18 Estantes del Horno 19 Mantenimiento 20 CONSEJOS PARA LA SOLUCIÓN DE PROBLEMAS 22 GE es una marca registrada de General Electric Company Fabricado bajo licencia de marca Horno de Pared Simple PT7050 30 Horno de Pared Simple PT9050 30 Horno de Pared Simple CT9050 30 Horno de Pared Doble PT7550 30 Horno de Pared Doble PT9550 30 Horno de Pared Doble CT9550 30
  • Page 35 - Spanish - : 49807542 11 Funciones especiales USO DEL HORNO Funciones especiales Selección de Temperatura dEGrEE El control del horno está configurado para usar unidades de temperatura Fahrenheit pero se puede cambiar a unidades de temperatura Celsius si se prefiere Tono de Finalización del Ciclo End tonE 6HWUDWDGHXQWRQRTXHLQGLFDHOILQDOGHXQWLHPSR3XHGH cambiarlo para que tenga un tono bEEP o un tono con repetición continua Con bEEP Volumen del Tono SoUnd Esta función permite que el volumen del tono del horno sea ajustado entre alto medio por omisión bajo o apagado Configuración del Reloj SEttinG Esta función especifica cómo se exhibirá la hora del día Las opciones son el horario de un reloj estándar de 12 horas con VHOHFFLRQHV030UGHHVWLORPLOLWDUGHKRUDV Hr o sin que se muestre oFF Conversión de Auto Receta AUto rECiPE OXVDUORVPRGRVGHFRFFLyQampRQYHFWLRQDNHRUQHDU SRUampRQYHFFLyQRampRQYHFWLRQDNH0XOWLRQHDGRSRU ampRQYHFFLyQ0OWLSOHVHUHGXFLUiGHIRUPDDXWRPiWLFDOD WHPSHUDWXUDGHFRFFLyQSURJUDPDGD6HGHEHREVHUYDUTXH esta opción no convierte los tiempos de horneado sino sólo la temperatura Apagado en 12 Horas 12 Hr SHUtoFF Cuando esta función sea activada el horno se apagará de forma automática luego de 12 horas de uso continuo Ajuste de la Temperatura del Horno UPPEr tEP oFFSEt Superior e Inferior en algunos modelos Esta función permite que la temperatura del horno sea ajustada KDVWDPiVFDOLHQWHRPiVIUtD8VHHVWDIXQFLyQVL piensa que la temperatura de su horno es demasiado caliente o demasiado fría y desea modificarla Para los modelos con horno doble los hornos superior e inferior se ajustan de forma separada UPPEr tEP OFFSET and LoEr tEP oFFSEt Este DMXVWHDIHFWDORVPRGRV7UDGLFLRQDODNHRUQHDGR7UDGLFLRQDO ampRQYHFWLRQDNHRUQHDGRSRUampRQYHFFLyQampRQYHFWLRQDNH 0XOWL5DFNRUQHDGRSRUampRQYHFFLyQHQVWDQWHV0OWLSOHV Barra de Luz de Notificación LiGHt bAr en algunos modelos Esta función usa una barra de luz entre la puerta y el panel de control para una indicación visual fácil del avance del precalentamiento y el tiempo de cocción Esta función puede ser encendida o apagado en las funciones especiales de su horno VWDIXQFLyQVHXWLOLDFRQORVPRGRVampRQYHFWLRQDNHRUQHDU SRUampRQYHFFLyQampRQYHFWLRQDNH0XOWLRUQHDUSRUampRQYHFFLyQ 0OWLSOHampRQYHFWLRQURLOVDUSRUampRQYHFFLyQampRQYHFWLRQ5RDVW RUDUSRUampRQYHFFLyQ7UDGLWLRQDODNHRUQHDGR7UDGLFLRQDO 7UDGLWLRQDOURLOVDGR7UDGLFLRQDODUPampDOLHQWH3URRI HXGDU6HOIampOHDQLPSLHDXWRPiWLFDampRRN7LPH7LHPSRGH ampRFFLyQ7LPHU7HPSRULDGRUQXQKRUQRGHSDUHGGREOHOD luz de notificación indica el funcionamiento actual del horno superior QLFDPHQWHFRQWLQXDFLyQVHGDXQDGHVFULSFLyQGHODVGLIHUHQWHV condiciones de iluminación APAGADO 1LQJXQDIXQFLyQGHOKRUQR o del temporizador están funcionando o la función fue apagada en las funciones especiales BARRA TITILANTE OKRUQRVHHVWi precalentando La barra de luz titilará hasta que la temperatura configurada del horno haya sido alcanzada BARRA DE PROGRESO3URJUHVDUi lentamente hasta haber una barra completamente iluminada al avanzar la cuenta regresiva del contador NOTA6LVHXVDHOERWyQCook Time Tiempo de Cocción la barra de luz y el horno se apagarán cuando el temporizador llegue DFHUR6LHOERWyQTimer Temporizador es usado la barra de luz permanecerá sólida cuando el tiempo llegue a cero BARRA SÓLIDA OKRUQRVHHQFXHQWUDHQ la temperatura yo función configurada o el temporizador de su cocina se completó NOTA La barra de progreso para funciones por tiempo tiene prioridad sobre las funciones sólidas o titilantes si ambas se usan al mismo tiempo Por Omisión dEFAULt Esta función reinicia todas las funciones especiales a las configuraciones por omisión originales del horno
  • Page 38 - Spanish - : 14 49807542 Estantes Planos Tradicionales Los estantes poseen bloqueadores de modo que al colocarlos correctamente sobre los soportes se detendrán antes de VDOLUVHFRPSOHWDPHQWHQRVHLQFOLQDUiQOFRORFDUUHWLUDU utensilios de cocina empuje la parrilla hasta que se detenga Para Retirar un Estante Empuje el mismo hacia usted incline el frente hacia arriba y empuje hacia afuera Para Reemplazar un Estante QFOLQHHOIUHQWHGHOHVWDQWHKDFLDDUULEDFXHOJXHODSDUWH trasera ubicando los enlaces debajo de los soportes de los estantes empuje el estante hacia atrás hasta trabarlo en los bloqueadores y haga que descienda hasta su posición Empuje el estante hasta que quede introducido completamente 6LUHVXOWDGLItFLOGHVOLDURUHWLUDUHVWDQWHVSODQRVFRORTXHXQ poco de aceite de cocina en una tela suave o en una toalla de papel y frote los costados del estante y cada soporte del mismo PRECAUCIÓN Tenga cuidado al retirar un estante de la posición más baja ya que la puerta podrá estar caliente Estantes del Horno cont USO DEL HORNOVWDQWHVGHORUQR3DSHOGHOXPLQLRampREHUWRUHVGHORUQR8WHQVLOLRV Estante plano Bloqueador 6RSRUWHGHO estante Enlace de ubicación PRECAUCIÓN No use ningún tipo de aluminio o cobertor de horno para cubrir el fondo del horno Estos ítems pueden atrapar el calor o derretirse ocasionando daños sobre el producto y el riesgo de descargas humo o incendios Los daños por uso inadecuado de estos ítems no están cubiertos por la garantía del producto 6HSRGUiXVDUDOXPLQLRSDUDHYLWDUGHUUDPHVFRORFDQGRXQDKRMDVREUHXQHVWDQWHLQIHULRUYDULDVSXOJDGDVGHEDMRGHODFRPLGD 1RXVHPiVDOXPLQLRTXHHOQHFHVDULRQXQFDFXEUDWRWDOPHQWHHOHVWDQWHGHXQKRUQRFRQSDSHOGHDOXPLQLR0DQWHQJDHO DOXPLQLRDSRUORPHQRVGHODVSDUHGHVGHOKRUQRSDUDHYLWDUXQDFLUFXODFLyQGHILFLHQWHGHOFDORU Papel de Aluminio y Cobertores del Horno Utensilios Pautas de Uso de Utensilios El material el acabado y el tamaño de los utensilios afectan el horneado Las ollas oscuras revestidas y opacas absorben el calor más UiSLGDPHQWHTXHODVROODVFODUDVEULOODQWHVOXVDUROODV que absorben el calor más rápidamente las comidas podrán resultar más doradas crocantes y con una capa más gruesa 6LXWLOLDXWHQVLOLRVRVFXURVUHYHVWLGRVFRQWUROHODFRPLGD DQWHVGHOWLHPSRPtQLPRGHFRFFLyQ6LVHREWLHQHQUHVXOWDGRV no deseados con este tipo de utensilios considere la posibilidad de reducir la temperatura del horno en 25º F la próxima vez Las ollas brillantes pueden producir resultados de horneado más parejos en tortas y galletas Las ollas de vidrio y cerámica calientan con lentitud pero retienen bien el calor Estos tipos de ollas funcionan bien con platos tales como tartas y postres con natilla Las ollas con aislante de aire calientan lentamente y pueden producir fondos dorados Mantenga los utensilios limpios para una cocción más pareja
  • Page 46 - Spanish - : 22 49807542 KRUUHWLHPSRGLQHUR3ULPHURUHYLVHORVFXDGURVTXHDSDUHFHQHQODVVLJXLHQWHVSiJLQDVHVSRVLEOHTXHQR necesite solicitar reparaciones Problema Causa Posible Qué Hacer Mi horno nuevo no cocina como el anterior Hay algún problema con las configuraciones de temperatura Su horno nuevo cuenta con un sistema de cocción diferente con relación al anterior y por lo tanto es posible que cocine de forma diferente En los primeros usos use los tiempos y temperaturas GHVXUHFHWDFRQFXLGDGR6LDQSLHQVDTXHVXKRUQR nuevo cocina con demasiado calor o demasiado frío podrá ajustar el termostato usted mismo para aplicar su preferencia de cocción específica Para ajustar la temperatura del horno consulte la sección de Funciones Especiales NOTA Este ajuste afecta las temperaturas GHORVPRGRV7UDGLWLRQDODNHRUQHDGR7UDGLFLRQDO ampRQYHFWLRQDNHRUQHDUSRUampRQYHFFLyQampRQYHFWLRQ DNH0XOWLRUQHDGRSRUampRQYHFFLyQ0OWLSOHpVWH QRDIHFWDUiORVPRGRVampRQYHFWLRQ5RDVWRUDUSRU ampRQYHFFLyQ7UDGLWLRQDOURLOVDGR7UDGLFLRQDO ampRQYHFWLRQURLOVDUSRUampRQYHFFLyQRampOHDQLPSLDU La comida no se hornea de forma apropiada Controles del horno configurados de forma incorrecta Consulte la sección Modos de Cocción La posición del estante es incorrecta o el estante no está nivelado 6HampRQVXOWHODVHFFLyQ0RGRVGHampRFFLyQODXtDGH Cocción Uso de una cacerola incorrecta o de una cacerola de tamaño incorrecto ampRQVXOWHODVHFFLyQ8WHQVLOLRV La temperatura del horno debe ser ajustada Consulte la sección Funciones Especiales Sustitución de ingredientes 6XVWLWXLULQJUHGLHQWHVSXHGHPRGLILFDUHOUHVXOWDGRGHOD receta La comida no asa de forma apropiada Controles del horno configurados de forma incorrecta VHJUHVHGHVHOHFFLRQDUHOPRGRFRUUHFWRSDUDDVDU NOTA El modo para cocción crocante por convección no es para asar comidas Se usó una posición incorrecta del estante Para acceder a sugerencias de ubicación de estantes consulte la Guía de Cocción Se cocinó comida en una olla caliente VHJUHVHGHTXHHOXWHQVLOLRHVWpIUtR Utensilio de cocina inadecuado para asar 8VHXQDROODHVSHFtILFDPHQWHGLVHxDGDSDUDDVDU El papel de aluminio usado para la olla y la rejilla para asar no se ajustó ni cortó de forma apropiada según lo recomendado 6LXVDUiSDSHOGHDOXPLQLRGHEHUiXVDUVHFRQIRUPHFRQ las aberturas de la olla En algunas áreas es posible que el nivel de corriente voltaje sea bajo Precaliente el elemento para asar durante 10 minutos La temperatura del horno es demasiado caliente o demasiado fría La temperatura del horno debe ser ajustada Consulte la sección Funciones Especiales El horno no funciona o parece no funcionar Es posible que un fusible de su hogar se haya quemado o que el disyuntor se haya desconectado 5HHPSODFHHOIXVLEOHRUHLQLFLHHOGLVXQWRU Controles del horno configurados de forma incorrecta ampRQVXOWHODVHFFLyQ8VRGHORUQR El horno se encuentra en Sabbath Mode Modo Sabático 9HULILTXHTXHHOKRUQRQRHVWpHQ6DEEDWK0RGH0RGR 6DEiWLFRampRQVXOWHODVHFFLyQXQFLRQHVVSHFLDOHV Sonido de chisporroteo o traqueo Éste es el sonido de metal calentándose o enfriándose durante las funciones de cocción y limpieza Esto es normal Por qué la estufa hace un sonido de clic cuando uso el horno Su estufa fue diseñada para mantener un control más ajustado sobre la temperatura del horno Es posible que escuche que los elementos de calentamiento del horno hagan sonidos de clic con mayor frecuencia que con hornos más antiguos para lograr mejores resultados durante los ciclos de horneado asado convección y limpieza automática Esto es normal El reloj y el temporizador no funcionan Es posible que un fusible de su hogar se haya quemado o que el disyuntor se haya desconectado 5HHPSODFHHOIXVLEOHRUHLQLFLHHOGLVXQWRU Consejos para la Solución de Problemas QWHVGHVROLFLWDUHOVHUYLFLRWpFQLFR CONSEJOS PARA LA SOLUCIÓN DE PROBLEMAS
  • Page 47 - Spanish - : 49807542 23 Problema Causa Posible Qué Hacer La luz del horno no funciona La lámpara está floja o presenta defectos MXVWHRUHHPSODFHODOiPSDUD La luz de funcionamiento del interruptor está rota ODPHDOVHUYLFLRWpFQLFR El modo de limpieza automática del horno no funciona La temperatura del horno es demasiado caliente como para configurar la limpieza automática Espere a que el horno se enfríe y reinicie los controles Los controles del horno están configurados de forma incorrecta Consulte la sección de Limpieza del Horno Exceso de humo durante un ciclo de limpieza Suciedad o grasa excesiva Presione la tecla CancelOff Cancelar Apagar EUDODV ventanas para liberar el humo en la habitación Espere hasta que la luz de la función LOCKED Bloqueado desaparezca Limpie el exceso de suciedad y reinicie el ciclo de limpieza Humo excesivo al asar La comida está demasiado cerca del quemador Baje la posición del estante con comida La puerta del horno no se abrirá luego de un ciclo de limpieza El horno está demasiado caliente Espere a que el horno se enfríe por debajo de la temperatura de bloqueo El horno no limpia luego de un ciclo de limpieza Los controles del horno están configurados de forma incorrecta Consulte la sección de Limpieza del Horno El horno estaba demasiado sucio Limpie derrames excesivos antes de iniciar el ciclo de limpieza Es posible que en hornos con mucha suciedad sea necesario usar la limpieza automática nuevamente o usarla durante un período de tiempo más prolongado DOOR titila en la pantalla El ciclo de limpieza automática fue seleccionado pero la puerta no está cerrada Cierre la puerta del horno Espere a que la puerta del horno finalice el bloqueo quotDOOR quot Puerta titilará mientras la puerta del horno está bloqueada para iniciar el ciclo de autolimpieza y vapor Esto es normal La luz DOOR está encendida cuando desea cocinar La puerta del horno está bloqueada debido a que la temperatura interior del horno no descendió por debajo de la temperatura de bloqueo Presione la tecla CancelOff Cancelar Apagar Deje que el horno se enfríe F y un número o letra titila en la pantalla Tiene un código de error de función Presione la tecla CancelOff Cancelar Apagar Permita TXHHOKRUQRVHHQIUtHGXUDQWHXQDKRUD9XHOYDDSRQHU el horno en funcionamiento Si el código de función se repite Desconecte totalmente la corriente de la cocina durante SRUORPHQRVPLQXWRVYXHOYDDFRQHFWDUODPLVPD6L el código de error de función se repite llame al servicio WpFQLFR La pantalla queda en blanco Es posible que un fusible de su hogar se haya quemado o que el disyuntor se haya desconectado 5HHPSODFHHOIXVLEOHRUHLQLFLHHOGLVXQWRU El reloj está apagado Consulte la sección Funciones Especiales El horno se encuentra en Sabbath Mode Modo Sabático 9HULILTXHTXHHOKRUQRQRHVWpHQ6DEEDWK0RGH0RGR 6DEiWLFRampRQVXOWHODVHFFLyQXQFLRQHVVSHFLDOHV Corte de corriente el reloj titila Corte o exceso de corriente 5HLQLFLHHOUHORM6LHOKRUQRHVWXYRHQXVRGHEHUi reiniciar el mismo presionando la tecla Cancel Off Cancelar Apagar configurando el reloj y reiniciando cualquier función de cocción Olor a quemado o aceite desde la ventilación Esto es normal en un horno nuevo y desaparecerá con el tiempo Para acelerar el proceso configure un ciclo de limpieza automática por un mínimo de 3 horas Consulte la sección de Limpieza del Horno Olor fuerte Un olor en la aislación alrededor del interior del horno es normal desde las primeras veces en que el horno es usado Esto es temporario y desaparecerá luego de varios usos o de un ciclo de limpieza automática Ruido del ventilador Es posible que un ventilador de enfriamiento se active automáticamente Esto es normal El ventilador de enfriamiento se encenderá para enfriar las partes internas Es posible que funcione hasta durante una hora y media una vez que el horno se haya apagado La puerta de vidrio del horno parece estar teñida o tener un color arcoíris Es esto un defecto No El vidrio del horno interno está cubierto con una barrera de calor que refleja este último nuevamente hacia el horno a fin de evitar la pérdida de calor y de mantener fría la puerta externa mientras se hornea Esto es normal Bajo ciertas luces y ángulos es posible que visualice esta tinta o arcoíris Consejos para la Solución de Problemas QWHVGHVROLFLWDUHOVHUYLFLRWpFQLFR CONSEJOS PARA LA SOLUCIÓN DE PROBLEMAS