Loading ...
Loading ...
Loading ...
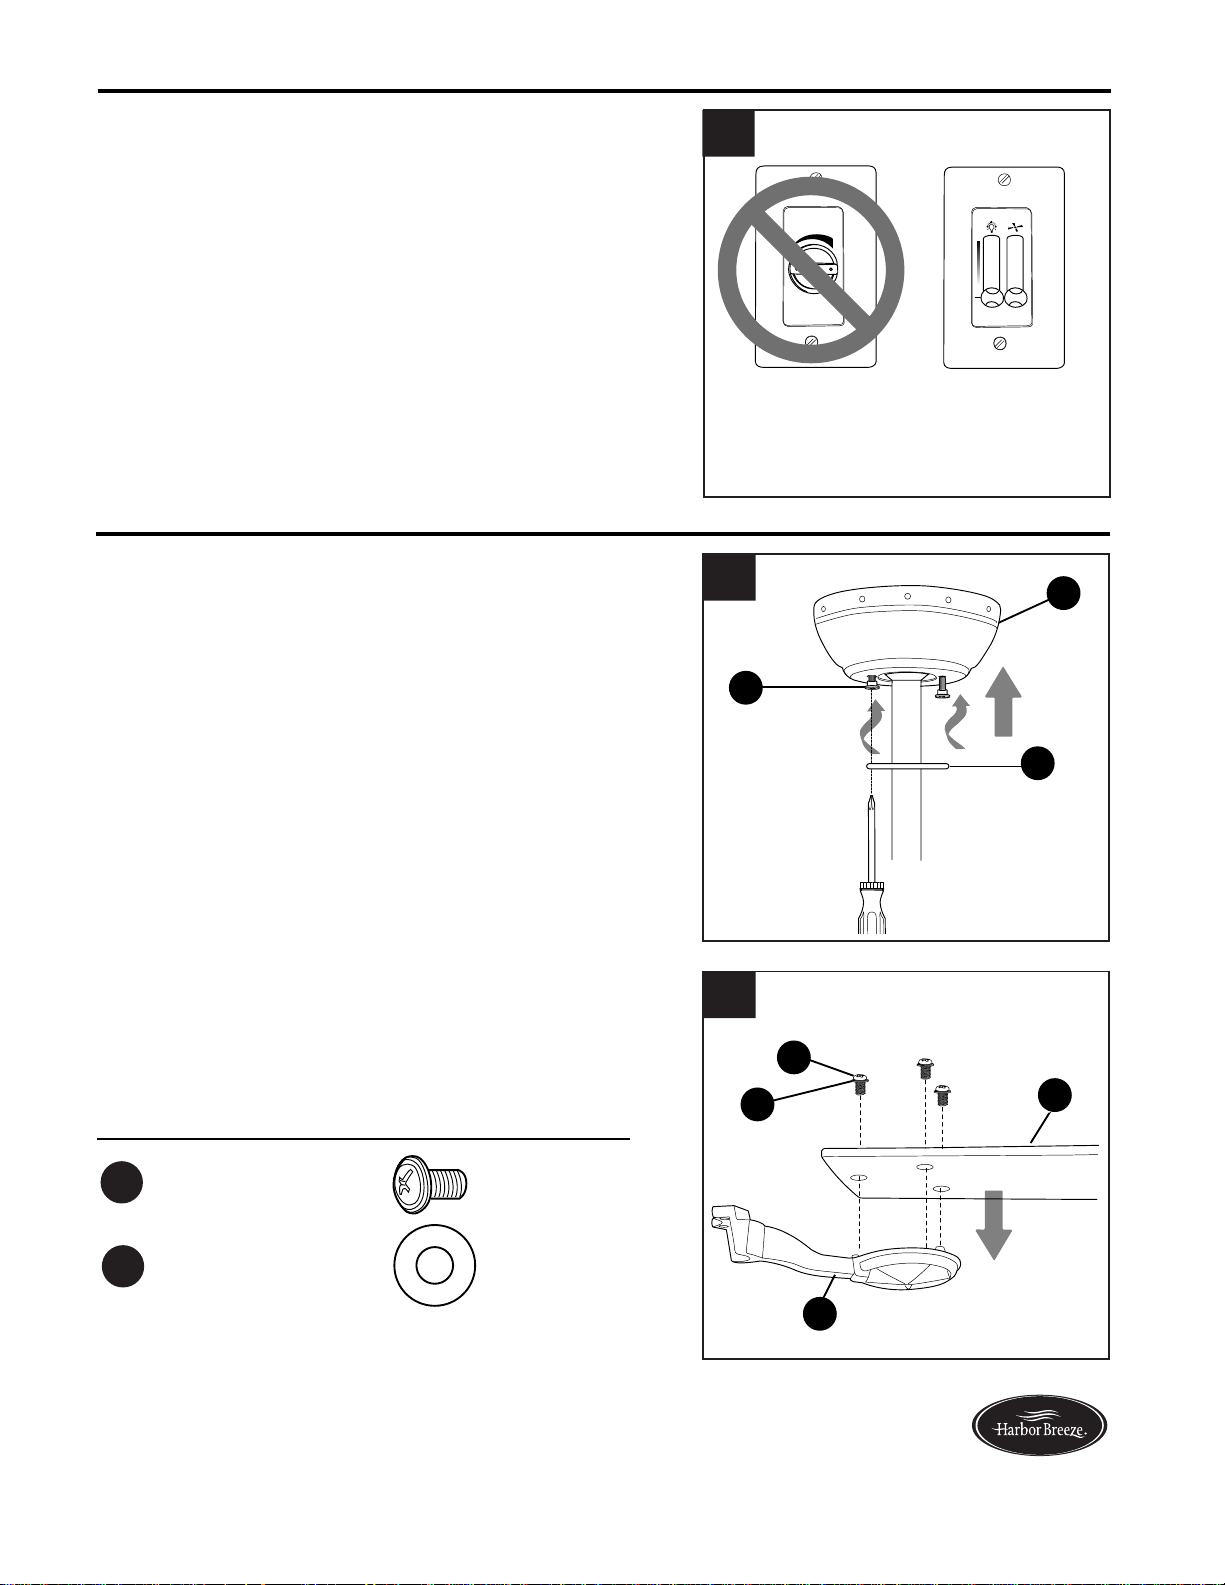
Locate two canopy mounting screws (T) on
underside of mounting bracket (B) and remove
canopy mounting screw (T) closest to the open end
of the mounting bracket (B). Partially loosen the
other canopy mounting screw (T). Lift canopy (C) to
mounting bracket (B). Place rounded part of slotted
hole in canopy (C) over loosened canopy mounting
screw (T) and push up. Twist canopy (C) to lock.
Re-insert canopy mounting screw (T) that was
removed, and then tighten both canopy mounting
screws (T). Slide canopy cover (D) up to canopy
(C), aligning rounded part of slotted holes in canopy
cover (D) with screwheads in bottom of canopy (C).
Turn canopy cover (D) clockwise until it stops.
IMPORTANT: Using a full range dimmer switch (not
included) to control fan speed will cause a loud
humming noise from fan. To reduce the risk of fire or
electrical shock, do NOT use a full range dimmer
switch to control fan speed.
3.
WIRING
Dimmer
Switch
Speed
Switch
For illustrative purposes only--not
intended to cover all types of controls
3
1
2
3
FINAL INSTALLATION
11
Lowes.com/harborbreeze
1.
1
Partially insert three blade screws (AA) along with
three blade washers (BB) to attach one blade arm
(N) to a blade (O). Then, tighten each blade
screw (AA) starting with the one in the middle.
Repeat for remaining blades (O).
2.
Blade Screw x 15
Blade Washer x 15
2
Hardware Used
AA
BB
D
T
C
AA
BB
I
J
N
O
Loading ...
Loading ...
Loading ...