Loading ...
Loading ...
Loading ...
3
INSTALLATION INSTRUCTIONS
LOCATION
• Two people should be used when moving the
appliance.
• Remove interior and exterior packaging prior to
installation. Wipe the outside of the appliance
with a soft, dry cloth and the inside with a
lukewarm wet cloth.
• Place the appliance on a fl oor that is strong
enough to support it when it is fully loaded.
• Do not place the appliance in direct sunlight or
near sources of heat, such as a stove or heater,
as this can increase electrical consumption.
Extreme cold ambient temperatures may also
cause the appliance to perform improperly.
• Do not use the appliance near water, for
example in a wet basement or near a sink.
• This appliance is intended for household use
only. It is not designed for outside installation,
including anywhere that is not temperature
controlled (garages, porches, vehicles, etc.).
• Before connecting the appliance to a power
source, let it stand upright for approximately
6 hours. This will reduce the possibility of a
malfunction in the cooling system from handling
during transportation.
• This appliance is 55 cm (21.7 inches) wide by
126.5 cm (49.8 inches) high by 56.3 cm (22.2
inches) deep.
• Allow 12.7 cm (5 inches) of space between the
back, sides and top of the appliance and all
adjacent walls.
• This appliance is intended for free-standing
installation only and is not intended to be
built into a cabinet or counter. Building in this
appliance can cause it to malfunction.
• CAUTION: This appliance is designed for storing
and cooling beverages and drinks. Do not store
perishable food, medicine or other products in
this appliance.
• The recommended ambient temperature for
this appliance is between 64°F - 100°F (18°C
- 38°C). Using this appliance in very cold or
very warm ambient conditions can cause it to
malfunction.
LEVELING INSTRUCTIONS
There is an adjustable leg on the bottom of the
appliance that can be turned up or down to ensure
that the appliance is level.
1. Turn the leveling leg counter-clockwise as far as
it will go, until the top of the foot is touching the
bottom of the cabinet.
2. Slowly turn the leveling leg clockwise until the
appliance is level.
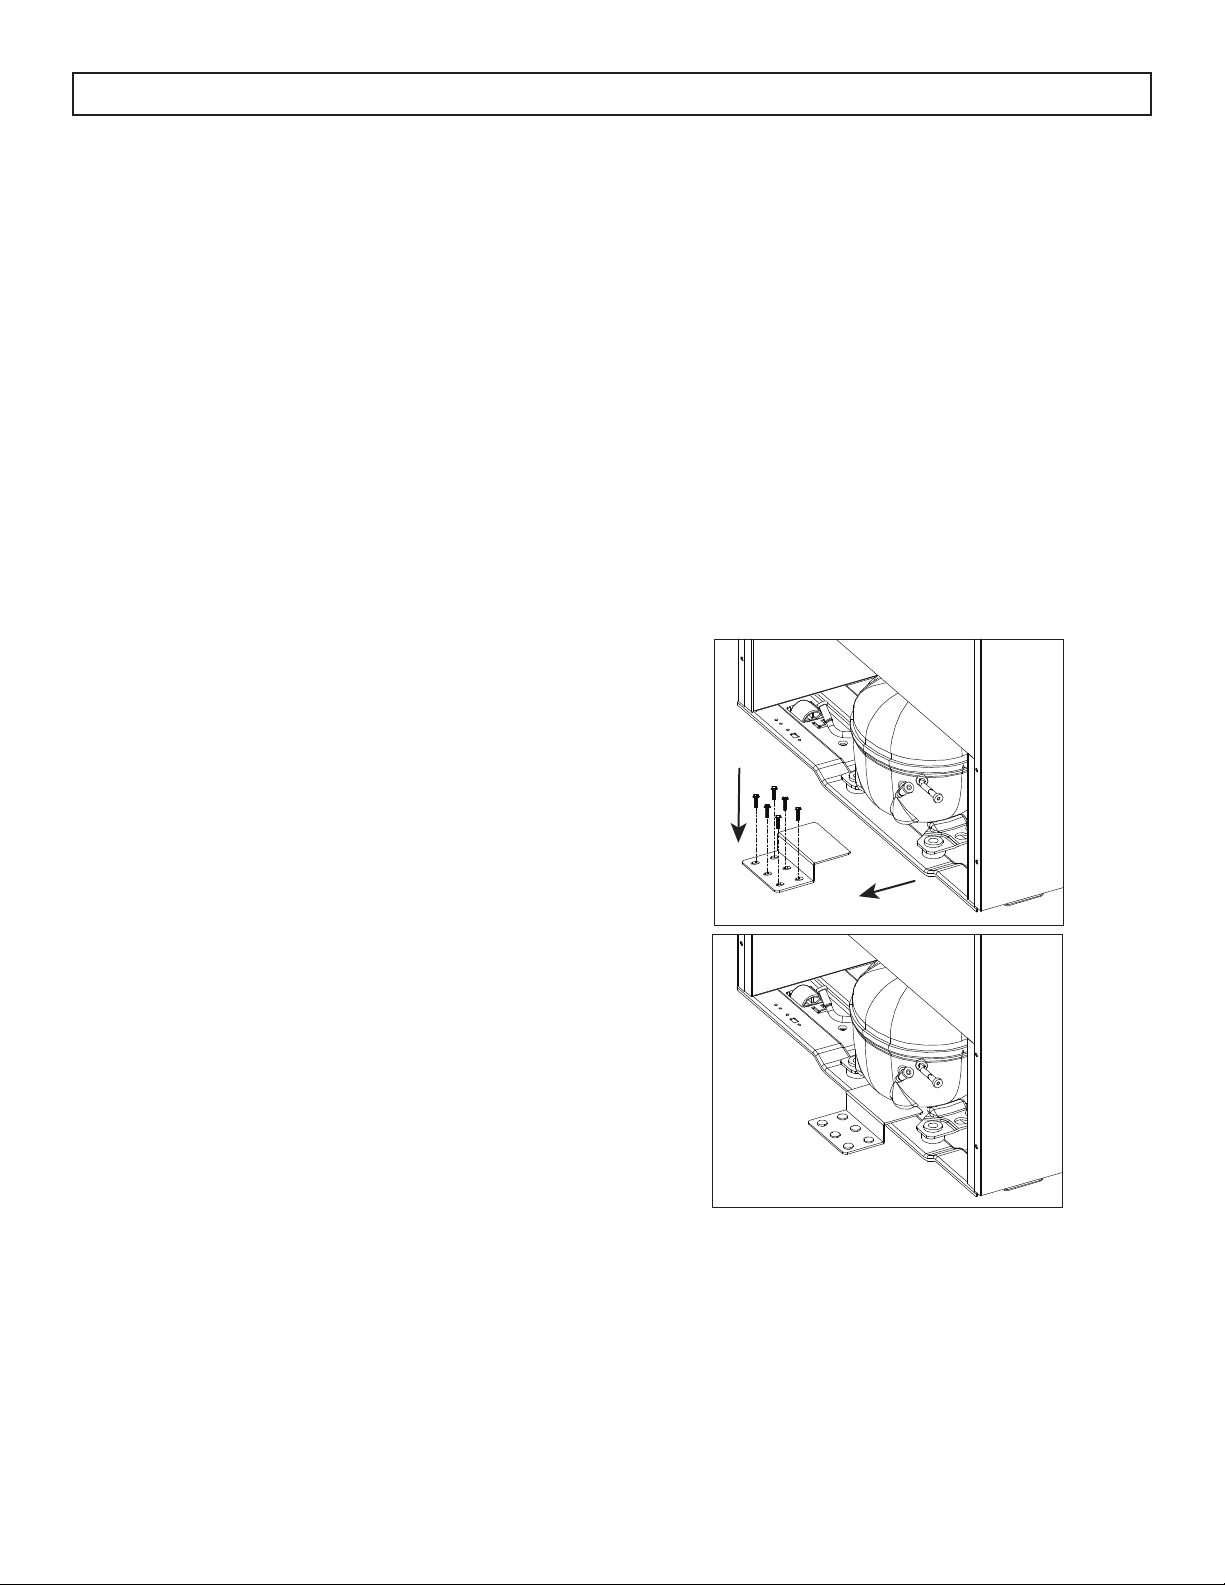
ANTI TIP BRACKET
The anti tip bracket should be installed to ensure
that the appliance cannot tip over and cause
damage or harm to persons or property.
1. Move the appliance to its fi nal position.
2. Use a pen or pencil to mark the location of the
back of the appliance on the fl oor.
3. Remove the appliance and install the anti tip
bracket in the fl oor at the marked location.
• For wood fl ooring: use the 6 provided
ST6*25 screws
• For concrete fl ooring: use the 6 provided
M6*50 expansion bolts
4. Slide the unit into place ensuring that the anti tip
bracket catches the cabinet.
Loading ...
Loading ...
Loading ...