Loading ...
Loading ...
Loading ...
49-80839-1 15
9
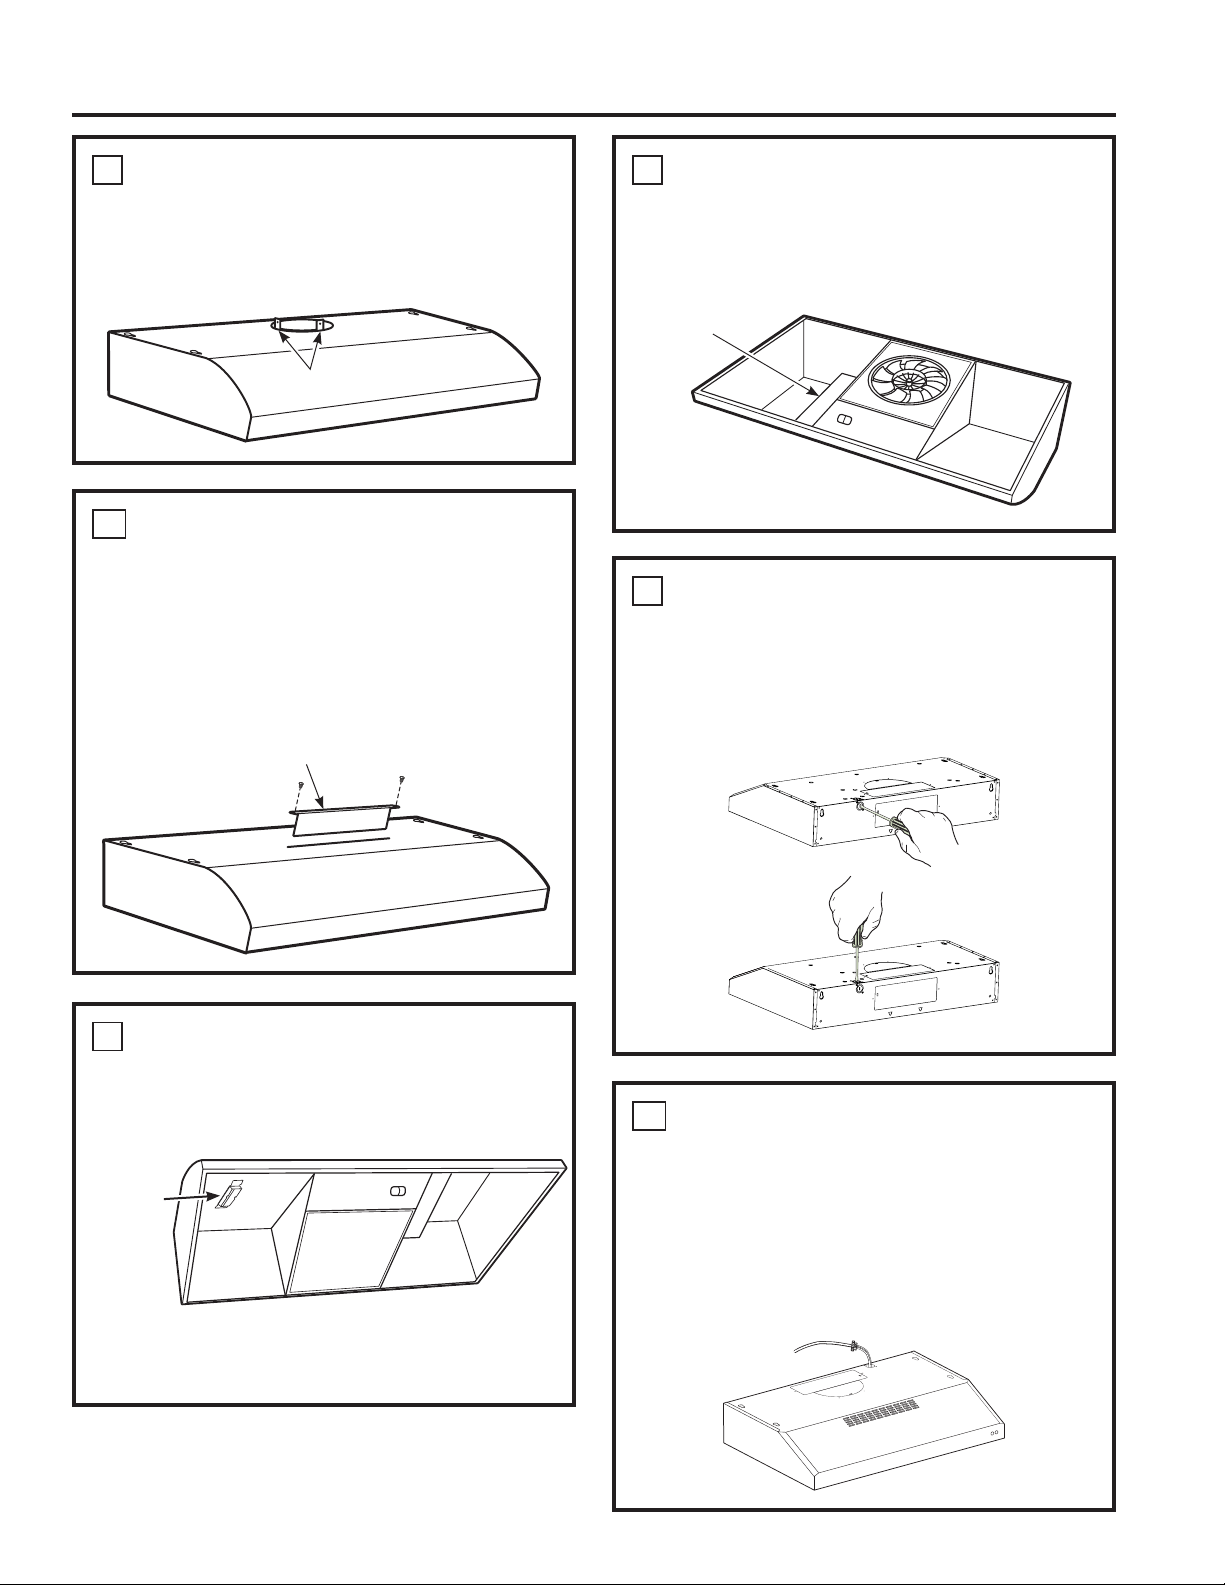
PREPARE FOR ELECTRICAL –
REMOVE ELECTRICAL
KNOCKOUTS
Use a flat blade screwdriver, remove the
appropriate electrical knockout from the back or
the top of the hood.
INSTALLATION PREPARATION
Installation Preparation
5
FOR 7" ROUND VERTICAL
DUCTED DISCHARGE
INSTALLATIONS ONLY:
Bend up the duct alignment ears in preparation
IRUODWHUDWWDFKPHQWRIWKHƎGXFW
7
REMOVE EXHAUST ADAPTOR
,IH[KDXVWLQJYHQWLQJXVLQJWKHƎ[Ǝ
rectangular duct, remove the exhaust adaptor
from the inside of the hood. Set it aside along
with its mounting screws.
NOTE: Rectangular exhaust adaptor is not
required for recirculation mode. Remove it and
keep it incase of future use.
Attachment ear tabs
3
1
»4Ǝ[Ǝ
rectangular
exhaust
adaptor and
screws
6
REVERSE THE BAFFLE FOR
DUCTED INSTALLATIONS
ONLY
If the hood is to be recirculated, skip to the
next step. Remove the baffle from the top of
the hood. Reinstall the baffle so the short side
marked “VENTED” is visible. The long side of
the baffle should be inside the hood.
8
PREPARE FOR ELECTRICAL –
REMOVE HOOD JUNCTION BOX
Remove the hood junction box from inside
the hood. Set the cover and its mounting
screws aside.
“VENTED” is visible
Hood
Junction
Box
10
FEED IN WIRES
1. Install strain relief on appropriate knockout of
the hood by tightening down the nut until strain
relief is secure.
2. Lift the hood in position and feed house wiring
through the strain relief.
2. Tighten the strain relief screws to secure the
wires.
Loading ...
Loading ...
Loading ...