COMMERCIAL
DRYERS
Use &CareGuide
For questions about features, operation/performance, parts,
acceesories or service, call: 1-800-NO BELTS (1-800-622-3587)
For installation and service, call: 1-8_O-NO BELTS (1-800-622-3567)
or visit our website at...
wl_lN.coinop.com
SECADORAS
COMERCIALES
ManualdeUsey Cuidado
Pare consut_ss respecto a csracfedaticas, operacibnidesempe_o,
partes, aeoesorios o servioio t6onioo, Ilame al:
1-800-NO BELTS (1-800-622-3587)
Para instalacibn y servico Ilame al: 1-8_0-NO BELTS (1-800-622-3567)
o visite nueatra p&gina de Internet
www.coinop.com
Tsble ofContenteJfndice ...................................... 2
8527907
Downloaded from www.ManualsFile.com manuals search engine
TABLEOFCONTENTS
DRYER SAFETY .............................................................................. 3
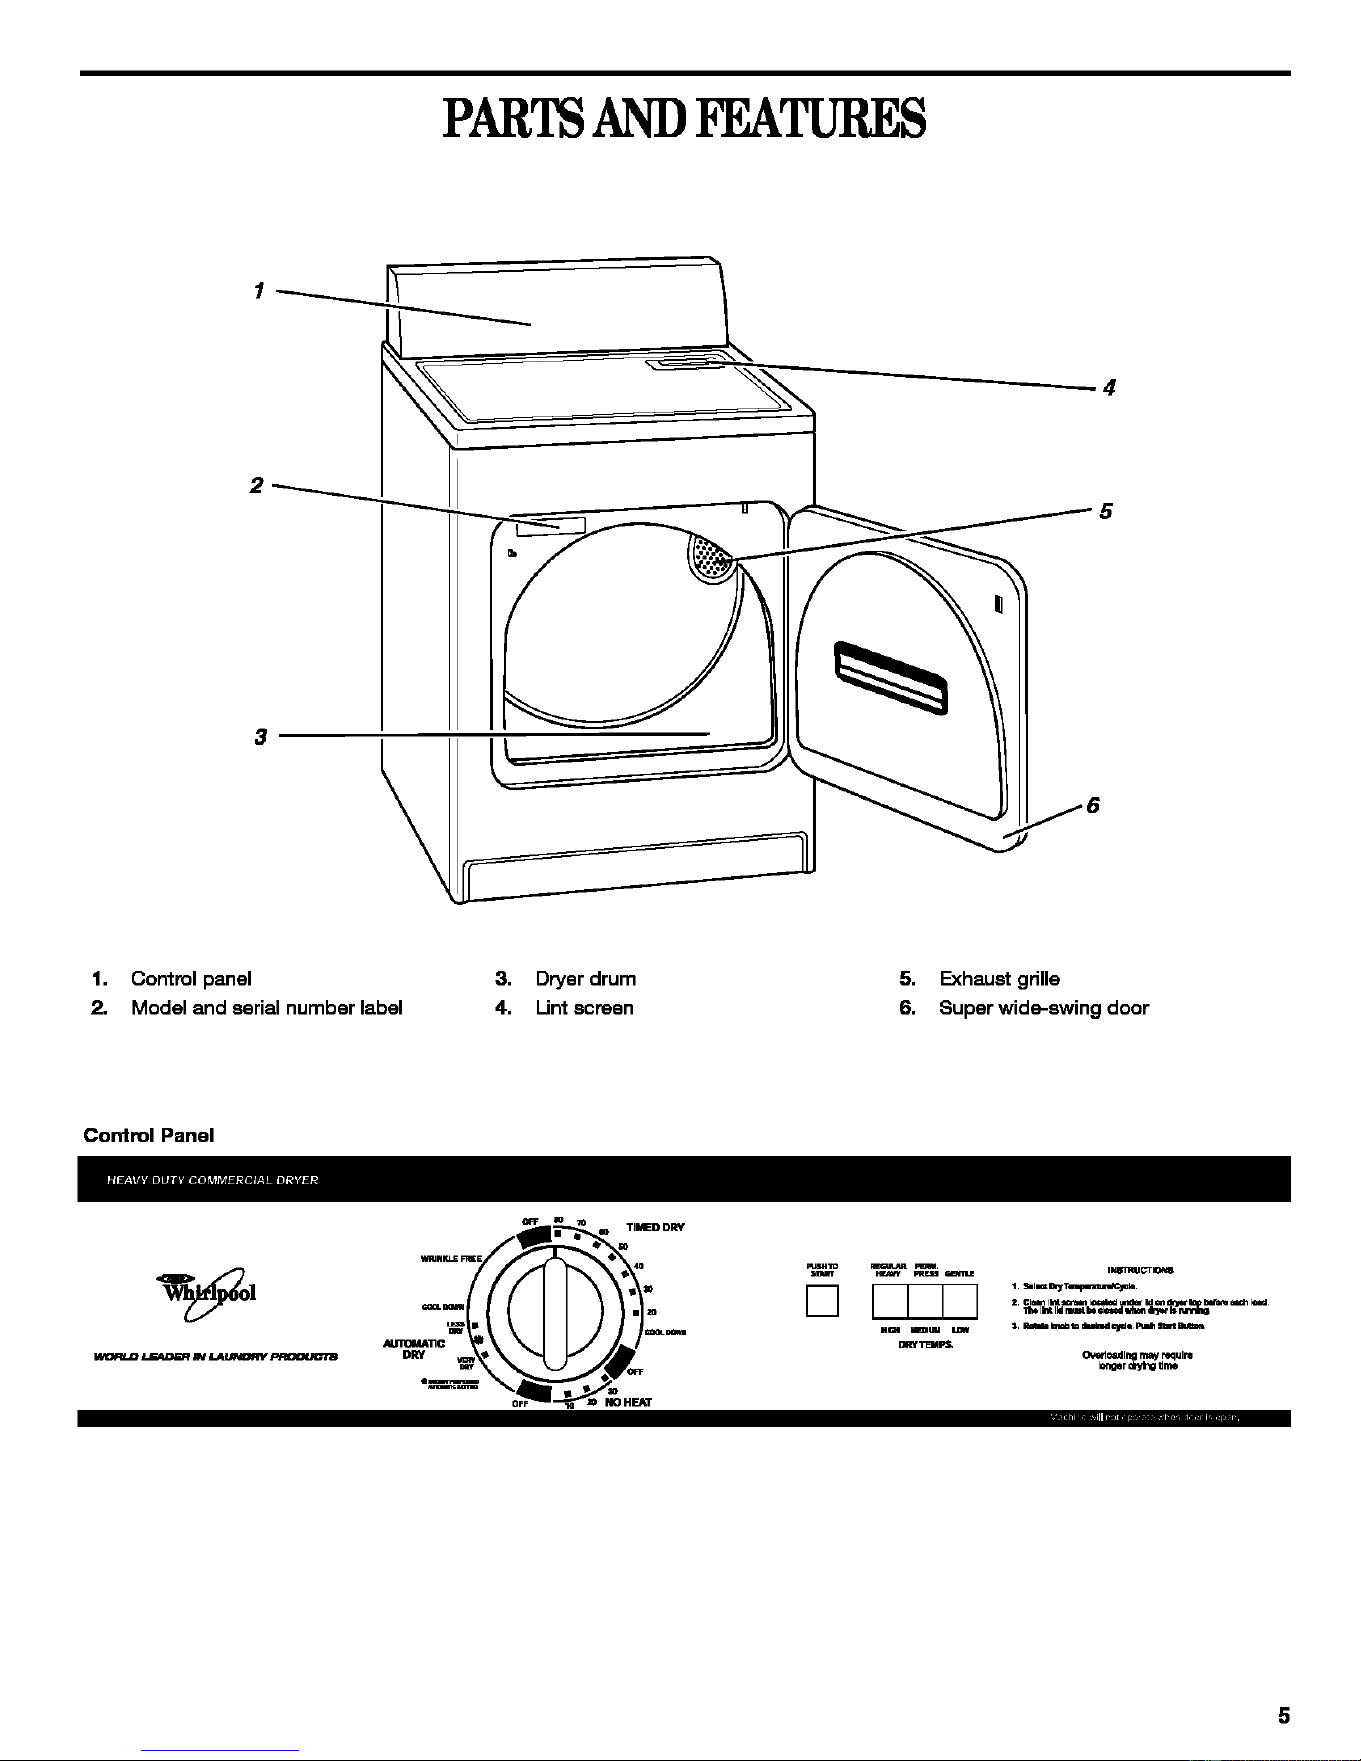
PARTS AND FEATURES ................................................................ 5
CHECKING YOUR VENT ............................................................... 6
DRYER USE .................................................................................... 7
Starting Your Dryer....................................................................... 7
Stopping and Restarting .............................................................. 7
Loading ......................................................................................... 7
Drying, Cycle and Temperature Tips ........................................... 8
Cycles ........................................................................................... 8
DRYER CARE ................................................................................. g
Cleaning the Lint Screen .............................................................. 9
Cleaning the Dryer Interior ........................................................... 9
Removing Accumulated Lint ........................................................ 9
TROUBLESHOOTING .................................................................. 10
ASSISTANCE OR SERVICE ......................................................... 11
WARRANTY' .................................................................................. 12
INDICE
BEGURIDAD DE LA SECADORA ................................................ 14
PARTEB Y CARACTER|STICAS .................................................. 16
REVISION DE SU VENTILACION ................................................ 17
USO DE SU SECADORA .............................................................. 18
Puesta en marcha de su escadora ............................................ 18
Pare datener y volver a poner en marcha .................................. 18
Cbmo cargar ............................................................................... 19
Conesjos de escedo, cicIos y temperatura ............................... 19
Ciclos .......................................................................................... 19
CUIDADO DE LA BECADORA ..................................................... 20
Limpieza del filtro de pelusa ...................................................... 20
Limpieza del interior de la escadora .......................................... 21
Eliminacibn de pelues acumuleda ............................................. 21
BOLUCION DE PROBLEMAB ...................................................... 21
AYUDA O BERVlCIO TI_CNICO .................................................. 22
GARANT[A ..................................................................................... 24
2
O • O •
JUST IMAGINE" _ 'roDo LO IMAGINAS
Downloaded from www.ManualsFile.com manuals search engine
DRYER SAFETY
Your safety and the safety of others are very important.
We have provided many important safety messages in this manual and on your appliance. Always read and obey all
safety messages.
p_ his is the safety alert symbol.
This symbol alerts you to potential hazards that can kill or hurt you and others.
All safety messages will follow the safety alert symbol and either the word "DANGER" or
"WARNING." These words mean:
You can be killed or seriously injured if you don't
immediately follow instructions.
You can be killed or seriously injured if you don't
follow instructions.
All safety messages will tell you what the potential hazard is, tell you how to reduce the chance of injury, and tell you
what can happen if the instructions are not followed.
WARNING: For your safety, the information in this manual must be followed to minimize
the risk of fire or explosion, or to prevent property damage, personal injury, or death.
- Do not store or use gasoline or other flammable vapors and liquids in the vicinity of this
or any other appliance.
- WHAT TO DO IFYOU SMELL GAS:
• Do not try to light any appliance.
• Do not touch any electrical switch; do not use any phone in your building.
• Clear the room, building, or area of all occupants.
• Immediately call your gas supplier from a neighbor's phone. Follow the gas supplier's
instructions.
• If you cannot reach your gas supplier, call the fire department.
- Installation and service must be performed by a qualified installer, service agency, or
the gas supplier,
Downloaded from www.ManualsFile.com manuals search engine
IMPORTANT SAFETY INSTRUCTIONS
WARNING: To reduce the risk of fire, electric shock, or injury to persons when using the dryer, follow basic
precautions, including the following:
Read all instructions before using the dryer.
Do not place items exposed to cooking oils in
your dryer. Items contaminated with cooking oils
may contribute to a chemical reaction that could
cause a load to catch fire.
Do not dry articles that have been previously
cleaned in, washed in, soaked in, or spotted with
gasoline, dry-cleaning solvents, other flammable,
or explosive substances as they give off vapors
that could ignite or explode.
Do not allow children to play on or in the dryer.
Close supervision of children is necessary when
the dryer is used near children.
Before the dryer is removed from service or dis-
carded, remove the door to the drying compart-
ment.
Do not reach into the dryer if the drum is moving.
Do not install or store the dryer where it will be
exposed to the weather.
Do not tamper with controls.
• Do not repair or replace any part of the dryer or
attempt any servicing unless specifically recom-
mended in this Use and Care Guide or in published
user-repair instructions that you understand and have
the skillsto carry out.
• Do not use fabric softeners or products to eliminate
static unless recommended by the manufacturer of
the fabric softener or product.
• Do not use heat to dry articles containing foam rubber
or similarlytextured rubber-like materials.
• Clean lint screen before or after each load.
• Keep area around the exhaust opening and adjacent
surrounding areas free from the accumulation of lint,
dust, and dirt.
• Theinteriorofthedryerandexhaustventshouldbe
cleaned periodically by qualified service personnel.
• See installation instructions for grounding require-
ments.
SAVETHESE INSTRUCTIONS
4
Downloaded from www.ManualsFile.com manuals search engine
CHECKINGYOURVENT
Your dryer must be properly installed and vented to achieve
maximum drying efficiency and shorten drying times. Use the
minimum recommended installation clearances (found in your
Installation Instructions) to avoid blocking the flow of combustion
and ventilation air. Refer to your Installation Instructions for more
information.
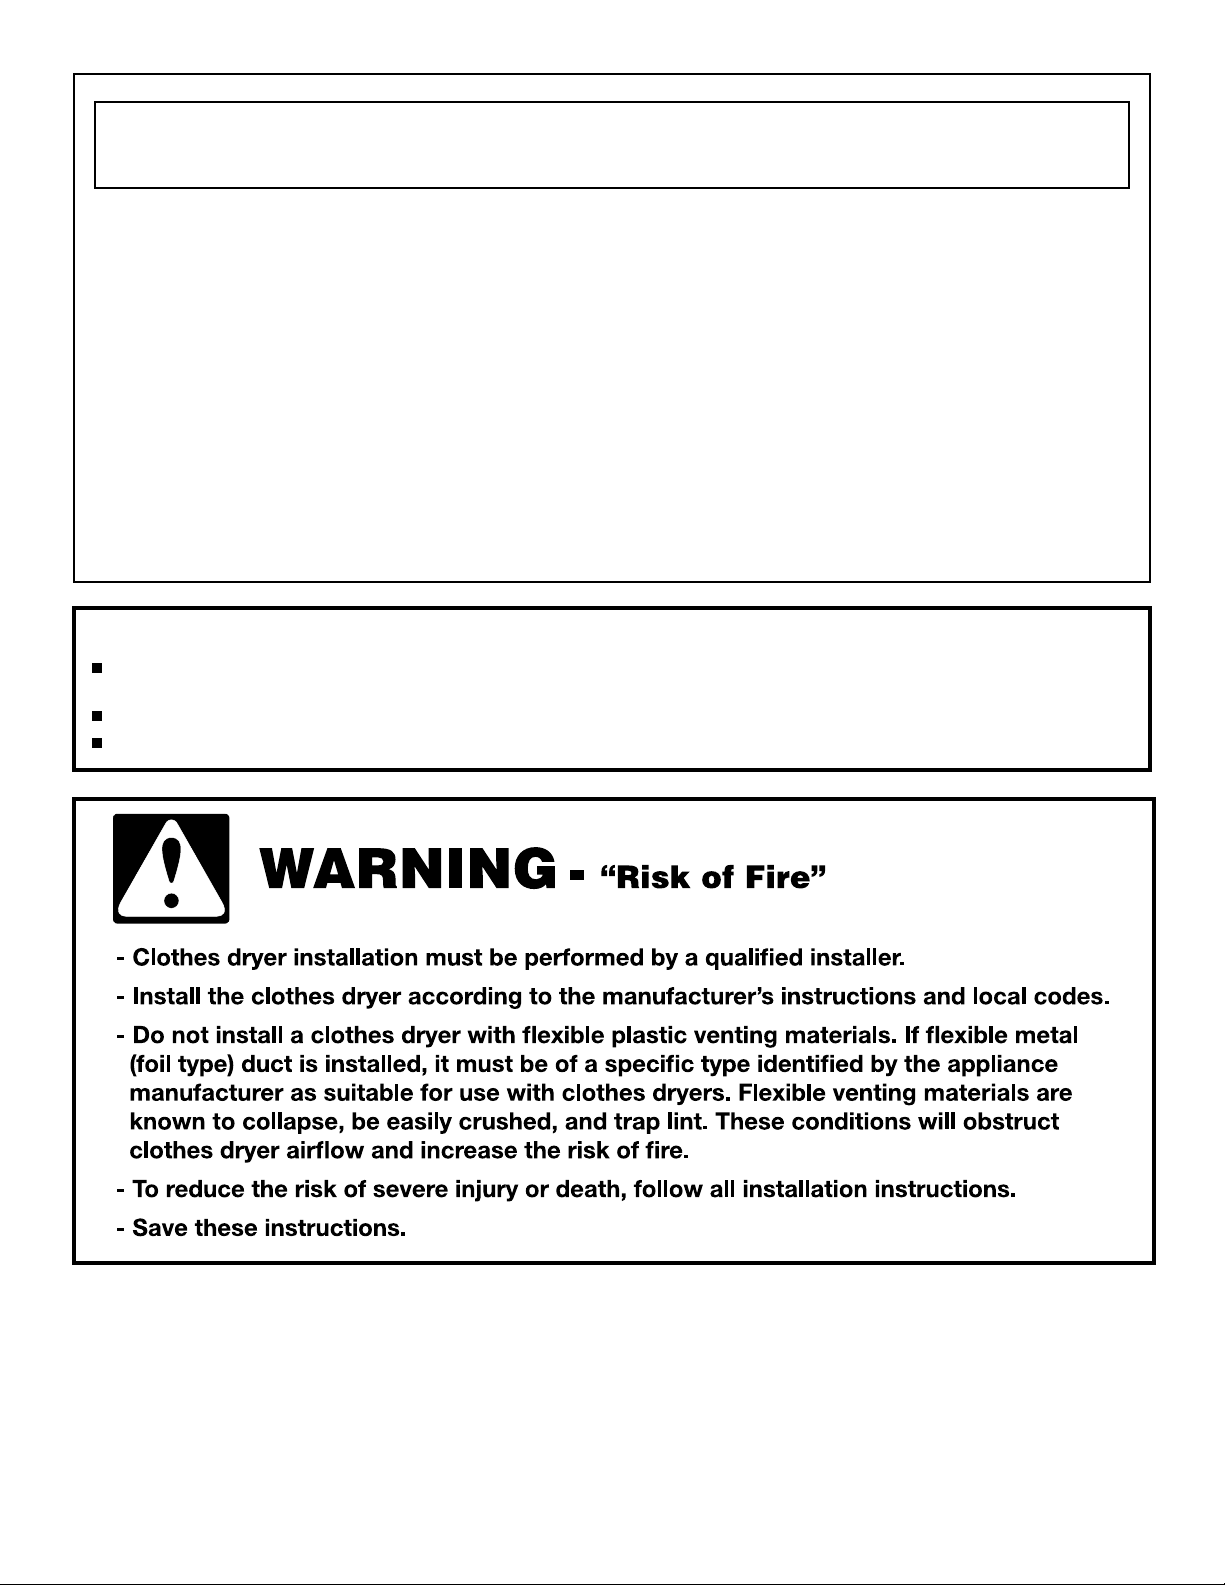
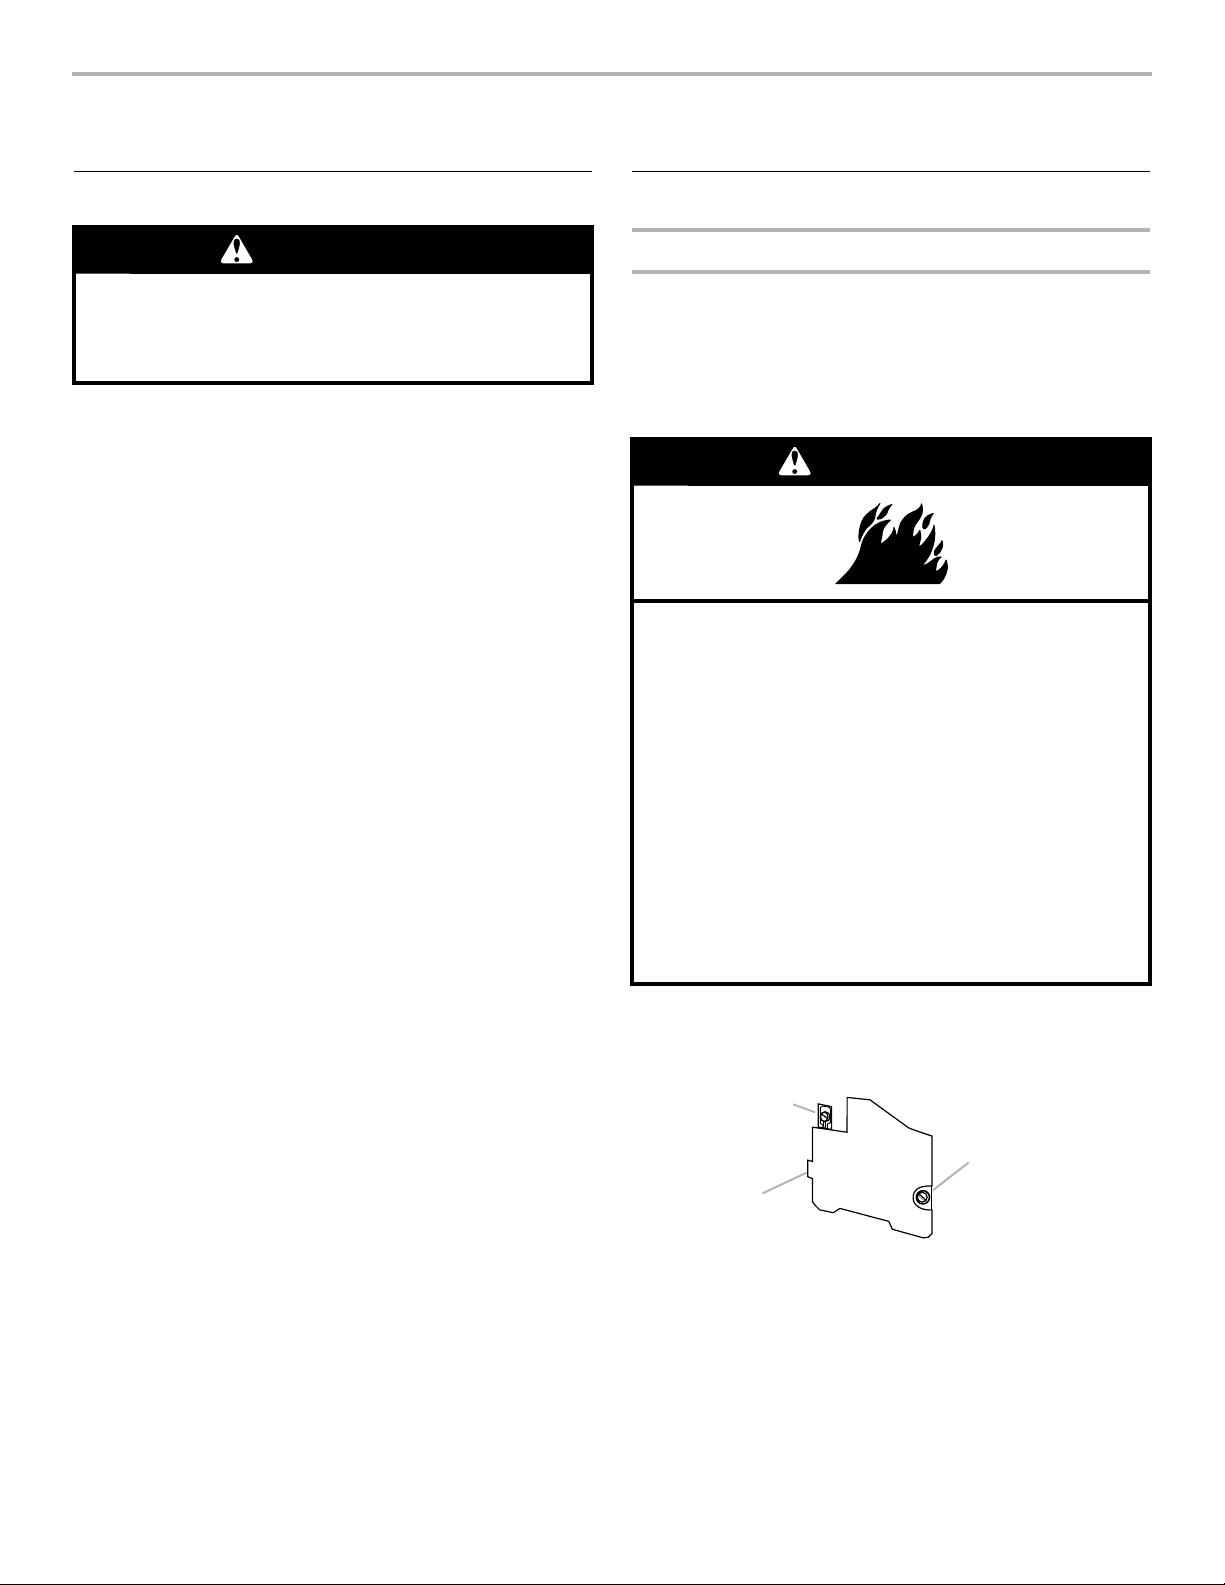
Fire Hazard
Use a heavy metal vent.
Do not use a plastic vent.
Do not use a metal foil vent.
Failure to follow these instructions can result in
death or fire.
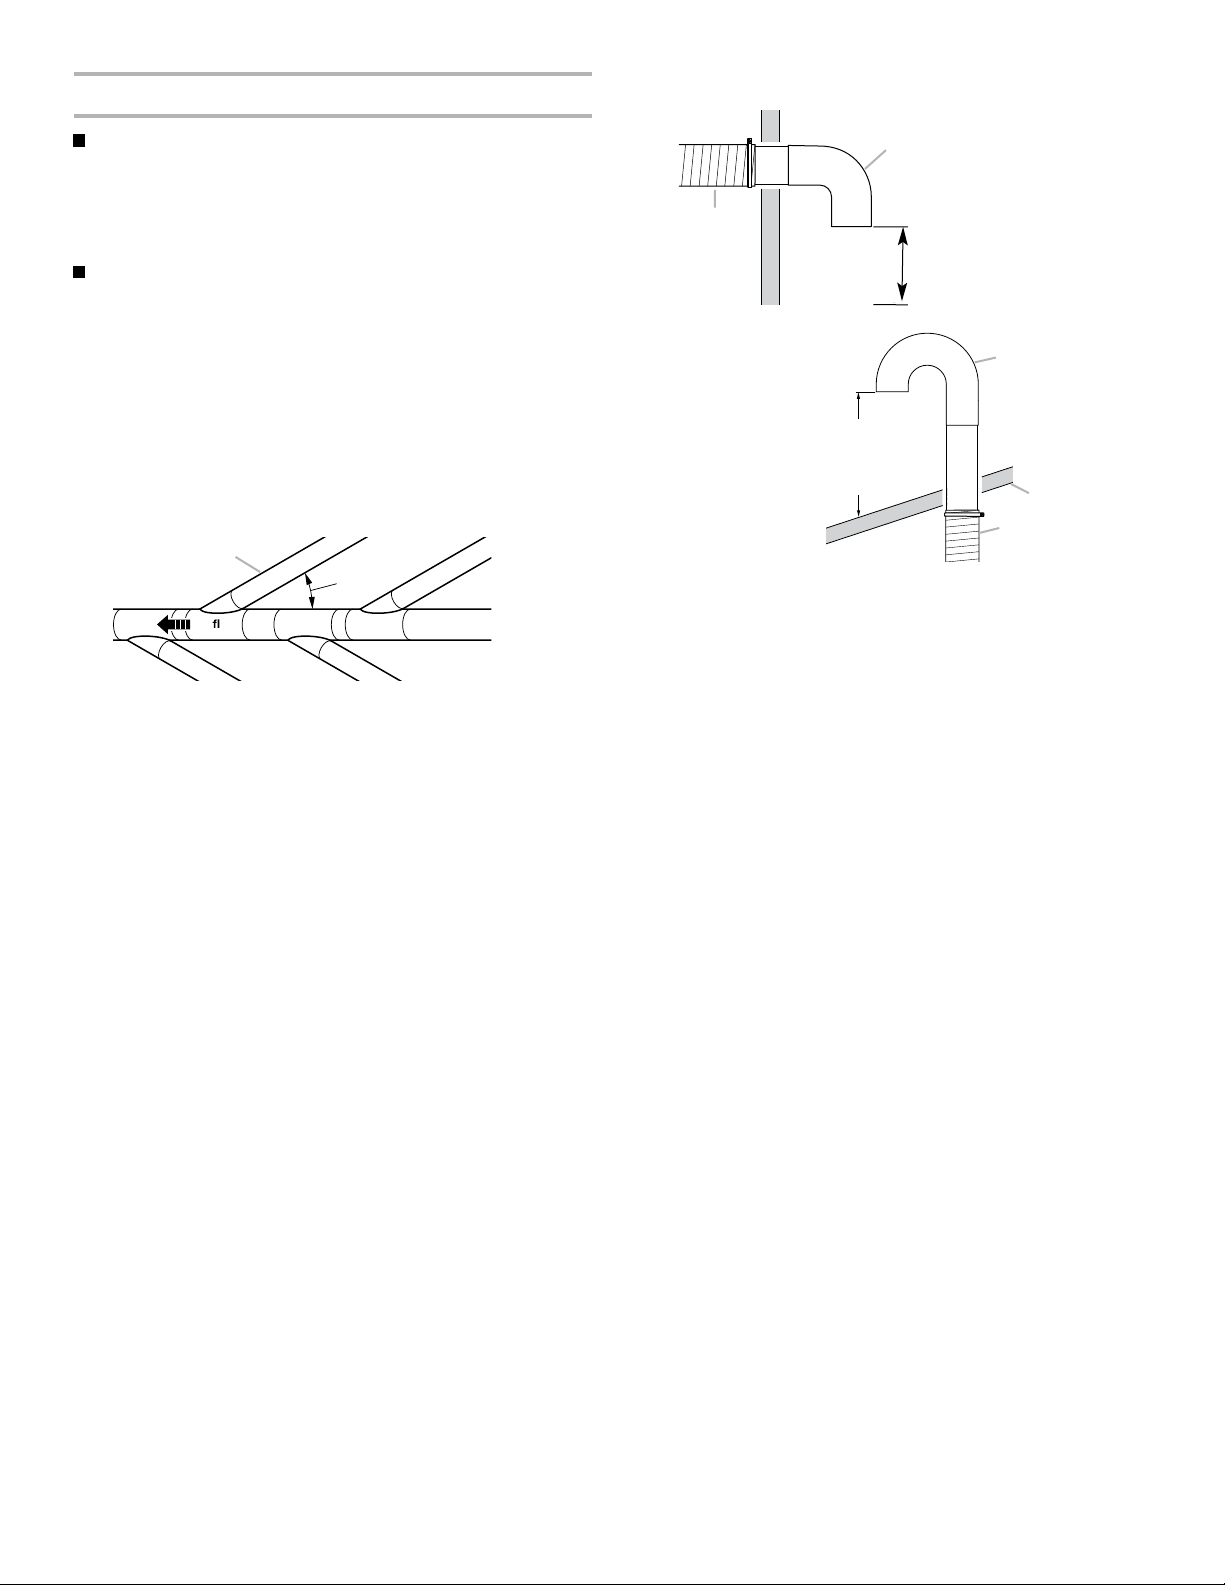
3. The exhaust vent can be routed up, down, left, right, or
straight out the back of the dryer, Space requirements are
listed in your Installation Instructions,
4,
Use the straightest path possible when routing the exhaust
vent. Use the fewest number of elbows and turns. Allow room
when using elbows or making turns. Bend vent gradually to
avoid kinking.
bettor
\
5. Use duct tape to seal all joints. Do not use screws to secure
vent. Lint may catch on screws.
Ifthe dryer is not properly installed and vented, it will not be
covered under the warranty.
NOTE: Service cells caused by improper venting will be paid for
by the customer, whether it was a paid installation or self-
installed.
1,
Do not use plastic vent or metal foil vent. Use 4 in. (10.2 cm)
metal or flexible metal vent. Do not kink or crush flexible
metal vent. It must be completely extended to allow adequate
exhaust air to flow. Check vent after installation. Refer to your
Installation Instructions for proper length requirements of vent.
2, Use a 4 in. (10.2 cro) exhaust hood. Smaller hoods increase
drying times.
6. Clean exhaust vent periodically, depending on use, but at
least every 2 years, or when installing your dryer in a new
location.
a Disconnect vent from the dryer and clean one section at a
time until you reach the exhaust hood.
a To clean out lint, use the hose attachment on your
vacuum, or a pole or wire with a feather duster or rag
attached.
a Be sure the flapper on the outside end of vent moves
freely.
a When cleaning iscomplete, be sure to follow the
Installation Instructions supplied with your dryer for final
product check.
6
Downloaded from www.ManualsFile.com manuals search engine
DRYERUSE
StartingYourDryer
2. Turn the Cycle Control knob to the recommended cycle for
the type of load being dried. Use the Energy Preferred
Automatic Setting (*) to dry most heavyweight and medium
weight loads. See "Drying, Cycle, and Temperature Tips."
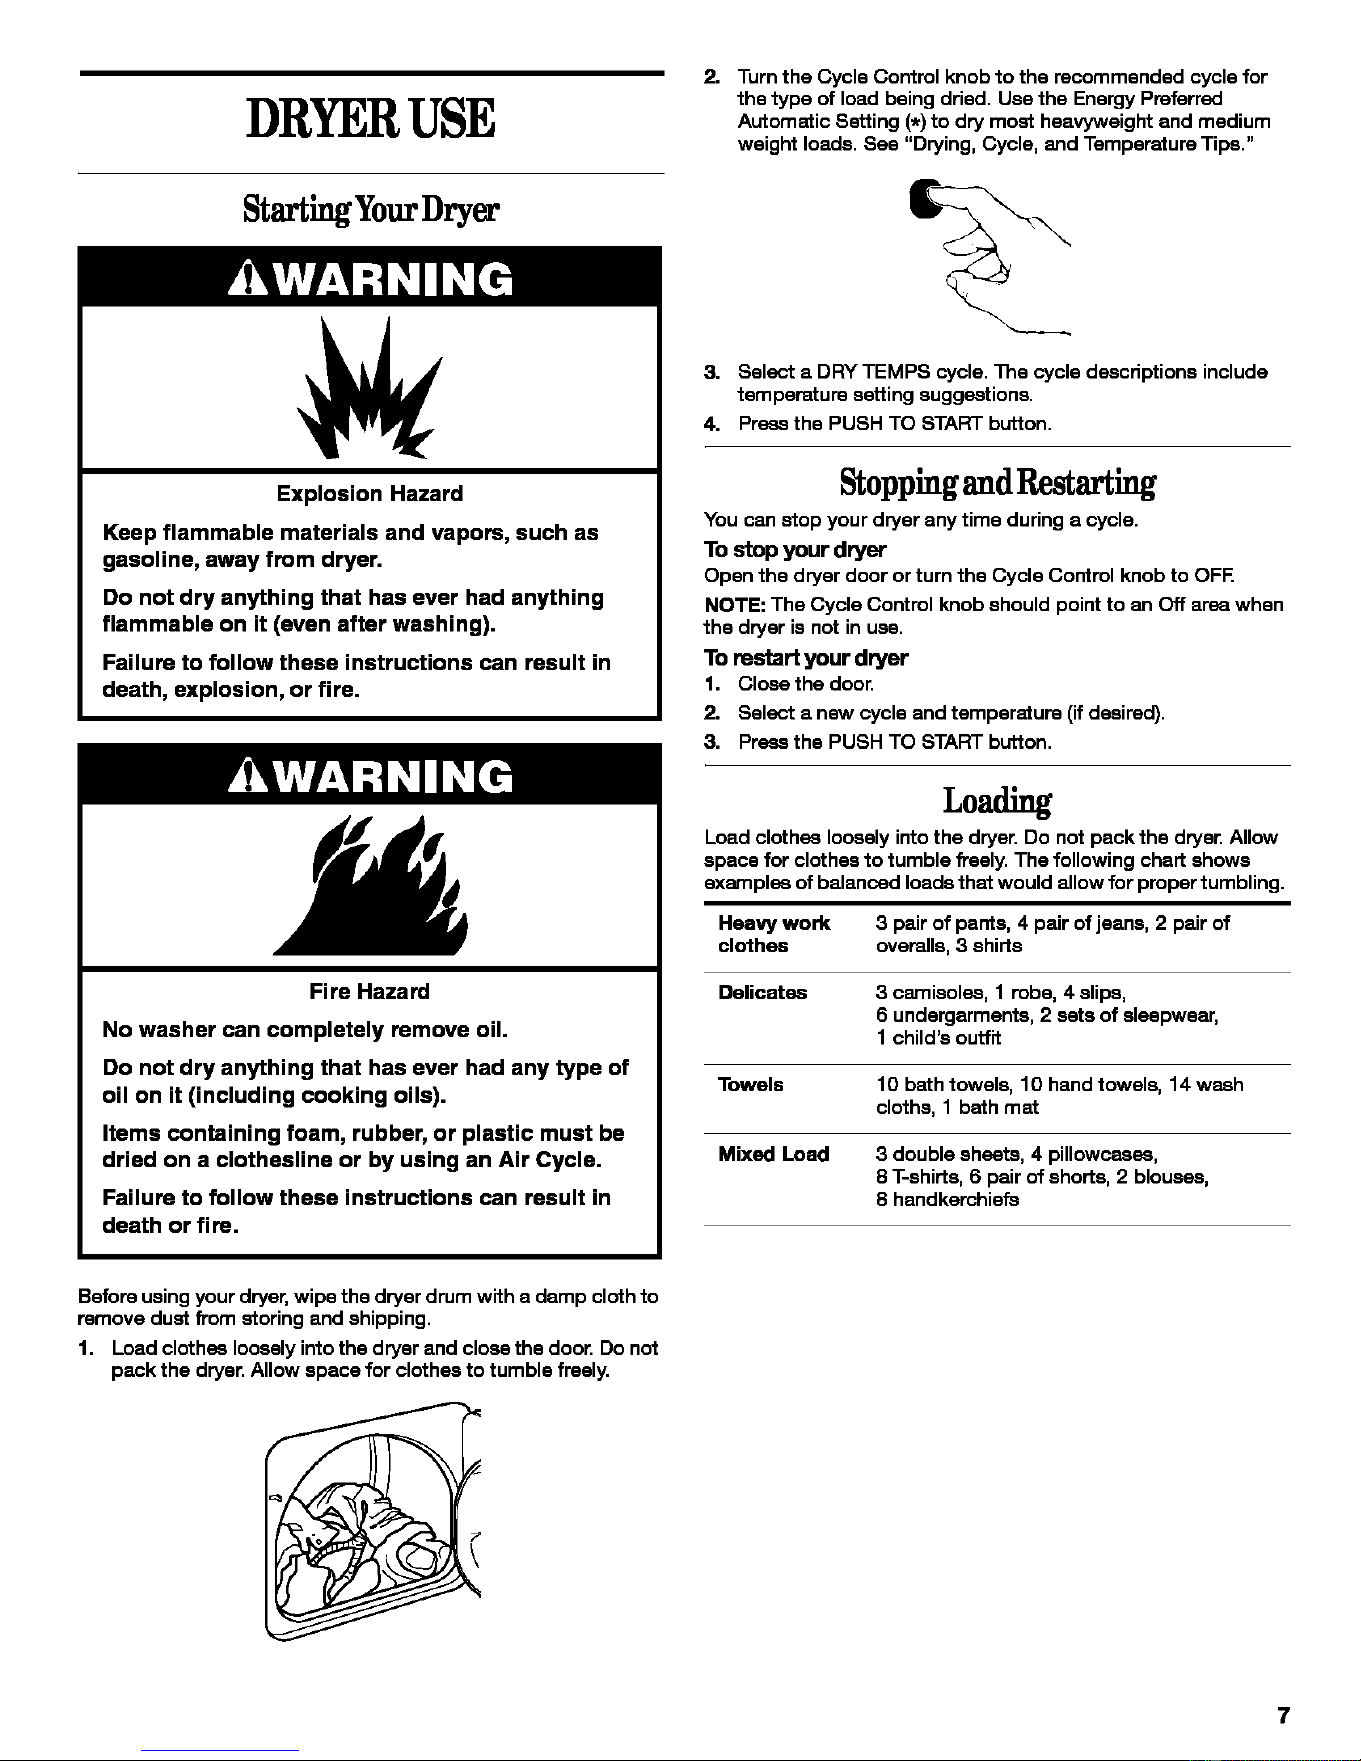
Explosion Hazard
Keep flammable materials and vapors, such as
gasoline, away from dryer.
Do not dry anything that has ever had anything
flammable on it (even after washing).
Failure to follow these instructions can result in
death, explosion, or fire.
Fire Hazard
No washer can completely remove oil.
Do not dry anything that has ever had any type of
oil on it (including cooking oils).
Items containing foam, rubber, or plastic must be
dried on a clothesline or by using an Air Cycle.
Failure to follow these instructions can result in
death or firs.
3. Select a DRYTEMPS cycle. The cycle descriptions include
temperature setting suggestions,
4. Press the PUSH TO START button,
StoppingandRestarting
You can stop your dryer any time during a cycle.
To stop your dryer
Open the dryer door or turn the Cycle Control knob to OFR
NOTE: The Cycle Control knob should point to an Off ares when
the dryer is not in use.
To restart your dryer
1. Clceethe door.
2. Select a new cycle and temperature (if desired).
3. Press the PUSH TO START button.
L0=t
Load clothes loosely intothe dryer. Do not pack the dryer. Allow
space for clothes to tumble freely. The following chart shows
examples of balanced loads that would allow for proper tumbling.
Heavy work 3 pair of pants, 4 pair of jeans, 2 pair of
clothes overalls, 3 shirts
De,cotes 3 camisoles, 1 robe, 4 slips,
6 undergarments, 2 sets of slespwesr,
1 child's outfit
Towels 10 bath towels, 10 hand towels, 14 wash
cloths, 1 bath mat
Mixed Load 3 double sheets, 4 pillowcases,
8 T-shirts, 6 pair of shorts, 2 blouses,
8 handkerchiefs
Before using your dryer, wipe the dryer drum with a damp cloth to
remove dust from storing and shipping.
1. Load clothes loosely intothe dryer and close the door. Do not
pack the dryer. Allow space for clothes to tumble freely.
7
Downloaded from www.ManualsFile.com manuals search engine

Drying,CycleandTemperatureTips
Select the correct cycle and temperature for your load.
Cool Down tumbles the load without heat during the last few
minutes of all cycles to make the load easier to handle.
Drying tips
= Follow care label directions when they are available.
a If you use fabric softener sheets, use only those labeled
"dryer safe." Follow package instructions.
a Remove the load from the dryer as soon as tumbling stops, to
reduce wrinkling. This is especially important for permanent
press, knits, and synthetic fabdcs.
Cycle and temperature tips
a Dry most loads using the Energy Preferred Automatic
Setting (*), if available on your dryer,
a Use a High heat setting for drying heavyweight items such as
towels and work clothes.
a Use a Medium heat setting for drying medium weight items,
such as sheets, underwear, permanent press fabrics, and
some knits.
a
a
Use a Low heat setting for drying lightweight items such as
lingerie, blouses, dresses, and some knits.
Use a no-heet (air) setting for rubber, plastic, or heet-sanaltive
fabrics.
a Line dry bonded or laminated fabrics.
NOTE: Ifyou have questions about drying temperatures for
various loads, refer to the care label directions. If you are unsure
of the temperature to select for a load, select a lower setting
rather than a higher setting.
Cydes
OFF 80 70
TIMED DRY
WRINKLE FREE
4O
COOL DOWN
LESS
AUTOMATIC
DRY
OFF
3O
2O
COOLm
)FF
SO
10 NO HEAT
Cycle Control knob
Automatic Dry
Use your Automatic Dry cycle to dry most loads, Your dryer uses
an Automatic Dry control, The control senses the moisture level in
the load and shuts off whan the load reanhes the selected
dryness, Select a heat setting based on the fabrics in your load,
After drying a load in the Automatic Dry cycle, check the dryness.
a If the load is drier than you like, select a setting closer to Less
Dry the next time you dry a similar load.
a If a load is not as dry as you like, complete drying using a
Timed cycle. Select a setting closer to Very Dry the next time
you dry a similar load.
NOTE: Drying time varies with an Automatic cycle. The type of
fabric, size of the load, and the dryness selected affect drying
time. See "Drying, Cycle and Temperature Tips."
Timed Dry
Use _med Dry for heavyweight and bulky items, such as
bedspreads and work clothes or large loads that require a long
drying time, Select the High heat setting,
You may also use the Timed Dry cycle for lightweight items such
as lingerie or knits, Select a heat setting based on the fabrics in
your load.
NOTE: Use your Timed Dry cycle to complete drying if items are
still damp after the Automatic Dry cycle.
No Heat
Use the No Heat setting for items that require drying without heat
such as foam, rubber, plastic and heat sensitive fabrics, Set the
Cycle Control knob to No Heat, This chart shows examples of
items that can be dried using the No Heat setting,
Type of Load No Heat satting*
Foam rubber - pillows, padded bras, 20 - 30
stuffed toys
Plastic - Shower curtains, tablecloths 20 - 30
Rubber-becked rugs 40 - 50
Olefin, polypropylane, sheer nylon I g - 20
*(Minutes). Reset cycle to complete drying, if needed.
When using the No Heat setting
m Check to see that coverings are securely stitched.
m Shake and fluff pillows by hand periodically during cycle.
m Dry item completely. Foam rubber pillows are slow to dry.
8
Downloaded from www.ManualsFile.com manuals search engine
DRYERCARE
Cleaningthe LintScreen
CleaningtheDryerInterior
Every load cleaning
The lint screen is located on the top of the dryer. Clean it before
each load. A screen blocked by lint can increase drying time.
To clean
1. Pullthe lint screen towards you. Roll lint off the screen with
your fingers. Do not rinse or wash screen to remove lint. Wet
lint is hard to remove.
2. Push the lint screen firmly back into place.
IMPORTANT:
• Do net run the dryer with the lint screen loose, damaged,
blocked, or missing. Doing so can cause overheating and
damage to both the dryer and fabrics.
Some towels made of synthetic fibers and natural fibers
(polyester and cotton blends) may shed more lint than other
towels, causing your dryer's lint screen to fill up faster. Be
sure to remove lintfrom the lint screen before and after drying
new towels.
• If lint falls off the screen into the dryer during removal, check
the exhaust hood and remove the lint. See "Checking Your
Vent."
As needed cleaning
Laundry detergent and fabric softener residue can build up on the
lint screen. This buildup can cause longer drying times for your
clothes, or cause the dryer to stop before your load is completely
dry. The screen is probably clogged if lint falls off the screen.
Clean the lint screen with a nylon brush every six months, or
more frequently if it becomes clogged due to a residue buildup.
To wash
1. Roll lint off screen with your fingers.
2. Wet both sides of lintscreen with hot water.
3. Wet a nylon brush with hot water and liquid detergent. Scrub
lint screen with the brush to remove residue buildup.
4. Rinse screen with hot water.
5. Thoroughly dry lint screen with a clean towel. Insert lint
screen back into dryer.
Explosion Hazard
Use nonflammable cleaner.
Failure to do so can result in death, explosion,
or fire.
To clean dryer drum
1. Make a paste with powdered laundry detergent and very
warm watec
2. Apply paste to a soft cloth.
OR
Apply a liquid, non-flammable household cleaner to the
stained area and rub with a soft cloth until all excess dye is
removed.
3. Wipe drum thoroughly with a damp cloth.
4. Tumble a load of clean clothe or towels to dry drum.
NOTE: Garments which contain unstable dyes, such as denim
blue jeans or brightly colored cotton items, may discolor the
dryer interior.These stains are net harmful to your dryer and will
net stain future loads of clothes. Dry unstable dye items inside-
out to prevent dye transfer.
RemovingAccmnulatedLint
From Inside the Dryer Cabinet
Lintshould be removed every 2 years, or more often, depending
on dryer usage. Cleaning should be done by a qualified person.
From the Exhaust Vent
Lint should be removed every 2 years, or more often, depending
on dryer usage.
Downloaded from www.ManualsFile.com manuals search engine
TROUBLESHOOTING
First tTy the solu_ons suggested here and possibly •void
the cost of a service call...
Clothes are net drying satisfactorily
• Check the following:
Isthe lint screen clogged with lint?
Isthe exhaust vent or outside exhaust hood clogged with lint,
restricting air movement? Run the dryer for 5-10 minutes.
Hold your hand under the outside exhaust hood to check air
movement. If you do not feel air movement, clean exhaust
system of lint or replace exhaust vent with heavy metal or
flexible metal vent. See your Installation Instructions.
Is the exhaust vent crushed or kinked? Replace with heavy
metal or flexible metal vent. See your Installation Instructions. •
Has a fuse blown, or a circuit breaker tripped? Electric dryers
use 2 household fuses or breakers. The drum may be turning,
but you may not have heat.
Has an air dry cycle been selected? Select the fight cycle for •
the types of garments being dried. See "Drying, Cycle and
Temperature Tips." •
For gas dryers, is the valve open on the supply line?
Are fabric softener sheets blocking the grille? Use only one
fabric softener sheet, and use it only once.
Is the dryer located in a room with temperature below
45°F (70C)?
Proper operation of dryer cycles requires temperatures above
45°F (7°C).
• Was a cold rinse water used? Was the load very wet?
Expect longer drying times with items rinsed in cold water
and with items that hold moisture (cottons).
• Is the load too large and heavy to dry quickly?.
Separate the load to tumble freely.
Dryer will net run
Check the following:
Isthe power cord plugged in?
Has a fuse blown, or has a circuit breaker tripped?
Was a regular fuse used? Use a time-delay fuse.
Isthe dryer door firmly closed?
Was the START button firmly pressed?
Is a cycle selected?
Unusual sounds
• Has the dryer had a period of non-use?
Ifthe dryer hasn't been used for a while, there may be a
thumping sound during the first few minutes of operation.
• Is it a gas dryer?.
The gas valve clicking is a normal operating sound.
Unt on load
• Is the lint screen clogged?
Clean lint screen. Check for air movement.
Is the load properly sorted?
Sort lint givers (towels, chenille) from lint takers (corduroy,
synthetics). Also sort by color.
Is the load too big or too heavy?.
Dry smaller loads so lint can be carried to the lintscreen.
Was the load overdded?
Use correct dryer settings for load type. Overdrying can
cause lint-attracting static electricity. See "Drying, Cycle, and
Temperature Tips."
Was paper or tissue left in pockets?
Is pilling being mistaken for lint?
Pilling (surfaca fuzz) is caused by normal wear and
laundering.
Stains on load or color change
• Was dryer fabric softener properly used?
Add dryer fabric softener sheets at the beginning of the cycle.
Fabric softener sheets added to a partially-dried load can
stain your garments.
• Were items soiled when placed in the dryer?.
Items should be clean before being dried.
• Were items properly sorted?
Sort light colors from dark colors. Sort colorfast items from
noncolorfest items.
Items shdnldng
• Was the dryer overloaded?
Dry smaller loads that will tumble freely.
• Did the load overdry?
Check the manufacturer's care label. Match dryer setting to
load type. See "Drying, Cycle, and Temperature Tips."
Loads are wrinkled
• Was the load removed from dryer at the end of the cycle?
• Was the dryer overloaded?
Dry smaller loads that can tumble freely.
• Did the load overdry?
Check the manufacturer's care label. Match dryer setting to
load type. See "Drying, Cycle, and Temperature Tips."
10
Downloaded from www.ManualsFile.com manuals search engine
Odom
• Have you recently been painting, staining or varnishing in
the area where your dryer is located?
If so, ventilate the area. When the odors or fumes are gone
from the area, re-wash and dry the clothing.
• If the dryer is electric, is it being used for the first time?
The new electric heating element may have an odor. The odor
will be gone after the first cycle.
Garment damage
• Check the following:
Were zippers, snaps, and hooks left open?
Were strings and sashes tied to prevent tangling?
Were care label instructions followed?
Were items damaged before drying?
ASSISTANCEORSERVICE
Before calling for assistance or service, please check
"Troubleshooting." it may save you the cost of a service call. If
you still need help, follow the instructions below.
When calling, please know the purchase date and the complete
model and serial number of your appliance. This information will
help us to better respond to your request.
If you need replacement parts
If you need to order replacement parts, we recommend that you
only use FSP®factory specified parts. These parts will fit right
and work right because they are made with the same precision
used to build every new WHIRLPOOL ® appliance. To locate FSP
replacement parts in your area cell the Customer Interaction
Center or your nearest designated service center.
For assistance and service
Call the Whirlpool Customer Interaction Center toll free at:
1-800-NO BELTS (1-800-622-3587),
Our consultants provide assistance with:
• Features and specifications on our full line of appliances
• Installation information
• Useand maintenance procedures
• Accessory and repair parts sales
• Specialized customer assistance (Spanish speaking, hearing
impaired, limited vision, etc.)
• Referrals to local dealers, repair parts distributors, and
service companies
Whirlpool designated service technicians are trained to fulfill the
product warranty and provide after-warranty service anywhere in
the United States.
To locate the Whirlpool designated service company inyour ares,
you can also look in your telephone directory Yellow Pages.
For further assistance
If you need further assistance, you can write to Whirlpool
Corporation with any questions or concerns at:
Whirlpool Brand Commercial Appliances
Customer Interaction Center
553 Benson Road
Benton Harbor, MI 49022-2692
Please include a daytime phone number in your correspondence.
11
Downloaded from www.ManualsFile.com manuals search engine
WHIRLPOOL®COMMERCIALDRYERWARRANTY
ONE-YEAR FULL WARRANTY
For one year from the date of purchase, when this dryer is operated and maintained according to instructions attached to or furnished
with the product, Whirlpool Corporation will pay for FSPe factory specified replacement parts and repair labor to correct defects in
materials or workmanship. Service must be provided by a Whirlpool designated service company.
SECOND THROUGH THIRD YEAR LIMITED WARRANTY
Forthe second through third years from the date of purchase, when this dryer is operated and maintained according to instructions
attached to or furnished with the product, Whirlpool Corporation will pay for FSP®fs_ctoryspecified replacement parts to correct defects
in materials or workmanship. Service must be provided by a Whirlpool designated service company.
Whirlpool Corporation will not pay for:
1. Service callsto correct the installation of your dryer, including venting. Heavy 4 in. (I 0.2 cm) metal exhaust vent must be used. Refer
to the venting section of this manual and your Installation Instructions.
2. Service calls to instruct you how to use your dryer, to replace fuses or correct wiring or reset circuit breakers in your commercial
establishment.
3. Damage resulting from accident, alteration, misuse, abuse, fire, floods, acts of God, improper installation (including, but not limited
to, venting with plastic or flexible foil), installation not in accordance with local electrical and plumbing codes, or use of products not
approved by Whirlpool Corporation.
4. Replacement parts or repair labor costs for units operated outside the United States.
5. Pickup and delivery. This product is designed to be repaired on site.
6. Repairs to parts or systems resulting from unauthorized modifications made to the appliance.
7. Any labor costs incurred during the Limited Warranty period.
WHIRLPOOL CORPORATION DOES NOT ASSUME ANY RESPONSIBILITY FOR INCIDENTAL OR CONSEQUENTIAL DAMAGES.
Some states do not allow the exclusion or limitation of incidental or consequential damages, so this exclusion or limitation may not
apply to you. This warranty gives you specific legal rights and you may also have other rights which vary from state to state.
Outside the 50 United States, this warranty does not apply. Contact your authorized Whirlpool dealer to determine if another
warranty applies.
If you need service, call the Customer Interaction Center at 1-800-NO BELTS (1-800-662-3587), from anywhere in the U.S.A., or write:
Whirlpool Brand Commercial Appliances, Customer Interaction Center, 553 Benson Road, Benton Harbor, MI 49022-2692.
1/02
Keep this warranty and your sales slip together for future
reference. You must provide proof of purchase or installation
date for in-warranty service.
Write down the following information about your dryer to better
help you obtain assistance or service ifyou ever need it. You will
need to know your complete model number end serial number.
You can find this information on the model and serial number
label, located on your appliance. Do nat alter or remove the serial
number label.
Dealer name
Address
Phone number
Model number
Serial number
Purchase date
Downloaded from www.ManualsFile.com manuals search engine

SEGURIDADDELASECADORA
Su seguridad y la seguridad de los demds es muy importante.
Hemos incluidomuchos mensajes importantes de seguridad en este manual y en su electrodom_stico.
Lea y obedezca siempre todos los mensajes de seguridad.
Este es el sfmbolo de advertencia de seguridad.
Este sfmbolo le llama la atenci6n sobre peligros potenciales que pueden ocasionar la muerte o una
lesi6n a usted y a los demds.
Todos los mensajes de seguridad irdn a continuacibn del sfmbolo de advertencia de seguridad
y de la palabra "PELIGRO" o "ADVERTENCIA". Estas palabras significan:
Si no sigue las instrucciones de inmediato, usted
puede morir o sufrir una lesi6n grave.
Si no sigue las instrucciones, usted puede morir
o sufrir una lesi6n grave.
Todos los mensajes de seguridad le dirdn el peligro potencial, le dirdn c6mo reducir las posibilidades de sufrir
una lesi6n y Io que puede suceder si no se siguen las instrucciones.
I
ADVERTENCIA: Para su seguridad, la informaci6n en este manual debe ser observada I
para minimizar el riesgo de incendio o explosi6n, o para prevenir dafios a propiedades,
I
heridas o la muerte.
- No almacene o use gasolina u otros Ifquidos y vapores inflamables cerca de dste u otro
aparato electrodomdstico.
- PASOS QUE USTED DEBE SEGUIR Sl HUELE A GAS:
• No trate de encender ningdn aparato electrodomdstico.
= No toque ningdn enchufe eldctrico; no use ningdn teldfono en su edificio.
= Desaloje a todos los ocupantes del cuarto, edificio o drea.
= Llame inmediatamente a su proveedor de gas desde el teldfono de un vecino.
Siga las instrucciones de su proveedor de gas.
= Si usted no puede comunicarse con su proveedor de gas, Ilame al departamento
de bomberos.
- La instalaci6n y el servicio deben ser efectuados por un instalador calificado, una
agencia de servicio o por el proveedor de gas.
14
Downloaded from www.ManualsFile.com manuals search engine
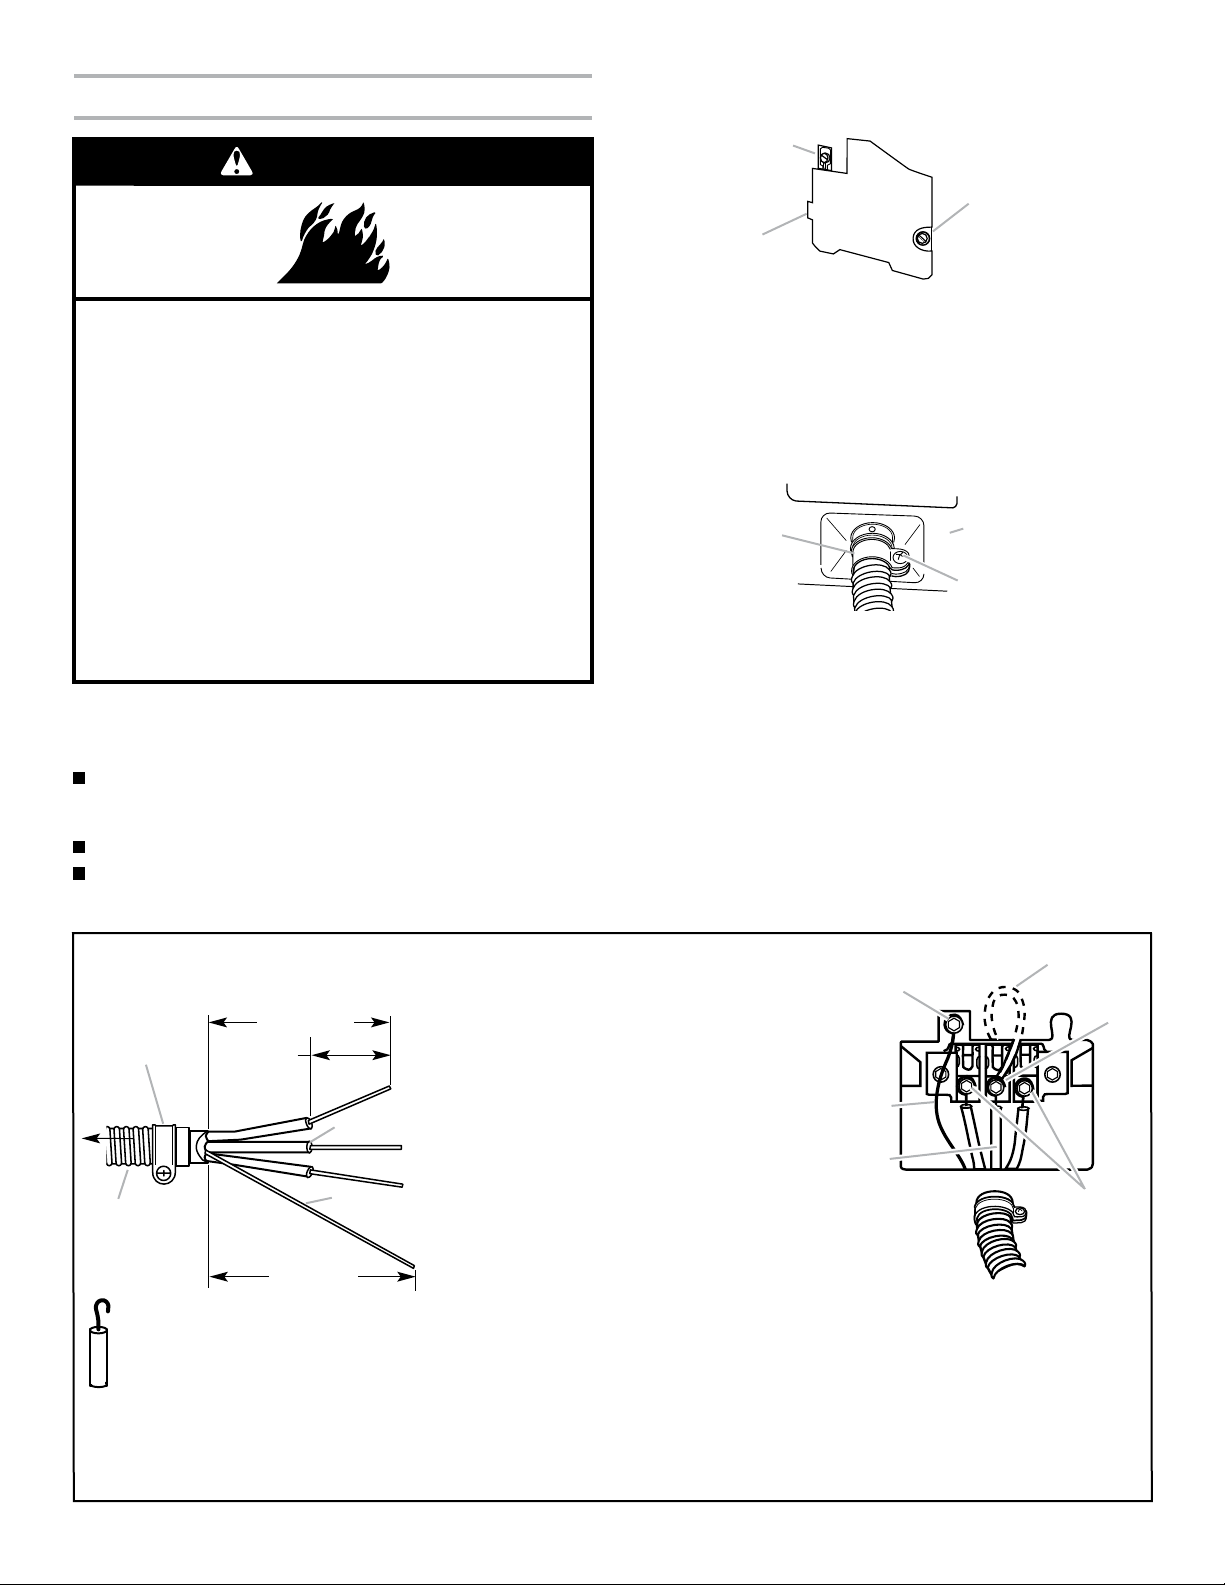
INSTRUCCIONES IMPORTANTES DE SEGURIDAD
ADVERTENClA: A fin de reducir el riesgo de incendio, descarga el6otrica o de daSo alas personas que usen
la seoadora, deben seguirse las preoauciones b_.sioas,inoluidas las siguientes:
Lea todas instrucciones antes de usar la secadora.
No coloque los objetos expuestos a aceite para
cocinar en su secadora. Los objetos expuestos a
aceites para cocinar pueden contribuir a una
reaccibn qu[mica que podr[a causar que la ropa
se inflame.
• No seque articulos que ya se hayan limpiado, lavado,
remojado o manchado con gasolina, disolventes de
limpieza en seco, u otras sustancias inflamables o
explosivas ya que despiden vapores que pueden
encenderse o causar una explosibn. •
• No permita que los niSosjueguen encima o dentro de
la secadora. Es necesaria una supervisibn cuidadosa
de los niSos cada vez que se use la secadora cerca de •
ellos.
• No repare o reemplace ninguna pieza de la secadora
nitrate de repararla a menos que esto se recomiende
especfficamente en el Manual de Uso y Cuidado o en
instrucciones de reparacibn publicadas para el usuario
que usted comprenda y sblo si cuenta con la expe-
riencia necesaria para Ilevar a cabo dicha reparacibn.
• No utilice suavizante de telas o productos para
eliminar la est_.ticade prendas a menos que Io
recomiende el fabricante del suavizante de telas
o las instrucciones del producto en uso.
No utilice calor para secar prendas que contengan
hule espuma o materiales con textura de hule similar.
Limpie el filtro de pelusa antes o despu6s de cada
carga de ropa.
• Quite la puerta de la secadors antes de ponerla fuera •
de funcionamiento o de desecharla.
• No introduzca lasmanos en la secadora cuando el
tambor est,. en movimiento. •
• No instale o almacene esta secadora donde estd
expuesta al agua o a la intemperie.
• No trate de forzar los controles. •
Mantenga el _.reaalrededor de la abertura de ventila-
cibn y las _.reas adyacentes a esta abertura sin
pelusa, polvo o tierra.
La parte interior de la m&quina y el conducto de
ventilacibn se deben limpiar peribdicamente. Esta
limpieza ladebe Ilevara cabo un reparador calificado.
Yea las instrucciones de instalacibn para los requisitos
de conexibn a tierra.
GUARDE ESTAS INSTRUCCIONES
15
Downloaded from www.ManualsFile.com manuals search engine

PARTESYCARACTERISTICAS
4
1. Panel de Control
2. Etiqueta con el nOmero de modelo
y de serie
3. Tambor de la secadora
4. FiRrode pelusa
5. Rejilla de ventilacibn
6. Puerta super ancha de vaiv6n lateral
Panel de Control
NJTOMA_¢
DRY
NOHEAT
[]
i_ GDr_LJn IN_F_iJ_'T_
2 ©Ira Ik_m leca_mdunamIkd_ d_ _
O_1Oedlng may mqulm
16
Downloaded from www.ManualsFile.com manuals search engine
3,
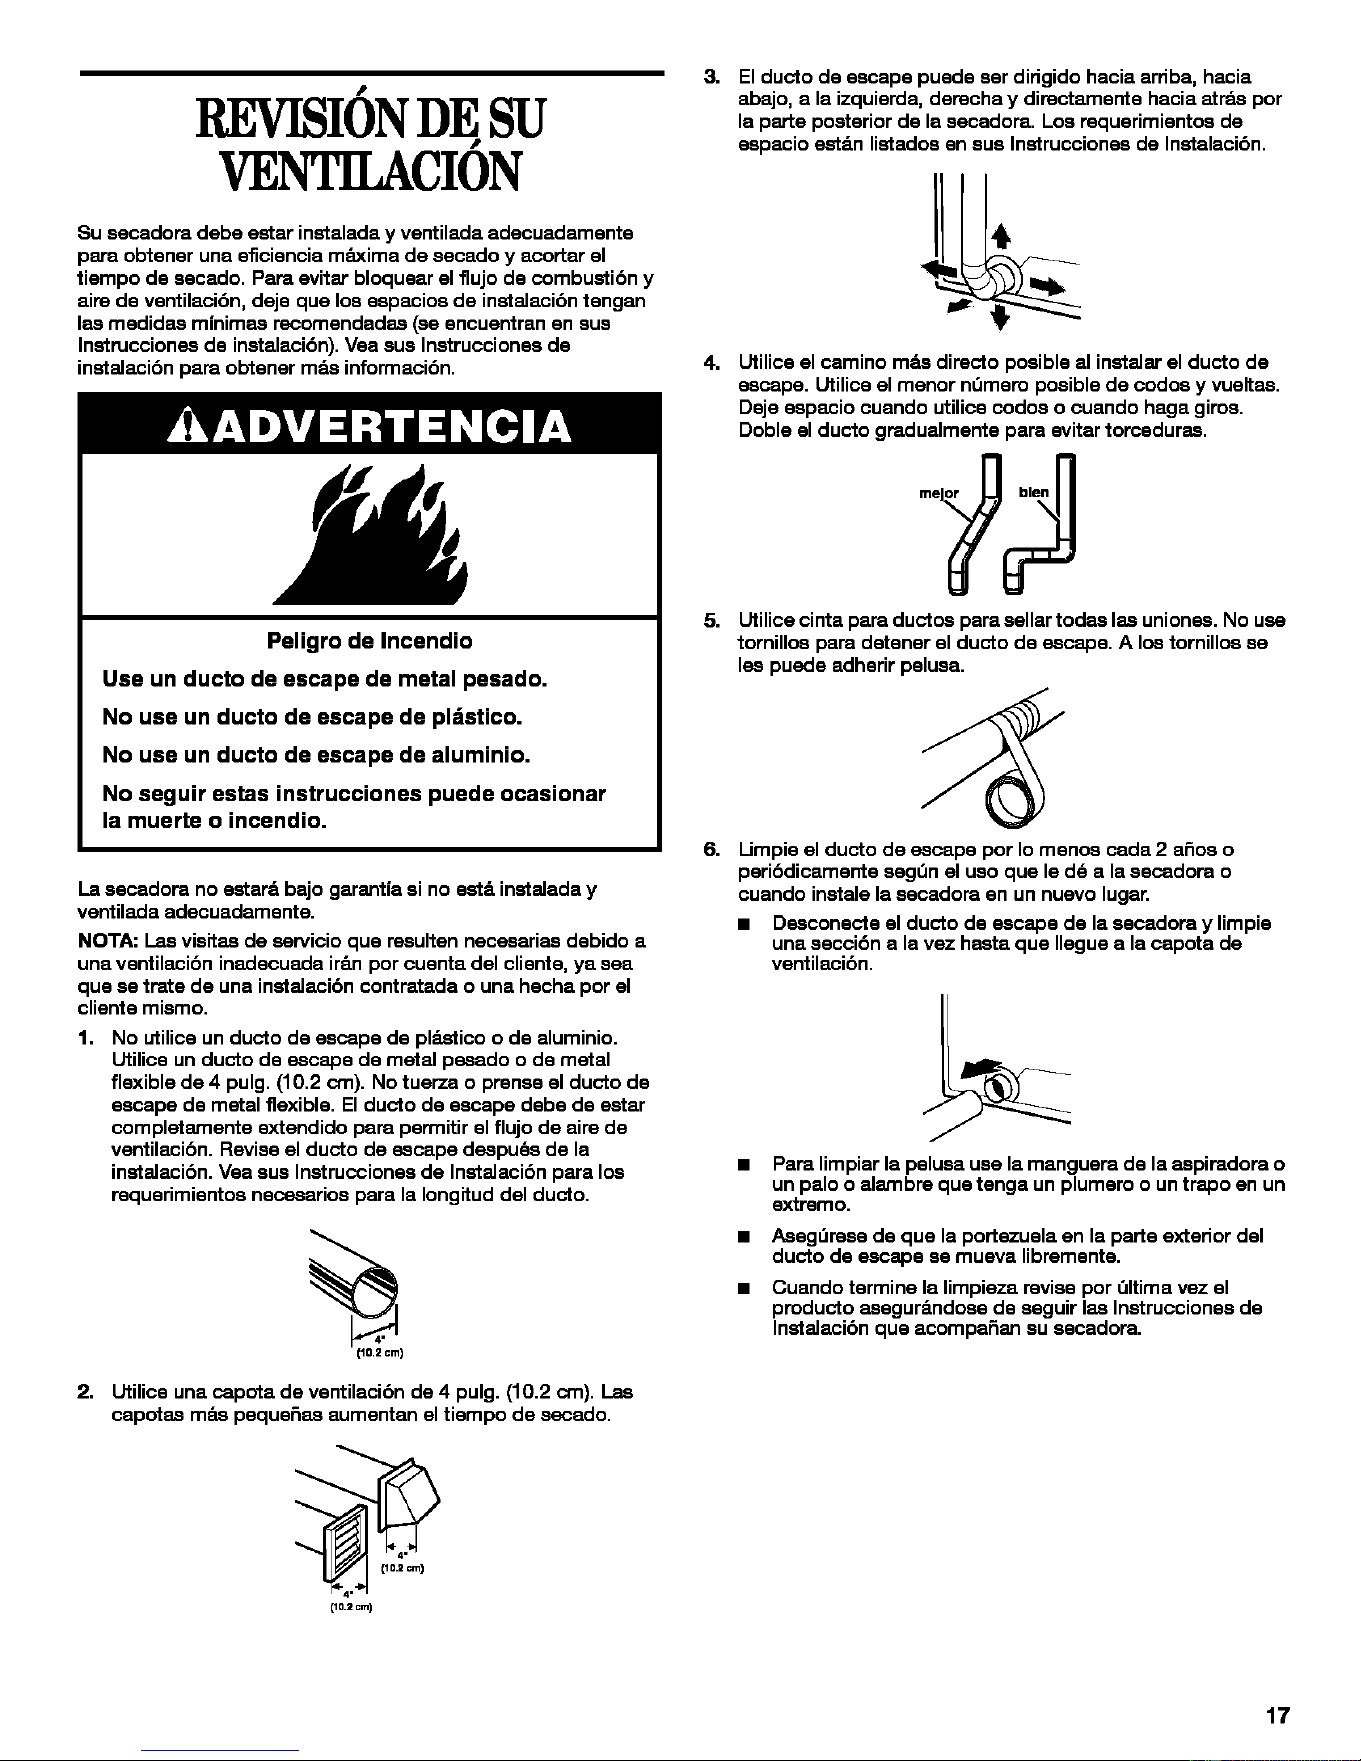
REVISIONDE SU
VE CION
Su secadora debe eetar instalada y ventilada adecuadamente
pare obtener una eflciencia m_txima de secado y acortar el
tiempo de escado. Para evitar bloquear el flujo de combustibn y
aire de ventilaci6n, deje que los espacios de instalacibn tengan
les medides m[nimes recomendades (se encuentran en sue
Instrucciones de inetalaci6n). Vea sue Inetrucciones de
instalacibn para obtener mds informaci6n.
Peligro de Incendio
Use un ducto de escape de metal pesado.
No use un ducto de escape de pl=_stico.
No use un ducto de escape de aluminio.
No seguir estas instrucciones puede ocasionar
la muerte o incendio.
La secadora no estard bajo garant[a si no esterinstalada y
ventilada adecuadamente.
NOTA: I_asvisites de esrvicio que resulten necesaries debido a
una ventilacibn inadecuada ir_m por cuenta del cliente, ya sea
que se trete de una instalacibn contratada o una hecha por el
cliente mismo.
1,
No utilice un ducto de escape de pldstico o de aluminio.
Utilice un ducto de escape de metal pesado o de metal
flexible de 4 pulg. (10.2 cm). No tuerza o prenee el ducto de
escape de metal flexible. El ducto de escape debe de estar
completarnente extendido pare permitir el flujo de aire de
ventilacibn. Revise el ducto de escape despu&e de la
instalacibn. Ves sue Inetrucciones de Instalacibn para los
requerimientca necasarica para la Iongitud del ducto.
2. Utilice una capota de ventilacibn de4 pulg. (10.2 cm). Les
capotes mds pequeRes aumentan el tiempo de secado.
4,
5,
6,
El ducto de escape puede esr dirigido hacia arriba, hacia
abajo, a la izquierda, derecha y directamente hacia atrds por
la parte posterior de la secadora. Los requerimientos de
espacio eet_n lietados ensus Inetrucciones de Inetalacibn.
Doble el ducto gradualmente
Utilice el camino mds directo poeible al instalar el ducto de
escape. Utilice el menor nOmem posible de codos y vueltes.
Deje espacio cuando utilice codos o cuando haga giros.
)am evitar torcedures.
f
Utilice cinta pare ductca para sellar todes lee uniones. No use
tornillos pare detener el ducto de escape. A los tornillos se
lee puede adherir pelusa.
Limpie el ducto de escape par Io menos cada 2 afios o
peribdicamente segOn el usa que le d6 a la secadora o
cuando inetale la escadora en un nuevo lugar.
a Desconecte el ducto de escape de la escadora y limpie
una seccibn a la vez hesta que Ilegue a la capota de
ventilacibn.
a
a
a
Para limpiar la pelusa use la manguera de la espiradora o
un palo o alarnbre que tenga un plumero o untrapo en un
extrsmo.
AsegOmes de qua la portezuelaon la parte exterior del
ducto de escape es mueva libremente.
Cuando termine la limpieza mvies por Oltima vez el
producto esegur_ndoes de esguir lee Inetrucciones de
Inetalacibn que acompaRan su escadora.
17
Downloaded from www.ManualsFile.com manuals search engine
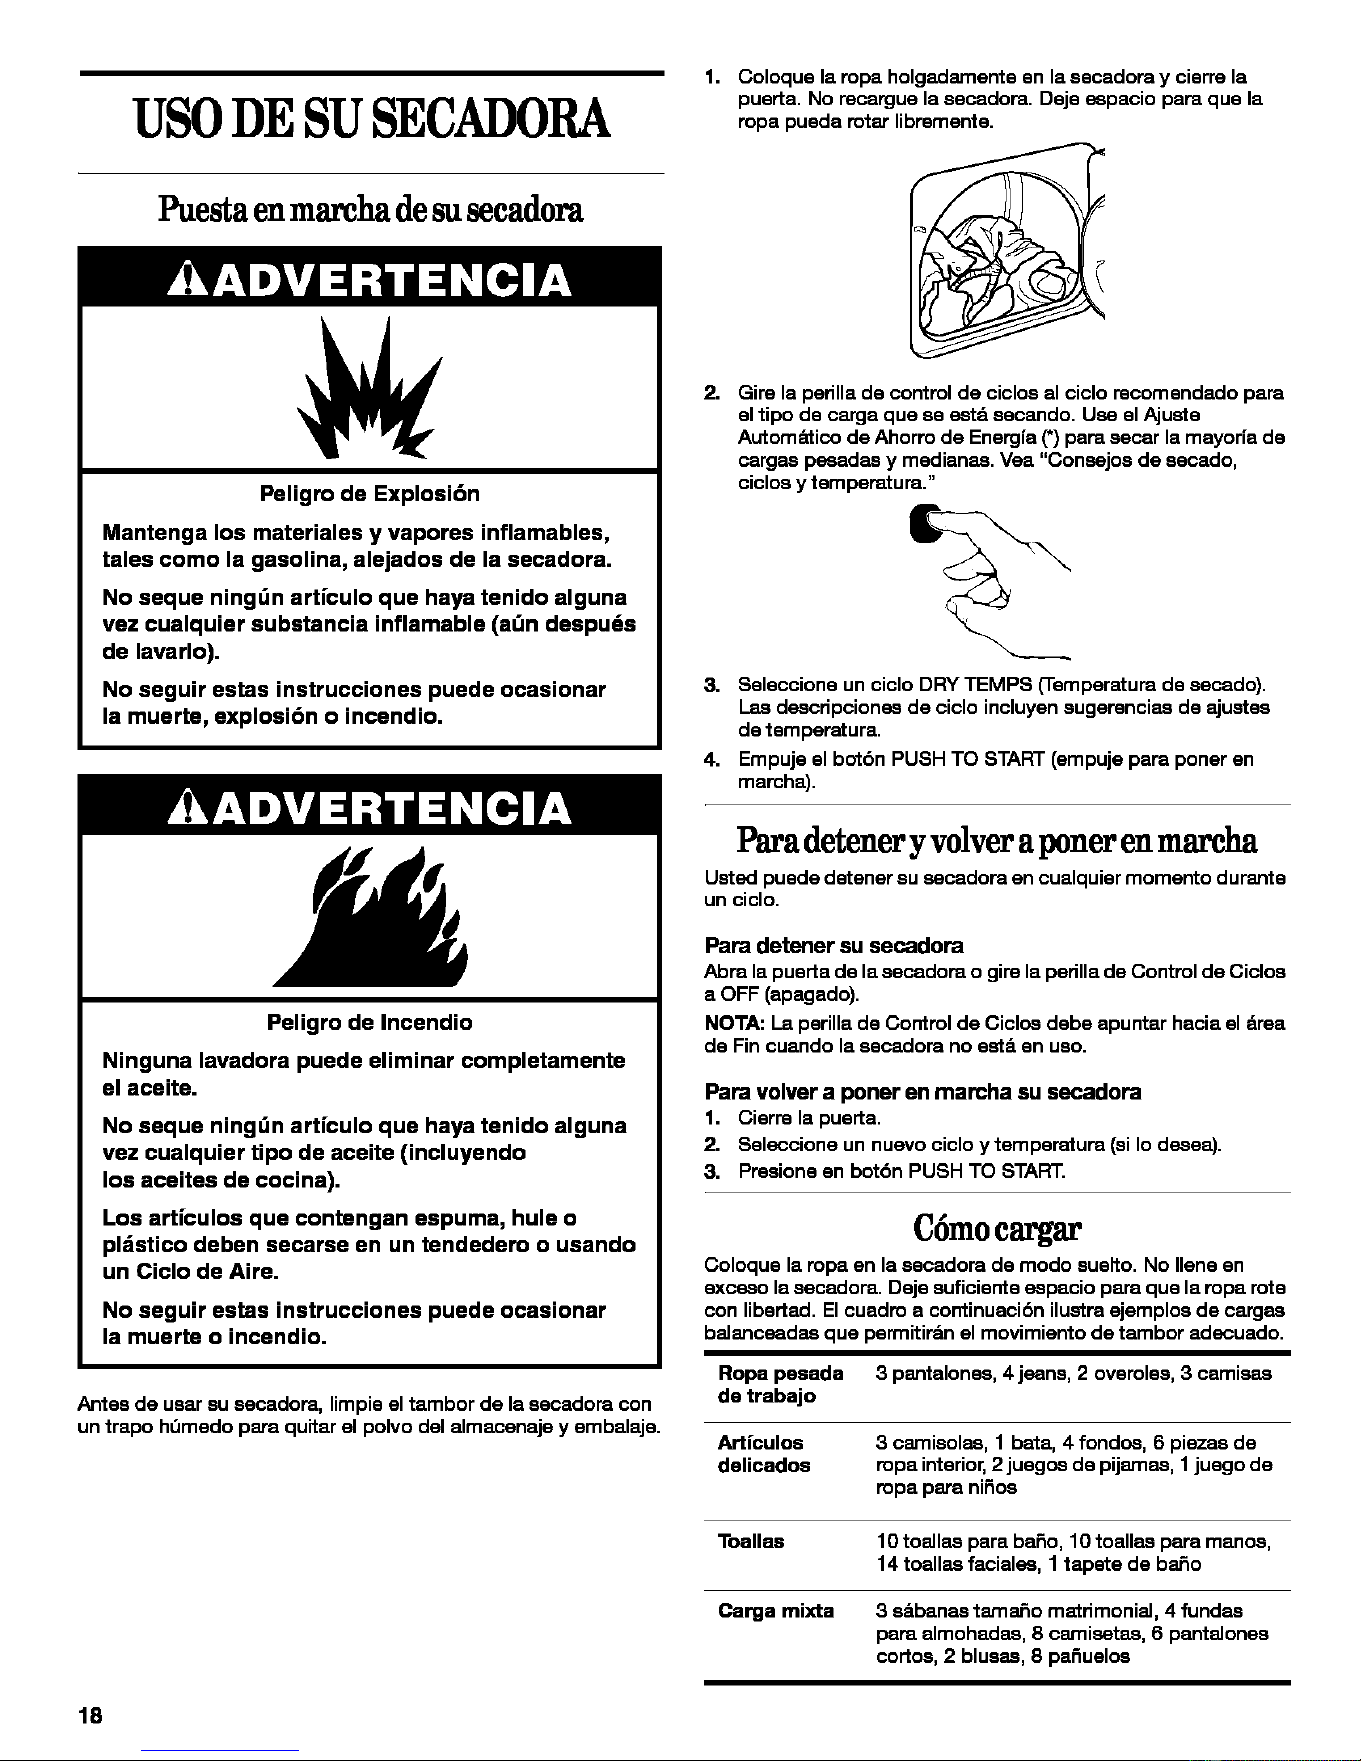
USODESUSECADORA
Puesta en marchadesu secadora
1. Coloque la ropa holgadamente en la secadora y cierre la
puerta. No recargue la secadom. Deje sepacio pare que la
ropa pueda rotar libremente.
Peligro de Explosi6n
Mantenga los materiales y vapores inflamables,
tales como la gasolina, alejados de la secadora.
No seque ning0n arficulo que haya tenido alguna
vez cualquier substancia inflamable (a0n despu6s
de lavarlo).
No seguir estas instrucciones puede ocasionar
la muerte, explosi6n o incendio.
Peligro de Incendio
Ninguna lavadora puede eliminar completamente
el aceite.
No seque ning0n arficulo que haya tenido alguna
vez cualquier tipo de aceite (incluyendo
los aceites de cocina).
Los arficulos que contengan espuma, hule o
pl=_sticodeben secarse en un tendedero o usando
un Ciclo de Aire.
No seguir estas instrucciones puede ocasionar
la muerte o incendio.
Antes de usar su secadom, limpie el tambor de la secadora con
un trapo h0medo pare quitar el polvo del almacenaje y embalaje.
2. Gire la pedlla de control de cicIos al cicIo mcomendado pare
el tipo de carga que se setd secando. Use el Ajuste
Autom_tico de Ahorro de Energ[a (*) pare secar la mayor[a de
cargse pseadse y medianse. Vea "Consejos de secado,
ciclos y tempemtura."
3. Seleccione un ciclo DRY TEMPS ('remperatura de secado).
Lse dsecripcionse de cicIo incluyen sugerencise de ajustse
de temperatura.
4. Empuje el botbn PUSH TO START (empuje pare poner en
marcha).
Paradetenery volveraponerenmarcha
Usted puede detener eu secadora en cualquier momento durante
un ciclo.
Pare detener su secadom
Abra la puerta de la secadom o gire la perilla de Control de Cicloe
a OFF (apagado).
NOTA: I_aperilla de Control de Ciclos debe apuntar hacia el drea
de Fin cuando la secadora no esteren ueo.
Pare volver a poner en marcha su secadora
1. Cierre la puerta.
2. Seleccione un nuevo ciclo y temperatura (si Io dseea).
3. Preeione en bot6n PUSH TO START.
C6mocargar
Coloque la ropa en la secadora de modo suelto. No Ilene en
excseo la secadora. Deje suficiente sepacio pare que la ropa rote
con libertad. El cuadro a continuacibn ilustra ejemploe de cargse
balancsedse que permitirdn el movimiento de tambor adecuado.
Ropa pesada 3 pantalonse, 4 jeans, 2 overolse, 3 camisse
de trabajo
Articulos 3 camisolse, 1 bata, 4 fondos, 6 piezas de
delicados mpa interior,2 juegos de pijamse, 1 juego de
mpa pare niRos
Toallas 10 toallse para baRo, 10 toallse para manos,
14 toallse facialse, 1 tapete de ba_o
Carga mixta 3 s_tbanse tarna_o matrimonial, 4 fundse
pars almohadse, 8 carnisetse, 6 pantalones
cortos, 2 blusas, 8 paRuelos
18
Downloaded from www.ManualsFile.com manuals search engine
Consejosdesecado,ciclosytemperatura
Seleccione el cicIo y temperature correctoe pare eu rope.
El enfriarniento hace girar la carga sin calor durante los 0ltimoe
minutoe de cada cicIo, para que la carga sea mds fiicil de
manejar.
Consejos de secado
a Siga les inatruccionee de cuidado de la etiqueta eiempre que
eat&n dieponibles.
a Si usa hojes de euavizante de teles, emplee Onicamente lee
que Ilevan atiquates de "pare ueo en escadorae", Siga les
inatrucciones del paquate,
a
Quite la carga de ropa de la escadora tan pronto es detenga
la rotaci6n pare evitar que lee prendes ee arruguen. Eato es
de singular importancia pare lee prendes de planchado
permanents, tejidoe de punto y fibres eint_tices.
Consejos de temperature y de ciclos
a Sequela mayoria de sue carges de ropa ueando la posicibn
de Energy Preferred Automatic Setting (*) (Ajuate automdtico
de ahorro de energia), ei eatS.dieponible con eu escadora.
a Use un ajuate de Temperature Alta pare escar articuloe
pesados tales como toalles y ropa de tmbajo.
a Use un ajuate de Temperature Media pare escar articuloe de
peso mediano tales como e_.banes, rope interior, teles de
planchado permanents y algunoe tejidoe de punto.
= Use un ajuate de Temperature Baja o Minima pare escar
articuloe de peso liviano tales como lenceria, bluees, vestidoe
y algunoe tejidoe de punto.
a Use un ajuate sin calor (con airs) pare articuloe de goma,
pldstico o teles sensibles al calor.
a Seque en el tendedero les teles larninades o tratades.
NOTA: Si tiene preguntes acerca de la temperature de secado
pare varies carges de ropa, refi&rese a lee inatruccionee de
cuidado de les atiquates. Si tiene dude reepecto ala temperature
que debe esleccionar pare una carga de ropa, elija el ajuate mds
bajo en vez del ajuate mds alto.
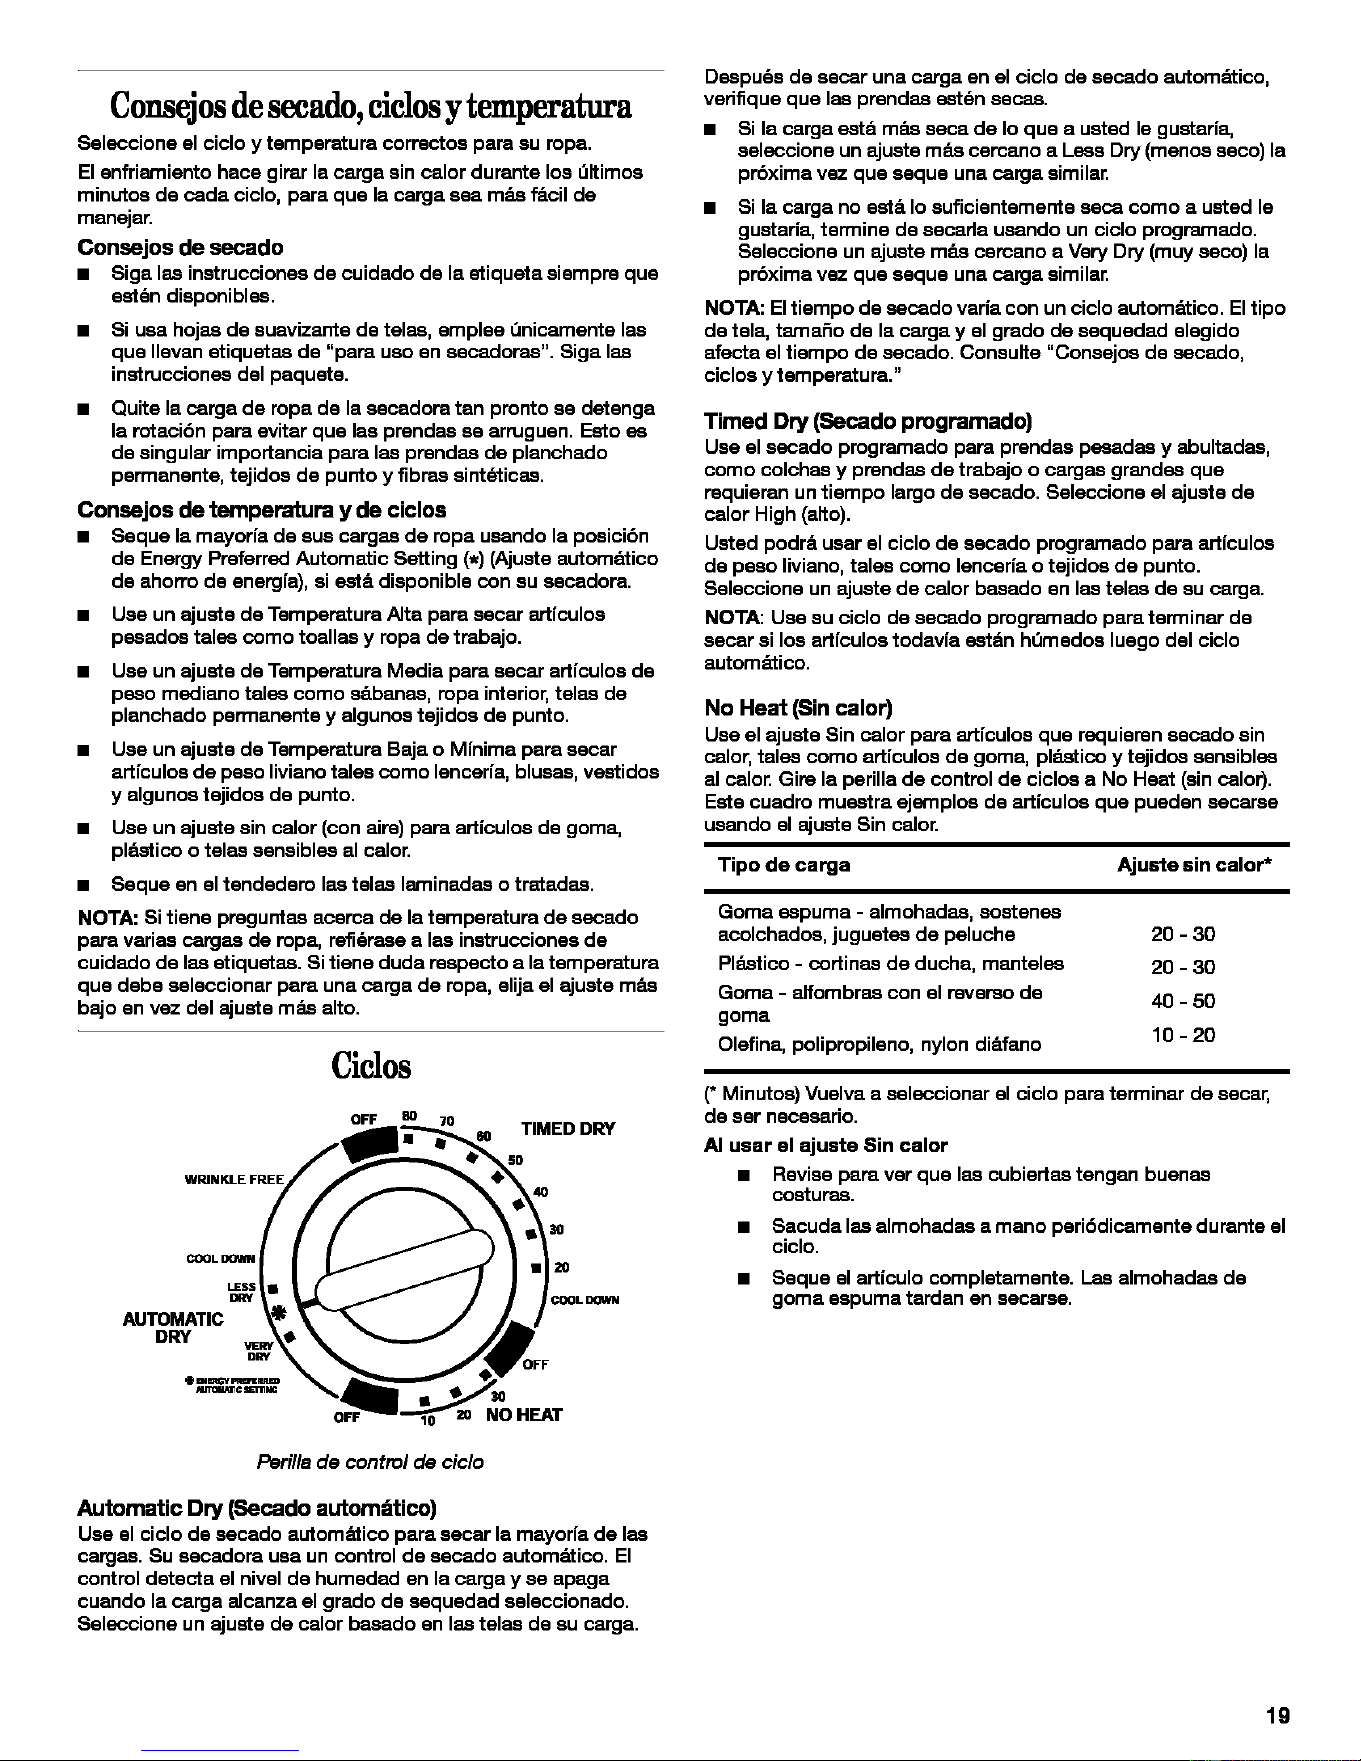
Ciclos
OFF 80 70 TIMED DRY
WRINKLE FREE
40
COOLDOWN
DRY
AUTOMATIC
DRY
/kTmZ_C a_nfllm
3O
2O
POOLDOWN
)FF
NO HEAT
Perilla de control de ciclo
Automatic Dry (Secede automhtico)
Use el ciclo de eecado autom_tico para eecar la mayoria de les
carges, Su escadora usa un control de escado automdtico, El
control datecta el nivel de humedad en la carga y eeapaga
cuando la carge alcanza el grado de esquedad esleccionado,
Seleccione un ajuate de calor besado en las teles de eu carga,
Despu&e de escar una carga en el cicIo de eecado automdtico,
veriflque que les prendes est_n esces.
= Si la carga estd mds seca de Io que a uated le guataria,
seleccione un ajuate mds cercano a Less Dry (menos esco) la
prbxima vez que esque una carga similar.
m Si la carga no eat_ Io euficientemente esca como a uated le
guataria, terrains de eecada ueando un cicIo prograrnado.
Selecoione un ajuate mds cercano a Very Dry (muy seco) la
prbxima vez que esque una carga similar.
NOTA: El tiempo de escado varia con uncicIo automdtico. El tipo
de tela, tarnaRo de la carga y el grado de eequedad elegido
afecta el tiempo de eecado. Consults "Coneejoe de escado,
cicloe y temperature."
Timed Dry (Secado pmgmmado)
Use el secado programado pea prendes pesades y abultades,
como colches y prendes de trabajo o carges grandes que
requieran un tiempo largo de escado. Seleccione el ajuate de
calor High (alto).
Uated podr_ user el ciclo de escado programado pare articulos
de peso liviano, tales como lenceria o tejidoe de punto.
Seleccione un ajuate de calor besado en lee teles de eu carga.
NOTA: Use eu cicIo de eecado prograrnado para terminar de
secar si los articuloe todavia estdn hOmedoe luego del cicIo
autom_tico.
No Heat (Sin calor)
Use el ajuate Sin calor pare articuloe que requieren escado sin
calor, tales como articuloe de goma, pldatico y tejidos esneibles
al calor. Gire la perilla de control de cicloe a No Heat (sin calor).
Eats cuadro muestra ejarnploe de articuloe que pueden eecarse
ueando el ajuate Sin calor,
Tipo de carga Ajuste sin calor*
Goma espuma - almohades, eoatenes
acolchadoe, juguates de peluche 20 - 30
Pldatico - cortinae de ducha, manteles 20 - 30
Goma - alfombres con el reverso de 40 - 50
goma
Olefina, polipropileno, nylon di_.fano 10 -20
(* Minutoe) Vuelva a esleccionar el ciclo pare terminar de eecar,
de ear necesario.
AI usar el ajuste Sin calor
a Revise pare ver que les cubiertes tengan buenes
coeturas.
m Sacudales almohades a mano peri6dicamente durante el
ciclo.
m Seque el articulo complatamente. Les almohades de
goma espuma tardan en secarse.
19
Downloaded from www.ManualsFile.com manuals search engine
CUIDADODELASECADORA
Limpiezade]filtrodepelusa
Limpiezade]interiordelasecadora
Limpieza en cada carga
El filtro de pelusa esterubicado an la parte superior de la
secadom. Limpielo antes del escado de cada carga. Un filtro
obstruido con pelusa puede aumantar el tiempo de secado.
Para limpiar
1. Jale el filtro de pelusa hacia ueted. Quite la pelues
enrolldndola con los dedos. No enjuague o lave el filtro para
quitar la pelusa. La pelusa mojada es dificil de quitar.
2. Empuje el filtro flrmemante hesta que quede an su lugar.
IMPORTANTE:
No ponga a funcionar la secadora con el filtro de pelusa flojo,
da_ado, u obstruido. El hacerlo pusde causar un
sobrecalentamiento y daRar tanto la escadora como les
prendes.
• Algunas toalles fabdcades con fibres sint6tices y fibres
naturales (poli_eter y mezcles de algodbn) puedan soltar mds
pelusa que otres toalles, dando como resultado que el filtro
de pelusa de su escadora es Ilane mds r_pido. AsegOrees de
quitar la pelusa del filtro antes y despu&s de secar toalles
nusves,
• Sial quitar la pelusa del filtro &sta cae dentro de la secadora,
revise la capota de ventilaci6n y quite la pelusa. Vea
"Revisibn de su Ventilaci6n."
Limpieza peribdica
Los residues de detergents y suavizante de teles pueden
acumularse an el filtro de pelusa. Esta acumulacibn puede dar
lugar a per|odos mds pmlongados de secado de su ropa, o
causar que la escadora se detanga antes de que su ropa est6
completamante seca. El filtro estd problamante obstruido si la
pelusa es cae del filtro.
Limpie el filtro de pelusa con un cepillo de nylon cada seis meses
o con mds frecuencia si es obstruye debido a la acumulaci6n de
residuos.
Para lavar
1,
2.
3.
Quite la pelusa enrolldndola con los dedos.
Moje arnbos lados del filtro de pelusa con agua caliante.
Moje un cepillo de nylon con agua caliente y detergante
I|quido. Tails el filtro de pelusa con el cepillo pars quitar la
acumulaci6n de residuos.
4. Enjuague el flltro con agua caliente.
5. Seque minuciosamente el filtro de pelusa con una toalla
limpia. Vuelva a colocar el filtro an la escadora.
Peligro de Explosi6n
Use un limpiador no inflamable.
No seguir esta instrucci6n puede ocasionar
la muerte, explosi6n o incandio.
Para limpiar el tambor de la secadora
1. Haga una pasta con detergents en polvo y agua tibia.
2. Aplique la pasta a un paRo suave.
O
Aplique un producto de limpieza I[quido no inflamable an el
_tres manchada y frote con un paRo suave hesta quitar todo
el tints en exceso.
3. Limpie el tambor minuciosamante con un patio h.'.medo.
4. Seque una carga de ropa limpia o toalles para secar el
tambor.
NOTA: I_as prendes de colores que destiRan tales como
mezclilles o art|culos de algod6n de colores vivos, pueden teRir el
interior de la secadora. Eetes manches no da_an su escadora ni
manchar_n les carges futures de ropa. Seque los art[culos de
colores que destiRen al rev_s pars evitar la transferencia del tints.
Eliminaci6ndepelusaaemnulada
En el interior del gabinete de la secadora
SegOn el uso de la secadora, es debe quitar la pelusa cada 2
aRos, o con mds frecuancia. La limpieza deber_tefectuarla una
persona califlcada.
En el ducto de escape
SegOn el uso de la secadora, es debe quitar la pelusa cada 2
aRos, o con mds frecuancia.
2O
Downloaded from www.ManualsFile.com manuals search engine

SOLUCIONDEPROBLEMAS
Primero, pruebe las soluciones aqui sugeridas y quiz_s se
ahorre el costo de una visita de servicio t6cnico...
La rope no estd secdndose de modo satisfactorio
• Revise Io siguiente:
&Estd el filtro de pelusa obstruido con pelusa?
&Estd el ducto de ventilecibn o la caropana extractorr
exterior obstruido con pelusa, restringiendo el fiujo de aire?
Pongaa funcionar la secadorr de 5 a 10 minutos. Ponga su
mano debajo de la campana extractorr pare verificar el
movimiento dal alre. Si no Io siente, limpie la pelusa del
sistema de ventilacibn o reeroplace el ducto de ventilaci6n
con uno de metal pesado o de metal flexible. Consulte los
Instruccionos de Instalaci6n.
&Estd el ducto de ventilecibn aplostado o retoroido?
Reempldcelo con un ducto de metal duro o flexible (ducto de
acero galvanizado). Consults los Instruccionos de Instalaci6n.
&Se ha quemado un fusible o se ha disparrdo el interrupter
de corriente de su case? Parr uso hogareRo, los secadorrs
el&ctricos usan dos fusibles o interruptores. El tarobor puede
ester girrndo sin generrr calor.
&Se ha seleccionado un ciclo de Secado al AJre?Seleccione
el ciclo correcto pare el tipo de prendos que se est6n
secando. Consults "Consejos de secado, ciclos y
temperrtura".
&Parr secadorrs de gas, i,ost_t la vdlvula abierta en la via de
abastecimiento?
&Estdn los hojas del suavizante de tales bloqueando la rejilla?
Use Onicamente una hoja de suavizante de telos y ,',sela una
sole vsz.
&Estd la secadorr ubicada en una habitaci6n cuya
temperatura estd debajo de 45°F (7°C)?
El funcionaroiento apropiado de los cicIos de la secadorr
requiem teropemturas superiores a 4S°F (7°C),
&Se us6 un enjuague fHo? &Estaba la carga muy mojada?
Espere tiempos de secede m_ts prolongados parr art|culos
enjuagados en ague fr|a y parr art[culos que retienen
humedad (prendas de algodbn).
&Est6 la carga demasiado voluminosa y pesada para
secaree con rapidez?
Separe la carga de modo que pueda rotar libremente,
La secadora no funciona
Revise Io siguiente:
&Estd el cable tomecorriente conectado ala alimentaci6n
el_ctrica?
&Se ha quemado un fusible, o se ha disparrdo el interrupter
de corriente de su case?
&Se usb un fusible normal? Use un fusible retardador.
&Estd osrmda la puerta de la ososdorr?
&Se oprimib con firmeza el botbn de START (Inicio)?
&Se ha seleccionado un ciclo?
Ruidos Extmfios
• i,Ha estado la secadorr sin uso durante un peHodo largo?
Si la secadorr ha estado sin uec per una teroporrda, podr|a
oiree un ruido posado durante los primeros minutos de
funcionamiento.
• i,Es una secadora a gas?
El chosquido de la v_Jvulade gas os un sonido de
funcionamiento normal.
Pelusa en la carga
• i,Estd obstruido el filtro de pelusa?
Limpie el filtro de palusa. Revise el movimiento del aim.
i,Se ha separrdo la carga de modo apropiado?
Separe los prendos que sueltan pelusa (toallos, ropa
afelpada) de las que atrren palusa (pane, art|culos sint&ticos).
Tambi&n separe por color.
i,Estd la carga demasiado voluminosa o demasiado
pesada?
Seque cargos menos voluminosos parr que la pelusa pueda
ser trraladada el filtro de pelusa.
i,Se sec6 la carga en exceso?
Use los ajustes correctos de la secadorr segOn el tipo de
carga. Secar en exceso puede dar lugar a la electricidad
est_tica que atros pelusa. Consults "Conosjos de secado,
ciclos y tempepatura".
i,Se dej6 papel o pafiuelo de papel en los bolsillos?
i,Se estd confundiendo las rootitas con la pelusa?
Los motitas (en la superficie de los prendas) son causadas
por el dosgoste normal y el lavado,
Manchas en la carga o cambio de color
i,Se us6 de roodo apropiado el suavizante de telas pare
secadorrs?
Agregue los hojos dal suavizante de telos al inicio dal ciclo, Si
agrega una hoja de suavizante de telos a una carga
paroialmente seca puede manchar los prendas,
i,Estaban sucios los arUculos en el momento de ponerlos
en la secadora?
Los art|culos debedan ester limpios antes de ponerlos a
secan
• i,Se separrron los arUculos de modo apropiado?
Separe los colores claros de los colores oscuros. Separe los
art[culos que no destiRen de los que dostiRen.
21
Downloaded from www.ManualsFile.com manuals search engine
Las prendse se encogen
• &Be sobrecarg6 la secadora?
Ssque cargse manos voluminosse qua pusdan rotar con
libsrtad.
• i, Be sec6 la carga en exceso?
Vsrifique la stiqueta de cuidado dsl fabricants. Ponga el
ajusts de la secadora seg0n el tipo de carga. Consulte
"Consejos de secado, cicIos y tsmperatura".
Las cargse estdn arrugadas
• &Be quit6 la carga de la secadora al terminar el ciclo?
• &Estaba la secadora sobrecargada?
Ssque cargse manos voluminosse qua pusdan rotar con
libsrtad.
• &Be sac6 la carga an exceso?
Vsrifique la stiqueta de cuidado dsl fabricants. Ponga el
ajusts de la secadora seg0n el tipo de carga. Consulte
"Consejos de secado, cicIos y tsmperatura".
Olorse
• &Pint6, ti_6 o bamiz6 recientemente an el ,_rea donde se
encuentra aM secadora?
Si se se|, ventile el _u'ea.Cuando los olorse y el humo se
hayan ido del drea, vuslva a lavar la ropa y luego sdquela.
• Si la secadora es el6ctrica, i,se estd usando por primera
vez?
El slsmanto calsfactor sl_ctdco pusde smitir un olor cuando
nuevo, Este olor dseaparecem dsepu_s del primer cicIo,
Prendas da_adas
• Revise Io siguiente:
&Ss dsjaron abiertos los cisrres, brochse de presibn y
ganchos?
&Ss ataron los cordonse y tirantse pare evitar que se
enreden?
&Ss siguisron Ise instruccionse de la etiqueta de cuidado de
la prenda?
&Ss da_aron losa (culosanisedsl secado?
AYUDA,O SERVICIO
TECNICO
Antes de solicitar seistancia o servicio, por favor consults la
secci6n "Solucibn de Problsmse." Esto Is podr(a ahorrar el costo
de una visita de servicio t&cnico. Si considsra que ann nscesita
ayuda, siga Ise instruccionse qua aparacan a continuaci6n.
Cuando llama, tsnga a mano lafecha de compra y el n0mero
completo dsl modslo y de la eerie de su electrodom6stico. Esta
informacibn nos ayudar_ a atander msjor a su psdido.
Si necesita piezas de repuesto
Si necseita psdir piszas de repuesto, recomendamos qua use
Onicamante piezse sepsciflcadse de fdbdca FSP_. Estse piezse
ancajardn bien y funcionar_n bian ya qua setdn fabricadse con la
misma precisibn smpleada an la fabricaci6n de cada
slsctrodom6stico nusvo de WHIRLPOOL ®.Pare encontrar piezse
de repussto FSP en su Iocalidad, Ilarns a nusstro Cantro de
interaccibn dsl cliante o al csntro de servicio dseignado mds
cercano a su Iocalidad.
Para solicitar ayuda o servicio t_mico
Llama al Centro de Interaccibn del Clients de Whirlpool sin costo
alguno al: 1-800-NO BELTS (1-800-622-3587),
Nuestros consultores ofrecen asistencia con respecto a:
• Caracter(sticse y sepscificacionse de nusstra Unea completa
de slsctrodom6sticos
• Informacibn sobre instalacibn
Procsdimiento pare sl uso y mantanimiento
Vsnta de accseorios y de partse para reparaci6n
Asistancia sepscializada pare el consumidor (habla hispana,
problemse de audicibn, visibn limitada, etc.)
Rscomendanionse con distribuidores ioc ,se,compa_ise que
dan servicio y distdbuidorse de partse pare reparacibn
Los t6cnicos dseignados por Whirlpool set,u1 antrenados para
cumplir con la garant|a de producto y ofrecer servicio una vsz
qua la garanUa tsrmine, an cualquier lugar de los Estados
Unidos.
Para Iocalizar a una compafi|a de servicio dseignada por
Whirlpool en su _trea, tambi&n pusds consultar la secci6n
arnarilla de su guia tslsfbnica.
Para obtener mhs asistencia
Si necseita seistancia adicional, pusds secribir a Whirlpool
Corporation con sue preguntse o dudas a:
Whirlpool Brand Commercial Appliances
Customer Interaction Center
553 Benson Road
Benton Harbor, MI 49022-2692
Favor de incluir un nOmero tslsfbnico de d|a an su
correspondencia,
22
Downloaded from www.ManualsFile.com manuals search engine
GARANTIADELASECADORACOMERCIALWHIRLPOOL®
GARANT|A TOTAL DE UN AblO
Durante un afio a partir de la fecha de compra, siempm y cuando se d6 la secedora un uso y mantenimiento de conformided con los
instrucciones adjuntas o provistos con el producto, Whirlpool Corporation se hard cargo del costo de lee piezos de repuesto
autorizadas FSP" y correr_ con los gastos de reparaci6n pare corregir defsotos en los materialos o en la fabricecibn. El osrvicio deber_
ser suministrado por una compafi|e de sorvicio designada por Whirlpool.
GARANT|A LIMITADA DEL SEGUNDO AL TERCER AblO
Del osgundo haste el tercer afio a partir de la fecha de compra, siempre y cuando os d@a la secedora un uso y mantenimiento de
conformided con lee instrucciones adjuntos o pmvistos con el producto, Whirlpool Corporation ee har_tcargo del costo de los piezos de
repuesto autorizedos FSP ®pare corregir defectos en los meteriales o en la fabricecibn. El servicio deber_t osr suministrado por una
compafifa de servicio designeda por Whirlpool.
Whirlpool Corporation no pagard por:
1. Visitos de servicio t_cnico pare corregir lainstalecibn de su secadora, incluyendo el sistema de ventileci6n. Se deberd emplear un
ducto de escape mst_lico resistente de 4 pulg. (10,2 cm) Consulte la seccibn del sistema de ventilaci6n de este manual as| como
lee Instrucciones de instelecibn.
2. Visitos de servicio t6cnico pare ensefiede e user su secedora, pare carnbier fusibles o pare corregir le instelecibn el@ctdca, o pare
reconectar los cortecimuitos en su establecimiento comemial.
3. Defios sufridoe como resultedo de eccidentes, elteraciones, uso incorrecto, ebuso, incendio, inundecionos, fuerza mayor,
instalecibn inedecuada (incluyendo, pero no limitedo a, ducto de ventilacibn de I_u_ina mst_tlicaflexible o de pldstico), instalacibn
que no est& de conformided con los cbdigos locales de electricided y plomeda, o uso de productos que no son aprobedos por
Whirlpool Corporation.
4. Piezos de repuestos o gastos de mano de obra pera la reperaci6n de unidedos usedes fuera de los Estedos Unidos.
5. Recogida y entrege. Este producto estd diosfiedo pera ser reparado en el sitio.
6. Reperaciones de piezos o sistemos como resultedo de modiflcecionos no eutorizadas que se heyan efectuedo el electrodom&stico.
7. Cualquier gasto de meno de obra durante los periodos de le garantfe limiteda.
WHIRLPOOL CORPORATION NO SE HARA RESPONSABLE POR DAI_OS INCIDENTALES O CONSECUENTES.
Algunos estedos no permiten le exclusibn o limitaci6n de defios incidentalos o consecuentos, por Io que este exclusi6n o limitecibn
quiz_ts no le corresponda. Esta gamntfa le otorga derechos legales especfficos, yes posible que usted tenga tambi6n otms demchos,
los cuales vadan de un estedo a ctm.
Esta garanfia no se aplica fuera de los 50 Estados Unidos. Para determinar si se aplica otra garanfia, sirvase poneree en
contacto con su distribuidor autorizado de Whirlpool.
Si usted nsoesite eervicio, llama el Centre de Interaccibn del Cliente el 1-800-NO BELTS (1-800-662-3587) dosde cualquier lugar de
los EE.UU., o oscriba a: Whirlpool Brand Commercial Appliances, Customer Interaction Center, 553 Benson Road, Benton Harbor, MI
49022-2692.
1/02
Guarde este manuel y su compmbante de venta juntos para
referencia en el futuro. Deberd proporcioner evidencia de
compm o fecha de instalaci6n para obtener el servicio
cubierto por la gamntfe.
Anote la siguiente informecibn rospecto a su secadora parafecilitar
la obtenci6n de asistencia o sorvicio t6cnico si alguna vez Io
neossita. Necesitard saber el n,',mem completo del modelo y de la
sorie. Podrd encontrar esta informeci6n en la stiqueta con el
n,',mem del modelo y de la sorie, ubiosdos en su electmdom_etico.
No quite ni altere la stiqusta con el n,',memde eerie.
Nombm del distdbuidor
Dimcci6n
N_mero de tel_fono
N_mero del modelo
N_mero de serie
Fecha de compra
23
Downloaded from www.ManualsFile.com manuals search engine