Loading ...
Loading ...
Loading ...
Assembly Instructions
8
Installation of the hob
❑ WARNING: The appliance may be
installed with a high cabinet or a high
wall only on one side of it. On the
respective opposite side, the height of
an adjacent piece of furnishing may not
exceed the height of the working
surface in which the hob is installed.
The distance between the high wall on
the side of the hob and the rear wall
must comply with the assembly instruc-
tions for the built-in hob. Observe the
protection class for heat exposure as
stated in the assembly instructions.
Installation procedure:
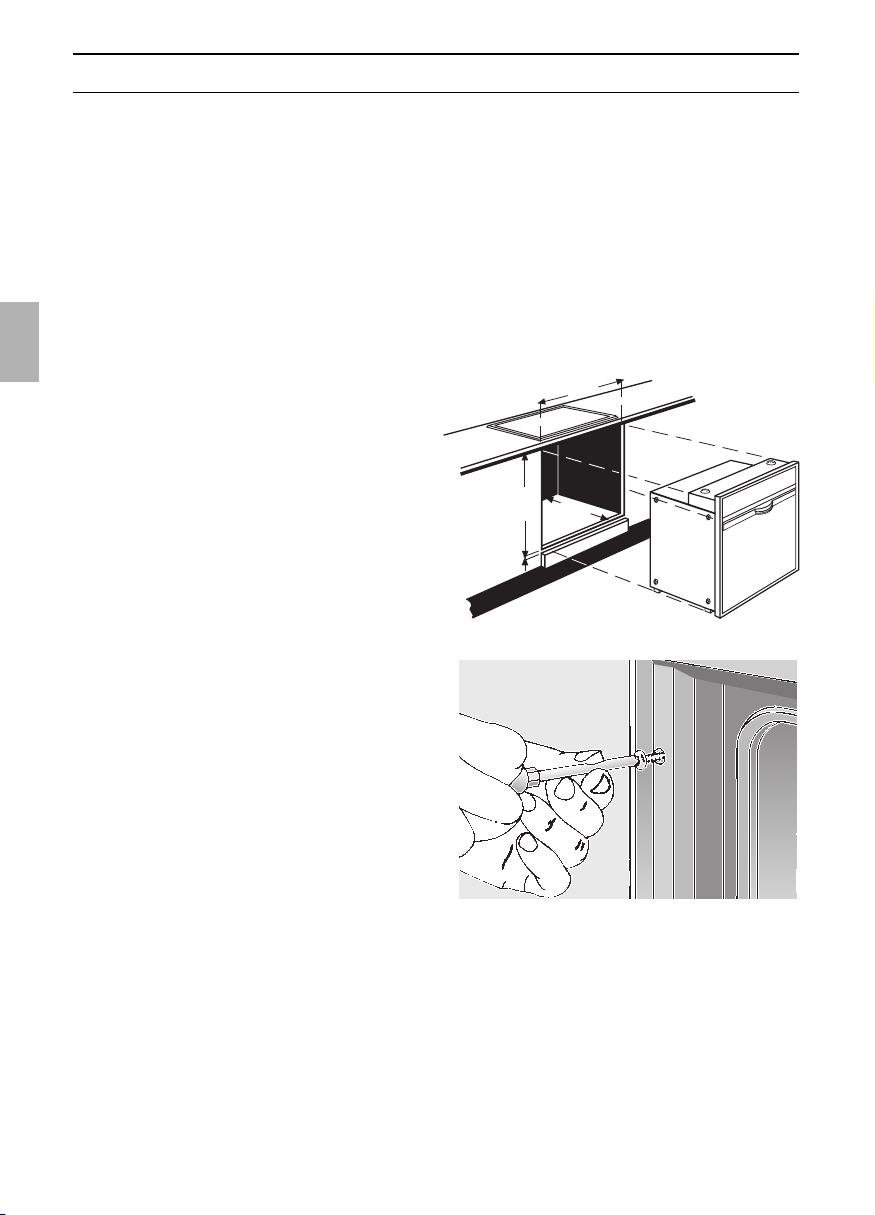
❑ Push the built-in cooker into the
installation roughing of the conversion
cabinet and align the unit until it is in
a level position.
❑ Open the oven door and, using one
screw on each side, fasten the built-in
cooker to the side strips of the
conversion cabinet (see illustration).
The two screws (supplied with the built-
in cooker) must be started slightly
outward.
❑ Verify that the built-in cooker is
positioned securely and in a level
position, and that the required
installation dimensions have been
maintained.
❑ In units featuring telescoping
extensions, these may not move by
themselves.
❑ In units featuring automatic oven
cleaning, after filling 0,4 l of cleaning
solution into the recess in the oven
floor, the liquid must not spill toward
the front.
❑ The properly installed appliance must be
covered on all sides in such a fashion
that not even components with rough
insulation are exposed to the touch. The
cover must be removable with tools
only.
560-
570
600
6
550
mind.
Loading ...
Loading ...
Loading ...