Loading ...
Loading ...
Loading ...
^
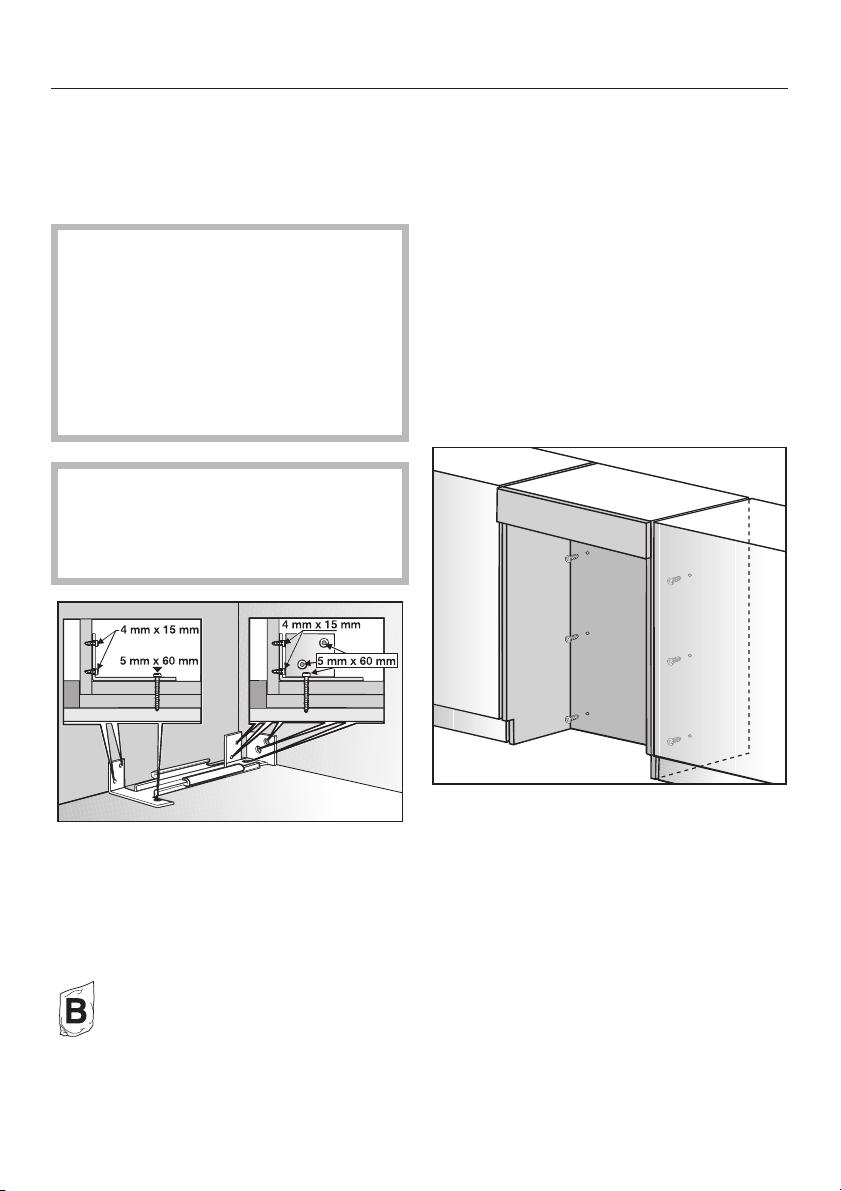
Mark the holes through the anti-tip
brackets b on the floor of the
installation niche.
^
Set the brackets aside.
Screws are supplied with the
appliance for various
applications/materials.
If the anti-tip brackets cannot be
attached securely with the screws
supplied, an alternative anti-tip
device can be used.
Assure that there are no electrical
wires or plumbing in the area which
the screws could penetrate-risk of
injury and damage.
^
Drill pilot holes:
–
1/8" (3 mm) for the5x60mmwood
screws
–
1/16" (2 mm) for the4x15mmwood
screws.
^
Tightly secure the anti-tip brackets in
the niche.
Be certain that the screws penetrate
through the flooring and into the wall
plate a minimum of
3
/
4
" (19 mm).
If the included anti-tip brackets cannot
be secured in the niche, the built-in
cabinet must be secured to the wall
behind it with several screws. Only in
this way can the appliance later
secured in the built-in cabinet be
prevented from tipping.
In a cabinet with a back wall
^
screw the back wall of the cabinet in
several places directly to the wall
behind it.
For this, use suitable plugs/screws
depending on the type of wall.
Installation
48
Loading ...
Loading ...
Loading ...