Loading ...
Loading ...
Loading ...
8
REPAIR AND MAINTENANCE
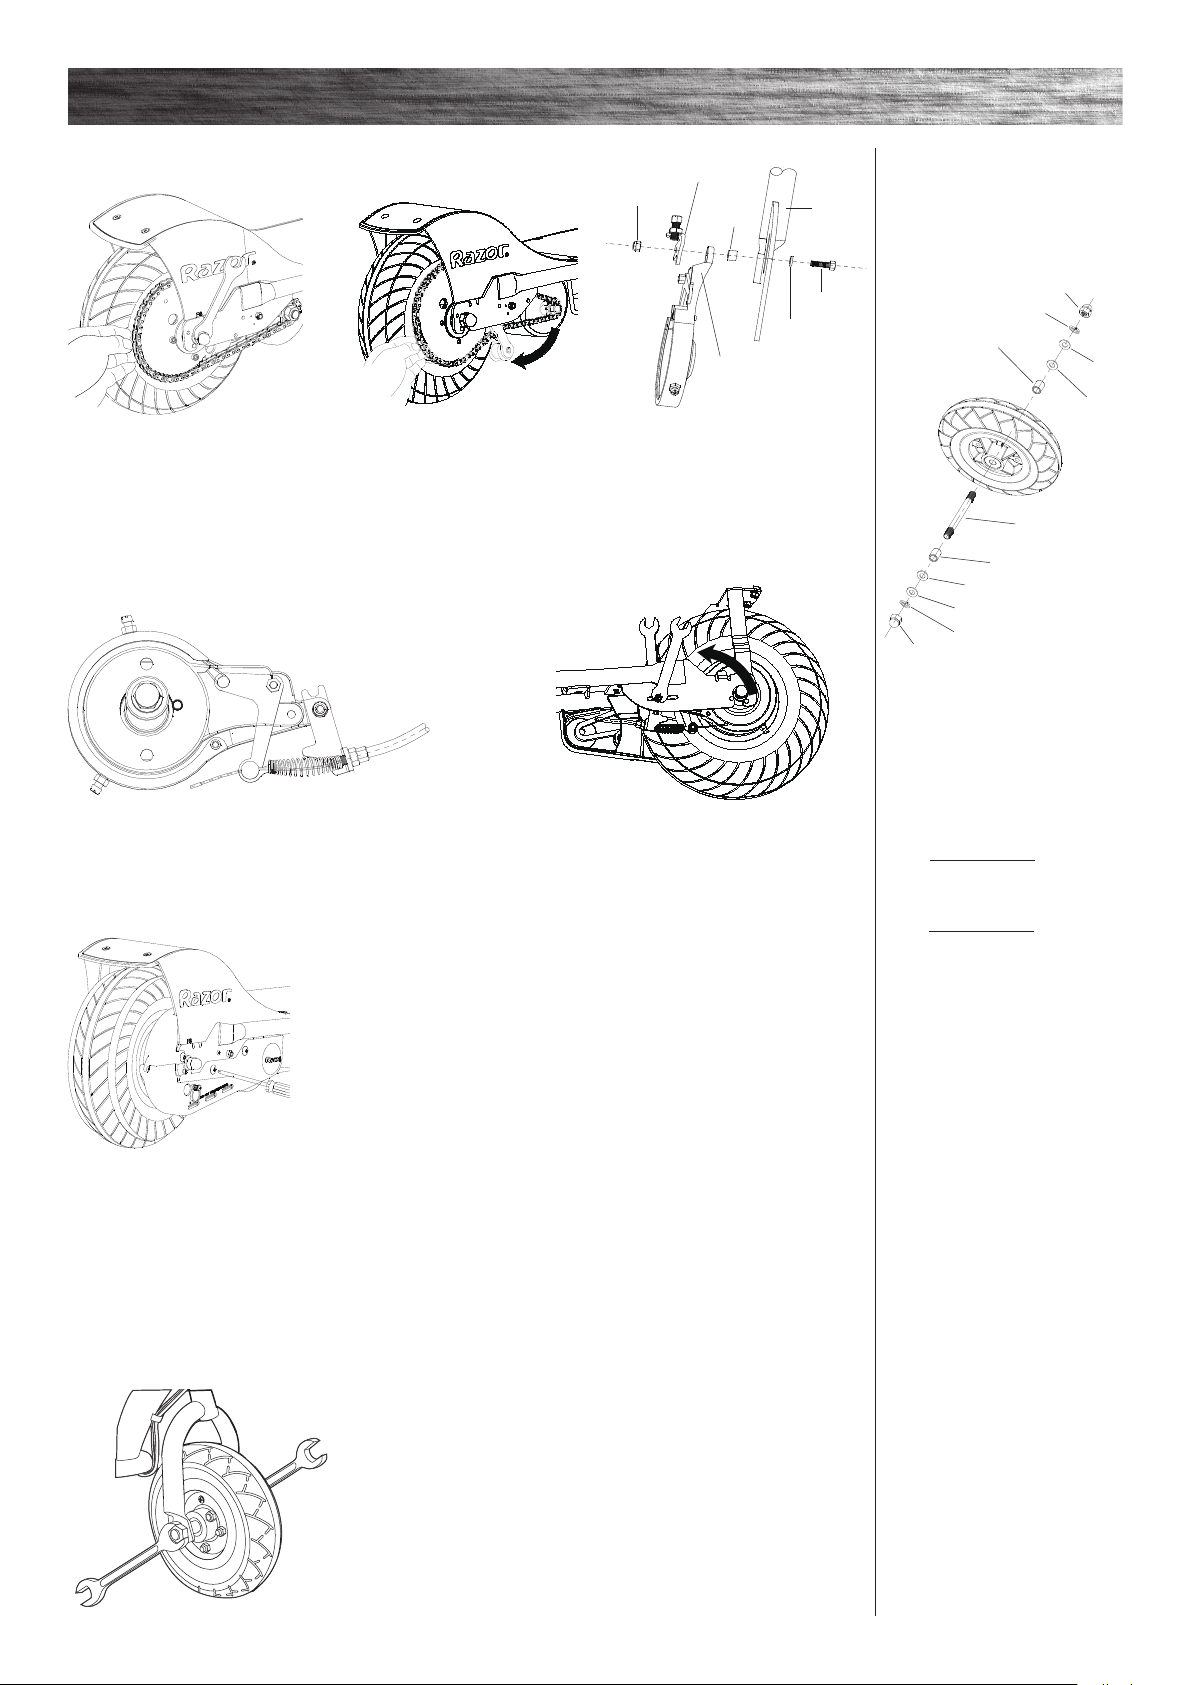
q Front Tire Replacement
Tools required: Two (2) 16 mm wrenches.
1 Using two (2) 16 mm wrenches,
loosen the front axle bolts by
turning the wrenches counter
clockwise. Remove wheel and
install replacement wheel. Note
the sequence of the hardware.
Right Side (Throttle)
9-1 - 16 mm Locknut
9-2 - Spring Washer
9-3 - Washer
Fork
9-4 - Washer
9-5 - Spacer
Left Side (Brake)
9-5 - Spacer
9-4 - Washer
Fork
9-3 - Washer
9-2 - Spring Washer
9-1 - 16 mm Locknut
Note: Front wheel hardware
sequence.
Middle
9-6 - Front Axle Bolt
E2XX US VERSION
--- wheel hardware sequence
Front wheel hardware sequence
Rear wheel hardware sequence
9-1
9-3
9-4
9-5
9-4
9-2
9-5
9-1
9-3
9-2
9-6
7 Install the cable guide brack-
et to the frame and brake plate
using bolt, washers, and nut. Do
not tighten.
8 Thread the brake cable through the brake adjuster barrel, through
the large spring, and into the small hole in the side of the anchor bolt.
Position the cable to the original location (as indicated by the slight
cable kink) and tighten securely.
9 Tighten the cable guide bracket bolt.
Tighten the locknuts on the rear axle. Test
the brake to verify proper function before
riding. Readjust as needed.
6 Verify chain is properly installed
on each sprocket and tensioner is
correctly positioned at the bottom
of the chain.
E300
5 Install the chain onto the rear
wheel sprocket. Slip wheel axle
into the frame slots. See rear wheel
hardware sequence on prior page.
Push the chain tensioner down to
create slack in chain. Hand tighten
rear axle locknuts.
Reassembly
Nut
Cable Guide
Bracket
Spacer
Frame
Washer
Bolt
Brake Plate
10 Replace the chain guard.
Loading ...
Loading ...
Loading ...