Operating Instructions Robot vacuum cleaner
Appliance overview
Illustrations A, B and C for this section are on the pull-out pages in the back of these operating instructions.
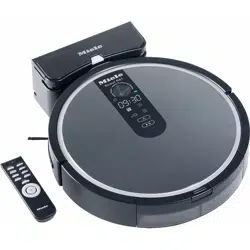
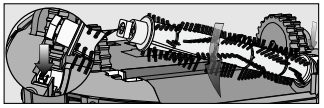
A - Robot vacuum cleaner and base station
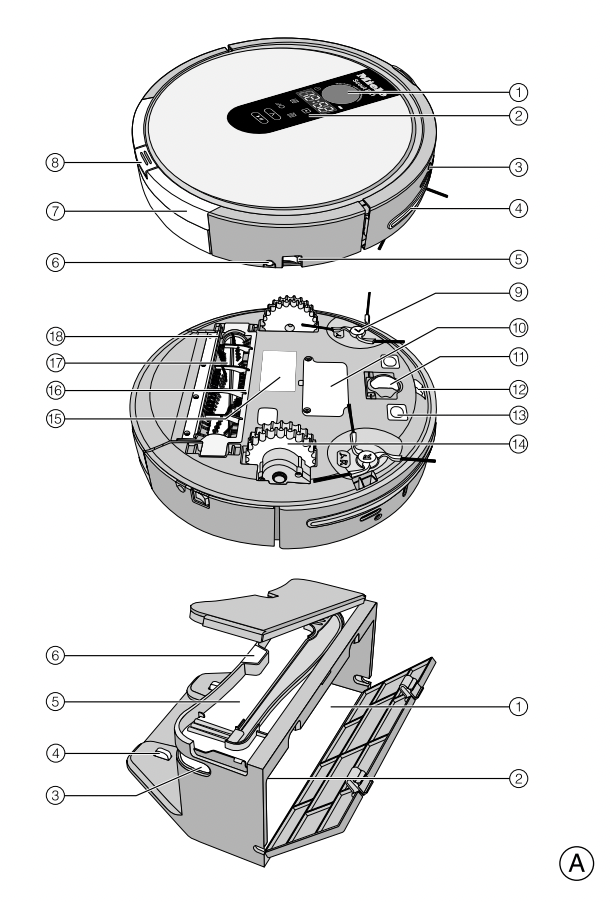
Top of the robot vacuum cleaner
- Camera
- Display
- Sensors (collision protection)
- Impact protection
- ON/OFF switch
- Power supply unit socket
- Dust box
- Dust box release button
Bottom of the robot vacuum cleaner
9. Side brushes
10. Battery compartment
11. Front wheel
12. Sensors (toppling protection)
13. Charging contacts
14. Drive wheels
15. Data plate
16. Roller brush holder
17. Roller brush
18. Dust box seal
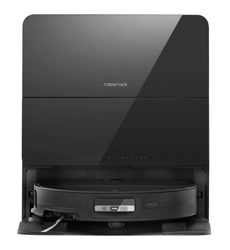
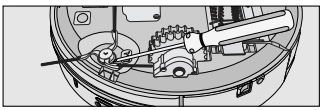
Base station
1. Power supply unit storage compartment
2. Power supply unit socket (not visible)
3. Infrared transmitter
4. Charging contacts
5. Cleaning brush storage compartment
6. Contact indicator
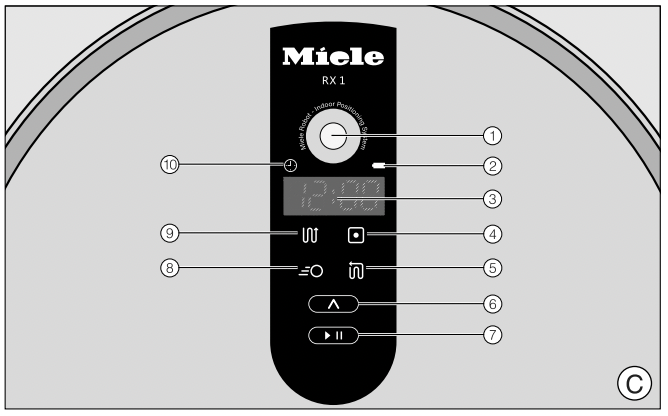
B and C - Remote control and display
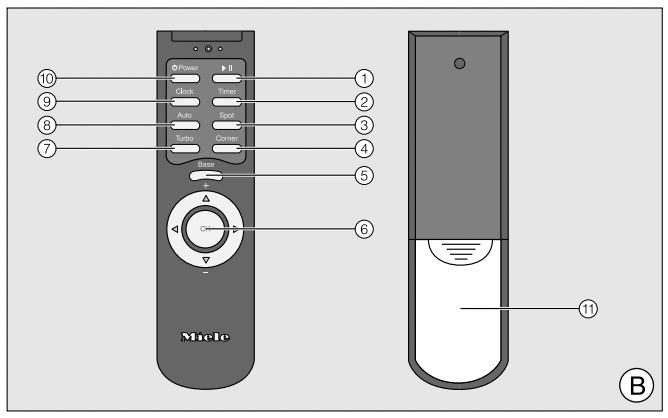
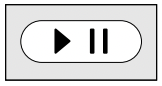
B - Remote control
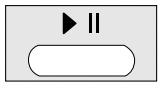
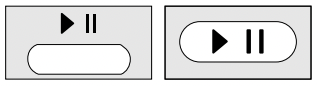
- Start / Pause button (
 )
)
- Timer button
- Spot vacuuming mode button
- Corner vacuuming mode button
- Base button
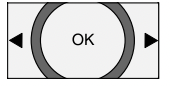
- OK confirmation button with direction buttons around it
- Turbo vacuuming mode button
- Auto standard vacuuming mode button
- Clock button
- Power button
- Battery compartment cover
C - Display
- Camera
- Rechargeable battery status indicator
- Clock display
- Spot vacuuming mode indicator
- Corner vacuuming mode indicator
- Vacuuming mode selection sensor
- Start / Pause sensor
- Turbo vacuuming mode indicator
- Auto standard vacuuming mode indicator
- Timer indicator
Caring for the environment
Disposal of packing material
The packaging is designed to protect the robot vacuum cleaner from damage during transportation. The packaging materials used are selected from materials which are environmentally friendly for disposal and should be recycled.
Recycling the packaging reduces the use of raw materials in the manufacturing process and also reduces the amount of waste in landfill sites.Make sure the packaging is disposed of in the proper manner for your area.
Disposal of your old appliance
Old electrical and electronic machines often still contain valuable materials. However, they also contain harmful substances that were essential for the proper functioning and safe use of the equipment. Handling these materials improperly or disposing of them in your household waste can be harmful to your health and the environment. Therefore, please do not dispose of your old machine with regular household waste.
Old appliances may contain materials that can be recycled. Please contact your local recycling authority about the possibility of recycling these materials. You can obtain information on this matter from your dealer, if necessary.
The lithium-ion rechargeable battery is located in the battery compartment on the bottom of the robot vacuum cleaner. Remove the rechargeable battery from the robot vacuum cleaner and the batteries from the remote control. Dispose of the rechargeable battery and the batteries in a designated collection bin for batteries.
Ensure that the vacuum cleaner presents no danger to children while being stored for disposal.
Functions and features of the robot vacuum cleaner
The robot vacuum cleaner is suitable for the daily cleaning of short pile area rugs, installed carpeting and hard flooring.
Please be sure to observe your flooring manufacturer's cleaning and care instructions.
The robot vacuum cleaner is fitted with a camera and various sensors. During operation, the room plan as well as the items present in the room are recorded. The robot vacuum cleaner uses this data to create an efficient vacuuming plan of the surfaces to be vacuumed, which it can then vacuum autonomously.
Included accessories
– Two side brushes
– Two replacement exhaust filters
– Remote control / two batteries
– Base station, including a cleaning brush
– Power supply unit with connector
– Power cord with plug
– Magnetic strip
Preparing for use
Diagrams 1 - 13 for this section are at the end of these operating instructions.
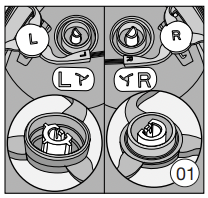
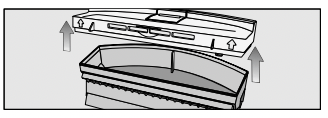
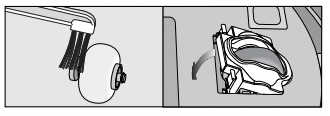
Insert the side brushes (Fig. 01)
- Place the robot vacuum cleaner upside down on a level, clean surface.
Do not lift the robot vacuum cleaner by the area around the dust box as it can come loose.
- Press the two side brushes supplied firmly but carefully onto the pins provided. Ensure that they match up correctly with the L and R markings.
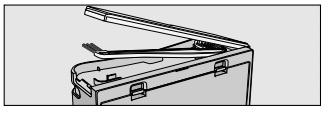
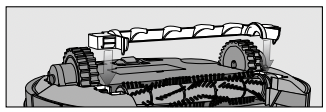
Remove the protective foil (Fig. 02)
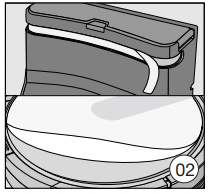
- Remove the protective foil from the base station and from the top of the robot vacuum cleaner.
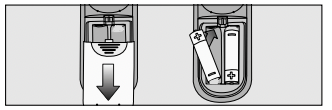
Place the batteries in the remote control (Fig. 03)
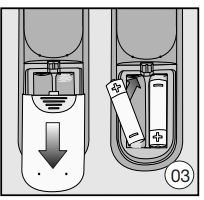
- Remove the battery compartment cover.
- Insert the two batteries supplied, making sure the polarity is correct.
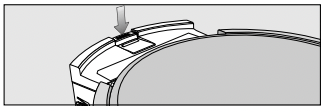
Switch on the robot vacuum cleaner (Fig. 04)
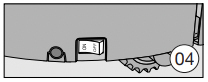
- Press the ON switch on the side of the robot vacuum cleaner.
The rechargeable battery status and the Auto standard vacuuming mode indicators will light up in the display.
After approx. 60 seconds the robot vacuum cleaner will switch into standby. The battery status indicator will continue to light up.
The robot vacuum cleaner is reactivated by pressing any button on the remote control or one of the two sensors in the robot vacuum cleaner display
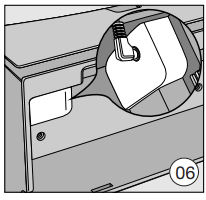
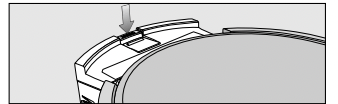
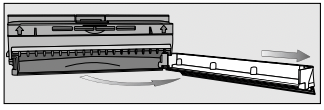
Connect the base station (Fig. 05 + 09)
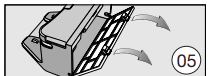

- Open the storage compartment at the back of the base station (Fig. 05).
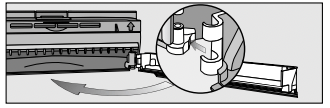
- Insert the power unit connector supplied into the socket at the top of the storage compartment (Fig. 06).
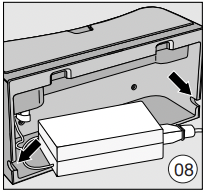
- Connect the power cord to the power supply unit and the plug to an electrical outlet (Fig. 07).

The contact indicator will light up red on the base station.
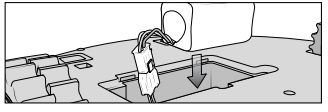
- Stow the power supply unit in the storage compartment in the base station and feed the power cord through the slot (Fig. 08).
- Place the base station on a level surface against a free wall. Ensure that there is an obstacle free distance of at least 5 ft. / 1.5 m in front and 1.5 ft. / 0.5 m to the right and left of the base station (Fig. 09).
Charge the rechargeable battery (Fig. 10)
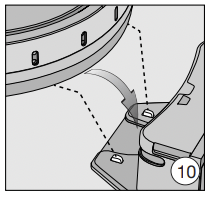
The rechargeable battery is supplied not fully charged. It needs to be charged fully before first use.
The battery can also be charged when the robot vacuum cleaner is switched off (OFF switch). In this case, the vacuum cleaner indicators will not react.
- Connect the robot vacuum cleaner correctly to the charging contacts on the base station.
Do not lift the robot vacuum cleaner by the area around the dust box as it can come loose. The base station contact indicator will go out as soon as the robot vacuum cleaner has been positioned correctly. The battery will charge and the battery status indicator will flash in the display.
The charging process takes up to 120 minutes and is complete when the battery status indicator in the display lights up green. You can then vacuum for up to two hours.
You can also charge the battery without using the base station directly via the power supply unit.
- Insert the power supply unit connector into the socket on the side of the robot vacuum cleaner (Fig. 11).
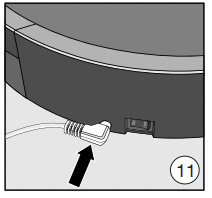
- Connect the power cord to the power supply unit and the plug to an electrical outlet (Fig. 07).
Rechargeable battery status indicator in the display
Red Charged capacity approx. 0% - 20%
Orange Charged capacity approx. 20% - 50%
Green Charged capacity approx. 50% - 100%
Set the time of day (Fig. 12)
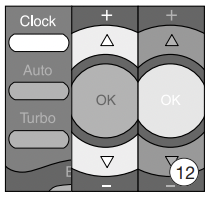
Use the remote control to set the clock.
- Press the Clock button for three seconds.
The hour indicator will flash in the clock display on the robot vacuum cleaner.
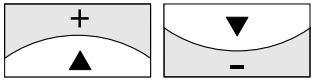
- Press the + or - direction button to set the current hour.
- Press the OK button to confirm your selection.
The minutes indicator will flash in the clock display on the robot vacuum cleaner.
- Press the + or - direction button to set the current minutes.
- Press the OK button to confirm your selection.
If you want to alter the time of day, proceed as described above.
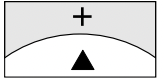
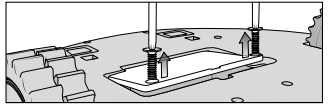
Define the area to be vacuumed (Fig. 13)
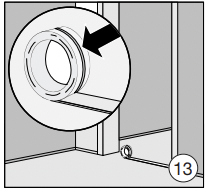
The robot vacuum cleaner is 37/16" (88mm) high. Any items which are to be vacuumed under should have a minimum clearance of 39/16" (90 mm).
You can define any areas which the robot vacuum cleaner should not have access to.
- Place the magnetic strip supplied with the groove facing downwards on the floor.
The robot vacuum cleaner will not cross over the magnetic strip.
Adhesive strips are supplied for permanent fixing.
Additional magnetic strips are available to order from Miele or online at miele-shop
Use
Always watch the robot vacuum cleaner when it is vacuuming new surroundings for the first time. This way you will be able to detect and remove any problematic obstacles or define the area they are in with the magnetic strip.
To turn the appliance on and off
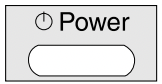
- Press the Power button on the remote control.
The display will be activated.
Starting vacuuming
There are two ways to start vacuuming in the Auto standard vacuuming mode.
Option 1 (Remote control)
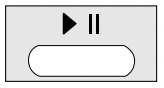
- Press the button.
Option 2 (Display)
- Press the sensor in the display. The area to be vacuumed will be cleaned.
Finish vacuuming: if vacuuming started from the base station
The robot vacuum cleaner will return to the base station automatically and recharge.
The robot vacuum cleaner will return to the base station and recharge even when there is low battery capacity. II will appear in the clock display. The robot vacuum cleaner will then continue vacuuming from the point at which it was interrupted.
Finish vacuuming: if vacuuming started from somewhere in the room
The robot vacuum cleaner will return to its starting point and switch into standby.
The robot vacuum cleaner will stand still when there is low battery capacity. You should then recharge it.
Manually controlled vacuuming
You can use the direction buttons on the remote control to vacuum a particular area of the room.
- While the robot vacuum cleaner is vacuuming, press and hold one of the direction buttons.
The robot vacuum cleaner will turn in the desired direction.
- Press and hold the + direction button.
The robot vacuum cleaner will travel in the desired direction and continue to vacuum.
Interrupting vacuuming
- Press the button on the remote control.
Press the button again to continue vacuuming.
Manual navigation (without vacuuming)
You can use the direction buttons on the remote control to direct the robot vacuum cleaner to a specific area of the room.
- Press and hold one of the direction buttons.
The robot vacuum cleaner will travel in the desired direction without vacuuming.
You cannot direct the robot vacuum cleaner manually to the base station in order to recharge it.
Directing the robot vacuum cleaner to the base station
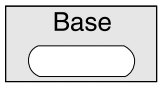
- Press the Base button on the remote control.
The robot vacuum cleaner will travel to the base station and recharge. The base station contact indicator will go out.
Finishing vacuuming manually
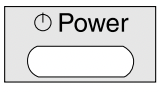
- Press the Power button on the remote control.
The robot vacuum cleaner will switch into standby automatically after approx. 60 seconds. The display will be deactivated. The battery capacity status indicator will continue to light up.
You can switch the robot vacuum cleaner into standby before 60 seconds is up by pressing the Power button again.
The robot vacuum cleaner is reactivated by pressing any button on the remote control or one of the two sensors in the robot vacuum cleaner display.
Vacuuming modes
There are four different vacuuming modes.
Auto

Standard vacuuming mode for normally soiled flooring.
Spot

Targeted vacuuming of an area approx. 6 x 6 ft (1.8 x 1.8 m) around the selected starting point of the robot vacuum cleaner.
Corner

For vacuuming normally soiled flooring (see Auto). Additional edge vacuuming after returning the starting point.
Short

For vacuuming lightly soiled flooring with a short vacuuming duration.
Selecting the vacuuming mode

- Press the Power button on the remote control.
There are two ways of selecting the vacuuming mode.
Option 1 (Remote control)
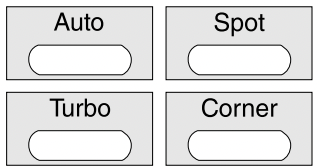
- Press the button for the vacuuming desired mode. The corresponding vacuuming mode symbol will light up in the display.
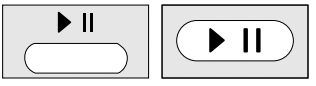
- To start vacuuming, press the button on the remote control or the sensor in the display
Option 2 (Display)
- Press the
 sensor repeatedly until the symbol for the vacuuming desired mode lights up.
- To start vacuuming, press the button on the remote control or the sensor in the display.
Setting the timer
(only possible if the clock has been set)
If you would like the robot vacuum cleaner to start at the same time every day, you can save the start time and vacuuming desired mode to memory.
You can also use the robot vacuum cleaner to vacuum in the dark. However, please be aware that vacuuming may be less thorough. The camera needs light to enable it to navigate without restriction.
Use the remote control to set the timer.
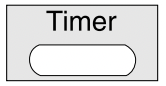
- Press the Timer button for at least three seconds.
The Timer  and the hour indicators will flash in the display.
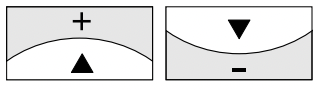
- Press the + or - direction button to set the hour you want.Press the + or - direction button to set the hour you want.
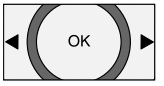
- Press the OK button to confirm your selection.
The Timer and the minutes indicators will flash in the display.
- Press the + or - direction button to set the minutes you want.
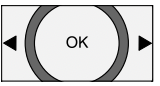
- Press the OK button to confirm your selection.
- On the remote control, press the button for the vacuuming desired mode or the direction buttons until the symbol for the vacuuming mode you want flashes.
- Press the OK button to confirm your selection.
The settings will be displayed for approx. three seconds.The robot vacuum cleaner will now start to vacuum at the same time each day.
The Timer indicator lights up to show that the timer has been activated.
To alter the entries, proceed as described previously.
Deactivating the timer
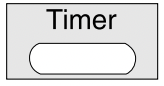
- Press the Timer button on the remote control briefly. The Timer indicator will go out.
Activating the timer / displaying a set start time
- Press the Timer button on the remote control briefly.
The Timer indicator lights up, the set start time is shown briefly and the robot vacuum cleaner will start vacuuming at the set start time.
Deactivating the acoustic signals
The acoustic signals are activated as standard. You can deactivate and then reactivate them.
- Press the OK button on the remote control for at least three seconds.
OFF will appear briefly in the clock display.
Acoustic signals for fault messages cannot be deactivated.
Reducing the maximum crossing over height
The robot vacuum cleaner is set as standard so that it can negotiate a height of up to 3/4" (20 mm). This allows it to vacuum carpets, cross over thresholds, etc.
If you would like to reduce this height down to approx. 1/4" (6 mm)) in order to protect chair or table legs, or lamps for example, you can deactivate the factory default setting.
- Press the Base button on the remote control for at least three seconds.
LO will appear in the clock display.
Press the Base button again for at least three seconds if you want to reactivate the maximum crossing over height of 3/4" (20 mm). HI will appear in the clock display
Maintenance
 Before any maintenance work switch the robot vacuum cleaner off with the OFF switch on the side.
Only use genuine accessories with the "Original Miele" logo on them. This will ensure that the suction power of the robot vacuum cleaner is maintained, giving the best possible cleaning results.
Purchasing accessories
Original Miele accessories can be ordered from Miele, your Miele retailer or online.
Ordering the correct accessories
Original Miele accessories are identified by the "Original Miele" logo on the packaging.
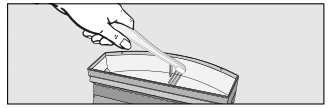
Emptying the dust box
Empty the dust box of the robot vacuum cleaner after each use.
- Press the dust box release button and remove the dust box.
- Remove the lid from the dust box.
- Empty the dust box.
The contents of the box can be disposed of with the normal household waste, providing it contains general household dust only.
Cleaning the dust box
Clean the dust box of the robot vacuum cleaner after each use.
There is a storage compartment for the cleaning brush on the top of the base station.
- Open the storage compartment and remove the cleaning brush.
- Clean the dust box with the brush end of the cleaning brush.
- Clean the bottom of the lid and also the filter grille using the brush end of the cleaning brush.
- Close the lid of the dust box making sure it clicks into place.
- Replace the dust box in the robot vacuum cleaner, making sure it clicks into position.
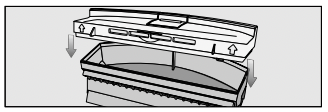
Replacing the exhaust filter
Replace the exhaust filter in the robot vacuum cleaner after approx. three months. Two replacement exhaust filters are supplied.
The exhaust filter is in the bottom of the dust box lid.
- Unclip the filter grille and replace the exhaust filter.
- Close the filter grille making sure it clicks into position.
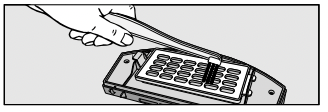
Cleaning the roller brush
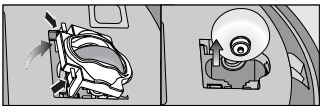
- Remove the dust box and place the robot vacuum cleaner upside down on a level, clean surface.
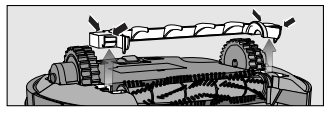
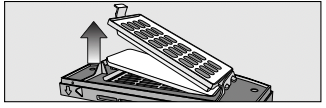
- Remove the roller brush cover.
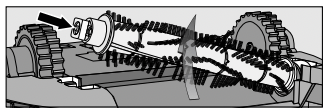
- Remove the roller brush, taking care not to lose the square guide.
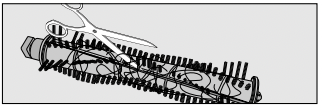
- Use scissors to cut any threads or hairs which have wound around the roller brush. There is a groove on the roller to guide you.
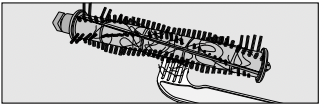
- Remove the threads and hairs with the comb end of the cleaning brush.
- Replace the roller brush. Make sure you position it carefully and that the square guide is attached
- Lock the cover making sure it clicks into position.
- Replace the dust box in the robot vacuum cleaner, making sure it clicks into position.
In order to continue to achieve the best possible cleaning results replace the roller brush with a new one after approx. two years.
Cleaning the side brushes
- Place the robot vacuum cleaner upside down on a level, clean surface.
Do not lift the robot vacuum cleaner by the area around the dust box as it can come loose.
- Lift off the side brushes using a flat head screwdriver, for example.
- Remove the threads and hairs with the comb end of the cleaning brush.
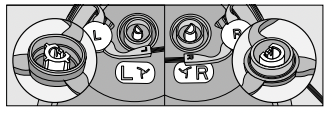
- Press the two side brushes firmly but carefully onto the pins provided. Ensure that they match up correctly with the L and R markings.
In order to continue to achieve the best possible cleaning results replace the side brushes with new ones after approx. one year.
Cleaning the seal on the dust box

- Press the dust box release button and remove the dust box.
- Clean the seal on the bottom of the dust box with a damp cloth.
- Replace the dust box in the robot vacuum cleaner, making sure it clicks into position.
In order to continue to achieve the best possible cleaning results replace the seal with a new one after approx. one year.
Replacing the seal on the dust box
- Press the dust box release button and remove the dust box.
- Unclip the seal from the dust box and carefully swing it out until it detaches from the dust box.
- Attach the new seal to the side and clip it into position.
- Replace the dust box in the robot vacuum cleaner, making sure it clicks into position.
Cleaning the front wheel
- Place the robot vacuum cleaner upside down on a level, clean surface.
Do not lift the robot vacuum cleaner by the area around the dust box as it can come loose.
- Unclip the cover.
- Remove the front wheel.
- Remove any threads and hairs and clean the front wheel with the brush end of the cleaning brush.
- Replace the front wheel and close the cover making sure it clicks into position.
Cleaning the sensors
- Carefully clean the sensors on the side and the bottom of the robot vacuum cleaner using a dry cotton wool bud.
Changing the batteries in the remote control
The remote control requires two AAA (1.5 V) batteries.
- Remove the battery compartment cover.
- Replace the batteries making sure the polarity is correct.
Replacing the rechargeable battery
Keep a spare original Miele lithium-ion rechargeable battery to hand for your Scout RX1.
- Place the robot vacuum cleaner upside down on a level, clean surface.
Do not lift the robot vacuum cleaner by the area around the dust box as it can come loose.
- Unscrew the cover of the rechargeable battery compartment on both sides with a cross-headed screwdriver
- Carefully remove the rechargeable battery, pressing the lug on the contact to release it.
- Insert the new rechargeable battery.
- Replace the cover of the rechargeable battery compartment.
- Dispose of the old rechargeable battery in a designated collection/recycling bin for batteries.
Storage
Before storing the robot vacuum cleaner, switch it off with the OFF switch on the side.
If the robot vacuum cleaner is not going to be used for a long period of time, make sure it is stored in a well ventilated, cool place.
Cleaning and care
Maintaining the robot vacuum cleaner and accessories
Before cleaning the robot vacuum cleaner, switch it off with the OFF switch on the side.
The robot vacuum cleaner and all plastic accessories can be cleaned with a dry or a slightly damp cloth, or with a proprietary cleaner suitable for plastic.
Do not use abrasive cleaning agents, glass cleaning agents, allpurpose cleaners or oil-based conditioning agents!
Do not immerse the robot vacuum cleaner or any accessories supplied with it in water.
Frequently Asked Questions
Before trying to solve any problems with the robot vacuum cleaner, switch it off with the OFF switch on the side.
| Problem |
Possible cause and solution |
| The robot vacuum cleaner switches itself off after it has been switched on using the Power button. |
The rechargeable battery is not sufficiently charged.
|
The robot vacuum cleaner does not react.
|
The robot vacuum cleaner is switched off.
- Press the ON switch on the side of the robot vacuum cleaner to switch it on.
|
|
The batteries in the remote control have been inserted incorrectly.
- Make sure the polarity is correct.
|
|
The batteries in the remote control are dead.
|
|
The signal between the infrared transmitter on the vacuum cleaner and the remote control is broken.
- Clean both parts carefully with a soft, dry cloth and make sure that no items disrupt the signal.
|
|
The remote control is too near to the robot vacuum cleaner or too far away from it.
- Increase or decrease the distance and when using the remote control direct it towards the robot vacuum cleaner.
|
The cleaning result is poor.
|
The dust box is full.
- Empty and clean the dust box.
|
|
The roller brush is dirty.
|
|
The dust box seal is dirty.
|
|
The exhaust filter is dirty.
- Replace the exhaust filter.
|
| The roller brush has worn out. |
The cleaning result is poor.
|
- Replace the roller brush.
|
|
The dust box seal has worn out.
- Replace the dust box seal.
|
|
The side brushes have worn out.
- Replace the side brushes.
|
| The robot vacuum cleaner is not charging. |
The base station / robot vacuum cleaner is not connected to the electricity supply correctly.
- Connect the base station exactly as described in these operating instructions. Do the same for the robot vacuum cleaner, see "Preparing for use - Charge the rechargeable battery".
|
The robot vacuum cleaner does not return to the base station after vacuuming.
|
The Auto standard vacuuming mode was started somewhere in the room.
- The robot vacuum cleaner will return to its starting point.
|
|
The Spot vacuuming mode has been selected.
- The robot vacuum cleaner will return to its starting point.
|
|
There is insufficient light for the robot vacuum cleaner to navigate.
- Provide sufficient lighting.
|
|
The base station is not connected correctly.
- Connect the base station exactly as described in these operating instructions.
|
|
The sensors on the robot vacuum cleaner are dirty.
- Clean the sensors carefully using a dry cotton wool bud.
|
|
The signal between the infrared transmitter on the base station and the vacuum cleaner is broken.
- Clean both parts carefully with a soft, dry cloth and make sure that no items disrupt the signal.
|
|
Obstacles on the floor which is to be vacuumed can impede navigation.
- Watch the robot vacuum cleaner during vacuuming.
- Remove any obstructions.
- Define the area they are in with the magnetic strip.
|
| The robot vacuum cleaner does not return to the base station after vacuuming. |
- Reduce the maximum crossing over height, see "Use - Reducing the maximum crossing over height".
|
Fault messages
Before resolving any faults with the robot vacuum cleaner, switch it off with the OFF switch on the side.
Fault messages are shown in the clock indicator of the robot vacuum cleaner's display
| Problem |
Possible cause and solution |
| F 1 |
"Wheel raised"
- Place the robot vacuum cleaner on a level floor surface.
|
| F 2 |
"Dirty sensors"
- Clean the sensors. This fault message will also appear if the side brushes are not fitted. In this case, fit the side brushes.
|
| F 3 |
"Dust box"
- Replace the dust box in the robot vacuum cleaner, making sure it clicks into position.
|
| F 4 |
"Drive wheels overloaded"
- Check whether the drive wheels have become dirty. Remove any threads and hairs.
|
| F 5 |
"Brushes overloaded"
- Check whether the roller brush and the side brushes have become dirty. Clean the roller brush and the side brushes.
|
| F 6 |
"Motor overloaded"
- Empty and clean the dust box. Replace the exhaust filter.
|
| F 7 |
"Internal system fault"
- Switch the robot vacuum cleaner off and then back on again (press the ON/OFF switch on the side).
|
| F 8 |
"Front wheel dirty"
- Check the front wheel for debris. Remove any threads and hair and clean the front wheel.
|