
Loading ...
Loading ...
Loading ...
23
English
1
Press the
latch
2
Pull out the
battery
3
Press the
stop lever
4
Pull out the
magazine cover
6
Remove the nails
5
(3) Detach the nose and guide plate using the hexagonal bar wrench stored in the back of the magazine.
21
Hexagonal Bar
Wrench
Magazine
NOTE: Do not remove
these two bolts
Guide Plate
Bolt (×2)
Nose
Push Lever
Driver Blade
Magazine
(1) Remove all remaining fasteners and battery from
nailer.
(2) Attaching and detaching the nose cap The nose cap
is attached simply by pressing it onto the nose.
Holding the nose cap with the holes toward the front
of the power tool, match the three protrusions with the
three notches in the nose.
Recess of the Nose
Protrusions
(located inside)
Nose Cap
(for fl at driving)
(3) To detach the nose cap, pull it off with your fi ngers.
If the nose cap is hard to detach, insert a slotted
screwdriver or thin bar into the gap between the nose
and the nose cap.
(4) After removing the nose cap, insert it onto the shaft of
the magazine stay through the holes.
Recess on Magazine Rear
Nose Cap (for fl at driving)
Protrusions (located inside)
NOTE
The nose cap may reduce nailing depth due to its
thickness. Re-adjustment of nailing depth is required.
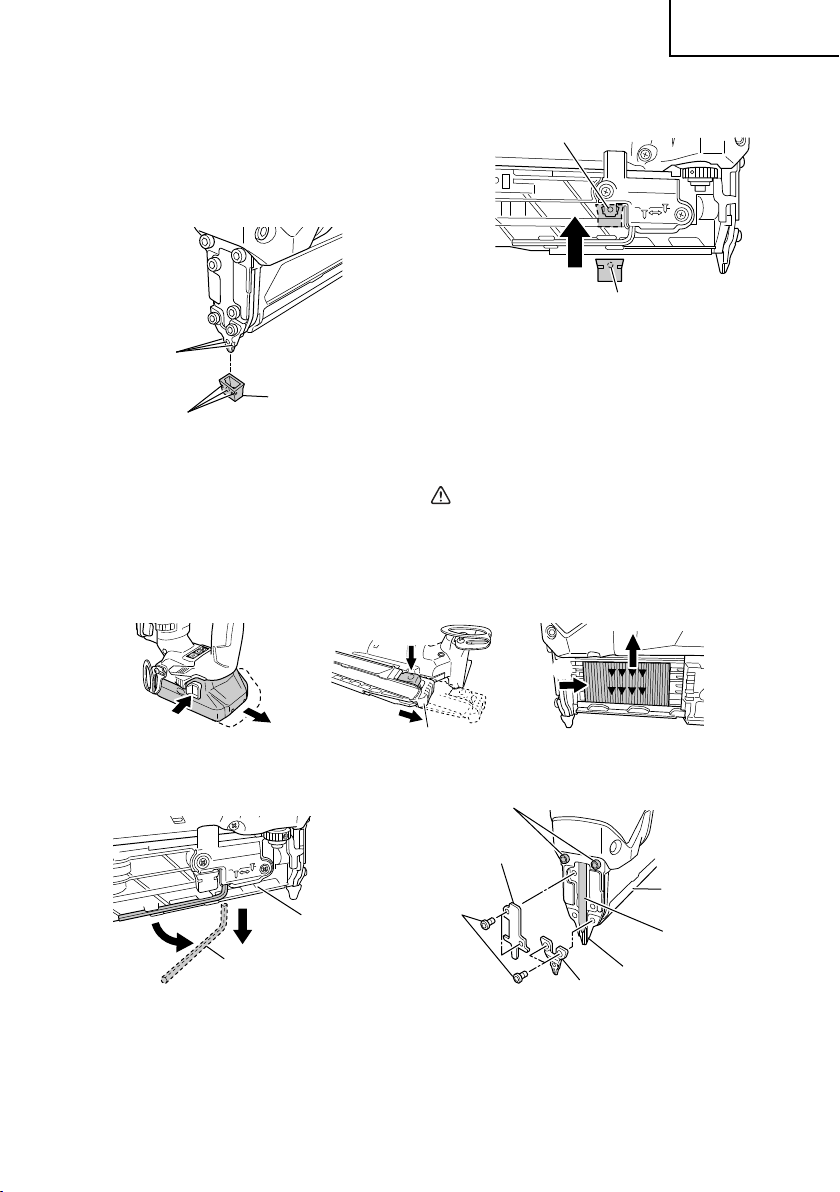
CLEARING A JAM
If nails are jammed in fi ring head, remove it, and adjust the
nailing in the following order.
CAUTION
●
Remove the battery from the Nailer.
(1) Remove the battery from the Nailer.
(2) Remove all nails.
000BookNP18DSALUS.indb23000BookNP18DSALUS.indb23 2017/09/0816:32:072017/09/0816:32:07
Loading ...
Loading ...
Loading ...