Loading ...
Loading ...
Loading ...
67
Monogramming and
Embroidering
Pattern Stitch Length Stitch Width Foot
Any Any None
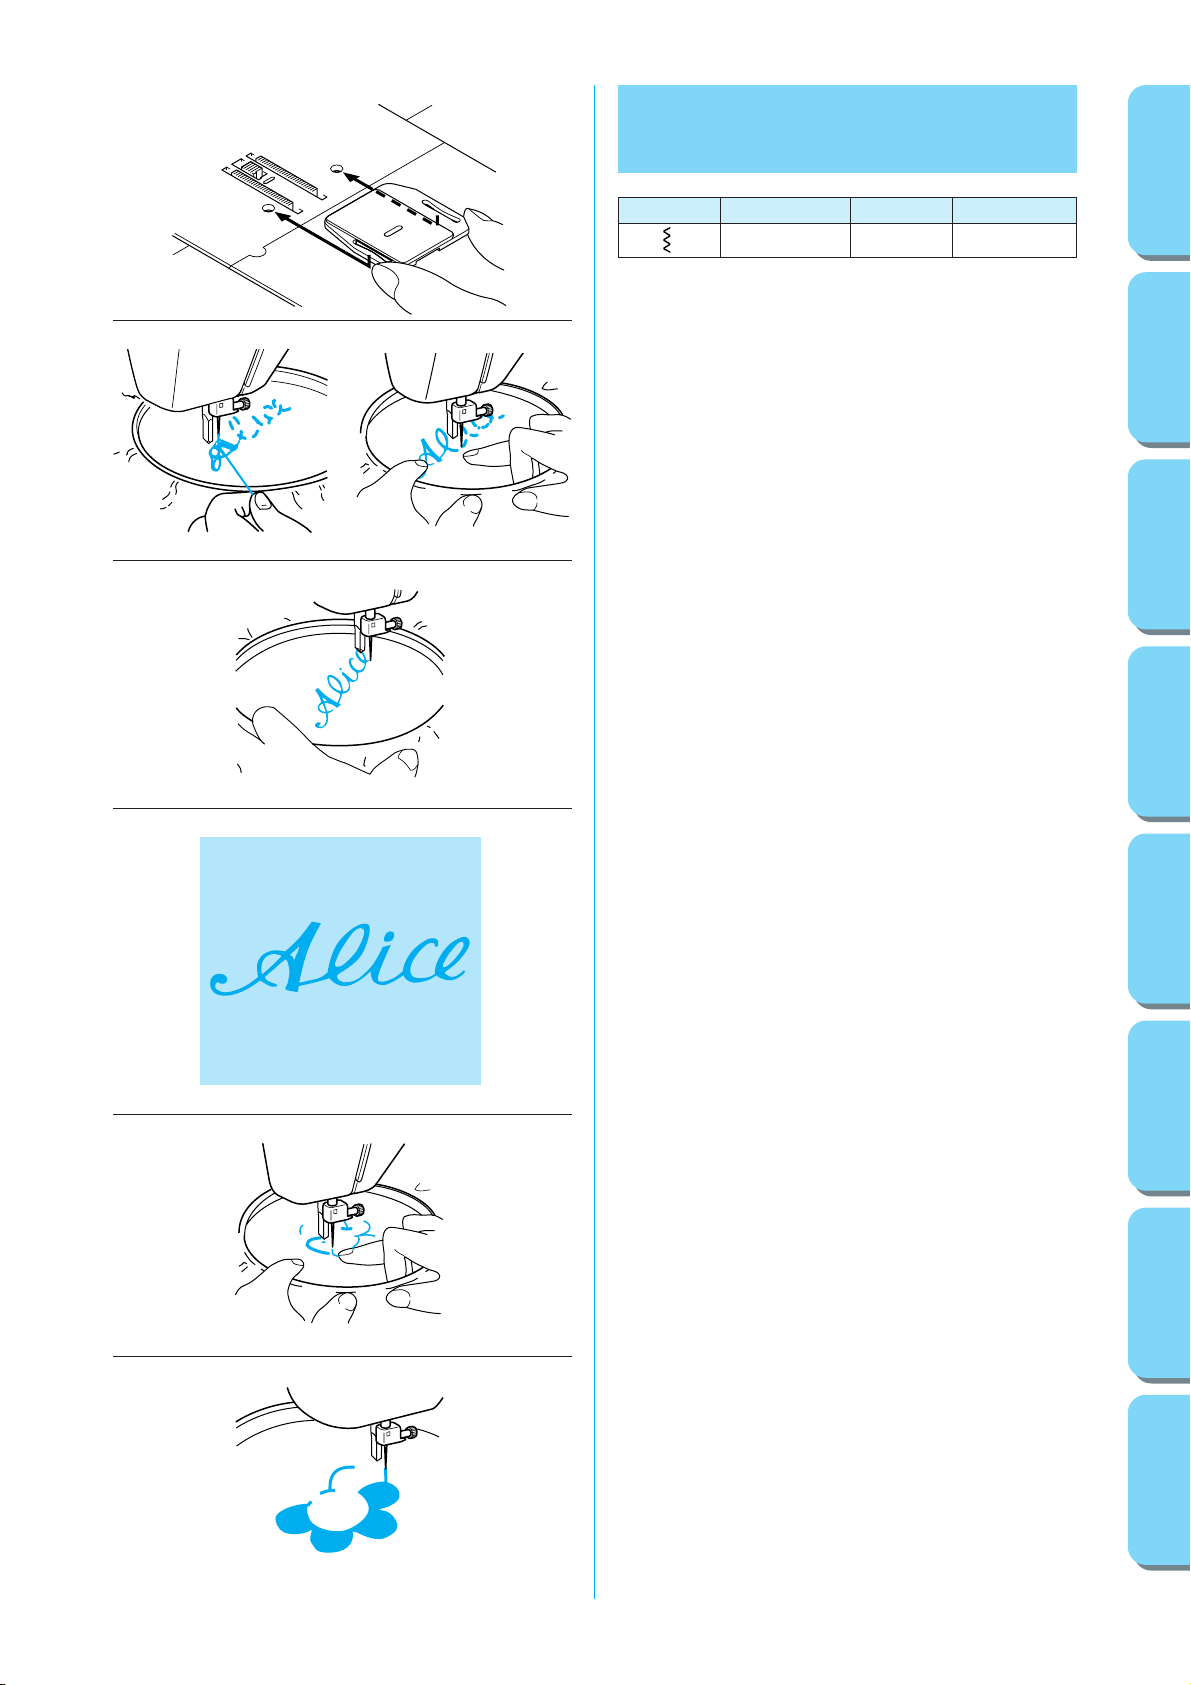
PREPARING FOR MONOGRAMMING AND EMBROIDERING
1. Remove the power supply plug from the outlet. And place the
darning plate on the needle plate as shown in fig. A. Connect the
power supply plug into a wall outlet.
2. Set the Pattern Selection Dial to the appropriate Zigzag Stitch
setting.
3. Draw the lettering (for monogramming) or design (for embroi-
dering) on the surface of the fabric.
4. Stretch the fabric between embroidery hoops as firmly as
possible with the underside of the fabric on the bottom of the
inside hoop.
5. Place the work under the needle and lower the presser bar with
the foot removed.
6. Pull the lower thread up through the work at the starting position
by turning the balance wheel and make a few holding stitches.
7. Grip the hoop with the thumb and forefingers of both hands while
pressing the fabric with the middle and third fingers and support-
ing the outside of the hoop with your smaller fingers.
MONOGRAMMING
1. Sew, moving the hoop slowly along the lettering at a constant
speed.
2. Secure with a few straight stitches at the end of the last letter.
EMBROIDERING
1. Stitch the outline of the design by moving the embroidery hoop.
2. Fill in the design alternating from the outline of the design to the
inside and from the inside to the edge of the outline until the
design is completely filled in. Keep the stitching close together.
NOTE:
A long stitch is made by moving the embroidery hoop rapidly and a
short stitch is made by moving it slowly.
3. Secure with a few Straight Stitches at the end of the design.
A
TABLE OF CONTENTS
KNOWING YOUR
SEWING MACHINE
STRAIGHT AND
ZIGZAG STITCHING
BUILT-IN STITCHES
BUTTONHOLE AND
BUTTON SEWING
USING ATTACHMENTS
AND APPLICATIONS
MAINTENANCE
INDEX
Loading ...
Loading ...
Loading ...