Loading ...
Loading ...
Loading ...
ENGLISH
4
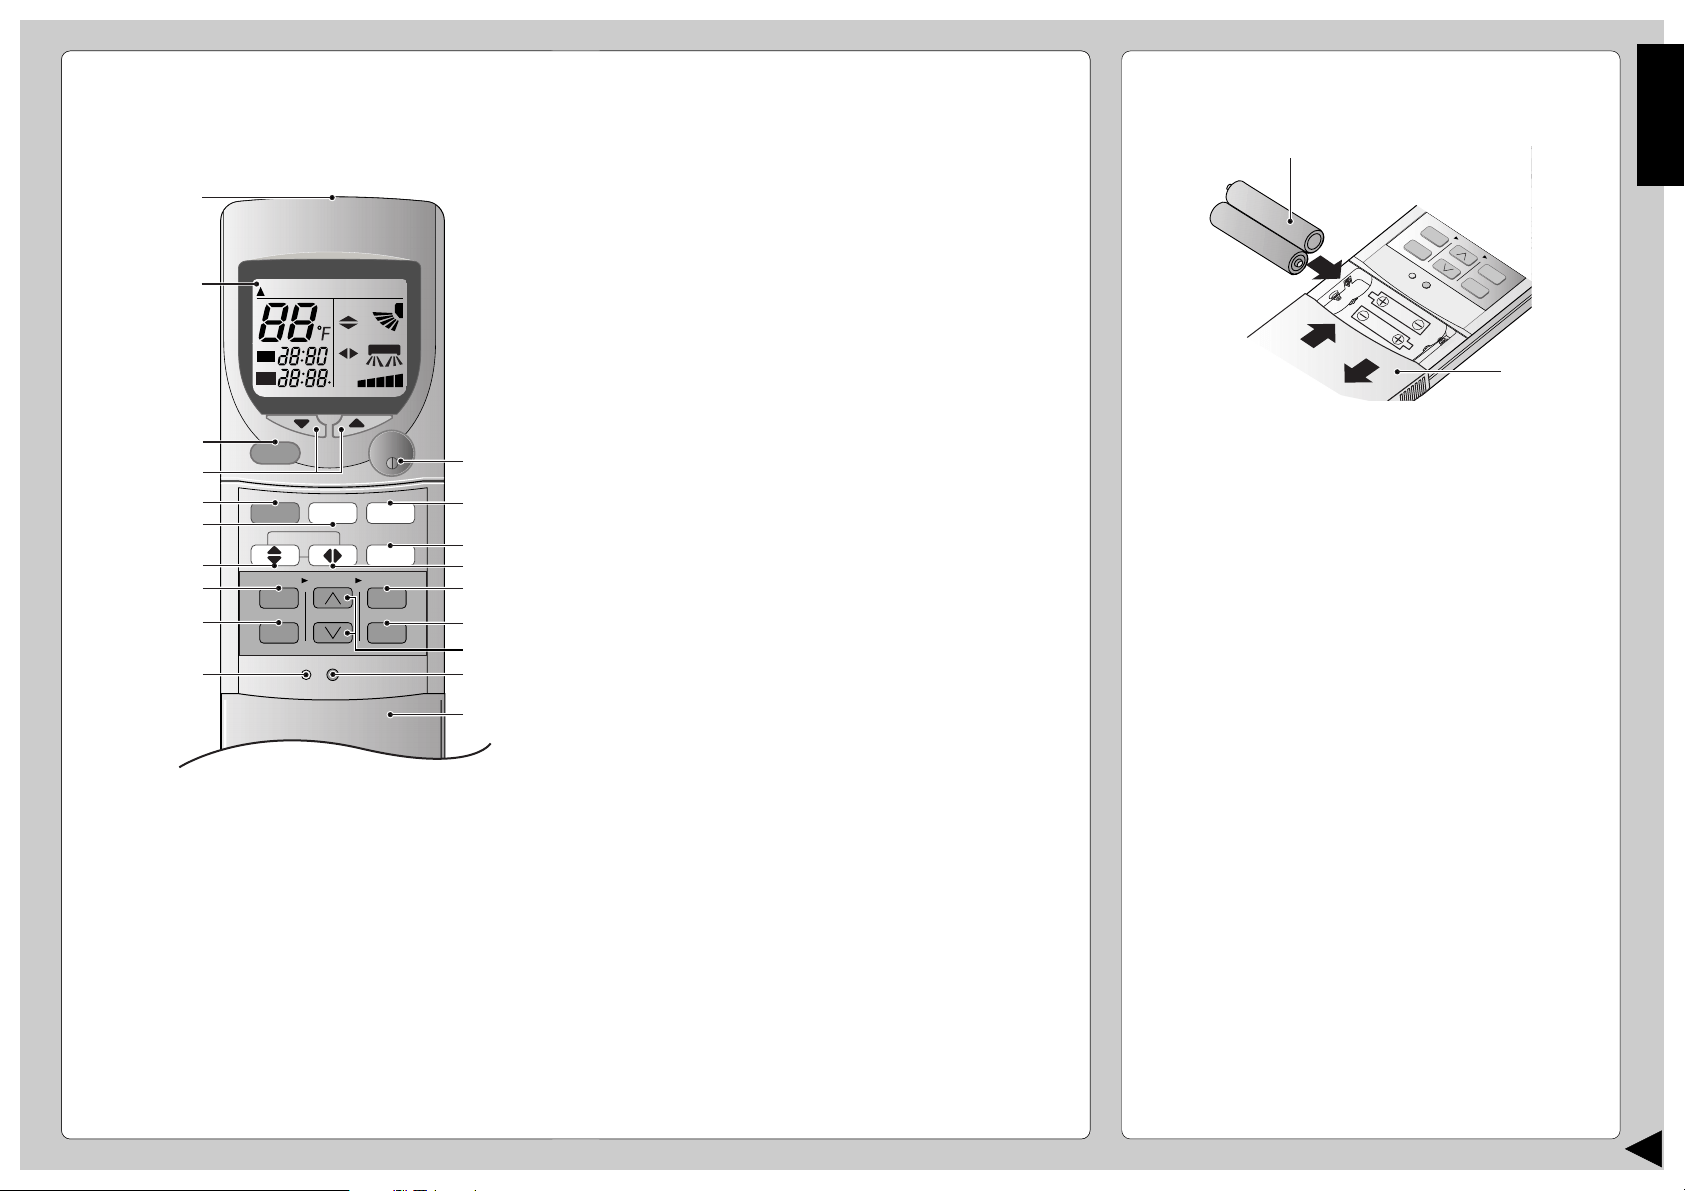
NAME OF EACH PART
■ Remote Control
● Remote Control Signal.
• Make sure it is not obstructed.
• Maximum distance : 10 m (32.8 ft.).
• Signal received sound :
One short beep or one long beep.
● Notes for Remote Control.
• Do not throw or drop.
• Do not get it wet.
• Certain types of fluorescent lamps may affect
signal reception. Consult your dealer.
CHECK
TEMP
AUTAUTO
ON
OFF
AUTO DRDRYCOOLCOOLHEAHEAT
FANAN
AUTAUTO
AUTAUTO
RESET CLOCK
MODE
SLEEP
ECONOMY
FAN SPEED
AIR SWING
OFF
CANCEL
ON
SET
1
2
3
TIMER
OFF/ON
POWERFUL
#
!
$
%
^
$
*
&
3
5
8
7
9
0
6
4
(
2
1
● How to Insert the Batteries
1 Slide down the remote control cover completely
to remove it.
2 Insert the batteries
– Be sure the direction is correct
– 12:00 on display - flashing
• Set the current time (CLOCK) immediately to
prevent battery exhaustion.
3 Re-install the remote control cover by inserting it
in the side groves and pushing inward.
● About the batteries
• Can be used for approximately one year.
● Observe the following when replacing the
batteries
• Replace with new batteries of the same type.
• Do not use rechargeable batteries (Ni-Cd).
• Remove the batteries if the unit is not going to be
used for a long period.
1 Signal Transmitter
2 Operation Display
3 Powerful Mode Operation Button
4 Room Temperature Setting Button
(Illuminating button)
5 Operation Mode Selection Button
6 Economy Mode Operation Button
7 Vertical Airflow Direction Button
8 ON-Timer Button
9 OFF-Timer Button
0 Reset Point
(Press with fine-tipped object to clear the memory)
! OFF/ON Button
(Illuminating button)
@ Sleep Mode Operation Button
# Fan Speed Selection Button
$ Horizontal Airflow Direction Button
% Timer Set Button
^ Timer Cancellation Button
& Time-Setting Button
* Clock Button
( Remote Control Cover
C
H
E
C
K
AUTO
O
F
AUTO HEAT
DRY
FANCOOL
FAN
AUTO
AUTO
R
E
S
E
T
C
L
O
C
K
A
IR
S
W
IN
G
O
FF
CANCEL
1
2
3
T
IM
E
R
POWERFUL
AUTO
MANUAL
ECONOM
Y
SLE
ON
S
E
T
FAN SPEED
MODE
2
1
1.5V
1.5V
Loading ...
Loading ...
Loading ...