Loading ...
Loading ...
Loading ...
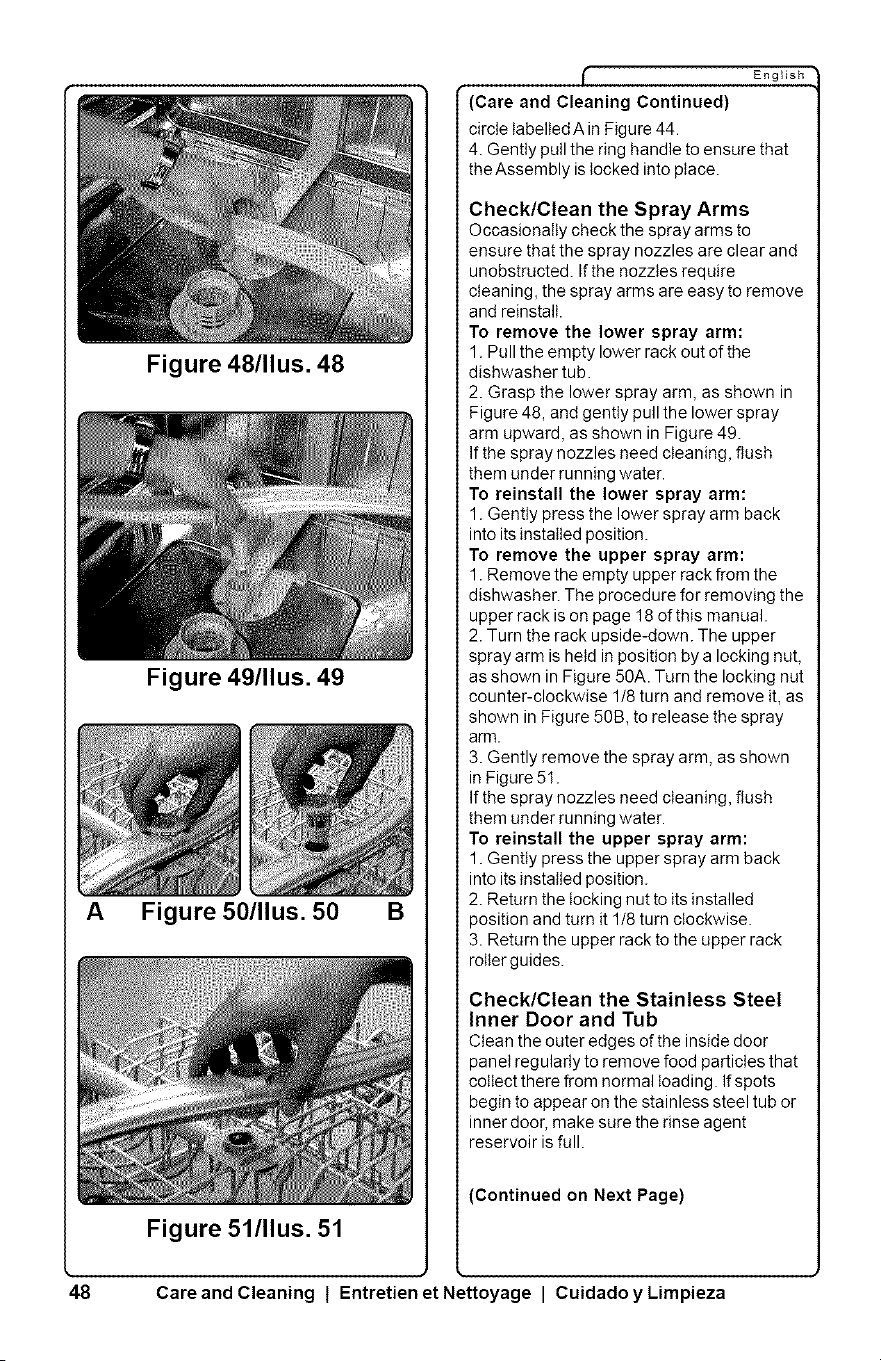
Figure 48/llus. 48
Figure 49/llus. 49
A Figure 50/llus. 50
Figure 51/llus. 51
B
English
(Care and Cleaning Continued)
circle tabelted A in Figure 44.
4. Gentty putl the ring handle to ensure that
the Assembly is tocked into ptace.
Check/Clean the Spray Arms
Occasionally check the spray arms to
ensure that the spray nozzles are clear and
unobstructed. If the nozztes require
cleaning, the spray arms are easy to remove
and reinstall.
To remove the lower spray arm:
1. Pull the empty lower rack out of the
dishwasher tub.
2. Grasp the lower spray arm, as shown in
Figure 48, and gentty pull the lower spray
arm upward, as shown in Figure 49.
If the spray nozzles need cleaning, flush
them under running water,
To reinstall the lower spray arm:
1. Gentty press the lower spray arm back
into its installed position.
To remove the upper spray arm:
1. Remove the empty upper rack from the
dishwasher. The procedure for removing the
upper rack is on page 18 of this manual.
2. Turn the rack upside-down. The upper
spray arm is hetd in position by a locking nut,
as shown in Figure 50A. Turn the locking nut
counter-clockwise 1/8 turn and remove it, as
shown in Figure 50B, to release the spray
arm.
3. Gently remove the spray arm, as shown
in Figure 51.
If the spray nozzles need cleaning, flush
them under running water.
To reinstall the upper spray arm:
1. Gentty press the upper spray arm back
into its installed position.
2, Return the locking nut to its installed
)osition and turn it 1/8 turn clockwise.
3, Return the upper rack to the upper rack
rotter guides.
Check/Clean the Stainless Steel
Inner Door and Tub
Ctean the outer edges of the inside door
panet regularly to remove food particles that
cottect there from normal toading. If spots
begin to appear on the stainless steel tub or
inner door, make sure the rinse agent
reservoir is full.
(Continued on Next Page)
48 Care and Cleaning t Entretien et Nettoyage I Cuidado y Limpieza
Loading ...
Loading ...
Loading ...