Loading ...
Loading ...
Loading ...
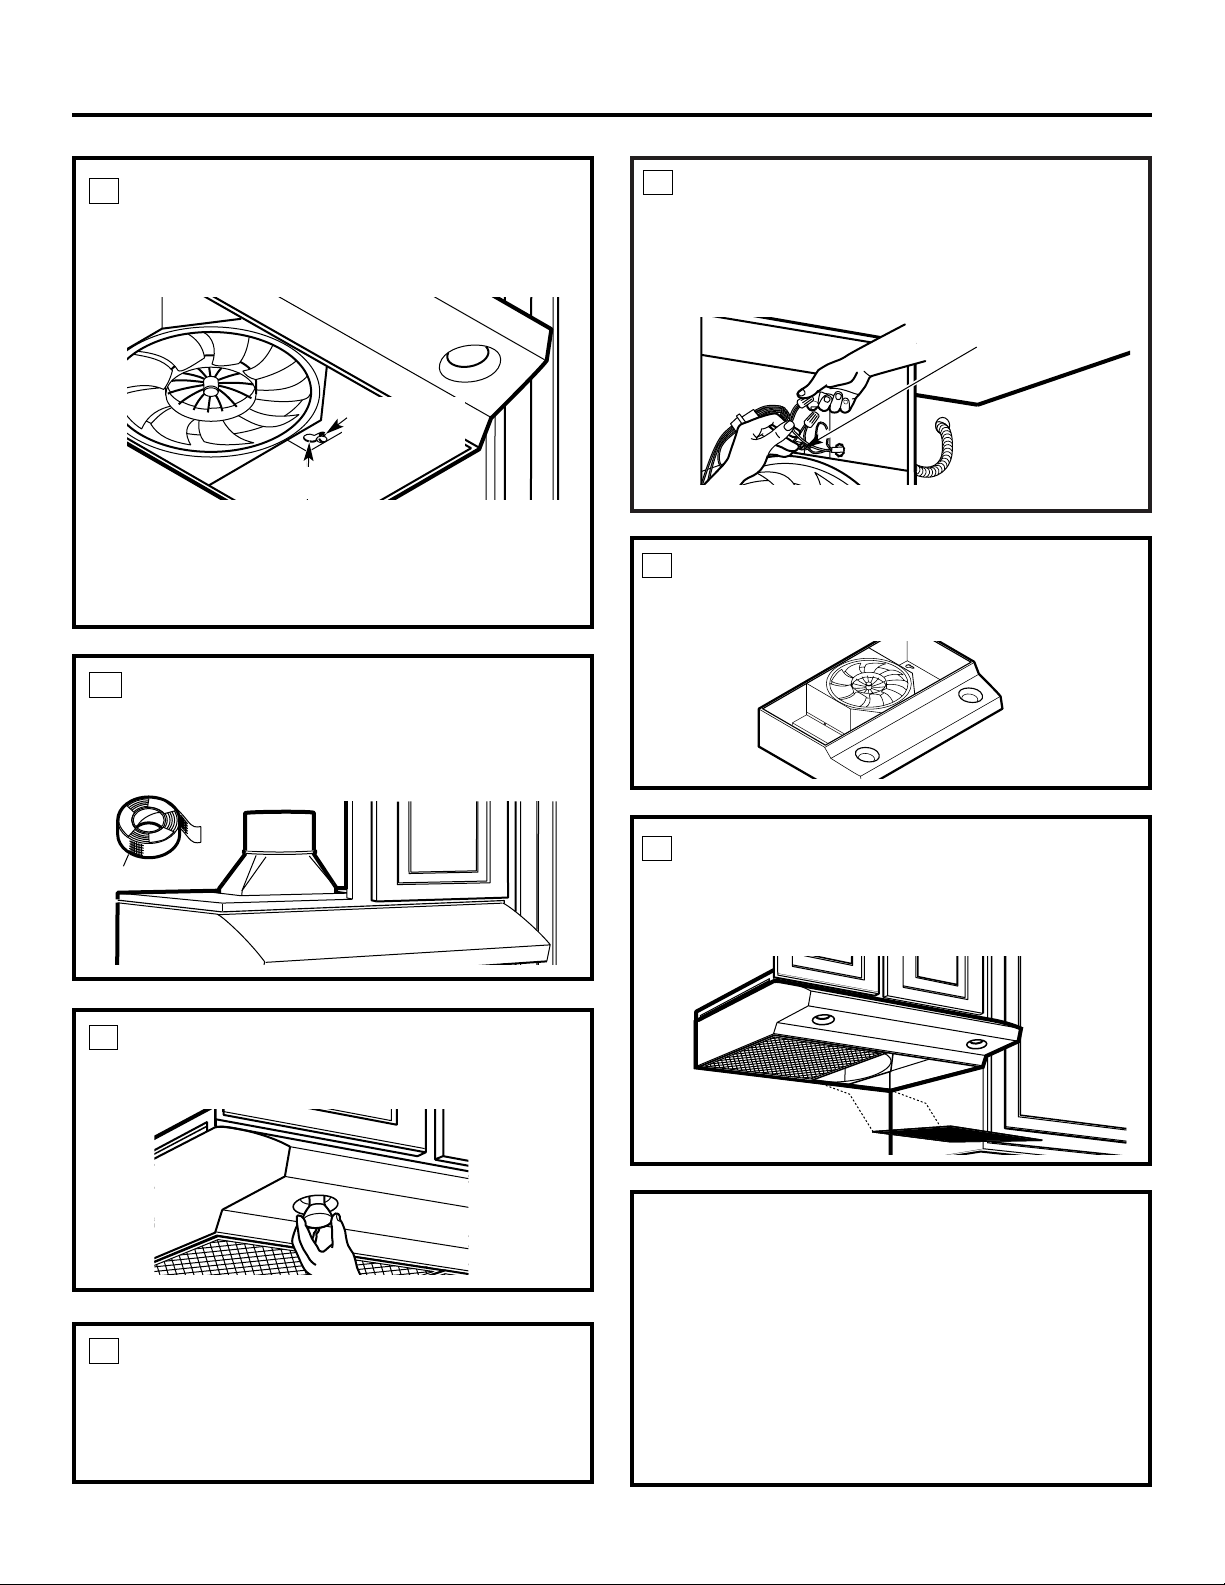
TROUBLESHOOTING CHECKLIST
If the hood seems to be operating at high speed when
the control is not set on high, or if ventilation seems
inadequate, check the following:
❏ Knockouts not removed from hood.
❏ Damper blade not opening.
❏ Reduced airflow because the duct is too small or
the duct length is too long.
❏ The duct is blocked.
❏ Undersized or restrictive wall or roof cap.
REPLACE WIRING COVER
On models so equipped, replace the wiring cover
or the bottom cover.
14
SECURE HOOD
Slide the hood back against the wall. Tighten
the mounting screws. Be sure the screw heads
are in the narrow neck of the keyhole slot.
Keyhole (4)
Mounting
screw (4)
NOTE: DO NOT PUSH ON FAN BLADE. Pushing
on the blade may cause it to interfere with other
hood parts.
FOLLOW ELECTRICAL CODE
Complete the electrical wiring according to
National Electrical Code and local codes.
NOTE: This hood must be permanently grounded.
Connect house wiring (120 VAC) to hood wiring.
CONNECT WIRING
Connect house black to hood black wire, house
white to hood white wire, and house ground under
green ground screw. Securely tighten the strain
relief clamp onto the house wiring.
Green ground screw
18
21
22
23
24
INSTALL LIGHT BULBS
Purchase and install two PAR20, 50 W maximum
halogen bulbs.
20
CONNECT DUCTWORK TO
HOOD
Use duct tape to make joints secure and air tight.
Duct tape
19
REPLACE FILTERS
Make sure fan blade turns freely. The installation is
complete. Turn on power at service panel, and test
for proper operation.
Installation Instructions
Loading ...
Loading ...