Loading ...
Loading ...
Loading ...
7
ge tube and reposition it in its compartment.
8. Put the basket back in the high position and place one of the
filters (optional) at the bottom of the basket (fig. 9). You can
obtain the filters from your retailer or one of our service cen-
tres. See enclosed guarantee leaflet.
9. Next pour the oil or fat very slowly into the deep fryer so
that it does not spill out of the filter (fig. 10).
10. The oil which has been filtered in this way can be preserved
inside the fryer. However, if a long time elapses before it is next
used, it is advisable to preserve the oil in a closed container in
order to stop it deteriorating. It is good practice to keep oil
used for frying fish separate from that used for frying other
food.
If fat is used, be careful not to let it cool down too
much or it will solidify.
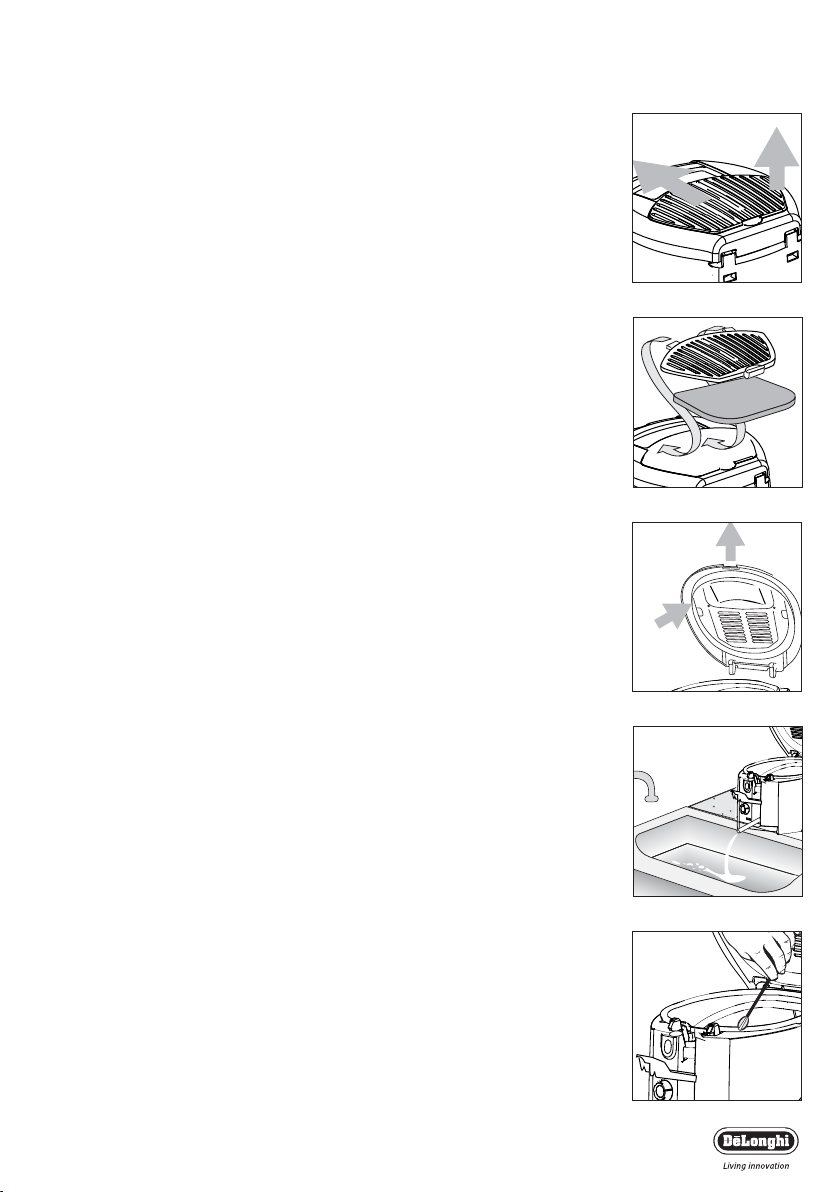
Maintenance of the anti-odour filter
Removable filter: Over time, the anti-odour filter inside the lid
loses its efficiency. You are therefore recommended to replace it
after every 10/15 frying sessions. To replace, remove the plastic
filter grille (fig 11-12).
Cleaning
Before cleaning, always remove the plug from the electrical socket.
Never immerse the fryer in water or hold it under
the tap. By getting inside the water would cause
short circuiting.
Check that the oil is sufficiently cold (wait about 2
hours), then empty out the oil or fat as previously described in
the paragraph headed “filtering the oil or fat”.
Remove the lid as shown in (fig. 13).
The lid is removable, to take it off, proceed as follows: push the lid
back (see arrow "1" fig. 13) and at the same time, lift it up (see
arrow "2" fig. 13). Do not immerse the lid in water without having
first removed the filter.
To clean the boiler pan, proceed as follows:
• Wash the tank with hot water and washing up liquid, then rinse
and dry everything carefully. In the models fitted with oil drai-
nage pipe, always use it to empty out the water (fig. 14); then
remove any remaining water which has collected in the oil
drainage tube.
• In order to clean the inside of the drainage tube, use the tube
brush supplied (fig. 15).
• We advise regular cleaning of the basket, with care being taken
to eliminate any deposits which might have accumulated in the
basket’s wheel guide ring.
• Dry the outside of the fryer with a soft, damp cloth in order
Roto Fryer F28311
fig. 11
fig. 12
fig. 13
1
2
1
2
fig. 14
fig. 15
Loading ...
Loading ...
Loading ...