Loading ...
Loading ...
Loading ...
en Installation
18
Installation
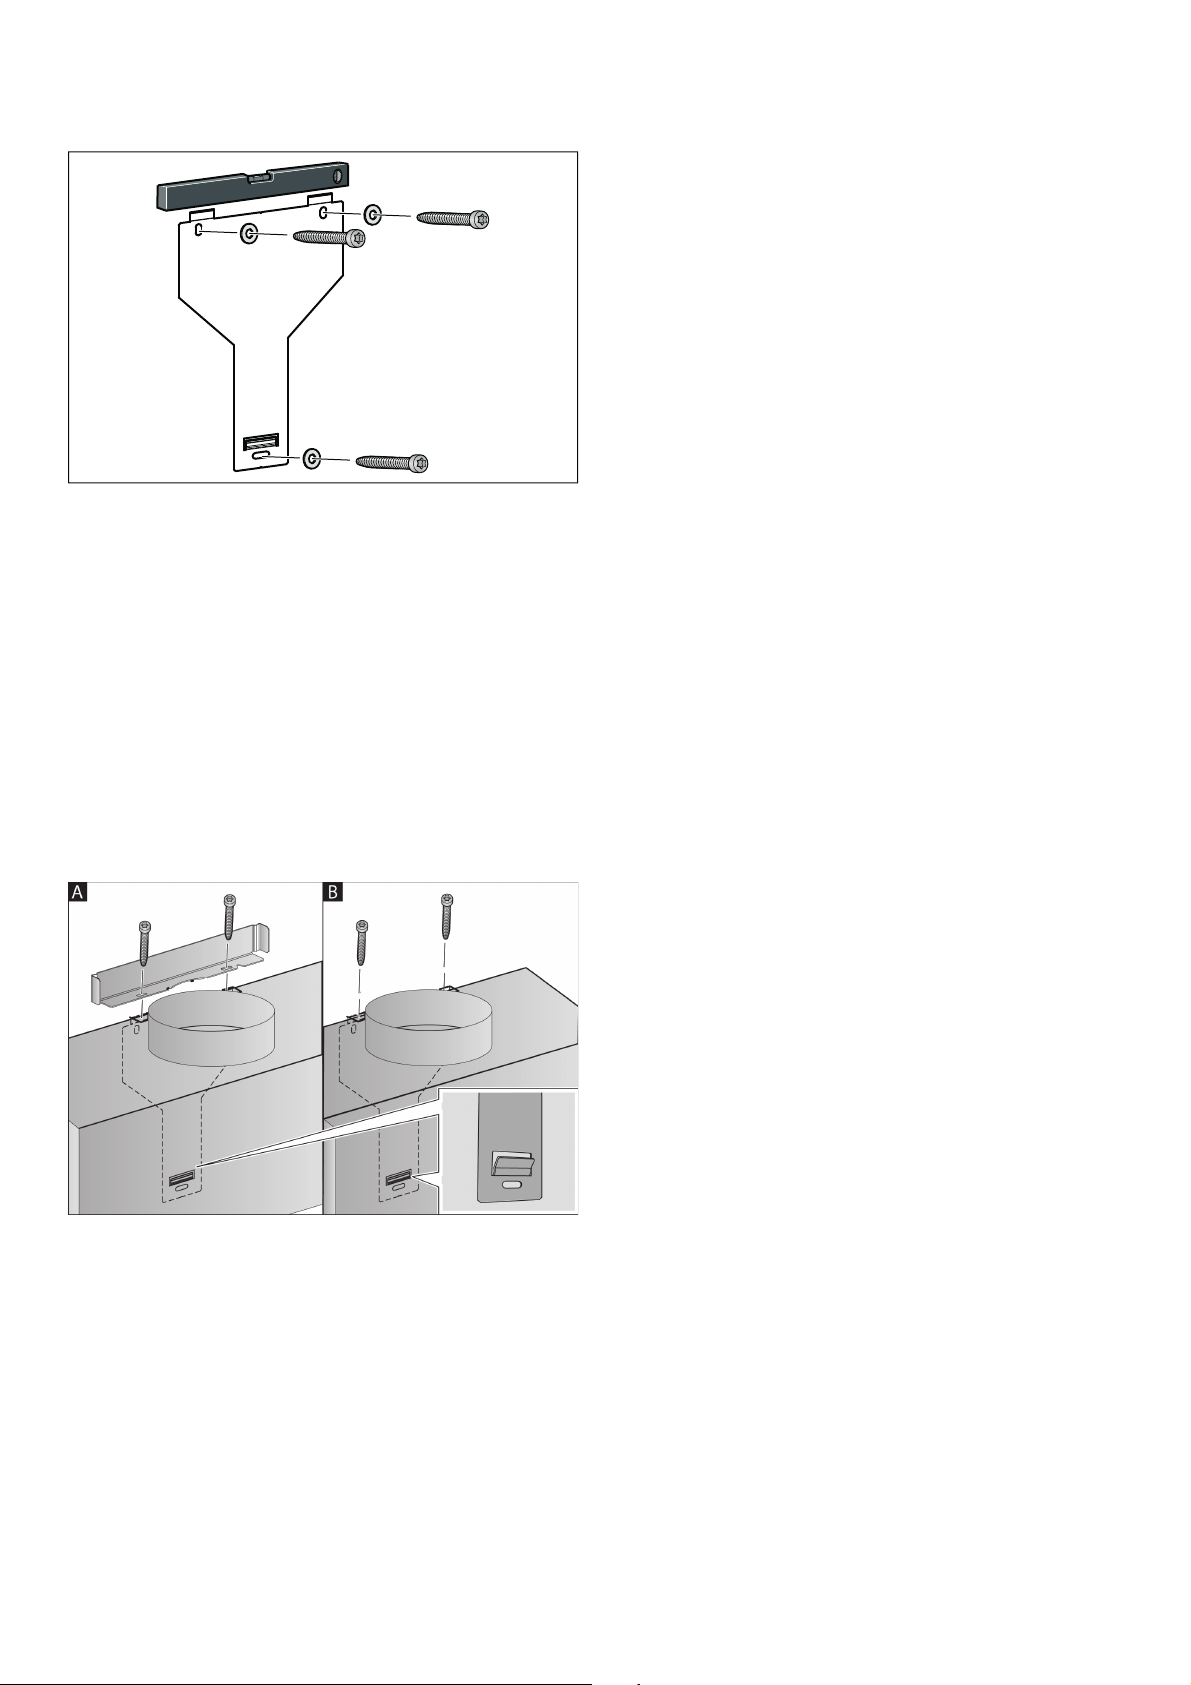
Screw in the mounting supports for the extractor hood
until they are hand-tight, use a spirit level to level the
appliance and then screw the mounting supports in
fully.
Wall-mounting the appliance and levelling it
1. First remove the protective film from the back of the
appliance and, following installation, remove the rest
of the film.
2. When mounting the appliance, ensure that it
engages properly with the mounting supports.
3. If required, the appliance can be moved to the right
or to the left.
4. Firmly tighten the screws for the mounting supports.
Hold the bracket firmly when doing so. ¨
5. If no duct is to be fitted, screw in the two locking
screws without the bracket. ©
Connecting the pipes
If the extractor hood is to be operated in exhaust-air
mode, the pipes must be connected. If the extractor
hood is to be operated in air-recirculation mode, an
optional accessory must be fitted. To do this, refer to
the installation instructions provided.
Note: If an aluminium pipe is being used, smooth the
connection area beforehand.
Exhaust air pipe, dia. 150 mm (recommended size)
Fit the exhaust air pipe directly to the air-pipe connector
and seal the joint.
Exhaust air pipe, dia. 120 mm
1. Fit the reducing connector directly to the air-pipe
connector.
2. Attach the exhaust air pipe to the reducing
connector.
3. Use suitable means to seal both joints.
Loading ...
Loading ...