Loading ...
Loading ...
Loading ...
E-9
ENGLISH
CD-BP90W
Preparation for Use
- System Connections / Remote Control -
System Connections (continued)
„
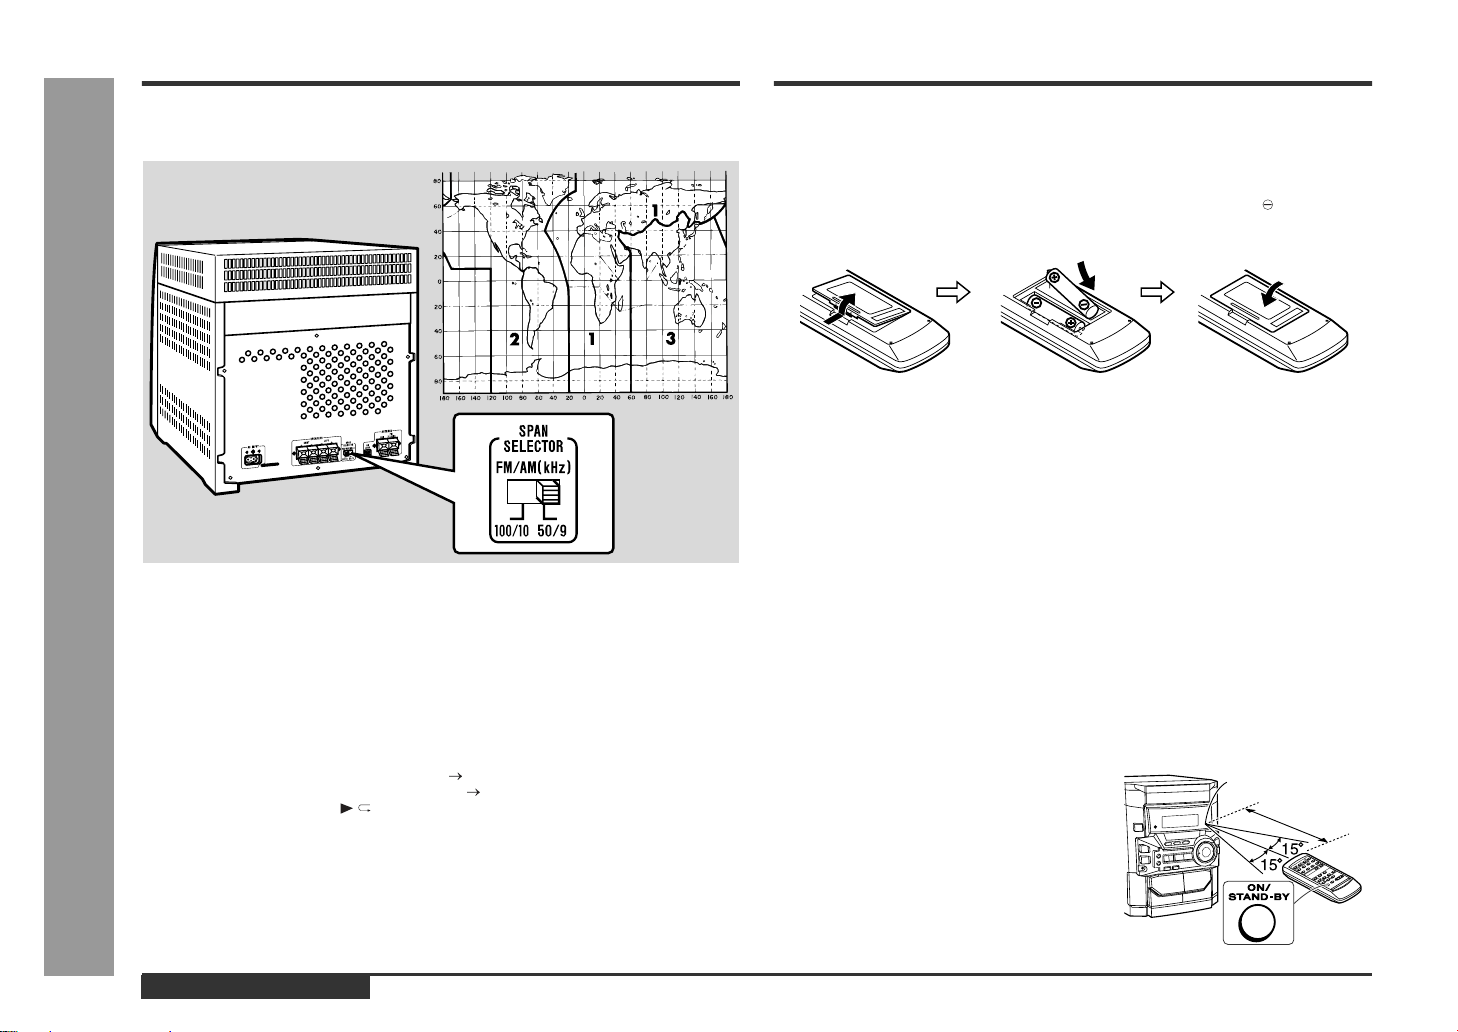
Setting the FM/AM Span Selector
The International Telecommunication Union (ITU) has established that member coun-
tries should maintain either a 100 kHz or a 50 kHz interval between broadcasting fre-
quencies of FM stations and 10 kHz or 9 kHz for AM station. The illustration shows
the 50/9 kHz zones (regions 1 and 3), and the 100/10 kHz zone (region 2).
Before using the unit, set the SPAN SELECTOR switch (on the rear panel) to the
interval (span) of your area.
To change the tuning zone:
Caution:
This operation will erase all data stored in memory including clock, timer settings,
tuner preset, and CD programme.
Remote Control
„
Battery installation
Precautions for battery use:
z
Replace all old batteries with new ones at the same time.
z
Do not mix old and new batteries.
z
Remove the batteries if the unit will not be used for long periods of time. This will
prevent potential damage due to battery leakage.
Caution:
z
Do not use rechargeable batteries (nickel-cadmium battery, etc.).
z
Installing the batteries incorrectly may cause the unit to malfunction.
Notes concerning use:
z
Replace the batteries if the operating distance is reduced or if the operation
becomes erratic. Purchase 2 "AA" size batteries (UM/SUM-3, R6, HP-7 or similar).
z
Periodically clean the transmitter on the remote control and the sensor on the unit
with a soft cloth.
z
Exposing the sensor on the unit to strong light may interfere with operation.
Change the lighting or the direction of the unit.
z
Keep the remote control away from moisture, heat, shock, and vibrations.
„
Test of the remote control
1 Press the ON/STAND-BY button to enter the stand-by mode.
2 Set the SPAN SELECTOR switch (on the rear panel) as follows.
z
For 50 kHz FM interval (9 kHz in AM) 50/9
z
For 100 kHz FM interval (10 kHz in AM) 100/10
3 Whilst pressing down the / button and the EQUALIZER/X-BASS/DEMO button,
press the ON/STAND-BY button until "CLEAR AL" appears.
1 Remove the battery cover.
2 Insert the supplied batteries according to the direction indicated in
the battery compartment.
When inserting or removing the batteries, push them towards the battery termi-
nals.
3 Replace the cover.
Face the remote control directly to the remote
sensor on the unit.
The remote control can be used within
the range shown:
Press the ON/STAND-BY button. Does the
power turn on? Now, you can enjoy the music.
Remote sensor
0.2 m - 6 m
(8" - 20')
Loading ...
Loading ...
Loading ...