Loading ...
Loading ...
Loading ...
8
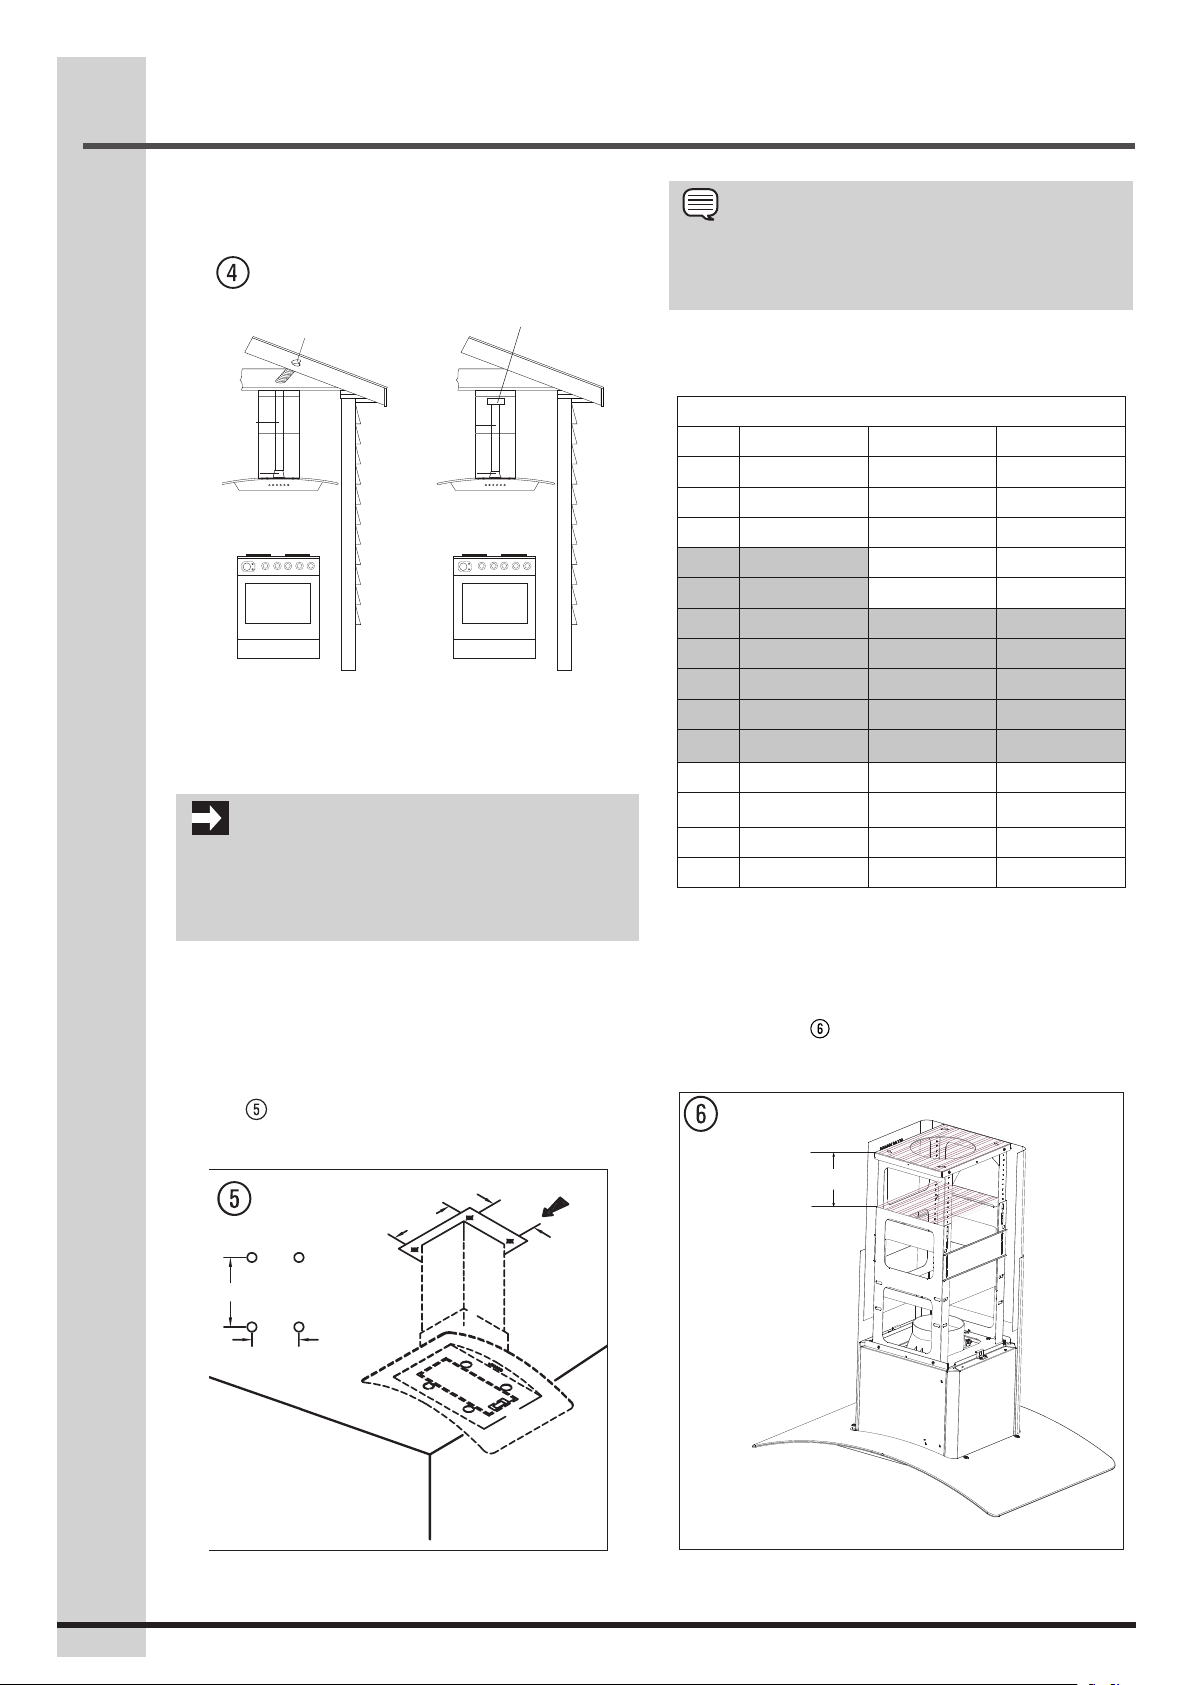
Examples of possible ducting or air
recirculation
Recirculator
Roof pitch with
flashing and cap
Pipe
Collar
Pipe
Collar
Installing range hood to the ceiling
(Exhaust operation)
IMPORTANT
This range hood is very heavy. Adequate structure
and support must be provided in all types of
installations.
Step 1:
• Make sure that no cables or pipes will become
damaged (e.g. electric, gas, water; test the areas
in question with a cable detector).
• Using the template, mark and drill 4 holes into
the ceiling. Measure as displayed in diagram
(fig.
). The holes must be drilled into a wood
structure capable to support 150lbs load.
NOTE
Have a suitable ladder ready so that you can easily
reach up to the ceiling.
Desired range hood distance above a
36” high cooktop
Ceiling height
8 feet 9 feet 10 feet *
1
A*
2
A*
2
A*
2
24” 6-25/32"
25” 5-25/32"
26”*
3
4-25/32"
27”*
3
3-25/32"
28”*
3
2-25/32"
29”*
3
1-25/32" 13-25/32" 13-25/32"
30”*
3
25/32" 12-25/32" 12-25/32"
31”*
3
11-25/32" 11-25/32"
32”*
3
10-25/32" 10-25/32"
33” 9-25/32" 9-25/32"
34” 8-25/32" 8-25/32"
35” 7-25/32" 7-25/32"
36” 6-25/32" 6-25/32"
*1 with 10’ extension chimney kit (17) - not supplied.
Please call Electrolux at 1.800.944.9044 to order
this kit.
*2 “Dimension A” in the chart represents the height
from the top of upper bracket to the top of lower
bracket (fig. ).
*3 Recommended mounting height.
Dimension A
Top of upper bracket
Top of lower bracket
Installing the hood
10.24"
7.48"
10.24"
7.48"
Loading ...
Loading ...
Loading ...