Loading ...
Loading ...
Loading ...
5
INSTALLATION INSTRUCTIONS
NOTE: Refrigerators whose model numbers contain “OS” in their suffix can be used in outdoor settings.
They have special insulation and a weather-resistant stainless steel body wrap. Also, a GFCI (Ground
Fault Circuit Interrupter) is built into the line cord. In the event the refrigerator is not operating, first
check to see if the GFCI has tripped. If so, press the RESET button.
BEFORE USING YOUR APPLIANCE
Remove the exterior and interior packing.
Before connecting the appliance to the power source, let it stand upright for approximately 2 hours.
This will reduce the possibility of a malfunction in the cooling system from handling during
transportation.
Clean the interior surface with lukewarm water using a soft cloth.
INSTALLATION OF YOUR APPLIANCE
The appliance is designed for built-in or recessed or free standing installation for indoor or outdoor
use.
CAUTION: This appliance is not designed for the storage of medicine or other medical products.
Place your appliance on a floor that is strong enough to support it when it is fully loaded. To level the
unit, adjust the front leveling legs.
For free standing installation, 5 inches (127mm) of space between the back and sides of the unit and
4” at the top are suggested, which allows the proper air circulation to cool the compressor and
condenser. Even for built-in installation, it is a must to keep ¼” (6.35mm) space on each side and at
the top, as well as 2” at the back. Take care that the air vent at the front of the appliance is never
covered or blocked in any way.
NOTE: It is recommended that you do not install the appliance near an oven, radiator or other heating
source. Direct sunlight may affect the acrylic coating and heat sources may increase electrical
consumption. Don’t install in a location where the temperature will fall below 44°F (7°C). For best
performance, do not install the appliance behind a cabinet door or block the base grille.
Avoid locating the unit in moist areas.
Plug the appliance into an exclusive, properly grounded wall outlet. Do not under any circumstances
cut or remove the third (ground) prong from the power cord. Any questions concerning power and/or
grounding should be directed toward a certified electrician or an authorized service center.
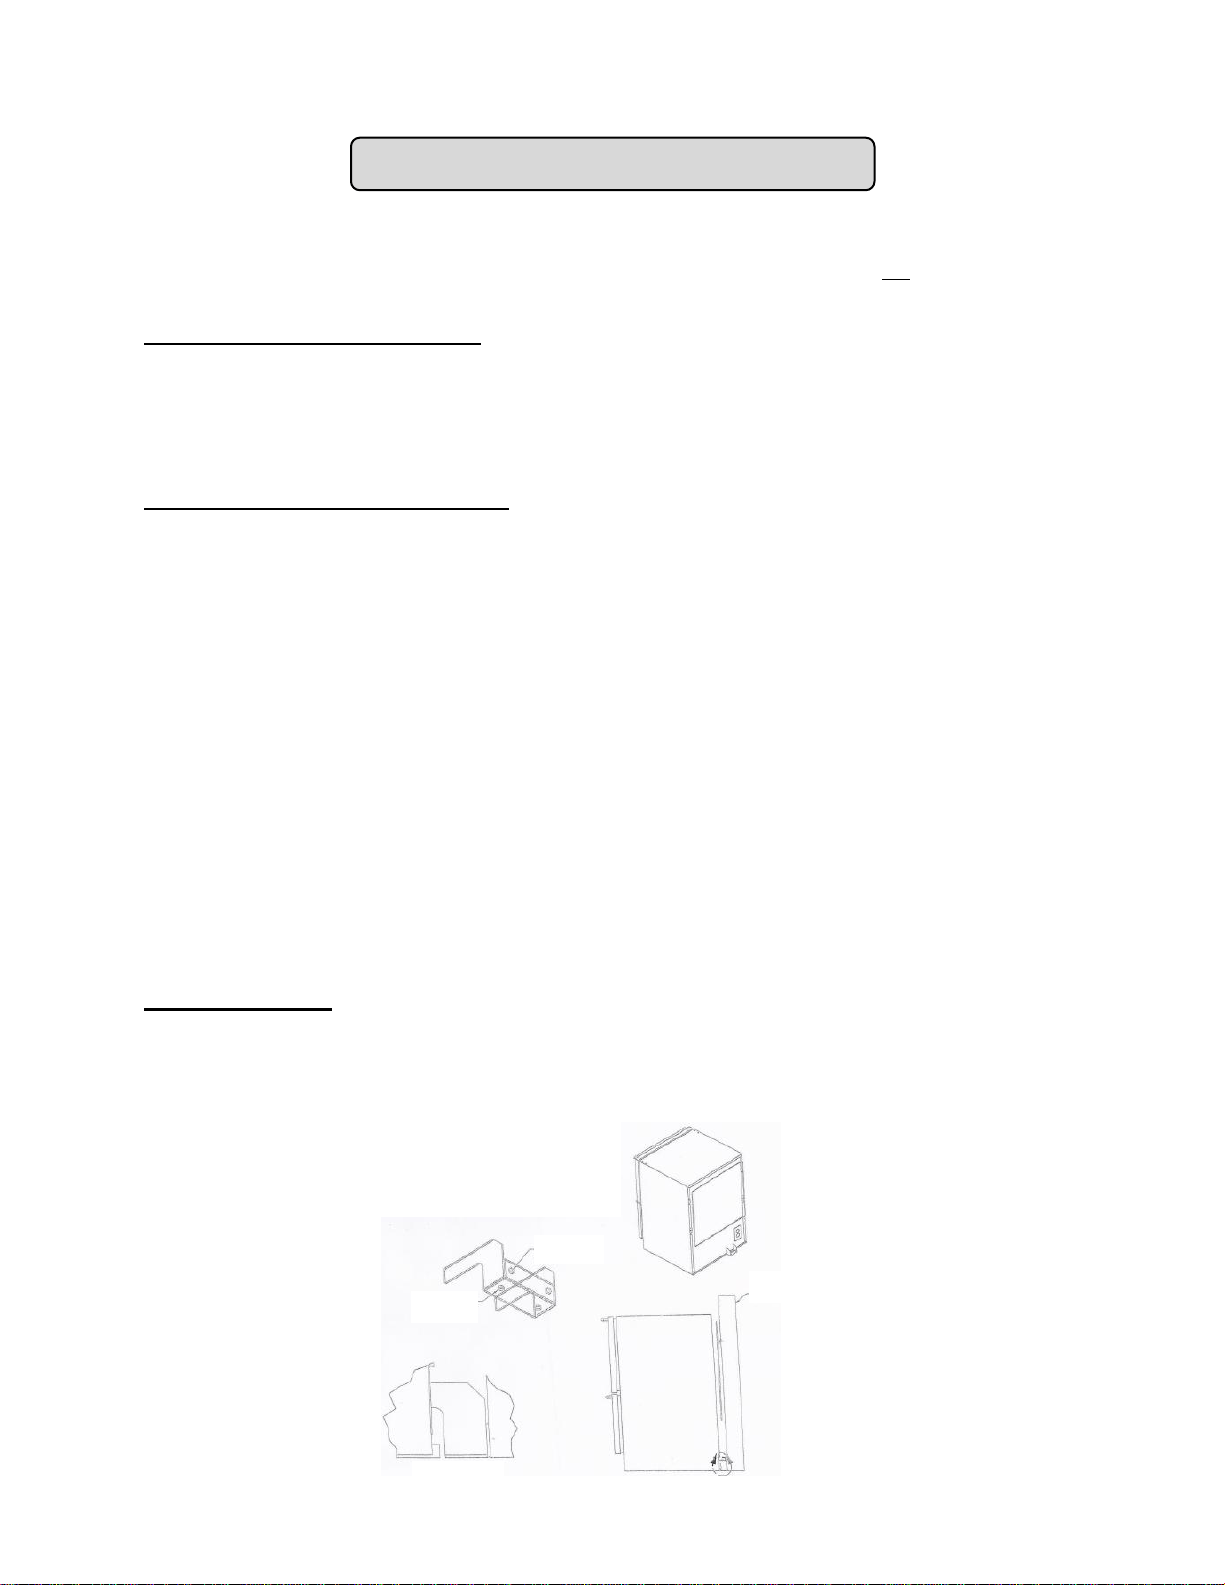
ANTI-TIP BRACKET
Your refrigerator is supplied with an anti-tip bracket that should be installed at the back of the unit to
prevent the refrigerator from tipping forward accidentally. Mount the bracket to either the floor or the wall,
depending on the height of the unit off the floor. Secure the bracket with fasteners (not included) to a
suitable foundation, either wood studs or joists. DO NOT SCREW INTO SHEETROCK!
Wall Mount
holes
Floor Mount
holes
Wall
Detail G
G
Loading ...
Loading ...
Loading ...