Loading ...
Loading ...
Loading ...
BURR MILL FEATURES AND BENEFITS
Your new Mr. Coffee Burr Mill has the following features:
• Whole Bean Hopper - Removable and easy to clean bean hopper holds up to a ½ lb. of
coffee beans at a time.
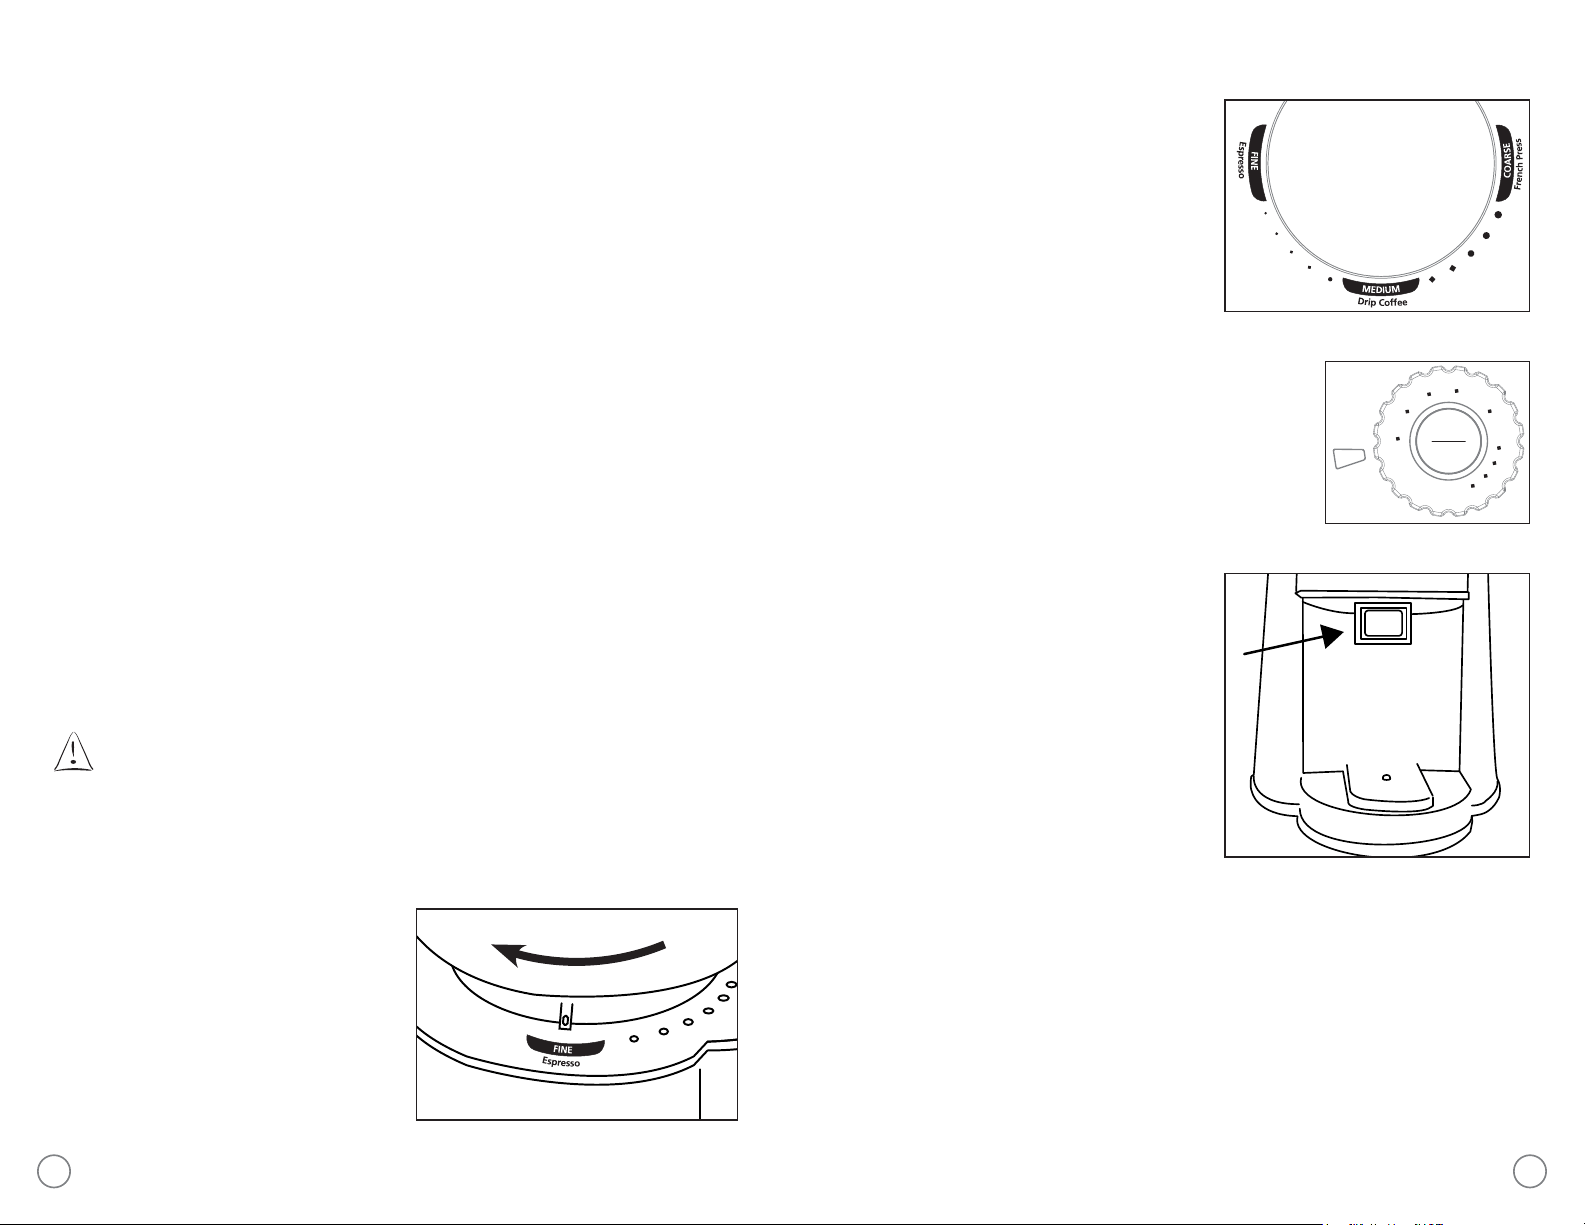
• 18 Custom Grind Selections - Choose from 18 different grind selections from fine
(espresso grade) to course (French Press grade) for your customized brewing method.
• Start/Stop Button & Cup Selection Dial - Perfect portions every time with automatic
grind settings from 2-18 cups.
• Automatic Shut-Off - Eliminates the guesswork by automatically stopping at the desired
portion chosen.
• Removable Ground Coffee Chamber - Lets you easily transfer ground coffee.
• Stainless Steel Design - A stylish accessory for your kitchen.
• On/Off Indicator Light - LED illuminates letting you know your Burr Mill is ready for use.
• Cord Storage - Safely stores excess cord to keep your countertop neat.
• Built-In Scoop/Brush - Makes clean up easy.
GETTING STARTED
Always clean your Burr Mill before using the first time.
Make sure that your 1st cup of coffee is as good as can be by cleaning your Mr. Coffee Burr
Mill before its first use. Just follow these simple steps:
1. Wash the bean hopper and grinding chamber parts with warm soapy water. (Never
use abrasive cleansers, steel wool pads or other abrasive materials. UNIT IS NOT
DISHWASHER SAFE).
CAUTION! Never immerse the Burr Mill itself in water, in any other liquid or place
in the dishwasher.
2. Dry all pieces thoroughly.
3. Install the Bean Hopper onto the unit and turn clockwise (several rotations-will hear
clicking as unit gets tighter) until it stops with the grind size indicator on Fine (Figure 1).
4. Please chamber lid back on grinder chamber and then install into unit, tightly locking
into place.
NOTE: If all Bean Hopper and Grinding
Chamber parts are not tightly in place
correctly, the safety switches within
the machine will not allow the grinder
to work. You MUST have all parts in
place to safely use the Burr Mill.
6 7
8
1
0
6
1
2
4
2
x
M
a
Brand: Mr. Coffee
Model: Burr Mill Grinder
Description: ID Spec/ Master Art
Page: 3 of 6
Notes:
Art Doc Number: 146492
Revision: 1
- To Scale 1:1
- Use CorelDRAW files for reproduction.
Start
Stop
Figure 3
HOW TO USE YOUR BURR MILL
1. After all parts have been put into place,
fill the Bean Hopper with coffee beans
and replace the lid.
2. Adjust the grind size by rotating the hopper
counterclockwise and then aligning the
indicator on the hopper to your desired
grind size (Figure 2).
NOTE: Grind size setting will change the output
volume of grounds. Fine will produce
less grounds and course will product
more grounds when the same volume
(cup) setting is used.
3. Set the Cup Selection Dial to the desired
amount of grounds (Figure 3).
4. Press and hold briefly the Start/Stop button to
start the grinding process.
5. The unit will automatically stop when the
selected volume has been reached.
NOTE: You may also stop the grinding process
at anytime by pressing the Start/Stop
button again.
6. Remove the coffee chamber and lid and use
the grounds as needed.
7. Cleaning brush can be used to remove dust
from grind chamber chute located behind
the removable grinding chamber (Figure 4).
8
1
0
6
1
2
4
2
x
M
a
Brand: Mr. Coffee
Model: Burr Mill Grinder
Description: ID Spec/ Master Art
Page: 3 of 6
Notes:
Art Doc Number: 146492
Revision: 1
- To Scale 1:1
- Use CorelDRAW files for reproduction.
Start
Stop
Figure 1
Figure 4
Figure 2
Loading ...
Loading ...
Loading ...