Loading ...
Loading ...
Loading ...
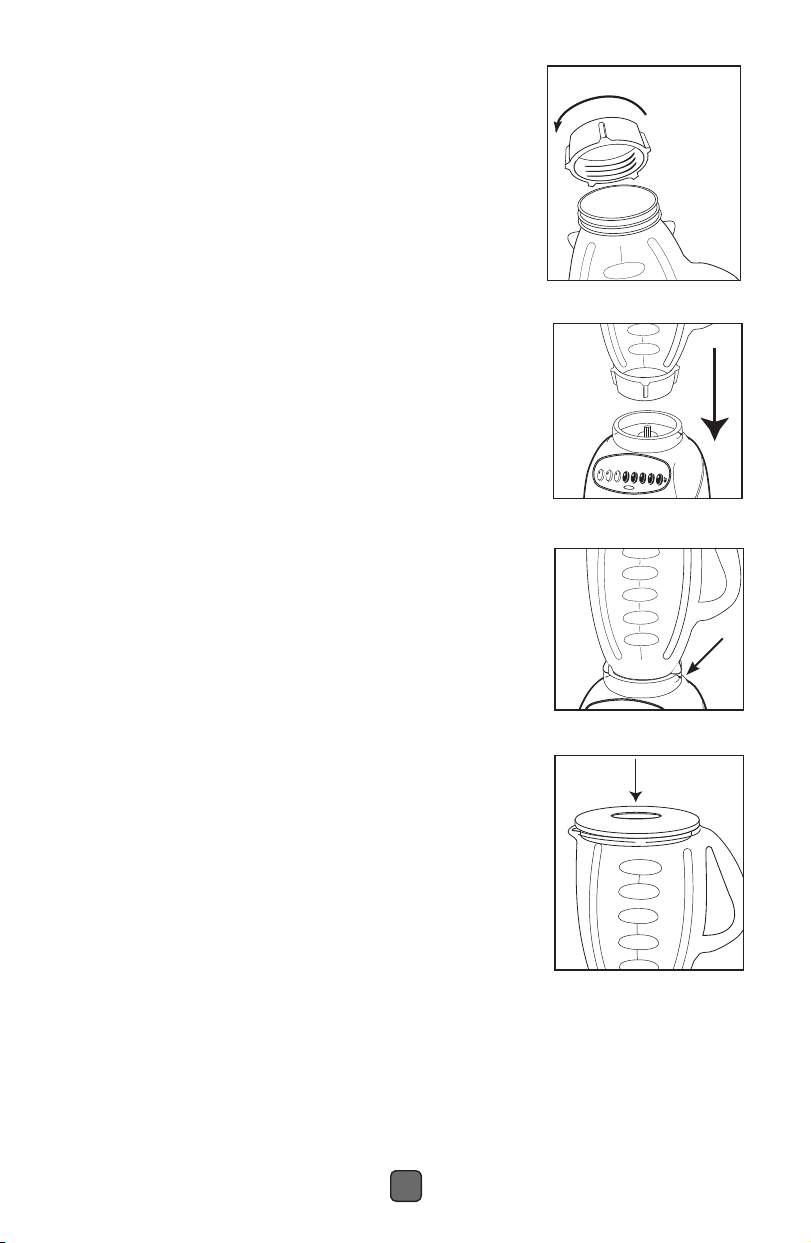
5. Placethreadedjarnutorthreadedjarskirtover
blade and jar (Note: If there are slots on top of
collar, line them up with notches on jar.) Place the
threadedjarnutorthreadedjarskirtonjarandturn
itclockwisetotighten. (Figure 4)
6. Place jar assembly onto base. (Figure 5)
7.
Line up tabs of jar with tabs on blender base.
Makesurethetabofthejaronthe
left
side is in the
backofthetaboftheblenderbaseandthetabof
the jar on the right side is in front of the tab of the
blenderbase.Makesurejarisseatedintoposition.
(Figure 6)
8. Place ingredients into jar.
9. Place lid with feeder cap on jar.
10. Plugthepowercordintoa120Volt
AC electrical outlet.
11. SlideswitchtoHIGHorLOW. (If your model does
not have a slide switch, push HIGH or LOW button.)
12. Push desired speed and blend ingredients
to desired consistency.
13. Press OFF to stop the blender.
14.TousePULSE,selectHIGHorLOW.PushPULSE
and hold down for desired length of time. Release
PULSE and allow blade to stop. Repeat cycle as
desired.
Blending Tips
•Putliquidsinthejarfirst,unlessarecipesaysotherwise.
•Crushingice:Crush6icecubesorapproximately2cups
of ice at a time.
•Donotremovethelidwhileinuse.Removefillercapto
add smaller ingredients. (Figure 7)
•Cutallfirmfruitsandvegetables,cookedmeats,fishand
seafood into pieces no larger than ¾ inch (1.8 cm) to
1inch(2.5cm).Cutallkindsofcheesesintopiecesno
largerthan3/4inch(1.8cm).
•Thisblenderwillnotmashpotatoes,whipeggwhites
or substitute dairy toppings, mix stiff dough or grind
raw meat.
HoT Foods
•OpentheFillerCaptoventsteam.TiltFillerCapawayfromyou.
Keephandsawayfromthecoveropeningtopreventpossibleburns.
•Whenworkingwithhotliquids,removeFillerCapandstartblendingat
alowspeed.Thenmovetoafasterspeed.DONOTaddliquidoverthe4cup
(1 liter) level.
5
FigUre 4
FigUre 5
FigUre 6
FigUre 7
Loading ...
Loading ...
Loading ...