. Acer Computing
Product's Documents
Below are documents related to this product, you can read online or download:
- Owner's manual - (English) Read Online | Download pdf

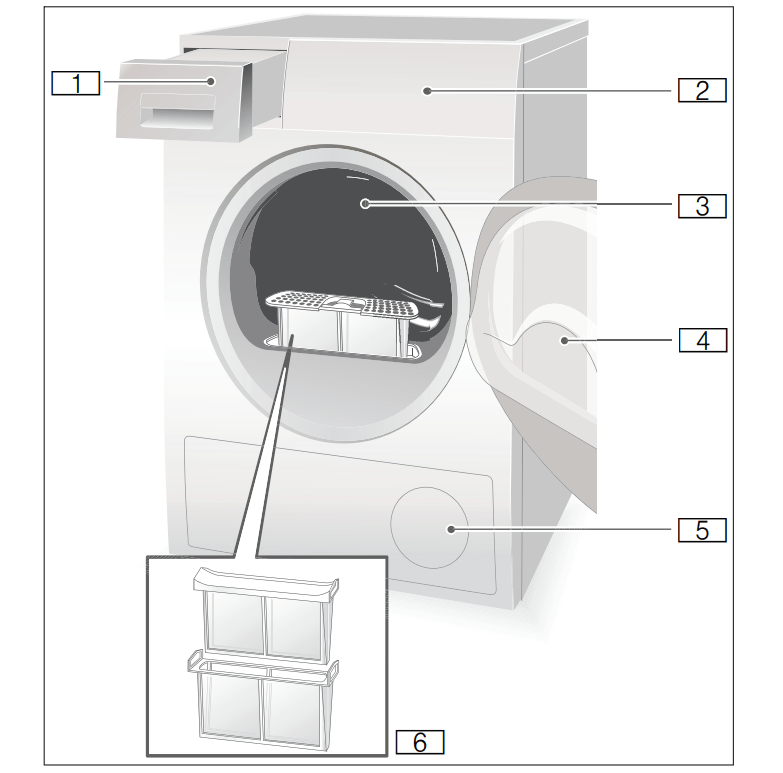
USER MANUAL Tumble dryer
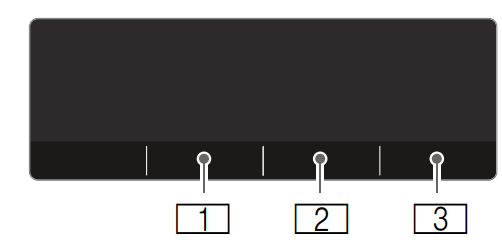
Note: All buttons are sensitive and only need to be touched briefly.
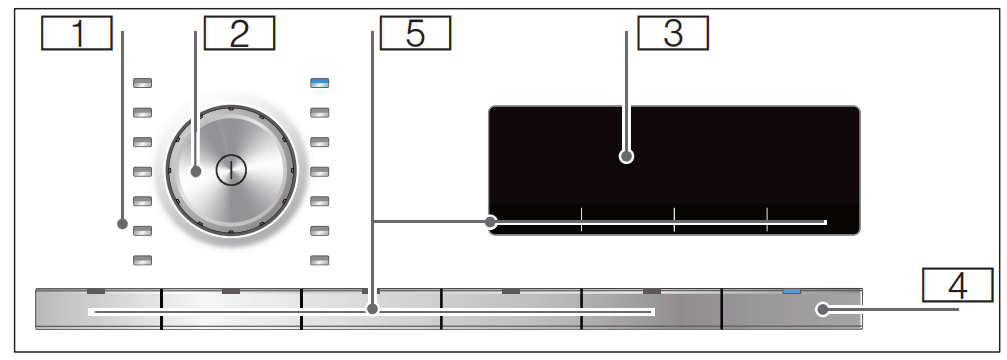
Buttons on the display panel
Display panel
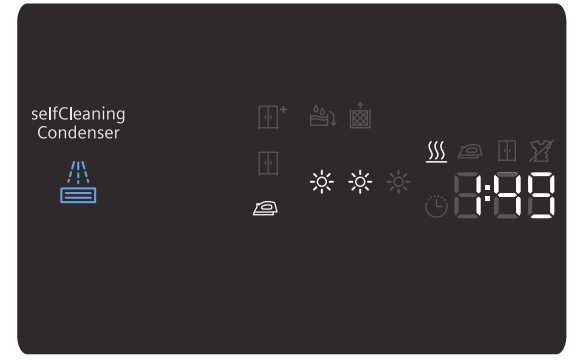
 | Dryness levels. |
 | Fine adjustment of the dryness level. |
 | Timed programme selected. |
 | Expected programme duration in hours and minutes. |
 | Programme delay in hours when "Ready in" time is selected. |
 | Empties the condensate container; →Page 28. |
 | Cleans the fluff filters; →Page 27. |
 | Heat exchanger is automatically cleaned. |
 |  Programme progress: Dry; Iron Dry; Cupboard Dry; AntiCrease; End and Pause. |
Note: The dryer must be correctly positioned and connected, → Page 13.

 button to switch the dryer on.
Note: The dryer drum is lit up after the door is opened and closed and once the programme has started. The drum interior light goes out on its own.
Note: If you have activated the childproof lock, you must deactivate it before you can set a programme, see → Page 24.
1. Select the required programme; detailed information on the programmes can be found from → Page 22 onwards.

2. Use the programme selector to set the required programme. The default programme settings for the selected programme appear in the display panel.
Note: Default programme settings are standard settings that are already defined when a programme is selected. After selecting a programme, you can see the default programme settings in the display panel.
3. If required, adjust the default programme settings. You can find detailed information on this from →Page 22 onwards.
Press the Start button.
Note: If you want to lock the programme to prevent it from being inadvertently adjusted, you can select the childproof lock, see → Page 24.
You can remove or add laundry and change or alter the programme at any time during drying.
Note: The programme duration in the display panel is updated depending on the load and residual moisture in the laundry. The values displayed may change after the programme is changed or the load is adapted.
The programme can be interrupted at any time; to pause, open the dryer door or press the Start button.
Caution! Risk of fire. Laundry may catch fire.
If you cancel the programme, you must remove the laundry items and spread them out so that the heat can disperse.
 appears in the display panel.
button to switch the dryer off.
Note: During drying, fluff and hair from the laundry is trapped by the fluff filter. If the fluff filter is blocked or dirty, this reduces the flow of air, which prevents the dryer from achieving its maximum performance. Clean fluff filters also reduce energy consumption and the drying time.
Clean the fluff filter after each drying cycle:
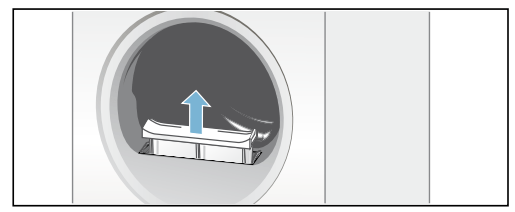
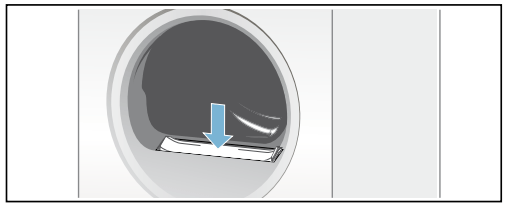
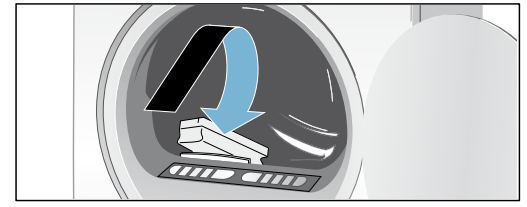
1. Open the dryer door and remove all fluff from the door.
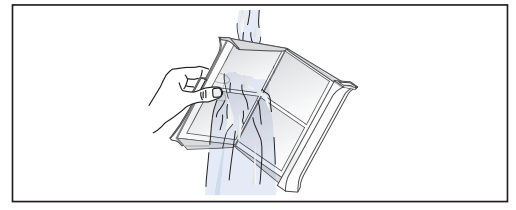
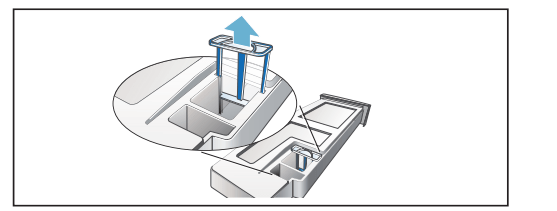
2. Pull out the two-part fluff filter.
3. Remove the fluff from the recess in the fluff filter.
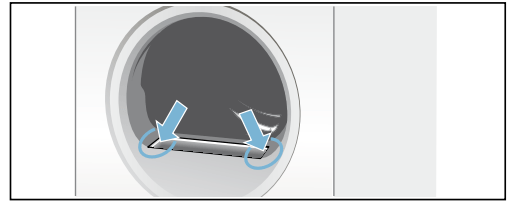
Note: Ensure that no fluff falls into the open shaft.
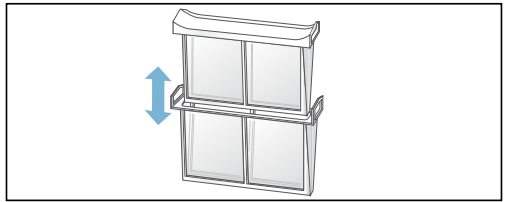
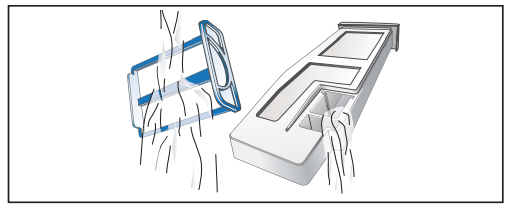
4. Pull apart the two-part fluff filter.
5. Open both filters and remove all the fluff.
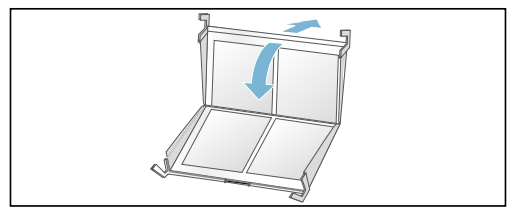
6. Rinse away the fluff under warm, running water.
7. Dry the fluff filter, close it and reinsert the two-part fluff filter.
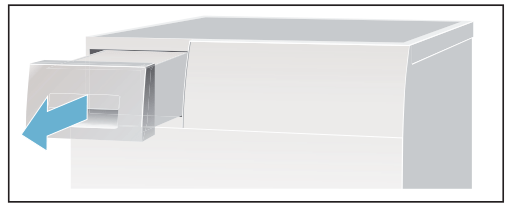
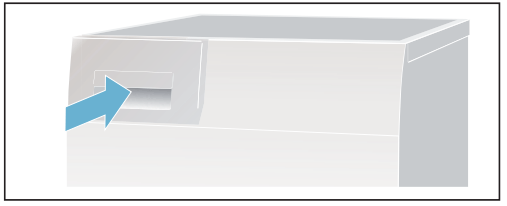
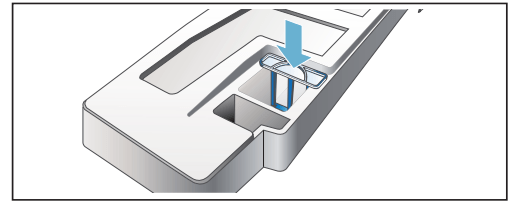
1. Pull out the condensate container horizontally
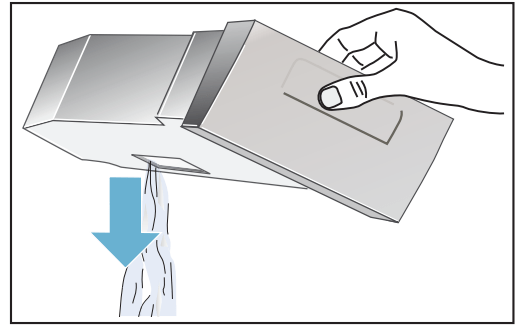
2. Pour out the condensation water.
Caution! Dirty condensation water may be harmful to your health and cause material damage.
Condensation water is not suitable for drinking and may be contaminated with fluff. Do not drink the condensation water or reuse it.
3. Push in the condensate container until you feel it lock back into place in the dryer.
Note: The filter in the condensate container filters the condensation which is used during the dryer's automatic cleaning cycle. The filter is cleaned by emptying the condensation. Nevertheless, you should check the filter regularly for remaining deposits and remove them. See → Page 31.
Clean the dryer using only water and a soft, damp cloth.
Remove all detergent residue, spray residue or other residues immediately. Do not use cleaning agents or agents for pre-treating laundry (e.g. prewash sprays, stain removers). Do not use high-pressure cleaners or steam jet cleaners to clean your appliance.
Note: The dryer is equipped with a stainless-steel moisture sensor. The moisture sensor measures how damp the laundry is.
After long periods of usage the moisture sensor may become covered by a fine layer of limescale or residues of detergents and care products. Such residues must be removed regularly as the sensor function and in consequence the drying result may be impaired.
Open the door and clean the moisture sensor with a coarse sponge.
Note: The filter in the condensate container cleans the condensation water that is used during the dryer's automatic cleaning cycle.
1. Pull out the condensate container horizontally.
2. Pour out the condensation water.
3. Remove the filter.
4. Clean the filter under warm, running water or in the dishwasher.
5. Push in the filter until you feel it lock into place.
6. Push in the condensate container until you feel it lock into place.
| Faults | Cause/remedy |
 on the display panel and drying has been interrupted. on the display panel and drying has been interrupted. |
|
 on the display panel. on the display panel. | Clean the fluff filter and press the Start button → Page 27. |
selfCleaning on the  display panel. display panel. | Not a fault. The heat exchanger is cleaned automatically. Do not pull out the condensate container while this is displayed. |
| Dryer does not start. |
|
| Creasing. |
|
| Water is leaking out. | Not a fault; the dryer may be positioned on an incline. Level the dryer. |
| Change in the programme duration displayed during drying. | Not a fault. The moisture sensors detect the remaining moisture in the load and adjust the programme length (except timed programmes). |
| Laundry is not dried correctly or is still too damp |
|
| * Depending on the model | |
| Drying time too long? |
|
| Display panel goes off and Start button flashes. | Not a fault. Energy-saving mode is active → Page 12. |
| Residual water in the condensate container despite the dryer being connected to the condensation drain*. | Not a fault. If the condensation drain is installed, residual water remains in the condensate container due to the dryer's self-cleaning function. |
| Humidity in the room increases. | Not a fault. Make sure the room is sufficiently ventilated. |
| Power cut. | The drying programme is interrupted. Remove the laundry and spread it out, or restart the programme. |
| Unusual noises when drying. | Not a fault. Noises are produced by the automatic cleaning of the heat exchanger → Page 30. |
| The dryer feels cold despite drying. | Not a fault. The dryer can dry efficiently at low temperatures using a heat pump. |
| * Depending on the model | |
Note: If you cannot rectify the fault yourself by turning the dryer off and on, please contact our after-sales service.