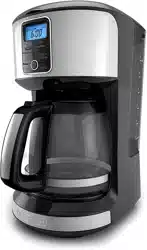
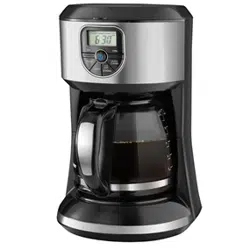
7. Removable Water Reservoir with water level markings (Part # CM4100-02)
8. Sneak-A-Cup™ interrupt feature
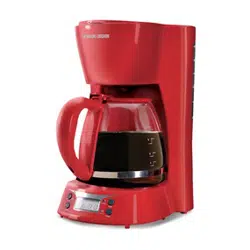
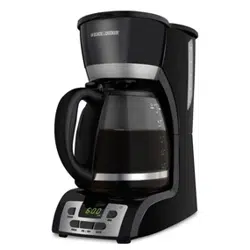
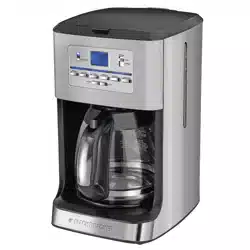
9. Perfect Pour™ 12 Cup Glass Carafe (Part # CM4100-03)
10. Nonstick “Keep hot” carafe plate
11. Built-in Cord storage (not shown)
Product may vary slightly from what is illustrated.
HOW TO USE
This product is for household use only.
GETTING STARTED
Remove all packing material, any stickers, and the plastic band around the power plug.
Wash removable parts as instructed in CARE AND CLEANING.
Pour fresh cold water up to 12-cup level mark into the water reservoir.
Place basket-style paper filter into removable filter basket. Place basket into filter basket holder.
Plug cord into standard electrical outlet.
Brew water through appliance without adding coffee grounds.
Discard water from the carafe and paper filter from filter basket.
Turn off appliance; unplug and allow to cool down.
SETTING THE CLOCK
Plug appliance into standard electrical outlet.
The digital clock display flashes 12:00.
To change the time: Press HOUR button until the correct time appears on the display. When the time passes noon “PM” illuminates to let you know you are in PM time. If the “PM” is not illuminated it is AM time.
Press the MIN button to select the minutes.
Note: If the appliance is unplugged or power is interrupted even momentarily, the time may need to be reset.
BREWING COFFEE
Open cover.
Fill water reservoir with desired amount of water. The MAX line represents a full carafe of coffee. Do not fill reservoir past this 12 Cup (MAX) line.
Insert removable filter basket into filter basket holder. Make sure basket handle faces front.
Place an 8-12 cup basket-style paper filter into the removable filter basket.
Add desired amount of ground coffee. Close cover.
Make sure carafe lid is properly attached to the empty carafe. Close the lid. Note: Coffee may overflow if carafe lid is not properly placed.
Place empty carafe on the carafe plate.
Plug power cord into an outlet.
If regular brew strength is desired, your coffeemaker is set to brew coffee.
If strong coffee is desired, press the STRONG/1-4 CUP button once to select the strong brew. The word STRONG is displayed.
Press ON/OFF (I/O) button and brewing begins.
Once coffee grounds have cooled, carefully open cover and, discard used grounds. Close cover.
The coffeemaker will keep brewed coffee hot for 2 hours and then automatically turn off.
To turn off the coffeemaker at any time press the ON/OFF button. The ON/OFF (I/O) light goes off. Unplug appliance when not in use.
BREWING 1 TO 4 CUPS
Note: This feature slows down the brewing to extract the best flavor when brewing a small amount of coffee.
Add the appropriate amount of water for the number of cups to be brewed (from 1 – 4).
Fill paper filter with desired amount of coffee grounds.
Press the STRONG/1-4 CUP button twice. 1-4 CUP is displayed.
Note: When using this feature coffee will be brewed at regular strength only.
Press the ON/OFF (I/O) button, its light illuminates and the brewing cycle begins.
To turn off the coffeemaker at any time, press the ON/OFF button.
SNEAK-A-CUP® FEATURE
Remove the carafe and brewing is paused. The carafe must be placed back on the carafe plate in 30 seconds to prevent overflow. Brewing begins again.
AUTO BREW
Follow steps 1 through 10 under BREWING COFFEE.
Make sure clock has been set to correct time of day.
Press the program (PROG) button.
The digital clock will flash 12:00. Note: If the coffeemaker has not been unplugged the last delayed brewing time will appear on the digital display.
To change the time: press HOUR button until the desired correct time appears on the display. Press the MIN button to select the minutes.
Press the AUTO button to activate the delayed brewing. The word AUTO is displayed.
To check the preset auto time, press PROG button and hold it. Once button is released, the clock time will display again.
If you want to change the preset auto time, press the AUTO button to cancel the AUTO function. The word AUTO goes off from digital display.
Follow steps 3 through 6 under AUTO BREW to reset time.
To cancel auto brew, press AUTO button. The word AUTO goes off from the digital display.
CARE AND CLEANING
This product contains no user serviceable parts. Refer service to qualified service personnel.
CLEANING
Be sure the unit is unplugged and has cooled.
Open the cover.
To remove the filter basket, grip the handle and lift straight up. Discard the paper filter, if used, and the coffee grounds.
Wash the filter basket, carafe, carafe lid, removable water reservoir, and water reservoir lid in the top rack of the dishwasher or wash by hand with hot water and soap.
Wipe the appliance’s exterior surface, control panel and carafe plate with a soft damp cloth. Do not use abrasive cleansers or scouring pads. Never immerse the coffeemaker in water.
To clean the inside of the cover, open the cover and leave in the open position. Wipe surfaces with a damp cloth.
AUTO CLEAN® SYSTEM
De-scaling With Auto Clean™
Over time, calcium deposits or “scale” may build up in your brewer. Scale is non-toxic but if left unattended can hinder brewer performance. Regularly de-scaling your brewer helps to maintain quality coffee as well as the lifespan of the heating element, and other internal parts that come in contact with water throughout the brew process.
To make the de-scaling process as effortless as possible, an Auto Clean™ system has been programmed into your coffeemaker.
When should I use Auto Clean™?
After every 60 brews, the word “CLEAN” will be displayed and blink. This notifies you it is time to run the Auto Clean™ system. “CLEAN” will be displayed until you run the Auto Clean™ system. If you want to clean your c 60 brew cycles, you may do so by following the steps below.
How do I use Auto Clean™?
Follow the simple steps below. Your coffeemaker will take care of the rest.
Combine 6 cups of white vinegar and 4 cups of cold water in carafe.
Pour into water reservoir.
Place an 8 to 12 cup basket style paper filter in the removable filter basket. Insert filter basket into filter basket holder and close cover.
Make sure the lid of the carafe is in place and place empty carafe on the carafe plate.
Plug power cord into an outlet.
Press AUTO CLEAN to activate cleaning cycle; the word CLEAN is displayed and the POWER ON light illuminates.
Part of the mixture will brew through. Remaining mixture will be held in coffeemaker for 30 minutes before completing its brew through. Note: The entire cleaning cycle will take 45–60 minutes to complete.
When the coffeemaker completes the AUTO CLEAN cycle, it shuts off automatically.
Brew fresh water through appliance following instructions given in GETTING STARTED before brewing coffee again.
TROUBLESHOOTING
PROBLEM
POSSIBLE CAUSE
SOLUTION
Coffeemaker does not turn on.
Coffeemaker is not plugged in.
Make sure appliance is plugged into a working outlet.
Coffeemaker is leaking.
Water reservoir may be overfilled.
Make sure water reservoir has not been filled beyond the 12-cup line.
Cover may not be correctly placed on carafe.
Make sure cover is correctly placed and tightened on carafe
Carafe may not be correctly placed on the carafe plate.
Make sure carafe is placed securely onto the carafe plate.
The filter basket overflows.
The carafe has been removed for longer than 30 seconds when using the Sneak-A Cup™ feature.
Make sure to replace the carafe within 30 seconds during the brewing cycle.
Excessive amount of coffee is used.
Reduce the amount of coffee used.
Coffee sediment in brewed cup of coffee.
The paper filter and/or the filter basket are not properly placed.
Insert basket-shaped paper filter into filter basket and insert basket properly into holder.
The coffeemaker brews slowly.
The coffeemaker needs cleaning.
Follow the instructions in the “Auto Clean” section.
This coffee maker will remain on for two hours after the brewing cycle has completed. There is not a way to adjust the shutoff time. Turning the coffee maker back on will allow for an additional two hours of heating.
#2 Is it safe to operate under a kitchen cabinet? Seems like there’s a lot of steam to damage the cabinet when brewing.
We recommend that if the coffee maker is used directly under a cabinet, there should be at least a full foot of clearance from the bottom of the cabinet to the top of the coffee maker. Otherwise, we would recommend pulling the coffee maker out from underneath the cabinet during the brewing cycle.
#3 Does it beep when turning on and when coffee is done?
This coffee maker does not beep when turning on, nor when the brew cycle is complete.
#4 Can't get auto clean to work, on my second coffee maker. They said first was defective. Second one same thing. What is the trick to get it to work ??
The issue you are describing may be warranty-related. We would appreciate the opportunity to work with you regarding the experience you have encountered with our product.